Fiat 500L Living (2019 year). Manual - part 1
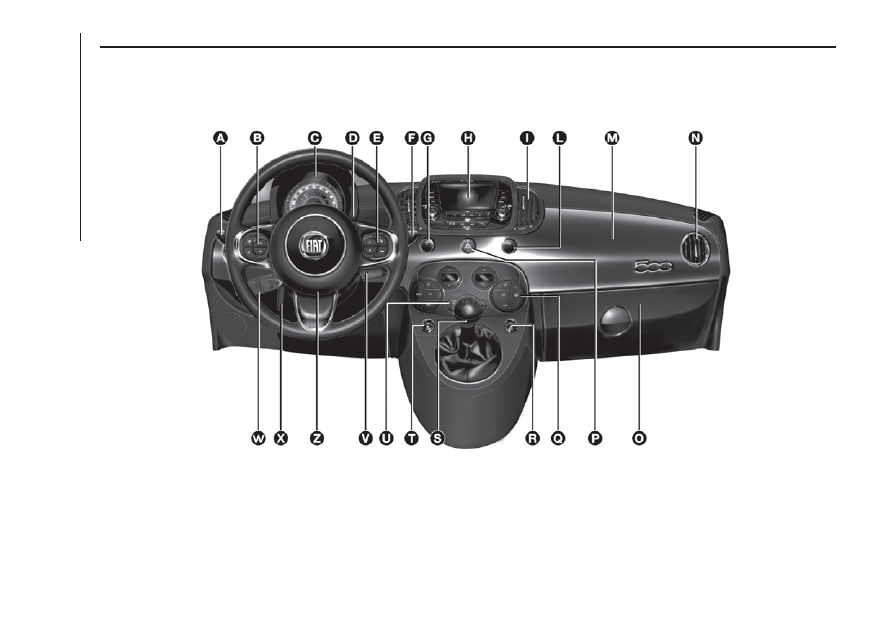
DASHBOARD
The presence, graphics and position of panels, controls, instruments and indicators may vary according to the different
versions.
A: light/direction indicator stalk – B: audio controls on steering wheel – C: instrument panel – D: headlight alignment corrector –
E: audio controls on steering wheel – F: windscreen wiper/washer and rear window wiper/washer stalk – G: Dualdrive electric
power steering (CITY function) / ECO function – H: Uconnect™ – I: central air vents – L: fog lights/rear fog lights – M:
passenger airbag – N: side air diffusers – O: glove box – P: hazard lights and switch – Q: climate control system controls – R:
right electric window – S: gear lever – T: left electric window U: ASR-OFF button – V: ignition device – W: Cruise Control/Speed
Limiter stalk – X: steering wheel adjustment lever – Z: driver airbag
1
F0S0641
8
KNOWING
YOUR
CAR