Lincoln MKZ Hybrid (2020 year). Manual in english - page 20
 

  Index      Manuals     Lincoln MKZ Hybrid (2020 year). Manual in english


Search            copyright infringement  


Content      ..     18      19      20      21     ..


Lincoln MKZ Hybrid (2020 year). Manual in english - page 20


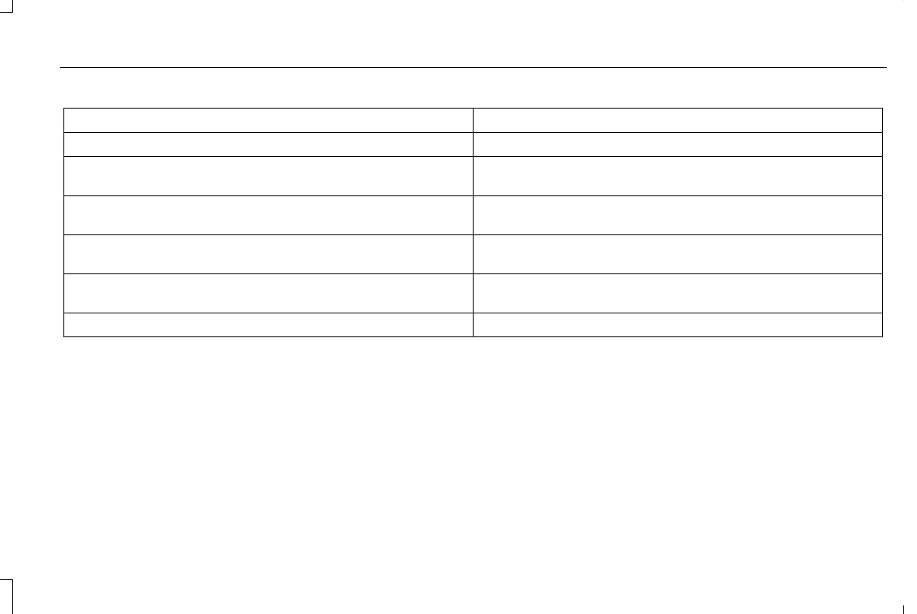
Cleaning Procedure

Type of Stain

Use lukewarm water and rinse by dabbing with clean water.

Fruit juice, jam, jelly, syrup or ketchup.

Use cold water and rinse by dabbing with clean water. Avoid warm
water because it makes these substances coagulate.

Blood, egg, excrement or urine.

Use lukewarm water. If the color remains, treat with lemon juice and
then rinse.

Liquor, alcoholic beverages, wine, beer, cola and tea.

Use lukewarm water and rinse by dabbing with clean water.

Indelible pencil, cocoa, chocolate, pastry with cream or chocolate, ice
cream or mustard.

Use lemon juice, wipe with lukewarm water and rinse by dabbing with
clean water.

Vinegar, hair gel, tomato sauce or coffee with sugar.

Use ethyl alcohol, then dab with water.

Dye transfer and all other stains.

323

Vehicle Care

-------------------------------------------------------------------------------------------------------------------------------------------------------------

CLEANING THE INSTRUMENT
PANEL AND INSTRUMENT
CLUSTER LENS

WARNING: Do not use chemical

solvents or strong detergents when
cleaning the steering wheel or instrument
panel to avoid contamination of the airbag
system.

Note: Follow the same procedure as
cleaning leather seats for cleaning leather
instrument panels and leather interior trim
surfaces.  See Cleaning Leather Seats (page
325).

Clean the instrument panel and cluster lens
with a clean, damp and soft cloth, then use
a clean, dry and soft cloth to dry these areas.

Avoid cleaners or polishes that increase
the gloss of the upper portion of the
instrument panel. The dull finish in this
area helps protect you from undesirable
windshield reflection.

Do not use any household cleaning
products or glass cleaners as these may
damage the finish of the instrument
panel, interior trim and cluster lens.

Wash or wipe your hands clean if you
have been in contact with certain
products such as insect repellent and
suntan lotion to avoid possible damage
to the interior painted surfaces.

Do not allow air fresheners and hand
sanitizers to spill onto interior surfaces.
If a spill occurs, wipe off immediately.
Your warranty may not cover these
damages.

If a staining liquid like coffee or juice has
been spilled on the instrument panel or on
interior trim surfaces:

1. Wipe up spilled liquid using a clean, soft

cloth as quickly as possible.

2. Use Motorcraft Premium Leather and

Vinyl Cleaner or a commercially available
leather cleaning product for automotive
interiors. Test any cleaner or stain
remover on an inconspicuous area.

3. Alternatively, wipe the surface with a

clean, soft cloth and a mild soap and
water solution. Dry the area with a clean,
soft cloth.

4. If necessary, apply more soap and water

solution or cleaning product to a clean,
soft cloth and press it onto the soiled
area. Allow this to set at room
temperature for 30 minutes.

5. Remove the soaked cloth, then with a

clean, damp cloth, use a rubbing motion
for 60 seconds on the soiled area.

6. Dry the area with a clean, soft cloth.

324

Vehicle Care

-------------------------------------------------------------------------------------------------------------------------------------------------------------

CLEANING LEATHER SEATS

 (IF

EQUIPPED)

Note: Follow the same procedure as
cleaning leather seats for cleaning leather
instrument panels and leather interior trim
surfaces.

For routine cleaning, wipe the surface with
a soft, damp cloth and a mild soap and water
solution.  Dry the area with a clean, soft cloth.

Note: Test any cleaner or stain remover on
an inconspicuous area.

You should:

Remove dust and loose dirt with a
vacuum cleaner.

Clean and treat spills and stains as soon
as possible.

Do not use the following products as these
may damage the leather:

Oil and petroleum or silicone-based
leather conditioners.

Household cleaners.

Alcohol solutions.

Solvents or cleaners intended specifically
for rubber, vinyl and plastics.

REPAIRING MINOR PAINT
DAMAGE

Authorized dealers have touch-up paint to
match your vehicle’s color. Your vehicle color
code is printed on a sticker on the front,
left-hand side door jamb. Take your color
code to your authorized dealer to make sure
you get the correct color.

Before repairing minor paint damage, use a
cleaner such as Motorcraft Bug and Tar
Remover to remove particles such as bird
droppings, tree sap, insect deposits, tar
spots, road salt and industrial fallout.

Always read the instructions before using
cleaning products.

CLEANING THE WHEELS

Note: Do not apply a cleaning chemical to
warm or hot wheel rims and covers.

Note: Industrial-strength (heavy-duty)
cleaners, or cleaning chemicals, in
combination with brush agitation to remove
brake dust and dirt, could wear away the
clear coat finish over a period of time.

Note: Do not use hydrofluoric acid-based or
high caustic-based wheel cleaners, steel
wool, fuels or strong household detergent.

Note: If you intend to park your vehicle for
an extended period after cleaning the
wheels with a wheel cleaner, drive your
vehicle for a few minutes before doing so.
This reduces the risk of increased corrosion
of the brake discs, brake pads and linings.

Note: Some automatic car washes could
cause damage to the finish on your wheel
rims and covers.

325

Vehicle Care

-------------------------------------------------------------------------------------------------------------------------------------------------------------

Alloy wheels and wheel covers are coated
with a clear coat paint finish. To maintain
their condition we recommend that you:

Clean them weekly with the
recommended wheel and tire cleaner.

Use a sponge to remove heavy deposits
of dirt and brake dust accumulation.

Rinse them thoroughly with a pressurized
stream of water when you complete the
cleaning process.

We recommend that you use our surface
wheel cleaner. Make sure that you read and
follow the manufacturer’s instructions.

Using other non-recommended cleaning
products can result in severe and permanent
damage.

VEHICLE STORAGE

If you plan on storing your vehicle for 30
days or more, read the following
maintenance recommendations to make sure
your vehicle stays in good operating
condition.

We engineer and test all motor vehicles and
their components for reliable, regular driving. 
Under various conditions, long-term storage
may lead to degraded engine performance
or failure unless you use specific precautions
to preserve engine components.

General

Store all vehicles in a dry, ventilated
place.

Protect from sunlight, if possible.

If vehicles are stored outside, they
require regular maintenance to protect
against rust and damage.

Body

Wash your vehicle thoroughly to remove
dirt, grease, oil, tar or mud from exterior
surfaces, rear-wheel housing and the
underside of front fenders.

Periodically wash your vehicle if it is
stored in exposed locations.

Touch-up exposed or primed metal to
prevent rust.

Cover chrome and stainless steel parts
with a thick coat of auto wax to prevent
discoloration.  Re-wax as necessary when
you wash your vehicle.

Lubricate all hood, door and luggage
compartment hinges and latches with a
light grade oil.

Cover interior trim to prevent fading.

Keep all rubber parts free from oil and
solvents.

Engine

Change the engine oil and filter prior to
storage because used engine oil contains
contaminates which may cause engine
damage.

Start the engine every 15 days for a
minimum of 15 minutes.  Run at fast idle
with the climate controls set to defrost
until the engine reaches normal
operating temperature.

With your foot on the brake, shift through
all the gears while the engine is running.

We recommend that you change the
engine oil before you use your vehicle
again.

326

Vehicle Care

-------------------------------------------------------------------------------------------------------------------------------------------------------------

Fuel system

Fill the fuel tank with high-quality fuel
until the first automatic shutoff of the fuel
pump nozzle.

Cooling system

Protect against freezing temperatures.

When removing your vehicle from
storage, check coolant fluid level.
Confirm that there are no cooling system
leaks and that fluid is at the
recommended level.

Disconnecting Your 12 Volt Battery

Check and recharge as necessary. Keep
connections clean.

If storing your vehicle for more than 30
days without recharging the battery, we
recommend that you disconnect the
battery cables to maintain battery charge
for quick starting.

Note: It is necessary to reset memory
features if you disconnect the battery cables.

Plugging in Your HYBRID

We recommend the following options for
your plug-in vehicle (PHEV) :

Leave your vehicle plugged in. The 12
volt battery maintains power if left
plugged in. However, this periodically
uses electricity from the household
outlet.

Connect a battery charger to your 12 volt
battery and leave it on a continuous, slow
charge.

Disconnect the 12 volt battery. If your 12
volt battery is located in the luggage
compartment, do not fully shut the
luggage compartment after
disconnecting the 12 volt battery. Only
leave the luggage compartment open if
your vehicle is stored in a locked
location.

Brakes

Make sure the brakes and parking brake
release fully.

Tires

Maintain recommended air pressure.

Miscellaneous

Make sure all linkages, cables, levers and
pins under your vehicle are covered with
grease to prevent rust.

Move vehicles at least 25 ft (7.5 m) every
15 days to lubricate working parts and
prevent corrosion.

Removing Vehicle From Storage

When your vehicle is ready to come out of
storage, do the following:

Wash your vehicle to remove any dirt or
grease film build-up on window surfaces.

Check windshield wipers for any
deterioration.

Check under the hood for any foreign
material that may have collected during
storage such as mice or squirrel nests.

Check the exhaust for any foreign
material that may have collected during
storage.

327

Vehicle Care

-------------------------------------------------------------------------------------------------------------------------------------------------------------

Check tire pressures and set tire inflation
per the Tire Label.

Check brake pedal operation. Drive your
vehicle 15 ft (4.5 m) back and forth to
remove rust build-up.

Check fluid levels (including coolant, oil
and gas) to make sure there are no leaks,
and fluids are at recommended levels.

If you remove the battery, clean the
battery cable ends and check for
damage.

Contact an authorized dealer if you have any
concerns or issues.

BODY STYLING KITS

The distance between the underside of your
vehicle and the ground is less than that of
other models.  Drive with extreme care to
avoid damage to your vehicle.

328

Vehicle Care

-------------------------------------------------------------------------------------------------------------------------------------------------------------

TIRE SEALANT AND INFLATOR KIT

Note: The temporary mobility kit (TMK)
contains enough sealant compound for one
tire repair. See your authorized dealer for
replacement sealant bottles after the TMK
is used. Only use the kit supplied with your
vehicle.

Note: The kit may be used as an air
compressor for tire inflation maintenance by
turning the selector switch to the Air position.

Your TMK is located under the load floor in
the trunk. The TMK consists of an air
compressor to re-inflate the tire with a bottle
of sealing compound that seals punctures
caused by most nails or similar objects. This
kit provides a temporary tire repair allowing
you to drive your vehicle up to 120 mi
(200 km) at a maximum speed of 50 mph
(80 km/h) to reach a tire service location.

E269305

Air compressor (inside)

A

Selector switch

B

On and off button

C

Air pressure gauge

D

Sealant bottle

E

Dual purpose hose: air and repair

F

Tire valve connector

G

Accessory power plug

H

Casing/housing

I

Bike/raft/sports ball adapters

J

Pressure release valve

K

General Information

WARNING: Failure to follow these

guidelines could result in an increased risk
of loss of vehicle control, injury or death.

Note: Do not use the kit if a tire has become
severely damaged. Only punctures located
within the tire tread can be sealed with the
kit.

Do not attempt to repair punctures larger
than ¼ inch (6 millimeters) or damage to the
tire's sidewall. The tire may not seal.

329

Wheels and Tires

-------------------------------------------------------------------------------------------------------------------------------------------------------------

Loss of air pressure may adversely affect tire
performance. For this reason:

Note: Do not drive the vehicle above 50 mph
(80 km/h).

Note: Do not drive further than 120 mi
(200 km). Drive only to the closest authorized
Lincoln dealer or tire repair shop to have
your tire inspected.

Drive carefully and avoid abrupt steering
maneuvers.

Periodically monitor tire inflation pressure
in the affected tire; if the tire is losing
pressure, have the vehicle towed.

Read the information in the Tips for Use
of the Kit section to make sure safe
operation of the kit and your vehicle.

Tips for Use of your TMK

To ensure safe operation of the TMK:

Read all instructions and cautions fully.

Do not remove any foreign objects, such
as nails or screws, from the tire.

Before operating the kit, make sure your
vehicle is safely off the road and away
from moving traffic. Turn on the hazard
lights.

Always set the parking brake to ensure
the vehicle doesn't move unexpectedly.

When using the kit, leave the engine
running (only if the vehicle is outdoors or
in a well-ventilated area) so the
compressor does not drain the vehicle's
battery.

Do not allow the compressor to operate
continuously for more than 15 minutes.
This helps prevent the compressor from
overheating.

Never leave the kit unattended during
operation.

Sealant compound contains latex. Those
with latex sensitivities should use
appropriate precautions to avoid an
allergic reaction.

Keep the kit away from children.

Only use the kit when the ambient
temperature is between -22°F (-30°C) and
158°F (70°C).

Only use the sealing compound before
the use-by date. The use-by date is on a
label on the sealant bottle and can be
seen through the rectangular viewing
window on the bottom of the compressor
housing. Check the use-by date regularly
and replace the bottle when the fluid has
expired.

Do not store the kit unsecured inside the
passenger compartment of the vehicle
as it may cause injury during a sudden
stop or crash. Always store the kit in its
original location.

After sealant use, the tire pressure
monitoring system sensor and valve stem
on the wheel must be replaced by an
authorized Lincoln dealer.

Operating the kit could cause an
electrical disturbance in radio, CD, and
DVD player operation.

E175978

* When inflation only is required for
a tire or other objects, the selector
must be in the Air position.

330

Wheels and Tires

-------------------------------------------------------------------------------------------------------------------------------------------------------------

What to do when a Tire Is Punctured

A tire puncture within the tire's tread area
can be repaired in two stages with the kit:

In the first stage, the tire is reinflated with
a sealing compound and air. After the tire
has been inflated, you need to drive the
vehicle about 3.7 mi (6 km) to distribute
the sealant in the tire.

In the second stage, you need to check
the tire pressure and adjust, if necessary,
to the vehicle's specified tire inflation
pressure.

First Stage: Reinflating the Tire with
Sealing Compound and Air

WARNING: Do not stand directly

beside the tire while the compressor is
operating. This could cause personal injury
if the tire bursts.

Note: If the tire does not inflate to the
recommended tire pressure within 15
minutes, stop and call roadside assistance.

WARNING: Watch the sidewall of the

tire when inflating. If any cracks, bumps or
similar damage appears, switch the
compressor off and let the air out by means
of the pressure relief valve. Do not
continue driving with this tire. This could
cause loss of vehicle control.

WARNING: Do not run the engine

when operating the air compressor unless
the vehicle is outdoors or in a
well-ventilated area.

Preparation: Park the vehicle in a safe, level
and secure area, away from moving traffic.

Turn the hazard lights on. Apply the parking
brake and turn the engine off. Inspect the
flat tire for visible damage.

Sealant compound contains latex. Use
appropriate precautions to avoid any allergic
reactions.

Do not remove any foreign object that has
pierced the tire. If a puncture is located in
the tire sidewall, stop and call roadside
assistance.

1. Remove the valve cap from the tire valve.

2. Unwrap the dual purpose hose (black

tube) from the back of the compressor
housing.

3. Fasten the hose to the tire valve by

turning the connector clockwise. Tighten
the connection securely.

E252191

331

Wheels and Tires

-------------------------------------------------------------------------------------------------------------------------------------------------------------

4. Plug the power cable into the 12-volt

power point in the vehicle.

5. Remove the warning sticker found on the

casing/housing and place it on the center
of the steering wheel.

6. Start the vehicle and leave the engine

running so the compressor does not
drain the vehicle’s battery.

E175981

7. Turn dial (A) clockwise to the sealant

position. Turn the kit on by pressing the
on/off button (B).

8. Inflate the tire to the pressure shown on

the tire label located on the edge of
driver door or the door jamb area. For
the first 45-60 seconds when the sealant
is being pumped into the tire, the air
pressure gauge may indicate a pressure
higher than the label pressure. This is
normal and should be no reason for
concern.
 The pressure gauge reading
indicates the tire inflation pressure after
about 60 seconds of operation during
the tire repair process. The final tire
pressure should be checked with the
compressor turned OFF in order to get
an accurate pressure reading.

332

Wheels and Tires

-------------------------------------------------------------------------------------------------------------------------------------------------------------

E175982

9. When the recommended tire pressure is

reached, turn off the kit, unplug the
power cable, and disconnect the hose
from the tire valve. Re-install the valve
cap on the tire valve and return the kit to
the stowage area.

10.

Immediately and cautiously, drive the
vehicle 3.7 mi (6 km) to distribute the
sealant evenly inside the tire. Do not
exceed 50 mph (80 km/h).

11.

After 3.7 mi (6 km), stop and check the
tire pressure. See Second stage:
Checking tire pressure.

WARNING: If you experience any

unusual vibration, ride disturbance or noise
while driving, reduce your speed until you
can safely pull off to the side of the road
and call for roadside assistance. Failure to
do so could cause you to lose control of
your vehicle and increase the risk of
personal injury or death.

Note: If you experience any unusual
vibration, ride disturbance or noise when
driving, do not proceed to the second stage
of this operation.

Second Stage: Checking Tire Pressure

Check the air pressure of your tires as
follows:

E175983

1. Remove the valve cap from the tire valve.

2. Firmly screw the air compressor hose

onto the valve stem by turning clockwise.

3. Push and turn the TMK selector switch

clockwise to the air position and note the
tire pressure.

333

Wheels and Tires

-------------------------------------------------------------------------------------------------------------------------------------------------------------

Note: If you are proceeding from the First
Stage: Reinflating the Tire with Sealing
Compound and Air section and have injected
sealant in the tire but the pressure is below
20 psi (1.4 bar), stop and call roadside
assistance. If tire pressure is above 20 psi
(1.4 bar), continue to the next step.

4. If required, turn on the compressor and

adjust the tire to the recommended
inflation pressure shown on the tire label
located on the driver's door or door jamb
area. The tire pressure should be
checked with the compressor turned OFF
in order to get an accurate pressure
reading.

5. Remove the hoses, re-install the valve

cap on the tire and return the kit to the
stowage area.

WARNING: The air compressor

power plug may be hot after use. Allow it
to cool before handling. Failure to do so
could result in personal injury.

What to do after the Tire has been
Sealed

WARNING: If you experience any

unusual vibration, ride disturbance or noise
while driving, reduce your speed until you
can safely pull off to the side of the road
and call for roadside assistance. Failure to
do so could cause you to lose control of
your vehicle and increase the risk of
personal injury or death.

Note: After the sealing compound has been
used, the maximum vehicle speed is 50 mph
(80 km/h) and the maximum driving distance
is 120 mi (200 km). The sealed tire should
be inspected immediately.

You can check the tire pressure any time
within the 120 mi (200 km) by performing the
steps listed previously in the Second stage:
Checking Tire Pressure procedure.

Servicing your TMK after use

After using the kit to seal your tire, you need
to replace the sealant bottle. Sealant bottle
replacement kits can be obtained at an
authorized dealer. Empty sealant bottles may
be disposed of at home. However, bottles
still containing liquid sealant should be
disposed of by your local authorized dealer
or tire dealer, or in accordance with local
waste disposal regulation.

Removal of the sealant bottle from the kit

E175984

1. Unwrap the dual purpose hose (black

tube) from the compressor housing.

334

Wheels and Tires

-------------------------------------------------------------------------------------------------------------------------------------------------------------

E175985

2. Unwrap the power cord.

E175986

3. Remove the back cover.

E175987

4. Rotate the sealant bottle up 90 degrees

and pull away from casing/housing to
remove.

Installation of the sealant bottle to the kit

1. With the bottle held perpendicular to the

housing, insert the bottle nozzle into the
connector and push until seated.

2. Rotate the bottle 90 degrees down into

the housing/casing.

E175988

3. Snap the back cover back into place.

E175989

4. Wrap the dual purpose hose (black tube)

around the channel on the bottom of the
housing/casing.

335

Wheels and Tires

-------------------------------------------------------------------------------------------------------------------------------------------------------------

E175990

5. Wrap the power cord around the housing

and stow the accessory power plug into
its storage area.

Note: If you experience any difficulties with
the removal or installation of the sealant
bottle, consult your authorized dealer for
assistance.

Check and record the sealant compound’s
use by date and make sure that it is replaced
with a fresh bottle after this date. The use by
date is on a label located on the sealant
bottle and can be seen through the
rectangular viewing window on the bottom
of the TMK housing.

TIRE CARE

Information About Uniform Tire Quality
Grading

E142542

Tire Quality Grades apply to new
pneumatic passenger car tires. The
Quality grades can be found where
applicable on the tire sidewall between
tread shoulder and maximum section
width. For example: Treadwear 200
Traction AA Temperature A
.

These Tire Quality Grades are
determined by standards that the United
States Department of Transportation has
set.

Tire Quality Grades apply to new
pneumatic passenger car tires. They do
not apply to deep tread, winter-type
snow tires, space-saver or temporary
use spare tires, light truck or LT type
tires, tires with nominal rim diameters of
10 to 12 inches or limited production tires
as defined in Title 49 Code of Federal
Regulations Part 575.104 ©)(2).

U.S. Department of Transportation Tire
quality grades: 
 The U.S. Department of
Transportation requires Lincoln Motor
Company to give you the following
information about tire grades exactly as

the government has written it.

336

Wheels and Tires

-------------------------------------------------------------------------------------------------------------------------------------------------------------

Treadwear

The treadwear grade is a comparative
rating based on the wear rate of the tire
when tested under controlled conditions
on a specified government test course.
For example, a tire graded 150 would
wear one and one-half (1 ½) times as well
on the government course as a tire
graded 100. The relative performance
of tires depends upon the actual
conditions of their use, however, and
may depart significantly from the norm
due to variations in driving habits,
service practices, and differences in
road characteristics and climate.

Traction AA A B C

WARNING: The traction grade

assigned to this tire is based on
straight-ahead braking traction tests,
and does not include acceleration,
cornering, hydroplaning or peak
traction characteristics.

The traction grades, from highest to
lowest are AA, A, B, and C. The grades
represent the tire’s ability to stop on wet
pavement as measured under controlled
conditions on specified government test
surfaces of asphalt and concrete. A tire
marked C may have poor traction
performance.

Temperature A B C

WARNING: The temperature

grade for this tire is established for a
tire that is properly inflated and not
overloaded. Excessive speed,
underinflation, or excessive loading,
either separately or in combination,
can cause heat buildup and possible
tire failure.

The temperature grades are A, the
highest, B and C, representing the tire’s
resistance to the generation of heat and
its ability to dissipate heat when tested
under controlled conditions on a
specified indoor laboratory test wheel.
Sustained high temperature can cause

the material of the tire to degenerate
and reduce tire life, and excessive
temperature can lead to sudden tire
failure. The grade C corresponds to a
level of performance which all
passenger car tires must meet under the
Federal Motor Vehicle Safety Standard
No. 139. Grades B and A represent
higher levels of performance on the
laboratory test wheel than the minimum
required by law.

Glossary of Tire Terminology

Tire label: A label showing the

original equipment tire sizes,
recommended inflation pressure and
the maximum weight the vehicle can
carry.

Tire Identification Number: A
number on the sidewall of each tire
providing information about the tire
brand and manufacturing plant, tire
size and date of manufacture. Also
referred to as DOT code.

Inflation pressure: A measure of the
amount of air in a tire.

337

Wheels and Tires

-------------------------------------------------------------------------------------------------------------------------------------------------------------

Standard load: A class of P-metric or
Metric tires designed to carry a
maximum load at set pressure. For
example: For P-metric tires 35 psi
(2.4 bar) and for Metric tires 36 psi
(2.5 bar). Increasing the inflation
pressure beyond this pressure will
not increase the tire’s load carrying
capability.

Extra load: A class of P-metric or
Metric tires designed to carry a
heavier maximum load at 42 psi
(2.9 bar). Increasing the inflation
pressure beyond this pressure will
not increase the tire’s load carrying
capability.

kPa: Kilopascal, a metric unit of air
pressure.

PSI: Pounds per square inch, a

standard unit of air pressure.

Cold inflation pressure: The tire
pressure when the vehicle has been
stationary and out of direct sunlight
for an hour or more and prior to the
vehicle being driven for 1.0 mi
(1.6 km).

Recommended inflation pressure:
The cold inflation pressure found on
the Safety Compliance Certification
Label, affixed to either the door hinge
pillar, door-latch post, or the door
edge that meets the door-latch post,
next to the driver's seating position,
or Tire Label located on the B-Pillar
or the edge of the driver’s door.

B-pillar: The structural member at
the side of the vehicle behind the
front door.

Bead area of the tire: Area of the tire
next to the rim.

Sidewall of the tire: Area between
the bead area and the tread.

Tread area of the tire: Area of the

perimeter of the tire that contacts the
road when mounted on the vehicle.

Rim: The metal support, wheel, for a
tire or a tire and tube assembly upon
which the tire beads are seated.

Information Contained on the Tire
Sidewall

Both U.S. and Canada Federal
regulations require tire manufacturers
to place standardized information on the
sidewall of all tires. This information
identifies and describes the fundamental
characteristics of the tire and also
provides a U.S. DOT Tire Identification
Number for safety standard certification
and in case of a recall.

338

Wheels and Tires

-------------------------------------------------------------------------------------------------------------------------------------------------------------


Content      ..     18      19      20      21     ..