Dodge Charger SRT (2019 year). Manual - part 21
ENGINE COMPARTMENT
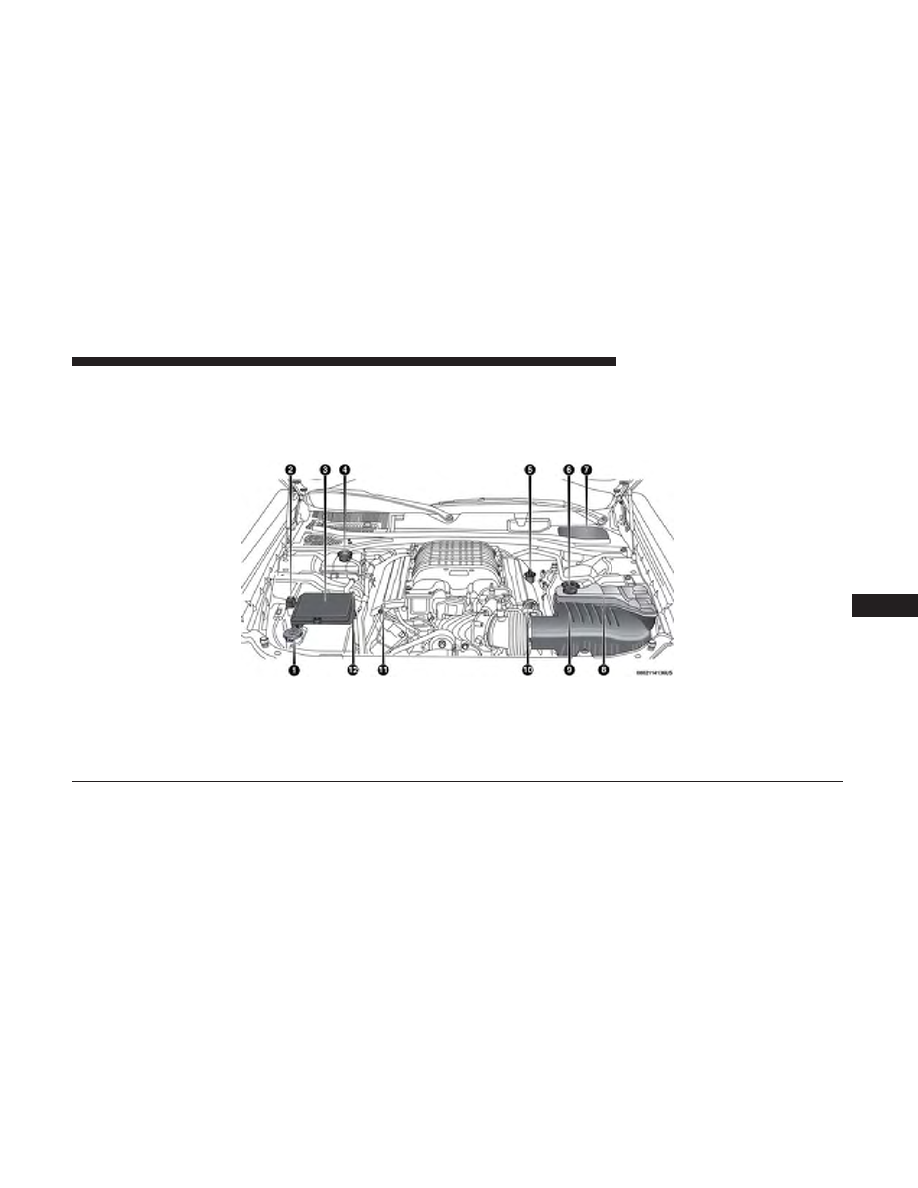
6.2L Supercharged Engine
1 — Washer Fluid Reservoir
7 — Brake Fluid Reservoir Access Cover
2 — Remote Jump Start (Positive Battery Post)
8 — Engine Coolant Reservoir
3 — Power Distribution Center (Fuses)
9 — Air Cleaner Filter
4 — Intercooler Fluid Reservoir
10 — Power Steering Reservoir
5 — Engine Oil Fill
11 — Engine Oil Dipstick
6 — Engine Coolant Pressure Cap
12 — Remote Jump Start (Negative Battery Post)
8
SERVICING AND MAINTENANCE
333