Dodge Sprinter. Manual - part 345
(1) Disconnect and isolate the negative battery
cable.
(2) Remove the cover from the rear A/C evaporator
housing (Refer to 24 - HEATING & AIR CONDI-
TIONING/DISTRIBUTION - REAR/A/C EVAPORA-
TOR COVER-REAR - REMOVAL).
(3) Recover the refrigerant from the rear refriger-
ant system (Refer to 24 - HEATING & AIR CONDI-
TIONING/PLUMBING - STANDARD PROCEDURE -
REFRIGERANT RECOVERY).
(4) Remove the cover from the rear A/C condenser
housing (Refer to 24 - HEATING & AIR CONDI-
TIONING/DISTRIBUTION
-
REAR/A/C
CON-
DENSER COVER - REMOVAL).
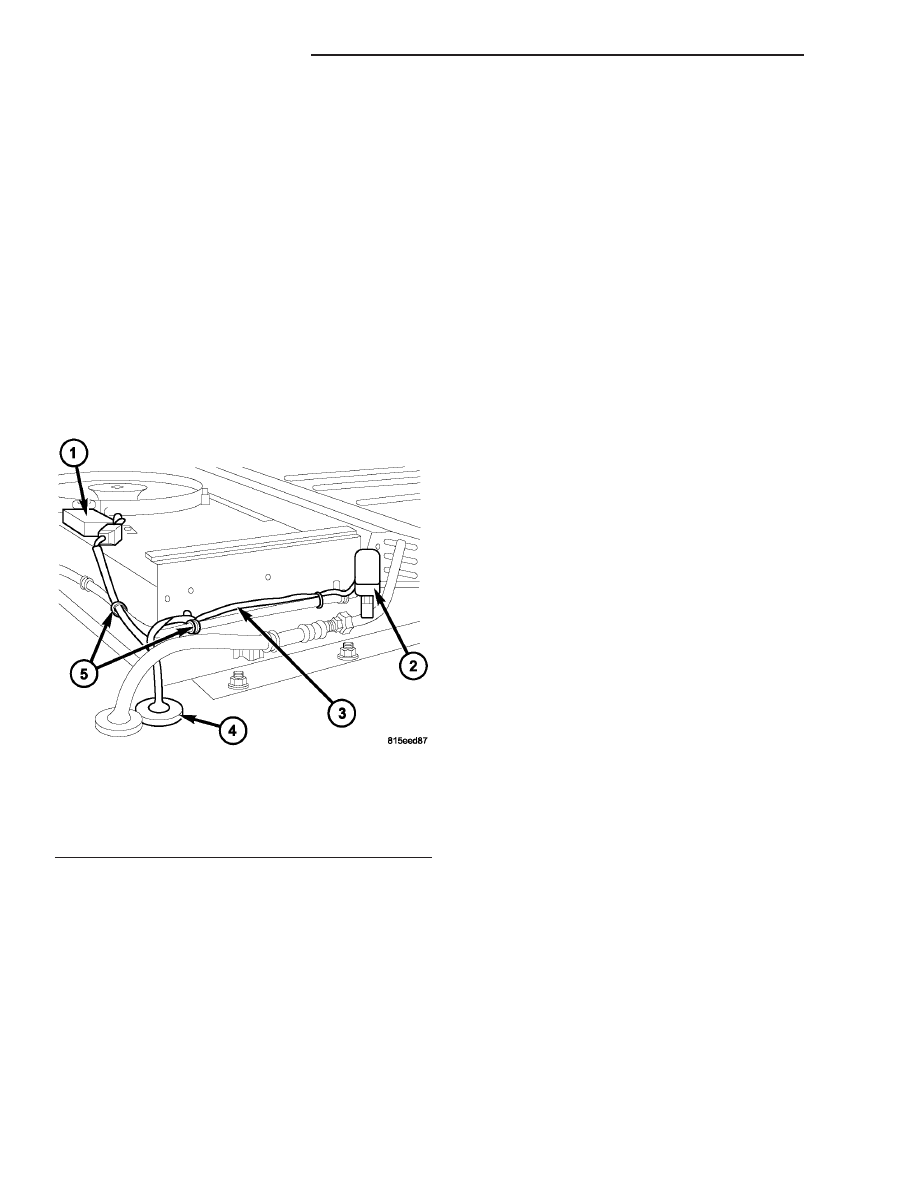
(5) Disconnect the rear A/C wire harness from the
rear condenser fan suppression filter and the rear
A/C high pressure switch and remove the retaining
straps that secure the wire harness to the rear liquid
line (Fig. 4).
(6) Disengage the rear A/C wire harness grommet
from the roof panel and pull the wire harness down
into the vehicle (Fig. 5).
(7) Disconnect the rear body wire harness connec-
tor from the rear A/C wire harness.
(8) Remove the retaining straps that secure the
rear dome lamp harness to the rear A/C evaporator
housing and position the rear dome lamp harness out
of the way.
(9) Remove the nut that secures the positive wire
lead to the rear A/C system terminal block and posi-
tion the wire lead out of the way.
(10) Remove the insulating tape from around the
rear evaporator connections.
(11) Disconnect the rear liquid line from the rear
A/C expansion valve and remove and discard the
O-ring seal.
(12) Disconnect the rear suction line from the rear
evaporator outlet tube and remove and discard the
O-ring seal.
(13) Install plugs into, or tape over the opened
refrigerant line fittings and rear expansion valve and
evaporator tube ports.
(14) Disconnect and install plugs into the two rear
evaporator drain hoses.
(15) Support the rear A/C evaporator housing and
remove the nine screws, four bolts and washers and
four damping washers that secure the rear A/C evap-
orator housing to the roof panel.
(16) With help from an assistant, remove the rear
A/C evaporator housing from the vehicle.
(17) If required, remove the rear A/C evaporator
from the rear A/C evaporator housing (Refer to 24 -
HEATING
&
AIR
CONDITIONING/PLUMBING/
REAR A/C EVAPORATOR - REMOVAL).
Fig. 4 Rear A/C Wire Harness - Condenser Side
1 - REAR CONDERSER FAN SUPPRESSION FILTER
2 - REAR A/C HIGH PRESSURE SWITCH
3 - REAR A/C WIRE HARNESS
4 - GROMMET
5 - RETAINING STRAPS
24 - 56
DISTRIBUTION - REAR
VA