Dodge Ram Truck 1500-2500-3500. Manual - part 262


  Index      Dodge     Dodge Ram Truck 1500-2500-3500 - service repair manual 2005 year


Search            


Content   ..  260  261  262  263   ..


Dodge Ram Truck 1500-2500-3500. Manual - part 262


RADIO AND NAV GPS ANTENNA NOT CONNECTED (CONTINUED)

3.

RADIO

NOTE: NOTE: Reconnect all previously discon-
nected components.

NOTE: NOTE: Move vehicle outside approxi-
mately 30ft from any structure.
Turn the ignition and Radio on.
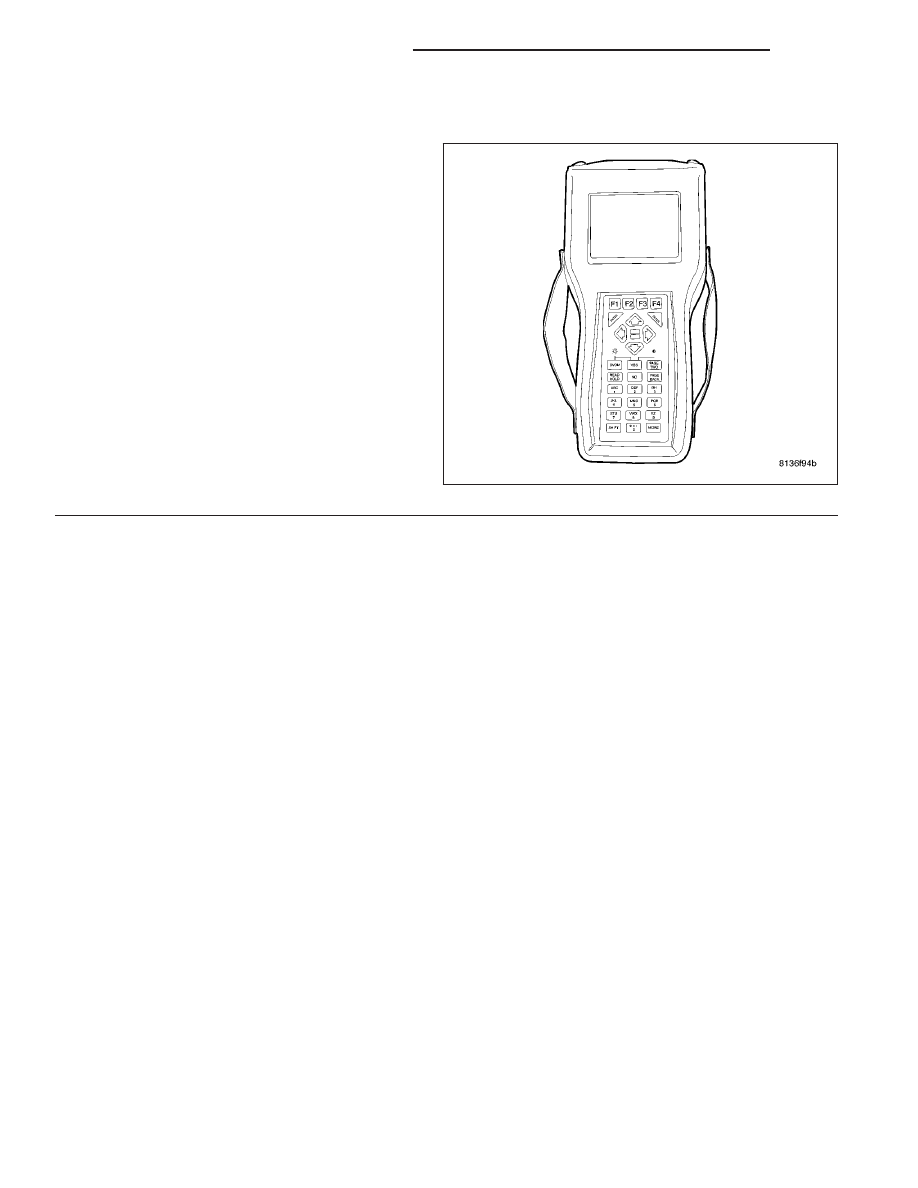
With the DRBIII

T

, erase the audio DTC’s and oper-

ate the radio and the navigation system.

With the DRBIII

T

, read the audio DTC’s.

Did this DTC reset?

Yes

>> Replace the Radio in accordance with

the service information.

Perform BODY VERIFICATION TEST -
VER 1.

No

>> Test Complete.

8A - 50

AUDIO - ELECTRICAL DIAGNOSTICS

DR/DH

AUDIO - SERVICE INFORMATION

TABLE OF CONTENTS

page

page

AUDIO - SERVICE INFORMATION

DESCRIPTION

. . . . . . . . . . . . . . . . . . . . . . . . . 51

OPERATION

. . . . . . . . . . . . . . . . . . . . . . . . . . . 52

DIAGNOSIS AND TESTING

AUDIO

. . . . . . . . . . . . . . . . . . . . . . . . . . . . . . 52

AMPLIFIER

DESCRIPTION

. . . . . . . . . . . . . . . . . . . . . . . . . 54

OPERATION

. . . . . . . . . . . . . . . . . . . . . . . . . . . 54

REMOVAL

. . . . . . . . . . . . . . . . . . . . . . . . . . . . . 54

INSTALLATION

. . . . . . . . . . . . . . . . . . . . . . . . . 55

ANTENNA - NAVIGATION

REMOVAL

. . . . . . . . . . . . . . . . . . . . . . . . . . . . . 56

INSTALLATION

. . . . . . . . . . . . . . . . . . . . . . . . . 57

ANTENNA-SATELLITE

DESCRIPTION

. . . . . . . . . . . . . . . . . . . . . . . . . 58

OPERATION

. . . . . . . . . . . . . . . . . . . . . . . . . . . 58

REMOVAL

. . . . . . . . . . . . . . . . . . . . . . . . . . . . . 59

INSTALLATION

. . . . . . . . . . . . . . . . . . . . . . . . . 59

ANTENNA BODY & CABLE

DESCRIPTION

. . . . . . . . . . . . . . . . . . . . . . . . . 59

OPERATION

. . . . . . . . . . . . . . . . . . . . . . . . . . . 60

DIAGNOSIS AND TESTING

ANTENNA BODY AND CABLE

. . . . . . . . . . . . 60

REMOVAL

. . . . . . . . . . . . . . . . . . . . . . . . . . . . . 62

INSTALLATION

. . . . . . . . . . . . . . . . . . . . . . . . . 62

ANTENNA CABLE - INSTRUMENT PANEL

REMOVAL

. . . . . . . . . . . . . . . . . . . . . . . . . . . . . 63

INSTALLATION

. . . . . . . . . . . . . . . . . . . . . . . . . 64

ANTENNA CABLE - SATELLITE RADIO

DESCRIPTION

. . . . . . . . . . . . . . . . . . . . . . . . . 64

REMOVAL

. . . . . . . . . . . . . . . . . . . . . . . . . . . . . 65

INSTALLATION

. . . . . . . . . . . . . . . . . . . . . . . . . 66

RADIO

DESCRIPTION

. . . . . . . . . . . . . . . . . . . . . . . . . 67

OPERATION

. . . . . . . . . . . . . . . . . . . . . . . . . . . 67

REMOVAL

. . . . . . . . . . . . . . . . . . . . . . . . . . . . . 67

INSTALLATION

. . . . . . . . . . . . . . . . . . . . . . . . . 68

RECEIVER-SATELLITE

DESCRIPTION

. . . . . . . . . . . . . . . . . . . . . . . . . 70

OPERATION

. . . . . . . . . . . . . . . . . . . . . . . . . . . 70

REMOVAL

. . . . . . . . . . . . . . . . . . . . . . . . . . . . . 71

INSTALLATION

. . . . . . . . . . . . . . . . . . . . . . . . . 72

SPEAKER

DESCRIPTION

. . . . . . . . . . . . . . . . . . . . . . . . . 74

OPERATION

. . . . . . . . . . . . . . . . . . . . . . . . . . . 74

DIAGNOSIS AND TESTING

SPEAKER

. . . . . . . . . . . . . . . . . . . . . . . . . . . 74

REMOVAL

. . . . . . . . . . . . . . . . . . . . . . . . . . . . . 75

INSTALLATION

. . . . . . . . . . . . . . . . . . . . . . . . . 78

SUPPRESSION COMPONENTS - RADIO NOISE

DESCRIPTION

. . . . . . . . . . . . . . . . . . . . . . . . . 82

OPERATION

. . . . . . . . . . . . . . . . . . . . . . . . . . . 82

REMOVAL

. . . . . . . . . . . . . . . . . . . . . . . . . . . . . 83

INSTALLATION

. . . . . . . . . . . . . . . . . . . . . . . . . 85

SWITCH - REMOTE RADIO

DESCRIPTION

. . . . . . . . . . . . . . . . . . . . . . . . . 86

OPERATION

. . . . . . . . . . . . . . . . . . . . . . . . . . . 86

DIAGNOSIS AND TESTING

REMOTE SWITCHES

. . . . . . . . . . . . . . . . . . 86

REMOVAL

. . . . . . . . . . . . . . . . . . . . . . . . . . . . . 88

INSTALLATION

. . . . . . . . . . . . . . . . . . . . . . . . . 88

AUDIO - SERVICE INFORMATION

DESCRIPTION

Several combinations of radio receivers and speaker systems are offered. The audio system uses an ignition
switched source of battery current so that the system will only operate when the ignition switch is in the RUN or
ACCESSORY positions.

A optional navigation radio (RB4) is available on this vehicle. With this system, the operator has the option of choos-
ing a street address, point of interest, trip itinerary as well as other features.

The audio system includes the following components:

Antenna (radio, navigation, satellite)

Power amplifier (with premium speaker system only)

Radio noise suppression components

Radio receiver

Remote radio switches (if equipped)

Satellite receiver (if equipped)

Speakers

DR/DH

AUDIO - SERVICE INFORMATION

8A - 51

Certain functions and features of the audio system rely upon resources shared with other electronic modules in the
vehicle over the Programmable Communication Interface (PCI) bus network. The data bus network allows the shar-
ing of sensor information. For diagnosis of these electronic modules or of the data bus network, the use of a scan
tool and the proper Diagnostic Procedures information is recommended.

OPERATION

The audio system components are designed to provide audio entertainment and information through the reception,
tuning and amplification of locally broadcast radio signals in both the Amplitude Modulating (AM) and Frequency
Modulating (FM) commercial frequency ranges.

The audio system components operate on battery current received through a fuse in the Integrated Power Module
(IPM) on a fused ignition switch output (run-acc) circuit so that the system will only operate when the ignition switch
is in the Run or Accessory positions.

The optional navigation radio system receives GPS signals from up to eight satellites to display the position and
direction of the vehicle. Map information is supplied through a DVD-ROM. An electronic gyro-sensor and the vehi-
cle’s speed sensor enable the system to display the present vehicle position even in locations where GPS signals
may be blocked.

When a destination is selected, the navigation system uses information from the map to quickly calculate a route. As
the vehicle is driven along the chosen route, the operator is guided with pictorial displays and voice prompts.

On vehicles that are equipped with the optional remote radio switches, the Instrument Cluster receives hard wired
resistor multiplexed inputs from the remote radio switches. The programming in the Instrument Cluster allows it to
process those inputs and send the proper messages to the radio receiver over the Programmable Communication
Interface (PCI) bus network to control the radio volume up or down, station seek up or down, preset station
advance, and mode advance functions.

DIAGNOSIS AND TESTING

AUDIO

Any diagnosis of the Audio system should begin with the use of a scan tool. For information on the use of
the scan tool, refer to the appropriate Diagnostic Service information.

Refer to the appropriate wiring information.

WARNING: DISABLE THE AIRBAG SYSTEM BEFORE ATTEMPTING ANY STEERING WHEEL, STEERING
COLUMN, SEAT BELT TENSIONER, SIDE AIRBAG, OR INSTRUMENT PANEL COMPONENT DIAGNOSIS OR
SERVICE. DISCONNECT AND ISOLATE THE BATTERY NEGATIVE (GROUND) CABLE, THEN WAIT TWO MIN-
UTES FOR THE AIRBAG SYSTEM CAPACITOR TO DISCHARGE BEFORE PERFORMING FURTHER DIAGNO-
SIS OR SERVICE. THIS IS THE ONLY SURE WAY TO DISABLE THE AIRBAG SYSTEM. FAILURE TO TAKE
THE PROPER PRECAUTIONS COULD RESULT IN ACCIDENTAL AIRBAG DEPLOYMENT AND POSSIBLE
PERSONAL INJURY.

AUDIO SYSTEM DIAGNOSIS TABLE

CONDITION

POSSIBLE CAUSES

CORRECTION

NO AUDIO

1. Fuse inoperative.

1. Check radio fuse and Ignition-Off Draw (IOD)
fuse in the Integrated Power Module (IPM).
Replace fuses, if required.

2. Radio/amplifier (if
equipped) connector
damaged.

2. Check for loose or corroded radio/amplifier
connector. Repair, as required.

3. Wiring damaged.

3. Check for shorted or open wires. Repair wiring
as required.

4. Radio/amplifier (if
equipped) ground damaged.

4. Check for continuity between radio chassis and
a known good ground. There should be
continuity. Repair ground as required.

8A - 52

AUDIO - SERVICE INFORMATION

DR/DH

CONDITION

POSSIBLE CAUSES

CORRECTION

5. Radio/amplifier (if
equipped) inoperative.

5. Refer to appropriate Diagnostic Service
information.

6. Speakers inoperative.

6. Refer to appropriate Diagnostic Service
information.

NO RADIO DISPLAY

1. Fuse inoperative.

1. Check radio fuse and Ignition-Off Draw (IOD)
fuse in Integrated Power Module (IPM). Replace
fuses as required.

2. Radio connector
damaged.

2. Check for loose or corroded radio connector.
Repair as required.

3. Wiring damaged.

3. Check for battery voltage at radio connector.
Repair wiring as required.

4. Radio ground damaged.

4. Check for continuity between radio chassis and
a known good ground. There should be
continuity. Repair ground as required.

5. Radio inoperative.

5. Refer to appropriate Diagnostic Service
information.

CLOCK WILL NOT KEEP
SET TIME

1. Fuse inoperative.

1. Check Ignition-Off Draw (IOD) fuse in the
Integrated Power Module (IPM). Replace fuse if
required.

2. Radio connector
damaged.

2. Check for loose or corroded radio connector.
Repair as required.

3. Wiring damaged.

3. Check for battery voltage at radio connector.
Repair wiring as required.

4. Radio ground damaged.

4. Check for continuity between radio chassis and
a known good ground. There should be
continuity. Repair ground as required.

5. Radio inoperative.

5. Refer to appropriate Diagnostic Service
information.

POOR RADIO RECEPTION

1. Antenna inoperative.

1. (Refer to 8 - ELECTRICAL/AUDIO/ANTENNA
BODY & CABLE - DIAGNOSIS AND TESTING).

2. Radio ground damaged.

2. Check for continuity between radio chassis and
a known good ground. There should be
continuity. Repair ground as required.

3. Radio noise suppression
inoperative or damaged.

3. Repair or replace ground strap as necessary.

4. Radio inoperative.

4. Refer to appropriate Diagnostic Service
inoperative.

SOUND DISTORTION
(VIBRATION FROM
SPEAKER AREA, BUZZING -
HUMMING)

1. Door trim panel loose or
missing fasteners.

1. Inspect door trim panel and correct as
necessary. Replace any missing fasteners.

2. Water shield loose or
misaligned.

2. Inspect water shield and adjust as required.

3. Items placed in door trim
panel map pockets vibrating
or moving from side to side.

3. Remove items from door trim panel. Ensure
that vibration is no longer present.

DR/DH

AUDIO - SERVICE INFORMATION

8A - 53


Content   ..  260  261  262  263   ..