Dodge Durango (DN). Manual - part 222
CAUTION: If the maximum tightening torque is
reached prior to reaching the required rotating
torque, the collapsible spacer may have been dam-
aged. Replace the collapsible spacer.
(14) Align the installation reference marks on the
propeller shaft and companion flange and install the
propeller shaft.
(15) Add gear lubricant to the differential housing,
if necessary. Refer to the Lubricant Specifications for
gear lubricant requirements.
(16) Install both C/V driveshafts.
(17) Install skid plate, if equipped.
(18) Lower the vehicle.
AXLE SHAFT
REMOVAL
(1) Raise and support vehicle. Ensure that the
transmission is in neutral.
(2) Remove the necessary C/V driveshaft from
vehicle.
(3) Remove the skid plate, if equipped.
(4) Clean all foreign material from axle seal area.
(5) Install Puller Adapter 8420 onto the axle shaft.
(6) Install Slide Hammer C-3752 to the puller
adapter.
(7) Remove axle shaft. Use care to prevent damage
to axle shaft bearing and seal, which will remain in
axle shaft tube.
(8) Inspect axle shaft seal for leakage or damage.
Replace the seal if there is any question as to its con-
dition.
(9) Inspect roller bearing contact surface on axle
shaft for signs of brinelling, galling and pitting. If
any of these conditions exist, the axle shaft and/or
bearing and seal must be replaced.
INSTALLATION
(1) Lubricate bearing bore and seal lip with gear
lubricant. Insert axle shaft through seal, bearing,
and engage it into side gear splines.
NOTE: Use care to prevent shaft splines from dam-
aging axle shaft seal lip.
(2) Push firmly on the axle shaft until the axle
shaft snap-ring passes completely through the side
gear and engages the snap-ring groove.
(3) Check the differential fluid level and add fluid
if necessary. Refer to Lubricant in this group for
lubricant requirements.
(4) Install skid plate, if necessary.
(5) Install C/V driveshaft.
(6) Lower vehicle.
AXLE SHAFT SEAL AND BEARING
REMOVAL
(1) Remove the axle shaft.
(2) Remove the axle shaft seal from the end of the
axle shaft tube with a small pry bar.
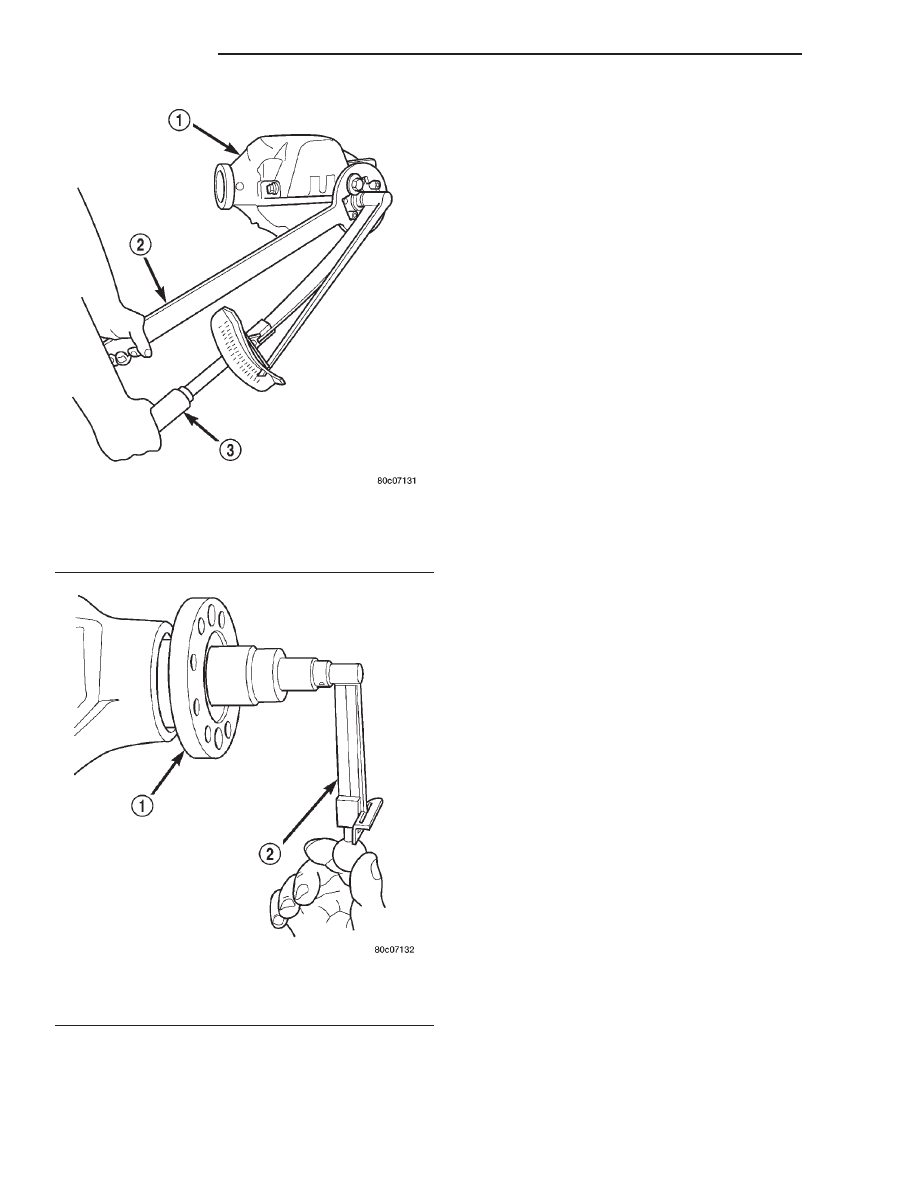
Fig. 9 Tighten Pinion Nut
1 – DIFFERENTIAL HOUSING
2 – COMPANION FLANGE HOLDER
3 – TORQUE WRENCH
Fig. 10 Check Pinion Rotation Torque
1 – COMPANION FLANGE
2 – INCH POUND TORQUE WRENCH
3 - 38
C205F AXLE
DN
REMOVAL AND INSTALLATION (Continued)