Dodge Durango (DN). Manual - part 171
FLOOR CARGO STORAGE DOOR
The floor cargo storage door is attached to the
cargo area carpet. Refer to Floor Carpet for service
procedures.
REARVIEW MIRROR
REMOVAL
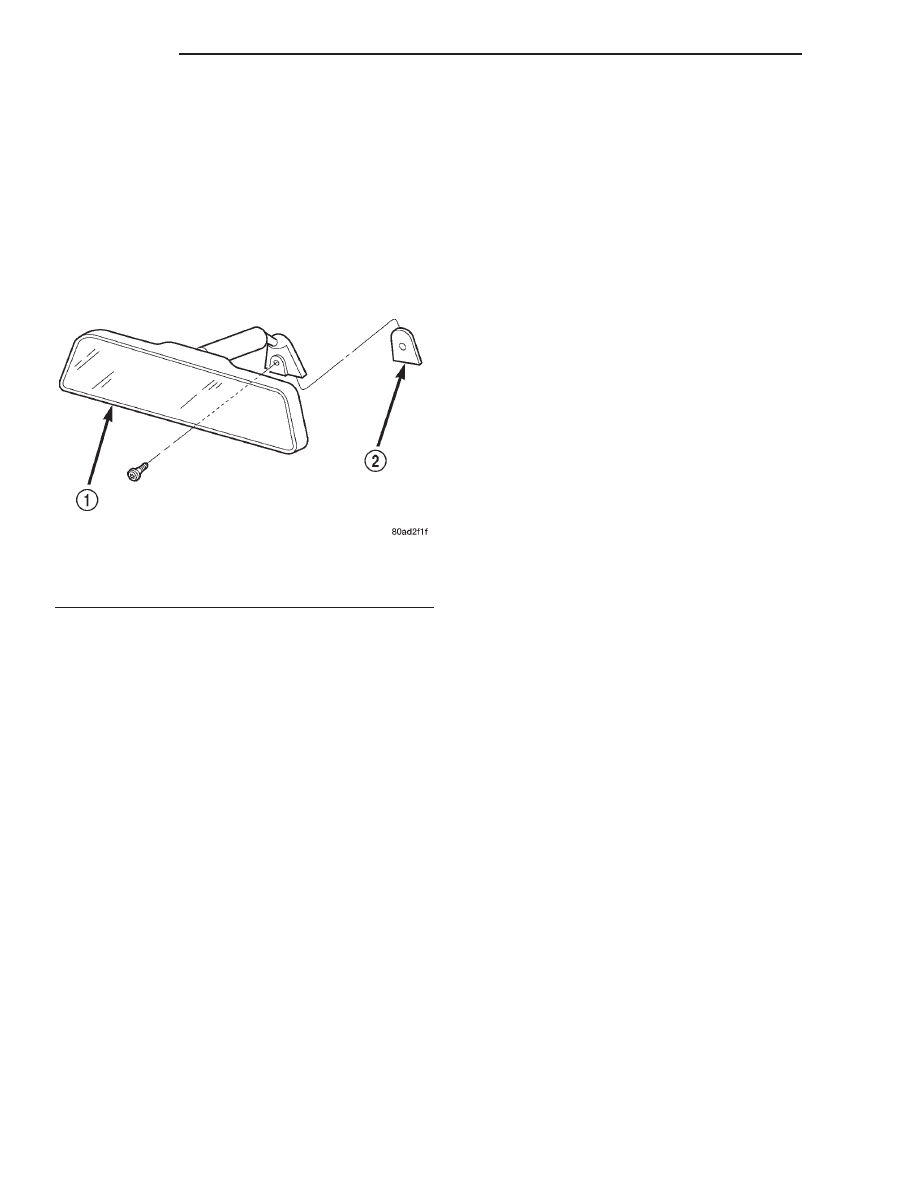
(1) Loosen the mirror base setscrew (Fig. 100).
(2) Slide the mirror base upward and off the
bracket.
INSTALLATION
(1) Position the mirror base at the bracket and
slide it downward onto the support bracket.
(2) Tighten setscrew to1 N·m (9 in. lbs.) torque.
REARVIEW MIRROR SUPPORT BRACKET
INSTALLATION
(1) Mark the position for the mirror bracket on the
outside of the windshield glass with a wax pencil.
(2) Clean the bracket contact area on the glass.
Use a mild powdered cleanser on a cloth saturated
with isopropyl (rubbing) alcohol. Finally, clean the
glass with a paper towel dampened with alcohol.
(3) Sand the surface on the support bracket with
fine grit-sandpaper. Wipe the bracket surface clean
with a paper towel.
(4) Apply accelerator to the surface on the bracket
according to the following instructions:
• Crush the vial to saturate the felt applicator.
• Remove the paper sleeve.
• Apply accelerator to the contact surface on the
bracket.
• Allow the accelerator to dry for five minutes.
• Do not touch the bracket contact surface after
the accelerator has been applied.
(5) Apply adhesive accelerator to the bracket con-
tact surface on the windshield glass. Allow the accel-
erator to dry for one minute. Do not touch the glass
contact
surface
after
the
accelerator
has
been
applied.
(6) Install the bracket according to the following
instructions:
• Apply one drop of adhesive at the center of the
bracket contact-surface on the windshield glass.
• Apply an even coat of adhesive to the contact
surface on the bracket.
• Align the bracket with the marked position on
the windshield glass.
• Press and hold the bracket in place for at least
one minute.
NOTE: Verify that the mirror support bracket is cor-
rectly aligned, because the adhesive will cure rap-
idly.
(7) Allow the adhesive to cure for 8-10 minutes.
Remove any excess adhesive with an alcohol-damp-
ened cloth.
(8) Allow the adhesive to cure for an additional
8-10 minutes before installing the mirror.
SUNVISOR
NOTE: All vehicles with driver and passenger side
airbags must have a colored-coded, 5-bullet point
airbag warning label applied to the sunvisor face
surface (in the stored position). When replacing the
sunvisor, verify label availability and ensure the
label is installed.
REMOVAL
(1) Remove the screws that attach the sunvisor
arm support bracket to the headliner and the roof
panel (Fig. 101).
(2) Disengage vanity lamp connector, if equipped.
(3) Detach the sunvisor from the visor supports.
(4) Remove the sunvisor from the headliner and
roof panel.
(5) If necessary, grasp both sides of the visor sup-
port base and firmly pull outward to disengage the
visor support cover from the base (Fig. 102).
(6) Lift/rock the visor support upward to disengage
it from the roof panel.
INSTALLATION
(1) If removed, position visor support in roof panel.
(2) Push the visor support cover inward and secure
the visor support to the roof panel.
(3) Position the sunvisor in the visor supports and
align the arm support bracket holes with the head-
liner holes.
Fig. 100 Rearview Mirror
1 – MIRROR
2 – SUPPORT BUTTON
23 - 64
BODY
DN
REMOVAL AND INSTALLATION (Continued)