Chrysler Le Baron, Dodge Dynasty, Plymouth Acclaim. Manual - part 340
EXTERIOR LAMPS—AY-BODY
INDEX
page
page
Center High Mounted Stop Lamp Bulb (CHMSL)
Cornering Lamp or Bulb—AY/C-P-Body
Front Side Marker Bulb—AY/C-P-Body
Front Side Marker Lamp—AY/C-P-Body
. . . . . . . . . . . . . . . . . . . . . . . 22
. . . . . . . . . . . . . . . . . . . . . . 22
. . . . . . . . . . . . . . . . . . . . . . . . . . . . . 22
License Plate Lamp or Bulb—AY/C-P-Body
Park, Turn Signal Lamp or Bulb—AY/C-P-Body
. . . . . . . . . . . . . . . . . . . . . . . . . . . 22
Tail, Stop, Turn Signal, Side Marker and Back-Up
. . . . . . . . . . . . . . 24
GENERAL INFORMATION
To service exterior lamps on AY/C-S-Body, refer to
procedures covered in Exterior Lamps—AC-Body sec-
tion. AC/C-S-Body uses the same lamps as AY/C-S-
Body.
HEADLAMPS
Conventional and halogen sealed beams are inter-
changeable, It is not recommended that they be
mixed. The lens, filament and reflector of sealed
beams are molded into one unit.
HEADLAMP DIAGNOSIS
For headlamp diagnosis, refer to the headlamp di-
agnosis chart at the beginning of this Group. Refer to
Wiring Diagrams manual for circuit and component
locations.
SEALED BEAM
REMOVAL
(1) Turn the headlight switch ON.
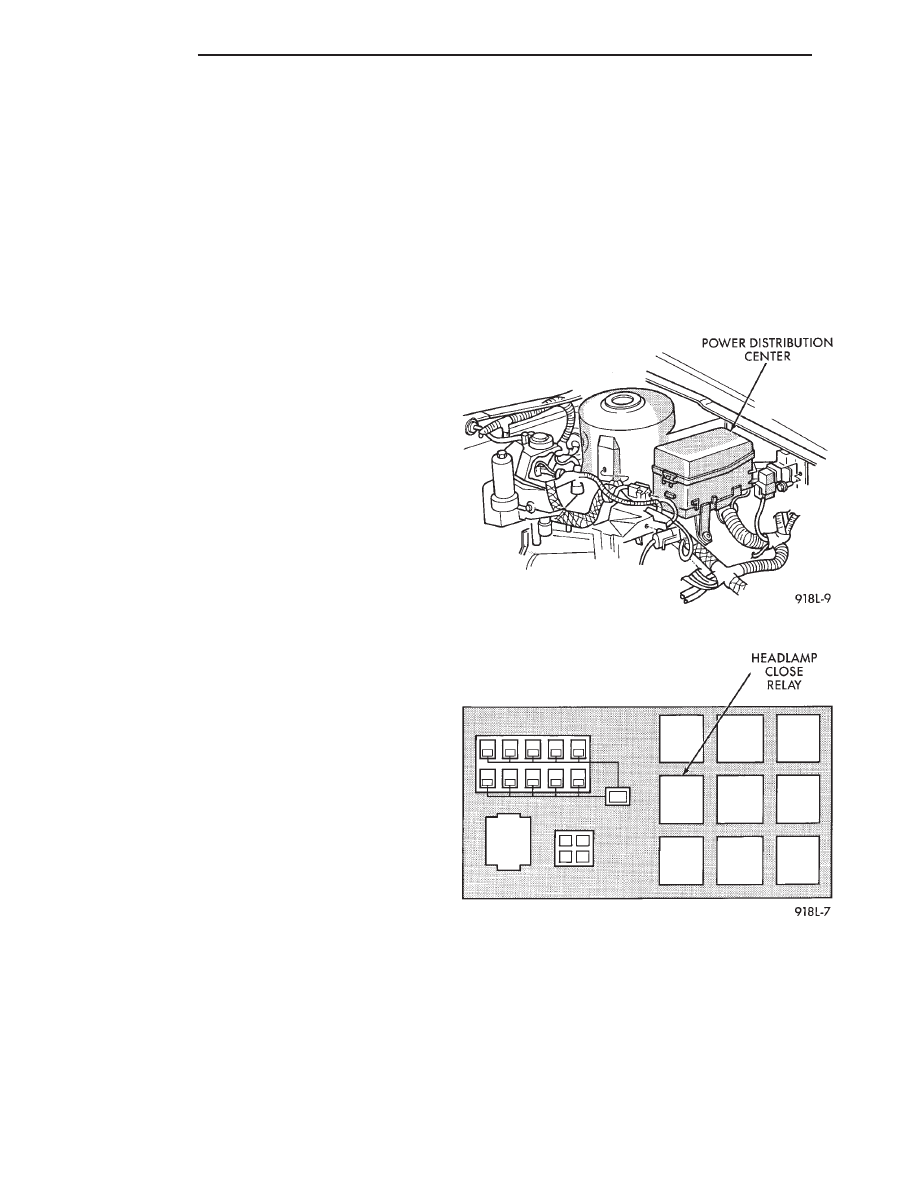
(2) Open the hood and locate the power distribu-
tion center forward of the left front suspension tower
(Fig. 1). Remove the cover.
(3) Remove the headlamp close relay (Fig. 2) to
prevent the headlamp doors from closing.
(4) Turn the headlight switch OFF.
(5) Remove screws from headlamp bezel and re-
move bezel, if equipped.
Do not disturb the headlamp adjusting screws.
(6) Remove screws from interior retaining ring
(Fig. 3), and remove ring.
(7) Separate sealed beam from seat and disconnect
wire connector.
INSTALLATION
Reverse the preceding operation.
PARK, TURN SIGNAL LAMP OR BULB—AY/C-P-
BODY
REMOVAL
(1) Open the headlamp doors.
(2) Remove push-in fasteners holding lower park
and turn signal lamp shield to grille opening panel
(Fig. 4).
(3) Remove screws holding park and turn signal
lamp grille opening panel (Fig. 5).
(4) Remove sockets from lamp and pull bulbs from
sockets if bulbs replacement is required (Fig. 6).
Fig. 1 Power Distribution Center
Fig. 2 Headlamp Close Relay
8L - 22
LAMPS
Ä