Daewoo Matiz (2003 year). Manual - part 250
9F – 8 AUDIO SYSTEMS
D19D553A
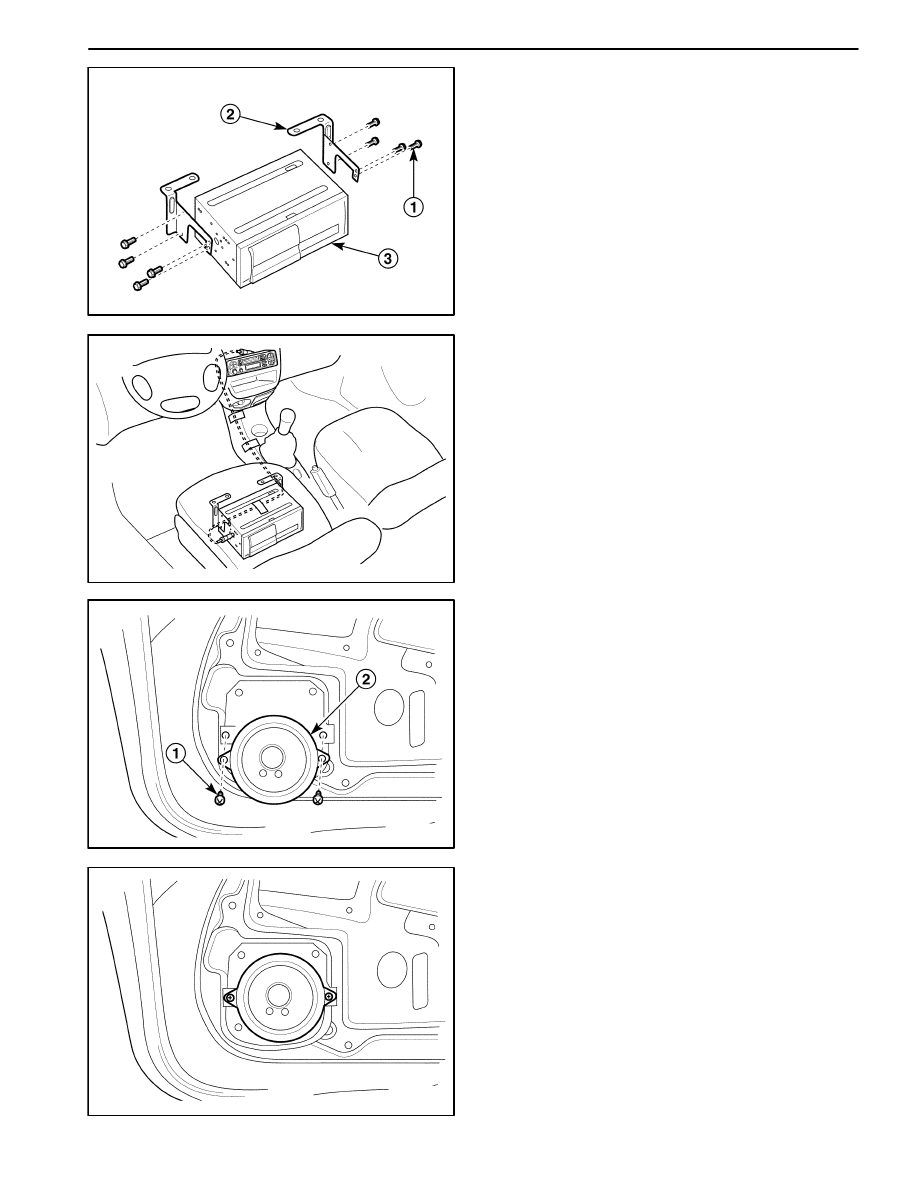
9. Separate the CD changer and the CD changer brack-
et.
D
Remove the bolts from the CD changer bracket
(1).
D
Remove the CD changer bracket (2).
D
Remove the CD changer (3).
D19D554A
Installation Procedure
1. Install the CD changer bracket to the CD changer
with the bolts.
2. Mount the CD changer assembly under the Driver’s
seat with the bolts and the screws.
3. Arrange the CD changer cable with the sponge pads
and the clip.
4. Connect the CD changer electrical connectors.
5. Install the floor console. Refer to Section 9G, Interior
Trim.
6. Install the Audio System to the instrument panel. Re-
fer to ”Audio System” in this section.
7. Connect the negative battery cable.
D109D555
FRONT SPEAKERS
Removal Procedure
1. Disconnect the negative battery cable.
2. Remove the door seal trim. Refer to Section 9P,
Doors.
3. Remove the speaker.
D
Remove the screws (1).
D
Disconnect the electrical connector.
D
Remove the speaker (2).
D109D556
Installation Procedure
1. Connect the electrical connector.
2. Install the speaker with the screws.
3. Install the door seal trim. Refer to Section 9P, Doors
4. Connect the negative battery cable.