Daewoo Nubira. Manual - part 32


  Index      Daewoo     Daewoo Nubira - service repair manual


Search            


Content   ..  30  31  32  33   ..


Daewoo Nubira. Manual - part 32


9Q – 8

I

ROOF

DAEWOO V–121 BL4

13.  Install the drain hoses.
14.  Install the headliner. Refer to”Formed Headliner” in

this section.

15.  Connect the negative battery cable.
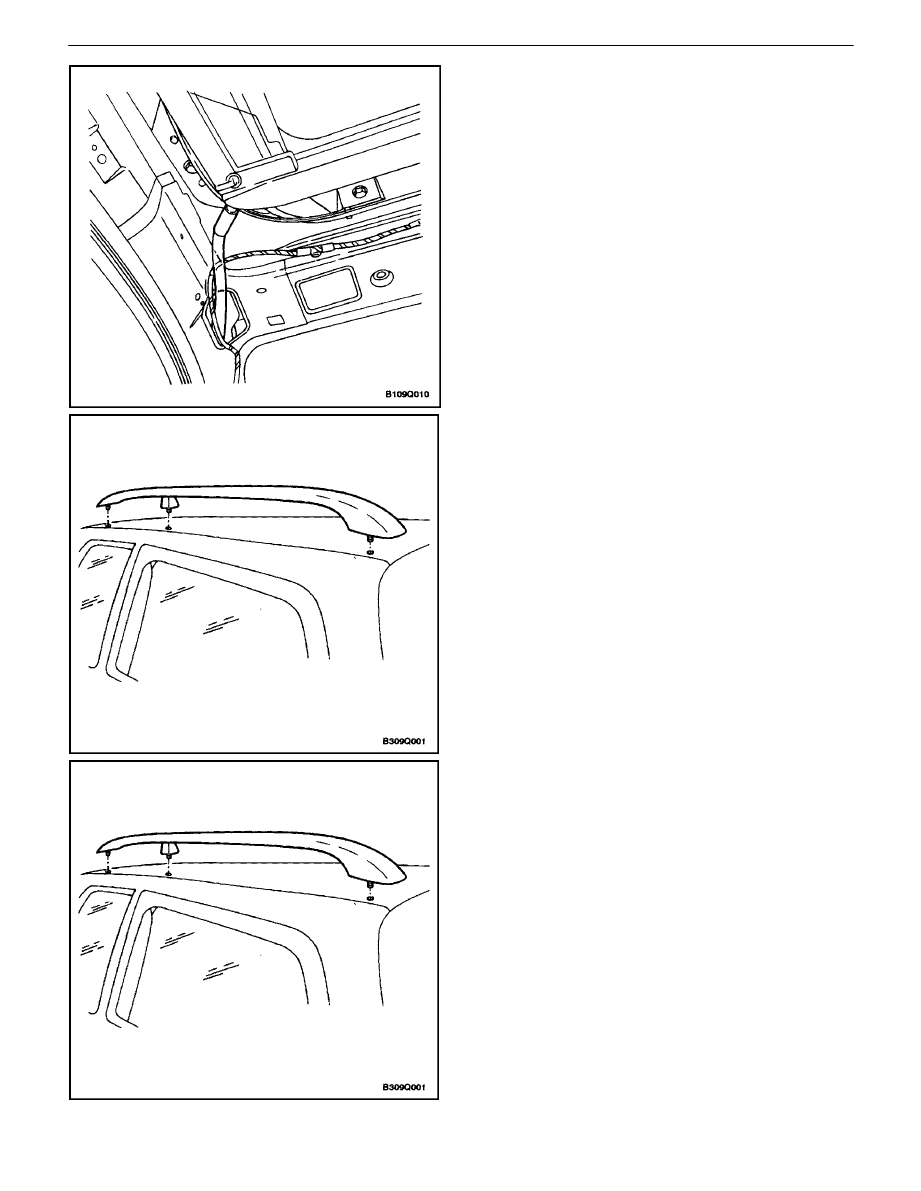
ROOF RACK (WAGON)

Removal Procedure

1.  Remove the headliner. Refer to”Formed Headliner”

in this section.

2.  Remove the nuts and the roof rack.

Installation Procedure

Notice : Dissimilar metals in direct contact with each other
may corrode rapidly. Make sure to use the correct fasten-
ers to prevent premature corrosion.

1.  Install the roof rack with the nuts.

Tighten

Tighten the roof rack nuts to 27 N

S

m (20 lb–ft).

2.  Install the headliner. Refer to”Formed Headliner” in

this section.

ROOF  9Q – 9

DAEWOO V–121 BL4

FORMED HEADLINER

(Notchback Shown, Hatchback and
Wagon Similar)

Removal Procedure

1.  Disconnect the negative battery cable.
2.  Remove the headliner/sunroof molding, if equipped.

3.  Remove the passenger assist handles. Refer

to”Passenger Assist Handles” in this section.

4.  Remove the ticket holder. Refer toSection 9E, In-

strumentation/Driver Information.

5.  Remove the sun visors and the sun visor supports

from the headliner. Refer to”Sun Visors”  in this
section.

6.  Remove the interior courtesy lamp or the interior

courtesy lamp/power sunroof control switch, if
equipped. Refer to Section 9B, Lighting Systems
or”Interior Courtesy Lamp/Power Sunroof Control
Switch” in this section.

7.  Remove the cargo area lamp (wagon only). Refer

to Section 9B, Lighting Systems

8.  Remove the clock. Refer toSection 9E, Instrumen-

tation/Driver Information.

9.  Remove the left and the right A–pillar trim panels.
10.  Remove the bolts and the seat belt anchors from

the left and the right B–pillars.

11.  Disconnect the top of the left and the right B–pillar

trim panels.

12.  Remove the bolts and the rear seat belt anchors

from the left and the right C–pillars.

9Q – 10

I

ROOF

DAEWOO V–121 BL4

13.  Remove the left and the right C–pillar trim panels.
14.  Remove the left and right D–pillar trim panels

(waon only). Refer to Section 9G, Interior Trim.

15.  Remove the retaining clips behind the upper B–pil-

lar trim panel.

16.  Remove the plastic retainers in the headliner along

the rear window.

17.  Recline both front seats.
18.  Remove the headliner through a rear door or the

hatchback door.

Installation Procedure

1.  Recline both front seats.
2.  Insert the headliner through a rear door or the

hatchback door.

3.  Install the headliner behind the trim panels and the

seals around the doors.

4.  Install the plastic retainers along the rear window.

ROOF  9Q – 11

DAEWOO V–121 BL4

5.  Install the retaining clips behind the upper B–pillar

trim panels.

6.  Install the left and right D–pillar trim panels (wagon

only). Refer to Section 9G, Interior Trim.

7.  Install the left and the right C–pillar trim panels.

Notice : Dissimilar metals in direct contact with each other
may corrode rapidly. Make sure to use the correct fasten-
ers to prevent premature corrosion.

8.  Install the rear seat belt anchors and the bolts to

the left and the right C–pillars.

Tighten

Tighten the rear seat belt anchor bolts to 35 N

S

m (26

lb–ft).

9.  Install the top of the left and the right B–pillar trim

panels.

10.  Install the seat belt anchors with the bolts in the left

and the right B–pillar panels.

Tighten

Tighten the rear seat belt anchor bolts to 35 N

S

m (26

lb–ft).


Content   ..  30  31  32  33   ..