DAF 95XF. Manual - part 591
 

  Index      DAF     DAF 95XF Series - service repair manual


Search            


Content   ..  589  590  591  592   ..


DAF 95XF. Manual - part 591


8

TANDEM REAR AXLE 1355 T

Inspection and adjustment

2-2

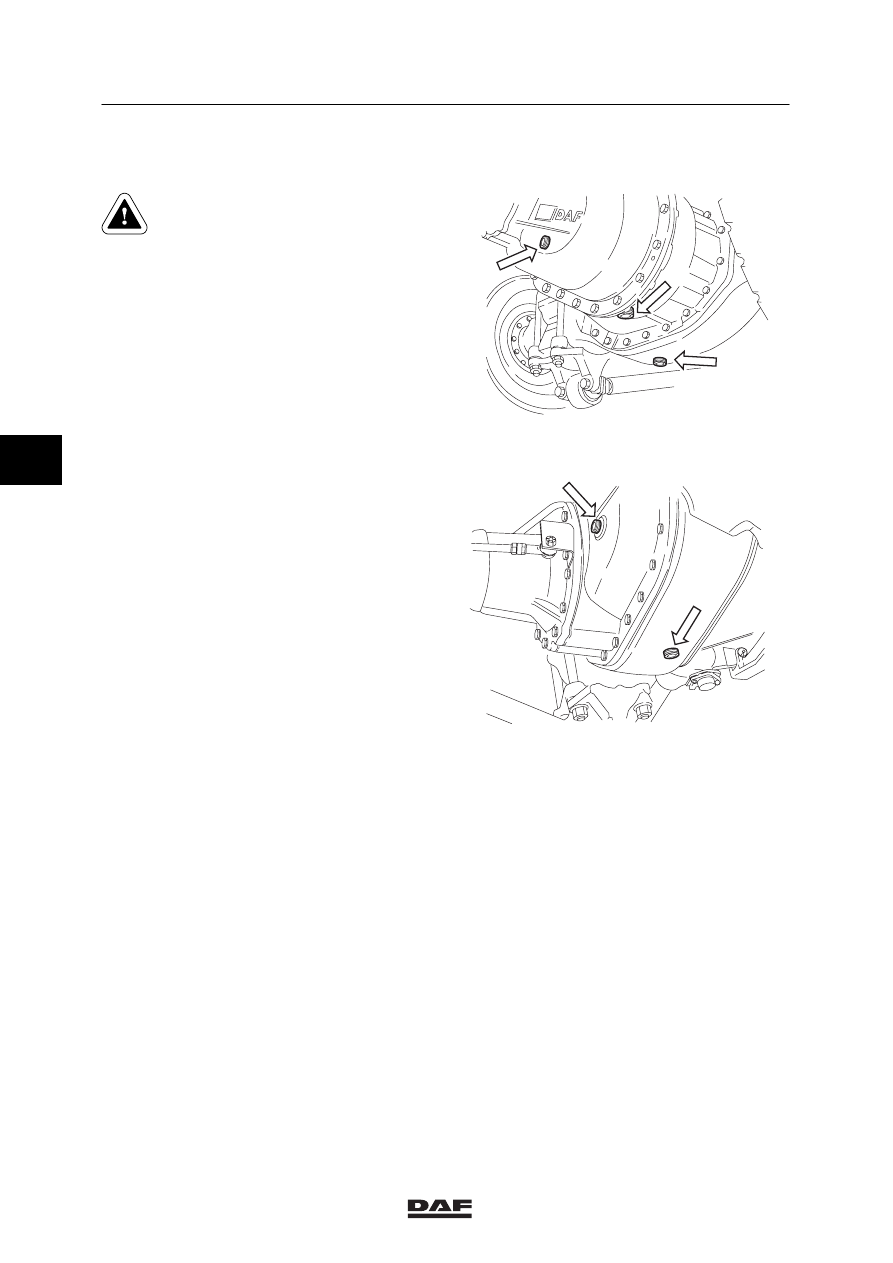
2.3 INSPECTION, DIFFERENTIAL OIL LEVEL

To prevent skin injury, avoid
unnecessary contact with the
drained oil.

Inspection, oil level first axle
1.

Position the vehicle on a level surface.

2.

Remove the oil-level plug/filler plug A. The
oil level should reach the oil-level
opening/filler opening.

3.

Fit the plug.
In the case of a Torx plug, use a special
Torx wrench (DAF no. 1329422) and the
specified tightening torque to fit the plug.
See main group “Technical data”.

Inspection, oil level second axle
1.

Position the vehicle on a level surface.

2.

Remove the oil-level plug/filler plug A. The
oil level should reach the oil-level
opening/filler opening.

3.

Fit the plug.
In the case of a Torx plug, use a special
Torx wrench (DAF no. 1329422) and the
specified tightening torque to fit the plug.
See main group “Technical data”.

B

B

A

M8049

B

A

M8050

2.4 INSPECTION, OPERATION OF DIFFERENTIAL LOCK

1.

Jack up the rear axle and support the axle
on stands.

2.

Bring the air system to operating pressure.

3.

Engage the differential lock. The warning
lamp should now come on.

4.

Check whether there is a “rigid” connection
between the driven wheels.

5.

Disengage the differential lock. The warning
lamp must not light up and the “rigid”
connection between the driven wheels
should be broken.

4

ǹ 0001

8

Inspection and adjustment

TANDEM REAR AXLE 1355 T

2-3

2.5 INSPECTION, HUB AND WHEEL BEARINGS

1.

Inspect the bearings for damage at the
following points:
-

the raceways of the bearing rollers

-

the bearing cage

-

the running surfaces of the inner and
outer race.

Replace the entire bearing (inner race,
bearing cage and outer race), if damage is
found.

2.

When the outer race of the bearing is loose
in the hub or has turned in the hub, the hub
should be replaced.

3.

Check the axle-stub screw thread, the
bearing surfaces of the inner bearing races
and the running surface of the oil seal for
damage.

4.

Check the ABS sensor ring for damage.
Replace the ring at even the slightest trace
of damage.

4

ǹ 0001

8

TANDEM REAR AXLE 1355 T

Inspection and adjustment

2-4

2.6 INSPECTION, ABS SENSOR RING

1.

Remove the wheel hub, see chapter
“Removal and installation”.

2.

Check the sensor ring (1) for deposits.
Special attention should be paid to deposits
between the teeth of the sensor ring.
Clean the sensor ring, if necessary.

3.

Check the sensor ring (1) for damage. Even
the slightest damage can cause a failure. If
required, replace the sensor ring.

4.

If possible, the sensor ring (1) should be
checked for the maximum admissible axial
end play, see main group “Technical data”.

5.

Check the sensor (2) for smooth operation.
If necessary, clean the sensor and apply
new grease.

S7 00 134

2

1

4

ǹ 0001

8

Removal and installation

TANDEM REAR AXLE 1355 T

3-1

3. REMOVAL AND INSTALLATION

3.1 REMOVAL AND INSTALLATION, ENTIRE REAR AXLE

Removing the entire rear axle
1.

Block the front wheels using chocks.

2.

Slacken the central bolt of the spring-brake
cylinder as far as possible.

3.

Apply the parking brake.

4.

Check the air lines and wiring.

5.

Remove the drive shaft from the drive
flange.

6.

Loosen the shock absorbers on the bottom.

7.

Loosen the control rod of the load-sensing
valve.

8.

Support the vehicle securely with stands
under the chassis side members.

9.

Remove the axle suspension/axle guide.
Take the necessary precautions to prevent
the axle from toppling when removing the
axle suspension/axle guide.

10. If possible, the entire rear axle with wheels

should be rolled from under the vehicle.

ǹ 0001

4


Content   ..  589  590  591  592   ..