Citroen Berlingo Dag (2011 year). Instruction - part 2
2
2
Access
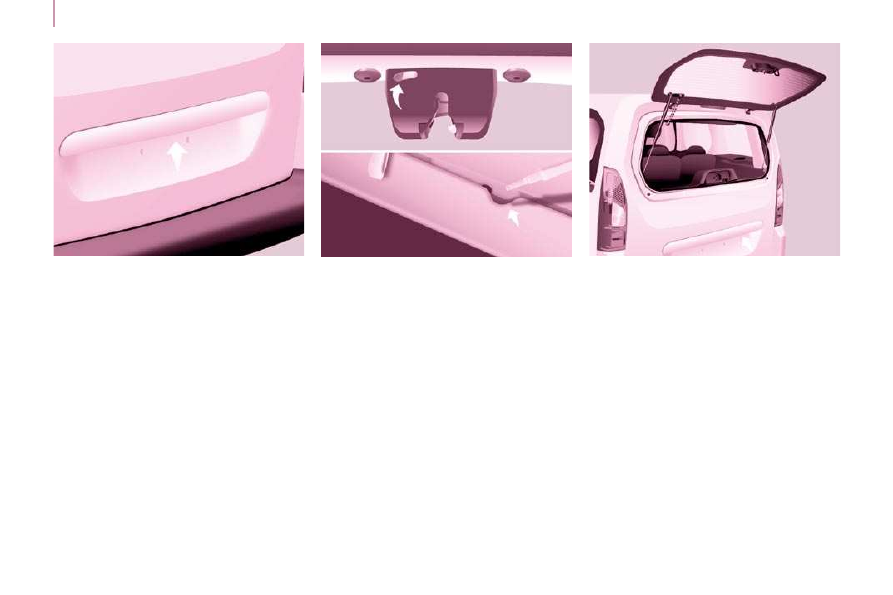
TAILGATE
From inside
Tailgate screen
The opening rear screen allows you to
access the rear of the vehicle directly,
without having to open the tailgate.
Emergency control
In the event of a central unlocking
operating fault, this permits unlocking
of the tailgate from the inside.
Insert a small screwdriver in the
opening, between the door and the
fl oor. To unlock the lock, move the
catch to the left then push the tailgate.
From outside
Locking/unlocking is by means of the
remote control.
To open, press the control below the
trim then raise the tailgate.
A pull strap is available to close the
tailgate in the high position.
Guide the closing of the tailgate to the
balance point of its travel then apply
a fi nal press on the tailgate to close it
fully.
Opening
After unlocking the vehicle using the
remote control or the key, press the
control and raise the rear screen to
open it.
Closing
Close the rear screen by pressing
the centre of the glass until it is fully
closed.
The tailgate and tailgate screen cannot
both be open at the same time, to
prevent damage to the glass and the
screen itself.