Citroen C-Zero (2017 year). Instruction - part 9
8
In the event of a breakdown
127
C-Zero_en_Chap08_en-cas-de-panne_ed01-2016
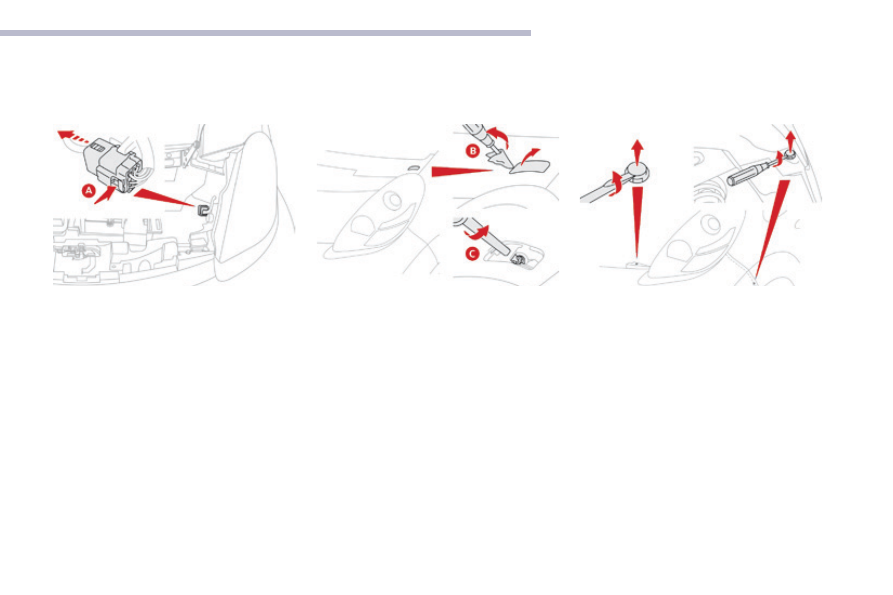
F Lift the cover B
, using a screwdriver
protected by a cloth.
F
Slacken fixing screw C until the head of the
screw touches the trim.
F
Remove the bumper retaining clips, using a
screwdriver.
F
Carefully lift the bumper.
To replace a failed bulb, you must first remove
the lamp.
To remove the lamp:
F
Open the bonnet.
F Press tab A
to release the connector.
Access to bulbs