Chrysler Pacifica. Manual - part 846
REAR DOOR OUTER BELT
MOLDING
REMOVAL
(1) Lower window completely.
(2) Remove
rear
inner
molding
weatherstrip.
(Refer to 23 - BODY/WEATHERSTRIP/SEALS/REAR
DOOR INNER BELT MOLDING - REMOVAL).
(3) Remove fixed glass run channel. (Refer to 23 -
BODY/DOORS - REAR/REAR DOOR FIXED GLASS
RUN CHANNEL - REMOVAL).
(4) Remove fixed glass run channel.
(5) Remove screws attaching outer belt molding,
one at the inside of the rear door shut face at the
B-pillar and one at the inside of the rear door shut
face at the C-pillar.
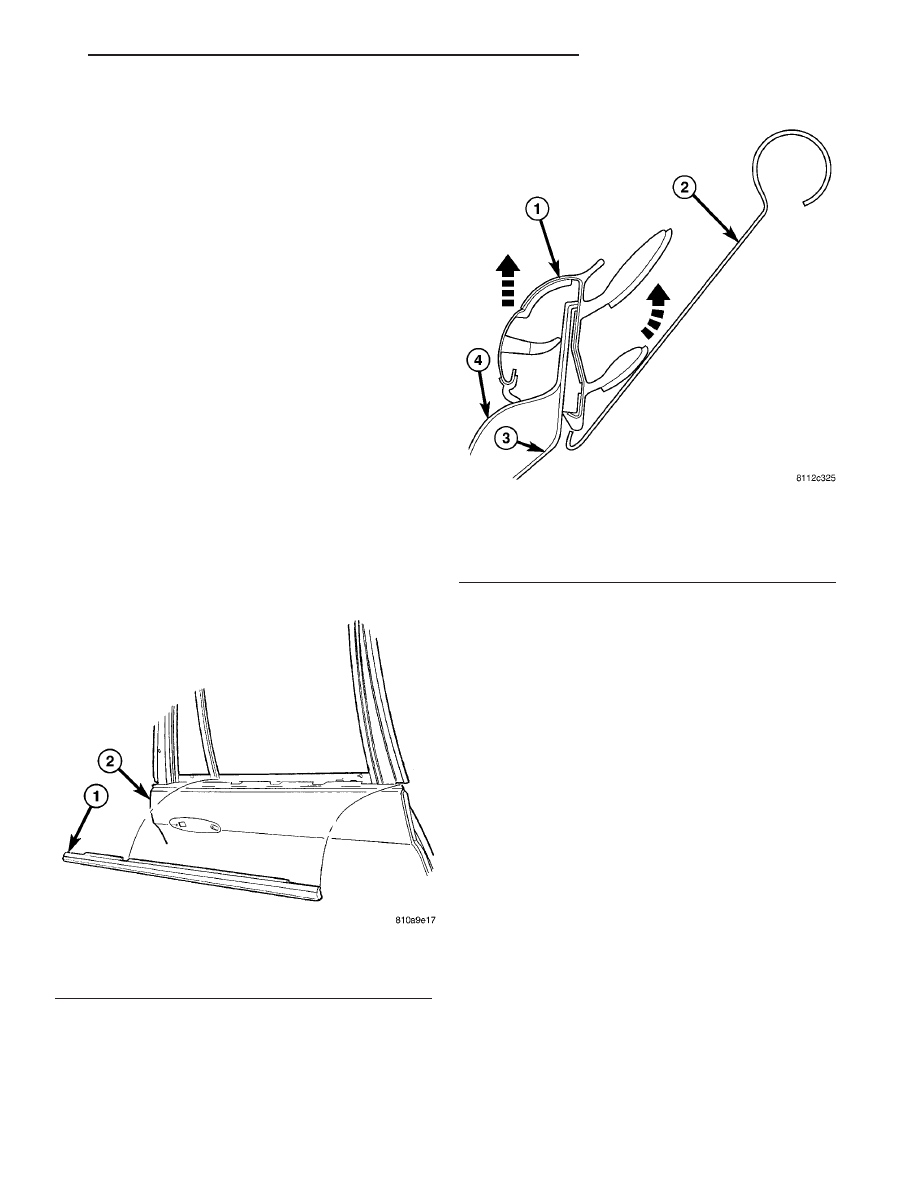
(6) Insert special tool #9093 between belt molding
and glass at rear and then slide tool forward approx-
imately 14 cm (5.5 in.) (Fig. 13) and (Fig. 14).
(7) Push down on outer belt molding and rotate
upper part of tool outward from vehicle approxi-
mately 6 - 8 cm (2.5 - 3 in.) then lift up on molding to
disengage from locking tab.
(8) Repeat step 3 and 4 at as necessary till outer
belt molding is free.
(9) Remove outer belt molding weatherstrip.
INSTALLATION
(1) Place outer belt molding weatherstrip into posi-
tion (Fig. 13).
(2) Press down or tap lightly on outer belt molding
until fully seated.
(3) Install screws attaching outer belt molding, one
at the inside of the rear door shut face at the B-pillar
and one at the inside of the rear door shut face at
the C-pillar.
(4) Install fixed glass run channel.
(5) Install rear inner molding weatherstrip. (Refer
to 23 - BODY/WEATHERSTRIP/SEALS/REAR DOOR
INNER BELT MOLDING - INSTALLATION).
(6) Install door trim panel. (Refer to 23 - BODY/
DOORS - REAR/TRIM PANEL - INSTALLATION).
(7) Close window.
Fig. 13 DOOR OUTER BELT MOUNTING
1 - OUTER BELT MOLDING
2 - DOOR ASSEMBLY
Fig. 14 OUTER BELT MOLDING
1 - OUTER BELT MOLDING
2 - SPECIAL TOOL #9093
3 - RETAINING TAB
4 - DOOR OUTER PANEL
CS
WEATHERSTRIP/SEALS
23 - 179