Chrysler Stratus Convertible. Manual - part 258
WASHER RESERVOIR PUMP
REMOVAL
(1) Disconnect and isolate the battery negative
remote cable.
(2) Partially remove the bumper fascia as needed
to gain access to the reservoir pump. Refer to Group
23, Body.
(3) Place a drain bucket below the reservoir to
catch any washer solvent that may leak out.
(4) Firmly grasping pump by hand twist and pull
away from reservoir and out of grommet. Care must
be taken not to puncture reservoir.
(5) Remover rubber grommet from reservoir and
throw away.
INSTALLATION
For installation, reverse the above procedures. A
new grommet is required for installation. Refill res-
ervoir with the washer solvent.
WIPER ARM AND BLADE
REMOVAL
(1) Place the wiper arm/blades in the PARK posi-
tion and turn ignition OFF.
(2) Unsnap arm cover. By hand rock gently side to
side and slide away from arm pivot. To remove the
left side raise hood for clearance
(3) Loosen retention nut.
(4) Remove the arm from the pivot by using a uni-
versal claw puller or by hand rock gently side to side
and slide. Raise blade and arm off glass and rock
side to side while applying pressure with the puller
till loose. Ensure that the puller is not on the collar
below the arm.
(5) Remove arm retention nut and arm.
INSTALLATION
(1) Place arm on pivot shaft, align blade with
wiper location made on windshield
(2) Start retention nut.
(3) Raise arm and blade off windshield while tight-
ening retention nut. Tighten nut to 33 to 40 N· mm
(23 to 29 ft. lbs.).
(4) Install arm head cover.
WIPER BLADE
REMOVAL
(1) Turn wiper switch ON, position blades to a con-
venient place on the windshield by turning the igni-
tion switch ON and OFF. Turn ignition switch OFF,
when blade is in the desirable position.
(2) Lift wiper arm to raise blade off glass.
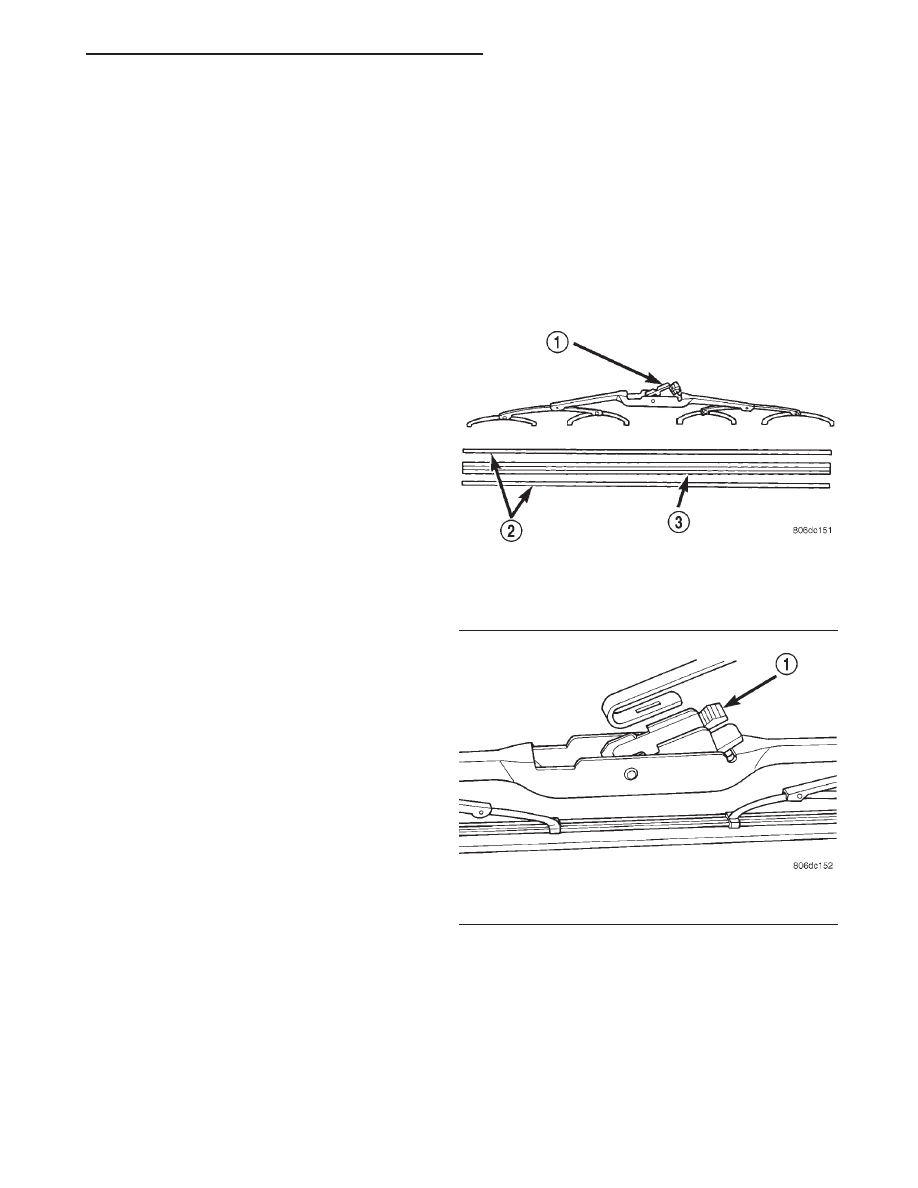
(3) Remove blade assembly from arm by pushing
release tab under arm tip and slide blade away from
arm tip (Fig. 10) and (Fig. 11).
(4) The driver’s side wiper blade has a air foil on it
and the air foil points downward as in (Fig. 2).
(5) Gently place wiper arm tip on windshield.
INSTALLATION
For installation reverse the above procedures.
When complete turn ignition switch ON. Turn wiper
switch OFF allowing the wiper blades PARK, then
turn ignition switch OFF.
WIPER BLADE ELEMENT
REMOVAL
(1) Lift wiper arm to raise blade off the wind-
shield.
(2) Remove blade assembly from arm by pushing
release tab under arm tip and slide blade away from
arm tip (Fig. 10) and (Fig. 11). Gently place wiper
arm tip on windshield.
Fig. 10 Wiper Blade and Element
1 – ARM RELEASE TAB
2 – VERTEBRA
3 – RUBBER ELEMENT
Fig. 11 Remove Blade from Arm
1 – RELEASE TAB
JX
WINDSHIELD WIPERS AND WASHERS
8K - 9
REMOVAL AND INSTALLATION (Continued)