Chery IndiS (S18D) . Manual - part 14
 

  Index      Chery     Chery IndiS (S18D) - service manual


Search            


Content   ..  12  13  14  15   ..


Chery IndiS (S18D) . Manual - part 14


5.1.2.

Remove the two fixing screws on control 
motor   with   inner   spline   wrench   and 
remove the control motor.

5.2. Installation Procedure

The installation procedures are  reverse to those 
for removal.

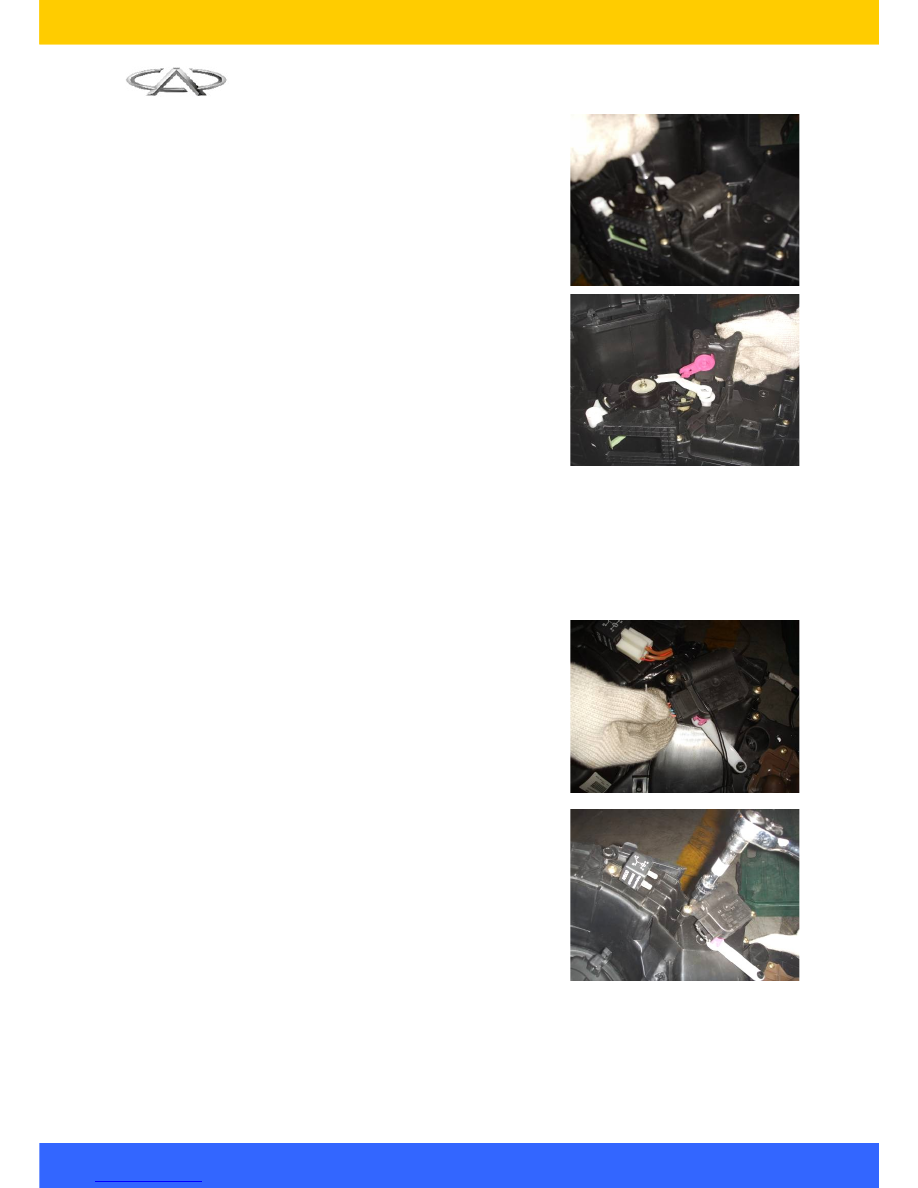
6. Removal and Installation of Blend Air Door Related Mechanism 

6.1. Removal Procedure

6.1.1.

Pull   out   the   blend   air   door   motor 
connector.

6.1.2.

Remove the blend door control plate with 
inner spline wrench.

53


6.1.3.

Align with the slot opening on one end of 
control arm and remove the control arm.

6.2. Installation Procedure

The installation procedures are  reverse to those 
for removal.

7. Removal and Installation of Int./Ext.Air Door Motor & Related Mechanism 

7.1. Removal Procedure

7.1.1.

Pull out the motor connector.

7.1.2.

Remove   the   fixing   screws   of   control 
motor and remove the motor.

7.2. Installation Procedure

The installation procedures are  reverse to those 
for removal.

8. Removal and Installation of Evaporator

8.1. Removal Procedure

54


8.1.1.

Remove the air-conditioner harness (See 
removal of air-conditioner harness)

8.1.2.

Remove   the   five   fixing   screws   on 
evaporator housing.

8.1.3.

Remove the evaporator top cover.

8.1.4.

Remove the evaporator core.

8.2. Installation of evaporator assembly

The installation procedures are  reverse to those 
for removal.

After   the   installation,   the   system   should   be 
evacuated, proper pressure should be maintained 
and anti-freeze agent should be filled to check for 
any leakage. Check if the radiator is blocked and 
compressed air can be used to clean it.

55


CHAPTER IX Body Dimension

I. Basic Instructions on BIW Maintenance

Vehicle body maintenance should be carried out by professionals according to the requirements of the 
manufacturer, and only in this way will the promises of “rust free” and “paint defect free” be effective. 

1.

Only adopt the materials specified by the manufacturer;

2.

When welding the outside metal of the vehicle body, make sure protective coating is applied to 

the inner side;

3.

When spot-welding, make sure zinc coating is used;

4.

Before air-tight sealing the welded parts, apply a layer of filling coating to the inner side and 

outer side;

5.

Before protecting the chassis with paint, apply protective coating to protect the chassis from 

rock bumping;

6.

When   the   coating   is   sprayed,   all   opening   parts   at   this   position   should   be   secured   with 

fasteners;

In some cases, the vehicle must be placed on a hoister platform, for removal of spare parts may affect 
the distribution of various parts in the vehicle body.

Before spot-welding, make sure the battery connector is unplugged, and check if the ventilation is good 
enough before welding. 

In maintaining the vehicle body in a certain area, take care to protect other vehicles in this area. 

Be particularly careful when spraying sand or welding near the oil tank or fuel system, and disassemble 
them if the safety can not be assured. 

When   maintaining   or   spray-painting   the   vehicle   body,   take   all   possible   measures   of   preventing 
accidents. 

When welding galvanized steel sheets, the spot-welding current should be raised by 30%, and the 
electrodes should be pointed, and the clamping force of the electrodes should be increased; and when 
doing gas shielded welding, the welding current should be further intensified. 

Do not weld the air-conditioning parts or try to weld the parts on the vehicle whose temperature are 
easily raised. When spray-painting the vehicle frame, the temperature either in the drying oven or the 
pre-heating oven should not go beyond 80˚C. 

Take the following measures  during welding operation to prevent shaking the electronically welded 
equipment: 

Connect the grounding of the electronic welding equipment directly to the welded parts. And check to 
make sure no other parts or insulative parts exists between the ground wiring connector and the spot-
welded parts;

First disassemble the ECU, and prevent the electronic device or circuit from contacting the ground 
wiring connector or welding wire. 

Corrections: 

The   vehicle   body   and   the   chassis   are   manufactured   off   the   production-line   by   low-temperature 
tempering and cold die casting. Therefore, when the metal parts are damage in any accident, the same 
processes must be used to restore them, and no heating is allowed. If they are damaged very seriously 
and can not be restored, the damaged parts must be removed after the connecting surface is corrected. 

The car bodies are made up of various members, pressing panels and other parts, of which the doors 
are the most complexly processed parts of the vehicle body. They involve processes like part stamping 
and welding, assembly of spare parts and assemblies, for which the dimensional fits and technical 
requirements are quite strict, so the car doors are difficult to maintain and the quality requirements are 
fairly high, and only the service personnel understand the structure of the car doors thoroughly and are 

56


Content   ..  12  13  14  15   ..