Chery B11. Manual - part 86


  Index      Chery     Chery B11 - service repair manual


Search            


Content   ..  84  85  86  87   ..


Chery B11. Manual - part 86


2.2 Unfixing, fixing or replacement of two rear wheel disc brake linings 
Tips
: after fixing the brake linings, brake for a couple of times to engage the brake 
linings and brake disc closer together.  
After replacing the brake linings of the rear axle, please check the brake fluid level. Fill 
in brake fluid to “MAX” level if necessary.  
The fixing steps are running contrary to the unfixing steps. 
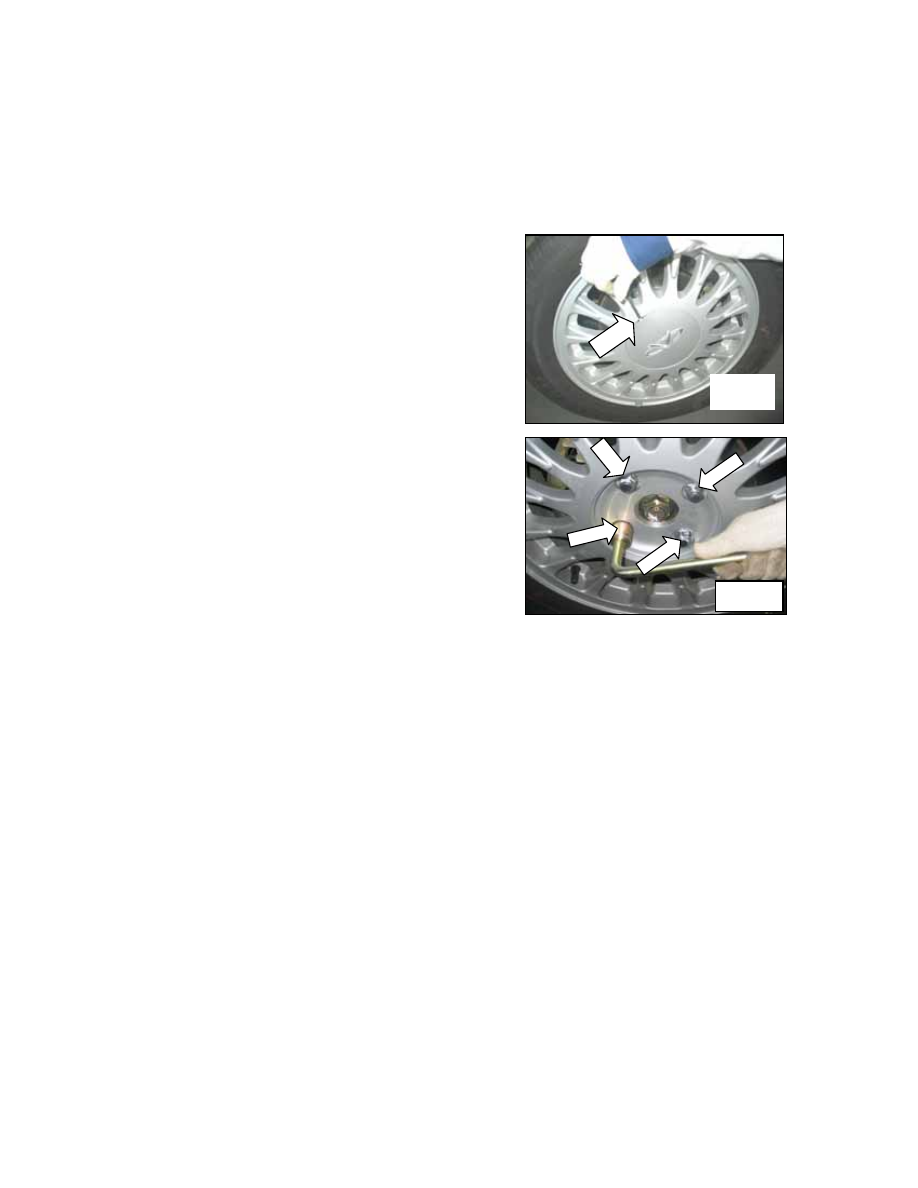
1. Unfix the decorative plate 

038

Caution: After having unfixed the decorative  
plate, take care not to rub the front of the plate  
against the ground to avoid possible scratches.  
2. Screw off the four set bolts of the wheels 
Screwing torque: 110N.m  
Caution: the screwing torque of the tyre bolt 
3. Release the guide bolt and pull out the brake  
caliper. Do not connect the brake caliper with the  
brake hose which may be damaged in that case.  

039

Fixing instructions: Only clean the guide bolt but  
do not apply grease.  
Check the screw thread and replace guide 
bolts that are defected. Toss the brake caliper  
upwards to dismantle it and then hang it on  
metal wires.  
4. Dismantle the brake lining 
Caution: mark the brake linings that have matched  
well. Do not replace the brake linings if only the  
brake lining on one side is worn out.  
Only when the thickness of brake disc equates or  
is less than the minimum thickness (MIIN TH) can  
the new brake linings be fixed. Pay attention to  
the minimum thickness of brake linings and clean  
the brake linings. Do not apply grease on the back  
plates of the brake linings. 


5. Check the dust seal (1) and replace if necessary. 
Clean the contact surfaces of brake pistons (2)  
and apply a thin film of sound-muffling ointment. 
Caution: do not contact the sound-muffling  
ointment with the dust seal, or the dust seal will  
become swollen.  


6. Clean the contact surfaces of brake calipers (3)  
and apply one thin film of sound-muffling ointment. 


7. Clean the hammerhead guide pieces on the brake 
caliper bracket and apply one thin film of  
sound-muffling ointment.  


2.3 Unfix, fix or replace the two rear brake discs 
The fixing steps are contrary to the unfixing steps.  
1. Dismantle wheel 
If necessary, dismantle and clean the brake lining. 
Caution: any brake disc which is thinner than the minimum 
brake disc thickness shall be replaced. The pair of brake  
discs on the same axle shall be replaced simultaneously.  
Please reinstall the brake linings if brake discs are replaced. 

(1 )      (2)


042

041

040

043

 
2. Release the set bolts of brake caliper assembly, dismantle 
the brake caliper and tie it on one side. 
Tips: please keep the brake pipe connected.  


3. Release the set bolt and dismantle the brake disc.  
Caution: release the brake disc: do not use hammer  
or similar articles to strike the drag ring. If necessary,  
use a rubber hammer to strike the brake disc carefully.  
Fixing instructions:  
Replace the set bolts of the brake disc and thoroughly 
clean the contact surfaces of the wheel hub. Remove the  
rusts if necessary. Any unevenness of contact surfaces  
will lead to brake disc deformation.  
 
 
2.4 Check and repair left and right rear brake calipers 
Tips: 
upon completion, brake for a couple of times to  
engage the brake linings and brake disc closer together.  
The fixing steps are running contrary to the unfixing steps. 
While fixing the brake linings of rear axle and replacing  
the brake linings of the front axle simultaneously, please  
check the brake fluid level. Fill in brake fluid  
to “MAX” level if necessary. 

044

1. Dismantle wheel 


2. Screw off the set bolts of the brake caliper 
 
 
3. Release the guide bolt and pull out the brake  
caliper; do not connect the brake caliper with the brake  
hose which may be damaged in that case. 
Fixing instructions: Only clean the guide bolt but do not  
apply grease. Check the screw thread and replace guide  
bolts that are defected. Toss the brake caliper upwards  
to dismantle it and then hang it on metal wires. 
 
4. Dismantle the dust cover of the oil cylinder 

045

Use a screwdriver to dismantle the dust cover of  
the oil cylinder. 


5. Dismantle the piston 

046

Carefully blow compressed air into the joint hole to  
push out the piston. Place one shield plate (hard wooden  
plate, etc) on the notch of brake caliper to protect the  
piston. Do not hold the piston in hand, or your fingers will 
be in danger of being clamped.  


047

 
6. Check the guide sleeve (5) 
Manually handle the guide sleeve to check if it is flexible  
enough, if failed, the guide sleeve shall be replaced.  


7. Carefully dismantle the seal with a rubber needle 

048

Clean the brake cylinder and components with alcohol and  
then blow dry with compressed air. Carefully check the  
surfaces of brake cylinders, pistons and flanges. No machining  
of brake cylinder and piston is allowed.  


8. Fixing instructions 
Apply one thin film of brake cylinder ointment on the brake 

049

cylinder, piston and seal and then fix the O-ring into the  
annulus groove on the back of the brake cylinder. Fix and press 
the whole dust seal into the front annulus groove.  


9. Fixing instructions 

050

Keep the clearance between dust seal and brake caliper body 
dry and free of brake cylinder ointment or brake fluid 
to ensure the precise position of the dust seal.  


Content   ..  84  85  86  87   ..