Chery A18. Manual - part 61
 

  Index      Chery     Chery A18 - service repair manual


Search            


Content   ..  59  60  61  62   ..


Chery A18. Manual - part 61


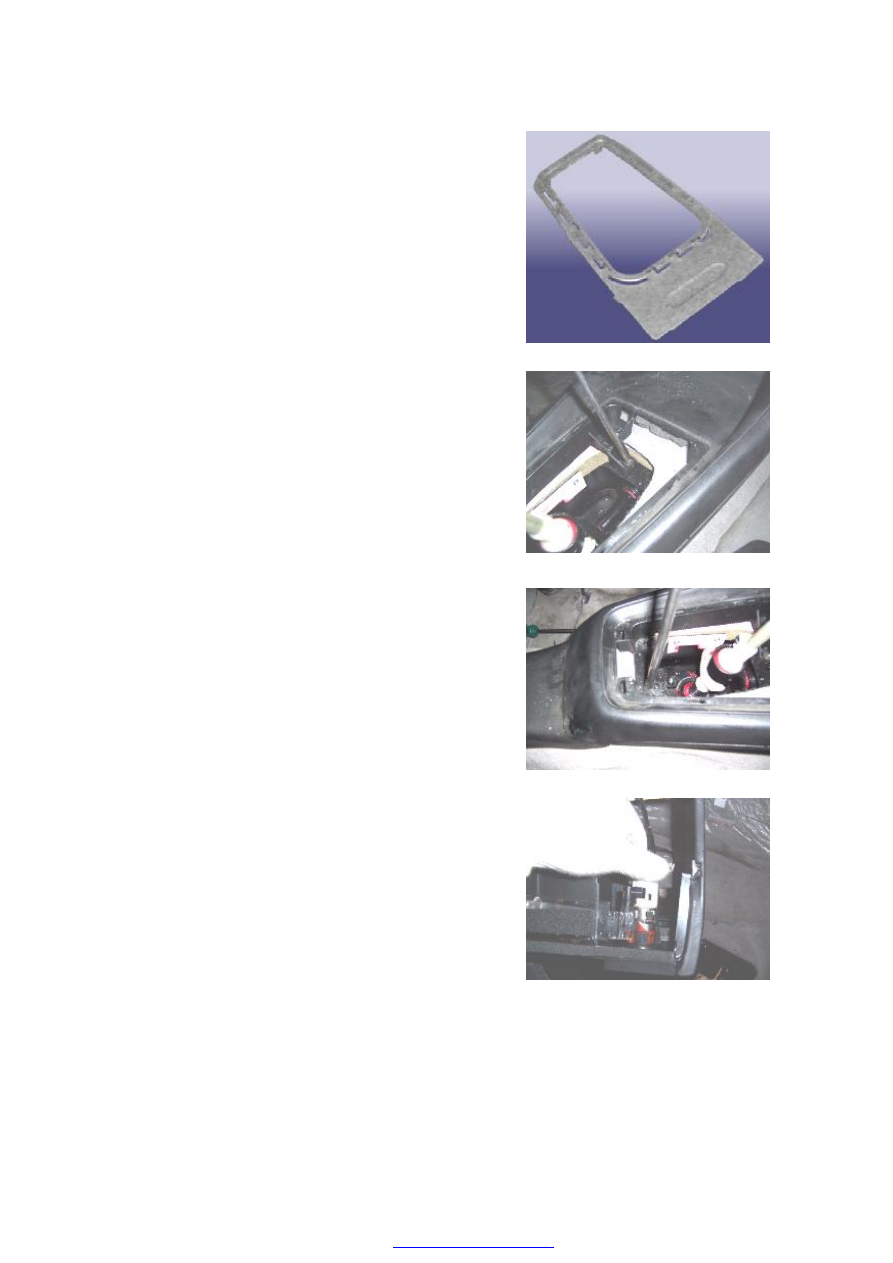
1.3. Prize up the shield  of the changing  gear  mechanism 

with the slotted screwdriver 


1.4.  Unscrew  bolts  connecting  the  console  with  the 

carbody with the Phillips screwdriver 

Moment: 3±0.5N.m 


1.5. Prize up 2 clips shown as the figure with the slotted 

screwdriver 


1.6. Take out the console with two hands 


1.7. Take out the plug of the smoke lighter 


2. Assembly steps 

Assemble according to the inverted sequence of the disassembly 


IV. Disassembly & assembly of the carpet 

Preparation tools: Slotted screwdriver, Phillips screwdriver, 

socket wrench 


1. Disassembly steps 

1.1. Disassemble the front, middle and rear row seats. (See 

the disassembly of the seat) 

1.2.  Disassemble  the  threshold  pressing  panel,  B  pillar,  C 

pillar and under shield of the D pillar. (See the disassembly 

of the B pillar, C pillar and D pillar)   

1.3.  Disassemble  the  console  &  the  shield  of  the  manual 

brake. (See the disassembly of the console & the shield of 

the manual brake) 

1.4.  Unscrew  5  plastic  covers  at  left  &  right  sides  under 

the instrumental panel 


1.5. Disassemble the trim parts of the limiting device of the 

throttle pedal   


1.6. Unscrew 3 fixing bolts of the left & right shields under 

the  instrumental  panel  with  the  Phillips  screwdriver  and 

take out shields 

Moment: 3±0.5N.m 


1.7. Take out all the plugs of plug-in units in the carpet hole 

and take out the carpet   

2. Assembly steps 

2.1.  Put  the  carpet  in  the  car,  compact  the  carpet  of  the 

middle  path,  uncover  the  corresponding  hole  from  the 

carpet hole and compact the carpet. 


2.2.  Pave  the  left  &  central  carpet  according  to  the  shape 

of the car floor, uncover the assembly holes of left & front 

seats and compact the carpet. 


2.3. Pave the right & central carpet according to the shape 

of  the  car  floor,  uncover  the  assembly  holes  of  right  front 

& rear seats and compact the carpet. 


2.4. Pave the rear carpet along the end of the car. 

V. Disassembly of the shock pad 

1. Disassembly steps 

1.1. Disassemble the carpet (See the disassembly of the carpet). 

1.2. Remove all the shock pads. 

There is the shock  pad before the  middle row which is similarly arranged with the Chery Futwin 

Coupe. 

2. Assembly steps 

2.1. Assemble according to the inverted sequence of the disassembly 

2.2. Assembly attentions: 

2.2.1. Tidy up the plug-in wiring harness of seats & rear oxygen sensor when paving the shock pad 

2.2.2. The undersurface of the shock pad inosculates with the plate work 


Content   ..  59  60  61  62   ..