Chery A15. Manual - part 89


  Index      Chery     Chery A15 - service repair manual


Search            


Content   ..  87  88  89  90   ..


Chery A15. Manual - part 89


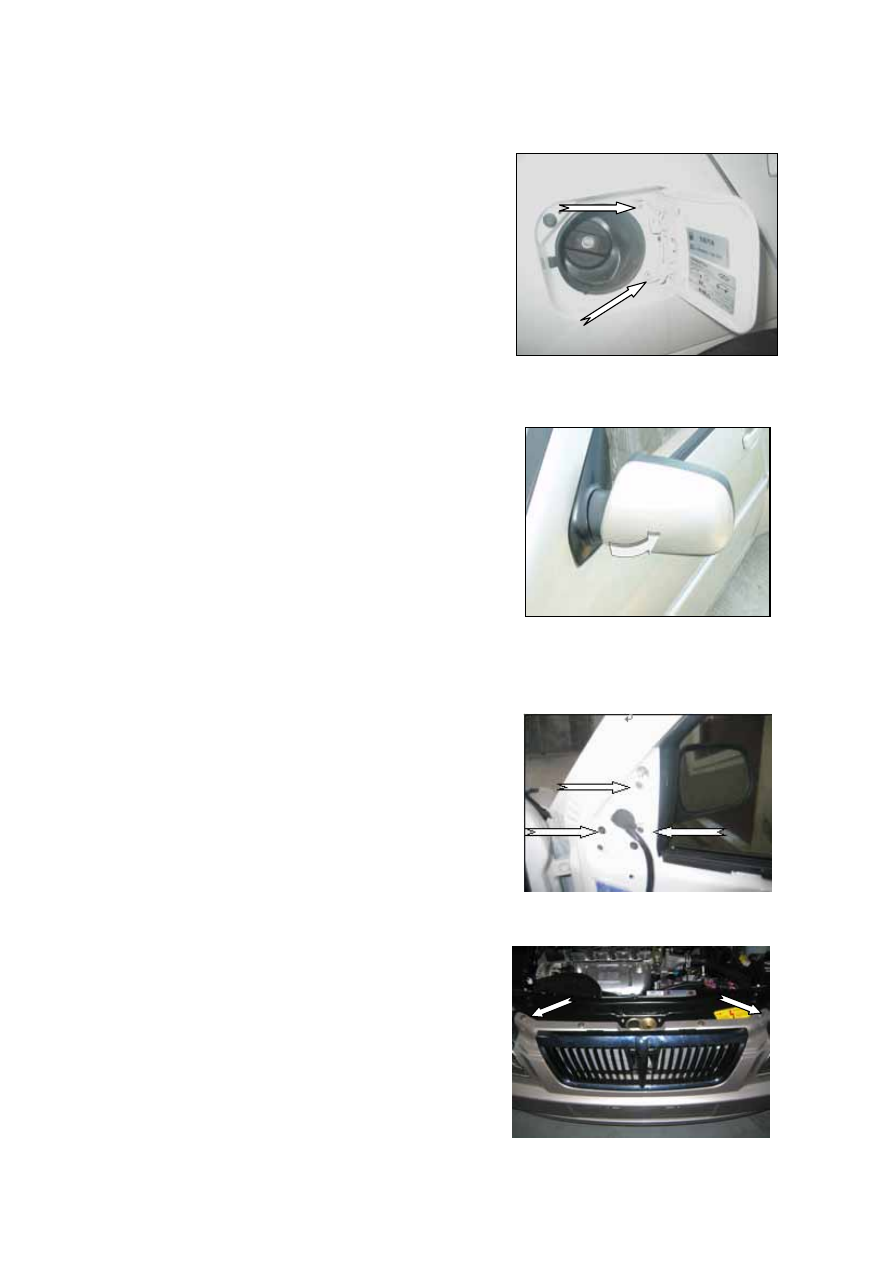
REMOVAL & INSTALLATION OF FUEL FILLER CAP


REMOVAL 
----Loosen the two screws between the filler 

cap and car body.   

 
INSTALLATION 
----Install in the reverse order of installation 
 
ADJUSTMENT 
----Keep the size at (4±0.5)mm and flatness 

error between cap rim and the fender at 
±0.5mm, which shall not affect the 
appearance.


REMOVAL & INSTALLATION OF 
EXTERIOR REARVIEW MIRROR


REMOVAL
 
----In removing the mirror, relevant 

instructions shall be followed to remove 
front door trim panel (refer to REMOVAL 
& INSTALLATION OF FRONT DOOR 
TRIM PANEL)


----Remove inner triangular block of the 
mirror.


----Remove the three screws connecting the 

mirror and door trim panel. Pull the mirror 
connector off to remove the mirror.   

 
INSTALLATION: 
----Install in the reverse order of removal. 

Tightening torque for bolts is 3±0.3N·m. 


REMOVAL & INSTALLATION OF 
RADIATOR GRILLE
  
 
REMOVAL
 
----Take out the four bolts between the grille 

top and front end panel to remove radiator 
grille as shown in the right figure.


INSTALLATION: 
---- Install in the reverse order of removal. 

Tightening torque for bolts is 3.5±2N·m. 


S-6

REMOVAL & INSTALLATION OF 
TRUNK LID TRIM PANEL


REMOVAL
 
----Remove the screw of trim panel frame.   
----Pry open the plastic clip with screwdriver to 

remove trunk lid trim panel. 


INSTALLATION: 
---- Install in the reverse order of removal.


REMOVAL & INSTALLATION OF ROOF 
TRIM MOULDING
 
 
REMOVAL
 
----Pry the moulding starting from where back 

window is with a plastic wedge. Loosen the 
clips of drip channel by hand and then open 
them with screwdriver. 

 
INSTALLATION: 
---- Install in the reverse order of removal. 
 
NOTE 
----All clips can be used once only.


S-7

REMOVAL & INSTALLATION OF 
FRONT WHEEL HOUSE INNER FENDER
 
REMOVAL
 
----Loosen the screw between front wheel 

house and its inner fender.   

 
INSTALLATION: 
---- Install in the reverse order of removal.


REMOVAL & INSTALLATION OF REAR 
WHEEL HOUSE INNER FENDER 
 
REMOVAL
 
---- Loosen the screw between front wheel 

house and its inner fender. 

 
INSTALLATION: 
---- Install in the reverse order of removal.


REMOVAL & INSTALLATION OF FRONT BUMPER


REMOVAL: 
----Remove wheel house inner fender (refer to 

REMOVAL & INSTALLALTION OF 
WHEEL HOUSE INNER FENDER)


----Remove the screw of wind deflectors 

under front bumper as shown in the right 
figure. Two wind deflectors, one each 
side. 


S-8

----Remove radiator grille (refer to 

REMOVAL & INSTALLATION OF 
RADIATOR GRILLE). 


----Remove the bolts between bumper bracket 

and front floor cross member. 


----Slide the bumper forward until it is 

disconnected with the side bracket.   


INSTALLATION: 
---- Install in the reverse order of removal. 
 
NOTE 
----Tightening torque for bumper bracket is 

82±8N·m.


REMOVAL OF SIDE BRACKET 


----Take out the clip of expansion seat inside 

the fender with the help of auxiliary tool to 
remove side bracket. 

----The clearance between fender apron and car 

body, rear wheel trim panel shall be not 
more than 1mm during installation. 


REMOVAL OF BRACKETS 


----Loosen the bolts between bumper and its 

brackets to remove the brackets. 

----Install the bumper in the reverse order of 

removal. Note that tightening torque for 
the bolt between the brackets and floor 
side member is 25N·m. Place the brackets 
horizontally with ground. 


S-9


Content   ..  87  88  89  90   ..