Chery A series. Manual - part 67
 

  Index      Chery     Chery A series - service repair manual


Search            copyright infringement  


Content   ..  65  66  67  68   ..


Chery A series. Manual - part 67


----Set on the front coil spring 8 and compress it 

less than 200~220mm. 


----Amount the washer 7, the front spring top 

tray 6, the bearing and vibration isolator 
assy 5 in sequence, and tighten the slotted 
nut 4 to the specified torque (40N•m), then 
loosen the compressing tools on the coil 
spring. 

Precaution: Please note that the two ends of the 

front coil spring should reach the corresponding   

locating positions of the spring trays. 

Inspection of the shock absorber: The 
methods for checking the shock absorber are 
as following: 

----Method of hand pressing the vehicle body. 

Shake the vehicle body for times on the 
side of the shock absorber which required 
to be checked and feel whether it is 
available. After the pressing, the vehicle 
will shake 2-3 times and then stop, which 
means the shock absorber works well. 

----Method of observation. The shock absorber 

should not leak oil at outside appearance. 
A little oil stain is normal. If there is 
serious leakage, the shock absorber should 
be replaced. 


----Method of touch. After long time running, 

touch the exterior of the shock absorber to 
check whether it is hot. If not hot, the 
shock absorber is in trouble. 


----Method of pulling and pressing. Place the 

piston rod of the shock absorber upwards, 
then pull and press it by hand for times and 
check: 


a whether there is a force during pulling and 

pressing which means the force is large 
while pulling up and small while pressing 
down. 


b whether there is idle stoke during pulling and   

M-17

pressing which means there is a force in 
lower part and not abruptly in upper part 
while pulling; there is a force in lower part 
and not in upper part while pressing. 

c whether the shock absorber is locked and 

unable to pull. 


d whether the piston rod of shock absorber is 

severely loose. 


Note: The above phenomenons indicate the 

failures of the shock absorber. 

Deal with the front shock absorber 

Caution: 


Whenever drilling on the shock absorber, 
please wear the goggles. The air pressure 
in the shock absorber could probably blow 
the metal flakes into eyes or face. 

----Clamp the shock absorber on flat ground or 

point the piston downwards to the clamped 
absorber. 

----Drill a hole of 2-3mm diameter at a distance 

of 20-30mm to the bottom of the tube in 
order to emit the air of the tube. 

----Turn the shock absorber to make the hole 

downwards. 

----Move the piston rod up and down for times 

to concentrate the oil, then cut the tube at 
the end. 

----Process the waste oil according to the waste 

disposal method. 

Note: 

 The shock absorber air is nitrogen. 

 The shock absorber oil is mineral oil. 


M-18

REMOVAL AND INSTALLATION OF THE FRONT WHEEL BEARING 

Removal: 

----Remove the front brake disc and the dust 

plate, and then extrude the hub. 

----Remove the spring retainer of both sides and 

extrude the wheel bearing. (shown as the 
illustration) 

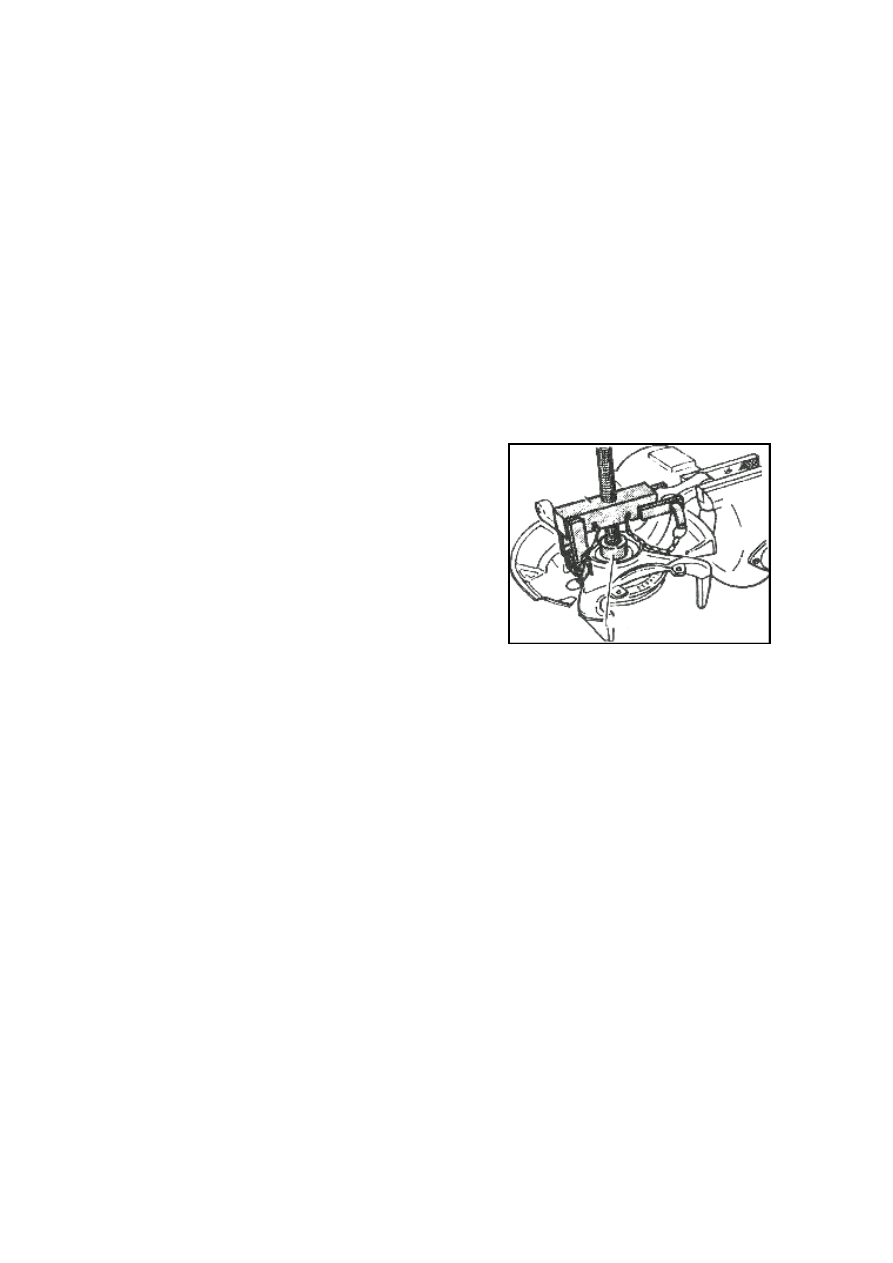
----Pull out the bearing inner race. Use the puller 

with hoop to pull the wheel bearing inner 
race out of the wheel hub. (shown as the 
illustration) 


Inspection: 

----After all the components are disassembled, 

please clean and check them, and replace 
them with new ones if necessary. 

----If the working surface of the brake disc wears 

severely beyond the specified value (wearing 
limit: 10.0mm), please replace it with a new 
one. 

Caution: Do not exceed the wearing limit. 

----If the dust plate is severely deformed, please 

replace it with a new one. 

----If the hub spline wears severely and looses, 

please replace it with a new one. 

----If the spring retainer is not available, please 

replace it with a new one. 

----If the wheel bearing is damaged, please 

replace it with a new one. 

Installation and adjustment 

----Set the outer spring retainer first, apply the 

lubricating grease onto the wheel bearing 
holder and then press the bearing down to the 
limit position, as shown in the illustration, 
and fix the inner spring retainer last. 

----Adjust the split positions of the inner and 

outer spring retainer so as to make their 
difference 180°. Then rotate the bearing inner 


M-19

race and observe whether it runs normally. 

----Apply the lubricating grease on the hub spline 

and the bearing neck, and then press the hub 
into the bearing. 


----Tighten three M6 bolts to fix the dust plate 

with the tightening torque of 10N·m. 

----Use the fuzz-free cloth to clean the working 

surface of the brake disc. If there is oil stain 
on the surface, clean it with ethanol. And 
then install the brake disc. 

----Rotate the brake disc and observe whether 

there is lock or abnormal noise. 


OVERHAUL OF THE LOWER CONTROL 
ARM 

Check the status of damage, crack and bend of 
the control arm. 

Replace the ball joint and the rubber cover of the 
lower control arm if they loose or wear. 


Replace the front housing of the lower control 
arm 

----Press out the front housing of the lower 

control arm. (shown as the illustration) 

----Apply the lubricating grease before installing 

the front housing of the lower control arm. 

----Press in the front housing of the control arm. 

(shown as the illustration) 


M-20


Content   ..  65  66  67  68   ..