RAM 3500 (2022 year). Manual in english - page 19
 

  Index      Manuals     RAM 3500 (2022 year). Manual in english


Search            copyright infringement  


Content      ..     17      18      19      20     ..


RAM 3500 (2022 year). Manual in english - page 19


300

SAFETY


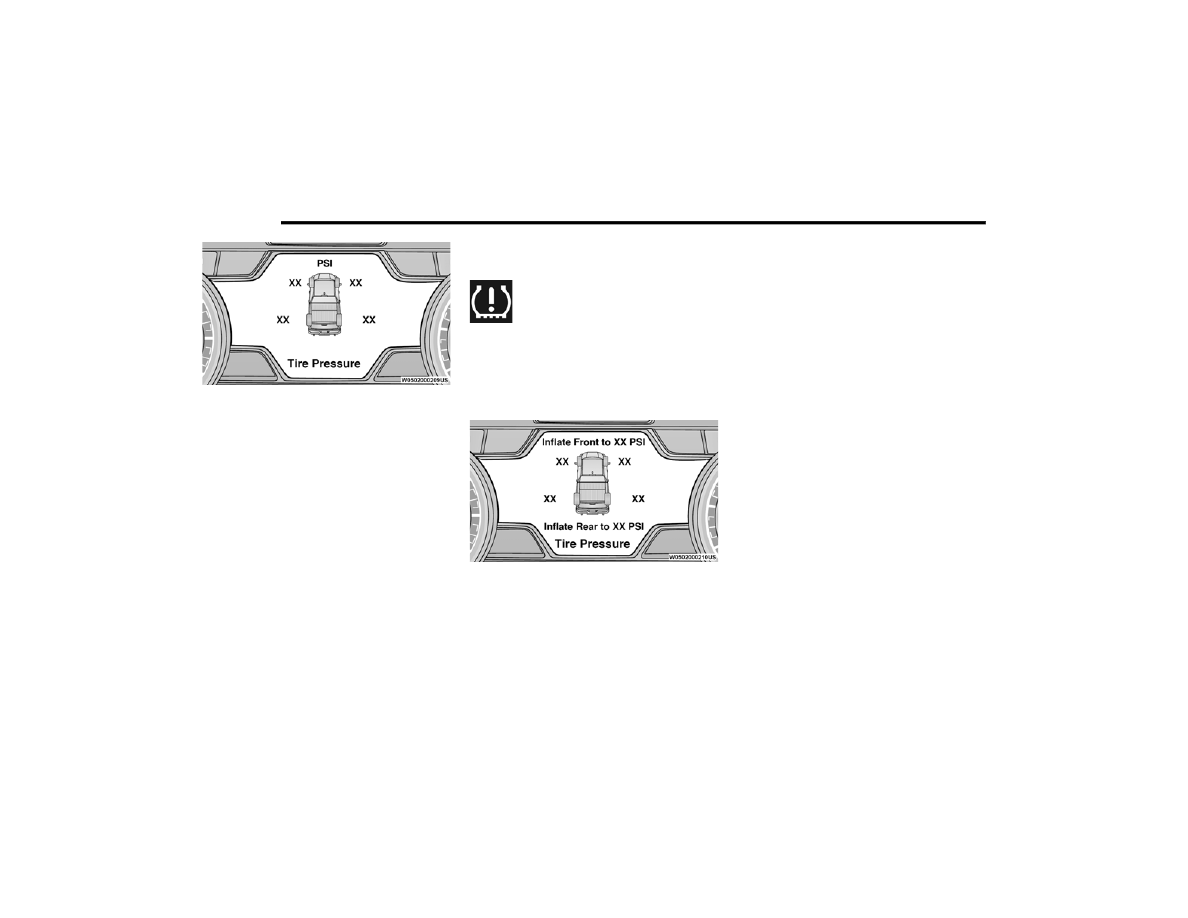
Example: Tire Pressure Monitoring System Display

The TPMS uses wireless technology with wheel rim 

mounted electronic sensors to monitor tire 

pressure levels. Sensors, mounted to each wheel 

as part of the valve stem, transmit tire pressure 

readings to the receiver module.
NOTE:

It is particularly important for you to check the tire 

pressure in all of the tires on your vehicle monthly 

and to maintain the proper pressure.
The TPMS consists of the following components:

Receiver module

Four TPMS sensors

Various TPMS messages, which display in the 

instrument cluster

TPMS Warning Light

Tire Pressure Monitoring System Low 

Pressure Warnings

The Tire Pressure Monitoring System 

Warning Light will illuminate in the 

instrument cluster when tire pressure is 

low in one or more of the four active road 

tires. In addition, the instrument cluster will display 

a graphic showing the pressure values of each tire 

with the low tire pressure values in a different 

color. An "Inflate to XX" message will also be 

displayed.

Example: Low Tire Pressure Display

Should this occur, you should stop as soon as 

possible and inflate the tires with a low pressure 

condition (those in a different color in the 

instrument cluster graphic) to the vehicle’s 

recommended cold placard pressure inflation 

value as shown in the "Inflate to XX" message. 

Once the system receives the updated tire 

pressures, the system will automatically update, 

the graphic display in the instrument cluster will 

return to its original color, and the Tire Pressure 

Monitoring System Warning Light will turn off. The 

vehicle may need to be driven for up to 20 minutes 

above 15 mph (24 km/h) in order for the TPMS to 

receive this information.
NOTE:

When filling warm tires, the tire pressure may need 

to be increased up to an additional 4 psi (28 kPa) 

above the recommended cold placard pressure in 

order to turn the Tire Pressure Monitoring System 

Warning Light off.

Service TPMS Warning

If a system fault is detected, the TPMS Warning 

Light will flash on and off for 75 seconds and then 

remain on solid. In addition, the instrument cluster 

will display a "SERVICE TPM SYSTEM" message for 

a minimum of five seconds and then display 

dashes (- -) in place of the pressure value to 

indicate which sensor is not being received.
If the ignition switch is cycled, this sequence will 

repeat, providing the system fault still exists. If the 

system fault no longer exists, the TPMS Warning 

Light will no longer flash, and the "SERVICE TPM 

SYSTEM" message will no longer display, and a 

pressure value will display in place of the dashes. 

-------------------------------------------------------------------------------------------------------------------------------------------------------------

SAFETY

301

A system fault can occur due to any of the 

following:

Signal interference due to electronic devices or 

driving next to facilities emitting the same radio 

frequencies as the TPMS sensors.

Installing aftermarket window tinting that 

contains materials that may block radio wave 

signals.

Accumulation of snow or ice around the wheels 

or wheel housings.

Using tire chains on the vehicle.

Using wheels/tires not equipped with TPMS 

sensors.

A system fault may occur due to an incorrect TPMS 

sensor location condition. When a system fault 

occurs due to an incorrect TPMS sensor location, 

the TPMS Warning Light will flash on and off for

75 seconds and then remain on solid. The system 

fault will also sound a chime. In addition, the 

instrument cluster will display a “Tire Pressure 

Temporarily Unavailable” message in place of the 

tire pressure display screen. If the ignition switch is 

cycled, this sequence will repeat, providing the 

system fault still exists. If the system fault no 

longer exists, the TPMS Warning Light will no 

longer flash and the tire pressure display screen 

will be displayed showing the tire pressure values 

in the correct locations.

Vehicles With Non-Matching Full Size Spare Or 

Compact Spare

The non-matching full size spare or compact 

spare tire does not have a TPMS sensor. There

-

fore, the TPMS will not monitor the pressure in 

the non-matching full size spare or compact 

spare tire.

If you install the non-matching full size spare or 

compact spare tire in place of a road tire that 

has a pressure below the low-pressure warning 

limit, upon the next ignition switch cycle, the 

TPMS Warning Light and a “LOW TIRE” message 

will remain on and a chime will sound. In addi

-

tion, the graphic in the instrument cluster will 

still display a pressure value in a different color 

and an “Inflate to XX” message.

After driving the vehicle for up to 20 minutes 

above 15 mph (24 km/h), the TPMS Warning 

Light will flash on and off for 75 seconds and 

then remain on solid. In addition, the instrument 

cluster will display a "SERVICE TPM SYSTEM" 

message for a minimum of five seconds and 

then display dashes (- -) in place of the pressure 

value.

For each subsequent ignition switch cycle, a 

chime will sound, the TPMS Warning Light will 

flash on and off for 75 seconds and then remain 

on solid, and the instrument cluster will display 

a "SERVICE TPM SYSTEM" message for a 

minimum of five seconds and then display 

dashes (- -) in place of the pressure value.

Once you repair or replace the original road tire 

and reinstall it on the vehicle in place of the 

non-matching full size spare or compact spare, 

the TPMS will update automatically. In addition, 

the TPMS Warning Light will turn off and the 

graphic in the instrument cluster will display a 

new pressure value instead of dashes (- -), as 

long as no tire pressure is below the low-pres

-

sure warning limit in any of the four active road 

tires. The vehicle may need to be driven for up 

to 20 minutes above 15 mph (24 km/h) in 

order for the TPMS to receive this information.

Trailer Tire Pressure Monitoring System 

(TTPMS) — If Equipped

The Trailer Tire Pressure Monitoring System 

(TTPMS) is a feature that displays the trailer tire 

pressure values and warns the driver of a low tire 

pressure event based on the drivers set target tire 

pressure value, through the TTPMS settings found 

in the radio.
The TTPMS monitors the pressure of each tire and 

warns the driver through the instrument cluster, 

when either a low tire pressure condition falls 

below 25% of the drivers set pressure or if a 

system malfunction occurs. The instrument cluster 

will display the actual tire pressure or dashes for 

each of the trailer tires in the correct trailer 

6

-------------------------------------------------------------------------------------------------------------------------------------------------------------

302

SAFETY


position, based on trailer configuration. The TTPMS 

can support up to 12 trailer tires per configured 

trailer on up to four configurable trailers  

Ú

page 232.

Trailer Tire Pressure Monitoring System

Trailer Tire Pressure Sensor Pairing
In order use this feature, the provided tire pressure 

sensors must be installed in the desired trailer 

tires and the sensors must be paired to the truck. 

If the target trailer requires more than the provided 

four sensors, additional sensors can be purchased 

at an authorized Ram dealership.
With the sensors installed and the trailer near or 

connected to your Ram truck, initiate the pairing 

process by entering the settings menu in the radio 

and selecting trailer. Select the desired trailer 

profile to pair to, open the “Tire Pressure” menu, 

and hit “Setup All Tires”  

Ú

page 232.

NOTE:

The vehicle may not be driven until the pairing 

process is complete.

Trailer Tire Pressure Settings

Trailer Tire Pressure Pairing

Follow the on screen prompts to select the number 

of axles (1 - 3), the number of trailer tires (2, 4, 6, 

8, or 12), and the set trailer tire pressure. The 

range is selectable anywhere between 25-125 psi 

(172-862 kPa).
Once psi (kPa) is programmed, the pairing screen 

appears. Tire sensors must be paired in order 

shown. Starting with Tire 1, deflate tire by 5 psi 

(34 kPa) and wait for a horn chirp. It may take up 

to three minutes for the chirp to occur, indicating 

that the sensor has paired. Repeat process on 

each tire, in order, until complete. Do not exit the 

pairing screen until process is complete. If pairing 

was unsuccessful, a double horn chirp will sound, 

and a prompt on the touchscreen will allow you to 

retry the procedure; “Retry” will only appear when 

setup fails. Each tire must be successfully paired 

during a single pairing process to receive the 

success screen.
NOTE:

If the pairing process times out after three minutes 

of no communication with a sensor, a double horn 

chip will occur indicating the pairing has failed and 

a message will display on the radio indicating the 

process was unsuccessful. Under certain circum

-

stances, the double horn chirp may continue to 

happen every three minutes indicating the failed 

pairing. If this happens, the horn chirping may be 

canceled by cycling the ignition button OFF and 

then back to RUN position.

-------------------------------------------------------------------------------------------------------------------------------------------------------------

SAFETY

303

Trailer Tire Pressure Monitoring System Low 

Pressure Warnings
When a tire pressure low in one or more of the 

active road tires is detected, the instrument cluster 

will display a message stating “Trailer Tire 

Pressure Low”. The instrument cluster will then 

display the TTPMS graphic showing the pressure 

values of each tire with the low tire pressure values 

in a different color.
Should this occur, you should stop as soon as 

possible and inflate the tires with a low pressure 

condition (those in a different color in the 

instrument cluster graphic) to the customer 

programmed target tire pressure value as shown 

at the top of the TTPMS instrument cluster graphic. 

Once the tire(s) are inflated, the system will 

automatically update the graphic display in the 

instrument cluster, returning to its original color. 

The vehicle may need to be driven for up to 

10 minutes above 15 mph (24 km/h) in order for 

the TTPMS to receive the updated information.
Service TTPMS Warning
If a system fault is detected, the instrument cluster 

will display a “Trailer Tire Pressure System Service 

Required” message for a minimum of five seconds.
Once the system fault is corrected the "Trailer Tire 

Pressure System Service Required" message will 

no longer be displayed. The vehicle may need to be 

driven for up to 10 minutes above 15 mph 

(24 km/h) in order for the TTPMS to receive the 

trailer tire pressure information.
Trailer Tire Pressure Monitoring System Not 

Configured
A “Trailer Tire Pressure System Not Configured” 

message will be displayed in the instrument 

cluster on the TTPMS instrument cluster graphic 

when a trailer number is selected that has not had 

trailer tire pressure sensors paired. To correct this 

condition, see  

Ú

page 232.

Trailer Sensors Detected Do Not Match Active 

Trailer
The “Trailer Sensors Detected Do Not Match Active 

Trailer” message will be displayed in the 

instrument cluster when the trailer sensors being 

received by the TTPMS module do not match the 

trailer sensors paired to the current trailer number 

selected. This message will be displayed when the 

sensors being received completely match the 

sensors paired to another trailer number 

configured in the TTPMS module.
To correct this condition, the correct trailer number 

must be selected in the radio  

Ú

page 232.

System Limitations
The TTPMS may have difficulty transmitting 

through steel-walled tires or on trailers longer than 

30 ft. It is recommended to use standard tires and 

trailers less than 30 ft long to avoid dropouts or 

difficulty when pairing.

NOTE:

The vehicle may not be driven until the pairing 

process is complete.

Tire Fill Alert

This feature notifies the user when the placard tire 

pressure is attained while inflating or deflating the 

tire.
The customer may choose to disable or enable the 

Tire Fill Alert feature through use of the customer 

settings in the radio.
NOTE:

Only one tire can be filled at a time when using 

the Tire Fill Alert system.

The Tire Fill Alert feature cannot be entered if an 

existing TPMS fault is set to “active” or if the 

system is in deactivation mode (if equipped).

The system will be activated when the system 

detects an increase of tire pressure, while filling 

the fire. The ignition must be in the RUN mode, with 

the transmission in PARK (P).
NOTE:

It is not required to have the engine running to 

enter Tire Fill Alert mode.
The hazard lamps will come on to confirm the 

vehicle is in Tire Fill Alert mode.
If the hazard lamps do not come on while inflating 

the tire, the TPMS sensor may be in an inoperative 

position, preventing the TPMS sensor signal from 

6

-------------------------------------------------------------------------------------------------------------------------------------------------------------

304

SAFETY


being received. In this case, the vehicle may need 

to be moved slightly forward or backward.
When Tire Fill Alert mode is entered, the tire 

pressure display screen will be displayed in the 

instrument cluster.
Operation:

The horn will chirp once to let the user know 

when to stop filling the tire, when it reaches 

recommended pressure.

The horn will chirp three times if the tire is over

-

filled and will continue to chirp every five 

seconds if the user continues to inflate the tire.

The horn will chirp once again when enough air 

is let out to reach proper inflation level.

The horn will also chirp three times if the tire is 

then underinflated and will continue to chirp 

every five seconds if the user continues to 

deflate the tire.

NOTE:

After use, the TFA feature will NOT remain active 

after ignition shut down. The feature will need to be 

re-enabled when the vehicle is restarted  

Ú

page 232.

SELECTABLE TIRE FILL ALERT (STFA)

The Selectable Tire Fill Alert (STFA) system is an 

optional feature that is included as part of the 

normal Tire Fill Alert system. The system is 

designed to allow the customer to select a 

pressure to inflate or deflate the vehicle's front and 

rear axle tires to and to provide feedback to the 

customer while inflating or deflating the vehicle's 

tires.
In the Selectable Tire Fill Alert application, which is 

located in the apps menu of the Uconnect system, 

the customer will be able to select a pressure 

setting for both the front and rear axle tire 

pressures by scrolling through a pressure range 

from XX to 15 psi in 1 psi increments for each axle 

setting. XX = the vehicle’s cold placard pressure 

values for the front and rear axles as shown on the 

vehicle placard pressure label.
NOTE:

The Tire Fill Alert feature disables every time the 

ignition is placed in the OFF position. The feature 

must be re-enabled through the radio each time 

the ignition is placed back in the ON/RUN position  

Ú

page 232.

The customer may also store the pressure values 

chosen for each axle in the radio as a preset 

pressure. The customer will be allowed to store up 

to two sets of preset values in the radio for the 

front and rear axle pressure values.
Once the customer selects the tire pressures for 

the front and rear axles that they want to inflate or 

deflate to, they can begin inflating or deflating one 

tire at a time.

NOTE:

The STFA system will only support inflating or 

deflating one tire at a time. 
The customer may choose to disable or enable the 

STFA feature through use of the TFA settings in the 

radio. If STFA appears grayed out it must be turned 

on prior to selecting.
In order to use STFA, the Tire Fill Alert feature must 

be enabled through the radio  

Ú

page 232.

The system will be activated when the TPMS 

receiver module detects a change in tire pressure. 

The ignition must be in the RUN mode, with the 

transmission in PARK (P).
The hazard lamps will come on to confirm the 

vehicle is in Tire Fill Alert mode.
If the hazard lamps do not come on while inflating 

or deflating the tire, the TPMS sensor may be in an 

inoperative position, preventing the TPMS sensor 

signal from being received. In this case, the vehicle 

may need to be moved slightly forward or 

backward.
When Tire Fill Alert mode is entered, the tire 

pressure display screen will be displayed in the 

instrument cluster.

-------------------------------------------------------------------------------------------------------------------------------------------------------------

SAFETY

305

Operation:

The horn will chirp once when the selected pres

-

sure is reached to let the user know when to 

stop inflating or deflating the tire.

The horn will chirp three times if the tire is over

-

inflated or over deflated and will continue to 

chirp every five seconds if the user continues to 

inflate or deflate the tire.

The horn will chirp once again when enough air 

is added or removed to reach proper selected 

pressure level.

Tire Pressure Information System (TPIS) 

3500 Series Trucks

Your vehicle may be equipped with a TPIS.
The TPIS uses wireless technology with wheel rim 

mounted electronic sensors to transmit tire 

pressure levels. Sensors mounted to each wheel 

as part of the valve stem transmit tire pressure 

readings to the receiver module.
NOTE:

It is particularly important for you to check the tire 

pressure in all of the tires on your vehicle monthly 

and to maintain the proper pressure.
The TPIS consists of the following components:

Receiver module

Four TPMS sensors (Single Rear Wheel (SRW) 

applications)

Six TPMS sensors (Dual Rear Wheel (DRW) 

applications)

Pressure display in the instrument cluster

The TPIS will display all four (Single Rear Wheel 

(SRW) applications) or six (Dual Rear Wheel (DRW) 

applications) tire pressure values in the instrument 

cluster display.
If a system fault is detected, the instrument cluster 

will display a "SERVICE TPM SYSTEM" message for 

a minimum of five seconds and then display 

dashes (- -) in place of the pressure value to 

indicate which sensor is not being received.
If the ignition switch is cycled, this sequence will 

repeat, providing the system fault still exists. If the 

system fault no longer exists, the "SERVICE TPM 

SYSTEM" message will no longer be displayed, and 

a pressure value will display in place of the dashes. 

A system fault can occur due to any of the 

following:

Signal interference due to electronic devices or 

driving next to facilities emitting the same radio 

frequencies as the TPMS sensors.

Installing aftermarket window tinting that 

contains materials that may block radio wave 

signals.

Accumulation of snow or ice around the wheels 

or wheel housings.

Using tire chains on the vehicle.

Using wheels/tires not equipped with TPMS 

sensors.

OCCUPANT RESTRAINT SYSTEMS 

Some of the most important safety features in your 

vehicle are the restraint systems:

O

CCUPANT

 R

ESTRAINT

 S

YSTEMS


F

EATURES


Seat Belt Systems

Supplemental Restraint Systems (SRS) Air Bags

Child Restraints

Some of the safety features described in this 

section may be standard equipment on some 

models, or may be optional equipment on others. If 

you are not sure, ask an authorized dealer.

I

MPORTANT

 S

AFETY

 P

RECAUTIONS

Please pay close attention to the information in 

this section. It tells you how to use your restraint 

system properly, to keep you and your passengers 

as safe as possible.

6

-------------------------------------------------------------------------------------------------------------------------------------------------------------

306

SAFETY


Here are some simple steps you can take to 

minimize the risk of harm from a deploying air bag:
1. Children 12 years old and under should 

always ride buckled up in the rear seat of a 

vehicle with a rear seat.

2. A child who is not big enough to wear the 

vehicle seat belt properly must be secured in 

the appropriate child restraint or 

belt-positioning booster seat in a rear seating 

position  

Ú

page 321.

3. If a child from 2 to 12 years old (not in a 

rear-facing child restraint) must ride in the 

front passenger seat, move the seat as far 

back as possible and use the proper child 

restraint  

Ú

page 321.

4. Never allow children to slide the shoulder belt 

behind them or under their arm.

5. You should read the instructions provided with 

your child restraint to make sure that you are 

using it properly.

6. All occupants should always wear their lap and 

shoulder belts properly.

7. The driver and front passenger seats should 

be moved back as far as practical to allow the 

front air bags room to inflate.

8. Do not lean against the door or window. If your 

vehicle has side air bags, and deployment 

occurs, the side air bags will inflate forcefully 

into the space between occupants and the 

door and occupants could be injured.

9. If the air bag system in this vehicle needs to be 

modified to accommodate a disabled person, 

see  

Ú

page 444 for customer service contact 

information.

S

EAT

 B

ELT

 S

YSTEMS


Buckle up even though you are an excellent driver, 

even on short trips. Someone on the road may be 

a poor driver and could cause a collision that 

includes you. This can happen far away from home 

or on your own street.
Research has shown that seat belts save lives, and 

they can reduce the seriousness of injuries in a 

collision. Some of the worst injuries happen when 

people are thrown from the vehicle. Seat belts 

reduce the possibility of ejection and the risk of 

injury caused by striking the inside of the vehicle. 

Everyone in a motor vehicle should be belted at all 

times.

Enhanced Seat Belt Use Reminder System 

(BeltAlert) 

Driver And Passenger BeltAlert — If Equipped

BeltAlert is a feature intended to remind 

the driver and outboard front seat 

passenger (if equipped with outboard 

front passenger seat BeltAlert) to buckle 

their seat belts. The BeltAlert feature is active 

whenever the ignition switch is in the START or ON/

RUN position.
Initial Indication
If the driver is unbuckled when the ignition switch 

is first in the START or ON/RUN position, a chime 

will signal for a few seconds. If the driver or 

outboard front seat passenger (if equipped with 

outboard front passenger seat BeltAlert) is 

unbuckled when the ignition switch is first in the 

START or ON/RUN position the Seat Belt Reminder 

Light will turn on and remain on until both outboard 

front seat belts are buckled. The outboard front 

passenger seat BeltAlert is not active when an 

outboard front passenger seat is unoccupied.

WARNING!

Never place a rear-facing child restraint in 

front of an air bag. A deploying passenger 

front air bag can cause death or serious injury 

to a child 12 years or younger, including a 

child in a rear-facing child restraint.

Never install a rear-facing child restraint in the 

front seat of a vehicle. Only use a rear-facing 

child restraint in the rear seat. If the vehicle 

does not have a rear seat, do not transport a 

rear-facing child restraint in that vehicle.

-------------------------------------------------------------------------------------------------------------------------------------------------------------

SAFETY

307

(Continued)

BeltAlert Warning Sequence
The BeltAlert warning sequence is activated when 

the vehicle is moving above a specified vehicle 

speed range and the driver or outboard front seat 

passenger is unbuckled (if equipped with outboard 

front passenger seat BeltAlert) (the outboard front 

passenger seat BeltAlert is not active when the 

outboard front passenger seat is unoccupied). The 

BeltAlert warning sequence starts by blinking the 

Seat Belt Reminder Light and sounding an 

intermittent chime. Once the BeltAlert warning 

sequence has completed, the Seat Belt Reminder 

Light will remain on until the seat belts are 

buckled. The BeltAlert warning sequence may 

repeat based on vehicle speed until the driver and 

occupied outboard front seat passenger seat belts 

are buckled. The driver should instruct all 

occupants to buckle their seat belts.
Change Of Status
If the driver or outboard front seat passenger (if 

equipped with outboard front passenger seat 

BeltAlert) unbuckles their seat belt while the 

vehicle is traveling, the BeltAlert warning sequence 

will begin until the seat belts are buckled again.
The outboard front passenger seat BeltAlert is not 

active when the outboard front passenger seat is 

unoccupied. BeltAlert may be triggered when an 

animal or other items are placed on the outboard 

front passenger seat or when the seat is folded flat 

(if equipped). It is recommended that pets be 

restrained in the rear seat (if equipped) in pet 

harnesses or pet carriers that are secured by seat 

belts, and cargo is properly stowed.
BeltAlert can be activated or deactivated by an 

authorized dealer. FCA US LLC does not 

recommend deactivating BeltAlert.
NOTE:

If BeltAlert has been deactivated and the driver or 

outboard front seat passenger (if equipped with 

outboard front passenger seat BeltAlert) is 

unbuckled the Seat Belt Reminder Light will turn 

on and remain on until the driver and outboard 

front seat passenger seat belts are buckled.

Lap/Shoulder Belts

All seating positions except the Mega Cab and 

Crew Cab front center seating position have 

combination lap/shoulder belts.
The seat belt webbing retractor will lock only during 

very sudden stops or collisions. This feature allows 

the shoulder part of the seat belt to move freely 

with you under normal conditions. However, in a 

collision the seat belt will lock and reduce your risk 

of striking the inside of the vehicle or being thrown 

out of the vehicle.

WARNING!

Relying on the air bags alone could lead to 

more severe injuries in a collision. The air 

bags work with your seat belt to restrain you 

properly. In some collisions, the air bags won’t 

deploy at all. Always wear your seat belt even 

though you have air bags.

In a collision, you and your passengers can 

suffer much greater injuries if you are not 

properly buckled up. You can strike the inte

-

rior of your vehicle or other passengers, or you 

can be thrown out of the vehicle. Always be 

sure you and others in your vehicle are 

buckled up properly.

It is dangerous to ride in a cargo area, inside 

or outside of a vehicle. In a collision, people 

riding in these areas are more likely to be seri

-

ously injured or killed.

Do not allow people to ride in any area of your 

vehicle that is not equipped with seats and 

seat belts.

6

-------------------------------------------------------------------------------------------------------------------------------------------------------------

308

SAFETY


(Continued)

Be sure everyone in your vehicle is in a seat 

and using a seat belt properly. Occupants, 

including the driver, should always wear their 

seat belts whether or not an air bag is also 

provided at their seating position to minimize 

the risk of severe injury or death in the event 

of a crash.

Wearing your seat belt incorrectly could make 

your injuries in a collision much worse. You 

might suffer internal injuries, or you could 

even slide out of the seat belt. Follow these 

instructions to wear your seat belt safely and 

to keep your passengers safe, too.

Two people should never be belted into a 

single seat belt. People belted together can 

crash into one another in a collision, hurting 

one another badly. Never use a lap/shoulder 

belt or a lap belt for more than one person, no 

matter what their size.

WARNING!

WARNING!

A lap belt worn too high can increase the risk 

of injury in a collision. The seat belt forces 

won’t be at the strong hip and pelvic bones, 

but across your abdomen. Always wear the lap 

part of your seat belt as low as possible and 

keep it snug.

A twisted seat belt may not protect you prop

-

erly. In a collision, it could even cut into you. 

Be sure the seat belt is flat against your body, 

without twists. If you can’t straighten a seat 

belt in your vehicle, take it to an authorized 

dealer immediately and have it fixed.

A seat belt that is buckled into the wrong 

buckle will not protect you properly. The lap 

portion could ride too high on your body, 

possibly causing internal injuries. Always 

buckle your seat belt into the buckle nearest 

you.

A seat belt that is too loose will not protect you 

properly. In a sudden stop, you could move too 

far forward, increasing the possibility of injury. 

Wear your seat belt snugly.

A seat belt that is worn under your arm is 

dangerous. Your body could strike the inside 

surfaces of the vehicle in a collision, 

increasing head and neck injury. A seat belt 

worn under the arm can cause internal inju

-

ries. Ribs aren’t as strong as shoulder bones. 

Wear the seat belt over your shoulder so that 

your strongest bones will take the force in a 

collision.

A shoulder belt placed behind you will not 

protect you from injury during a collision. You 

are more likely to hit your head in a collision if 

you do not wear your shoulder belt. The lap 

and shoulder belt are meant to be used 

together.

A frayed or torn seat belt could rip apart in a 

collision and leave you with no protection. 

Inspect the seat belt system periodically, 

checking for cuts, frays, or loose parts. 

Damaged parts must be replaced immedi

-

ately. Do not disassemble or modify the seat 

belt system. If your vehicle is involved in a 

collision, or if you have questions regarding 

seat belt or retractor conditions, take your 

vehicle to an authorized FCA dealer or autho

-

rized FCA Certified Collision Care Program 

facility for inspection.

WARNING!

-------------------------------------------------------------------------------------------------------------------------------------------------------------

SAFETY

309

Lap/Shoulder Belt Operating Instructions 

1. Enter the vehicle and close the door. Sit back 

and adjust the seat.

2. The seat belt latch plate is above the back of 

the front seat, and next to your arm in the rear 

seat (for vehicles equipped with a rear seat). 

Grab the latch plate and pull out the seat belt. 

Slide the latch plate up the webbing as far as 

necessary to allow the seat belt to go around 

your lap.

Pulling Out The Latch Plate

3. When the seat belt is long enough to fit, insert 

the latch plate into the buckle until you hear a 

“click.”

Inserting Latch Plate Into Buckle

4. Position the lap belt so that it is snug and lies 

low across your hips, below your abdomen. To 

remove slack in the lap belt portion, pull up on 

the shoulder belt. To loosen the lap belt if it is 

too tight, tilt the latch plate and pull on the lap 

belt. A snug seat belt reduces the risk of sliding 

under the seat belt in a collision.

Positioning The Lap Belt

5. Position the shoulder belt across the shoulder 

and chest with minimal, if any slack so that it 

is comfortable and not resting on your neck. 

The retractor will withdraw any slack in the 

shoulder belt.

6. To release the seat belt, push the red button 

on the buckle. The seat belt will automatically 

retract to its stowed position. If necessary, 

slide the latch plate down the webbing to allow 

the seat belt to retract fully.

Lap/Shoulder Belt Untwisting Procedure  

Use the following procedure to untwist a twisted 

lap/shoulder belt.
1. Position the latch plate as close as possible to 

the anchor point.

2. At about 6 to 12 inches (15 to 30 cm) above 

the latch plate, grab and twist the seat belt 

webbing 180 degrees to create a fold that 

begins immediately above the latch plate.

3. Slide the latch plate upward over the folded 

webbing. The folded webbing must enter the 

slot at the top of the latch plate.

4. Continue to slide the latch plate up until it 

clears the folded webbing and the seat belt is 

no longer twisted.

6

-------------------------------------------------------------------------------------------------------------------------------------------------------------

310

SAFETY


Adjustable Upper Shoulder Belt Anchorage 

In the driver and outboard front passenger seats, 

the top of the shoulder belt can be adjusted 

upward or downward to position the seat belt away 

from your neck. Push or squeeze the anchorage 

button to release the anchorage, and move it up or 

down to the position that serves you best.

Adjustable Anchorage

As a guide, if you are shorter than average, you will 

prefer the shoulder belt anchorage in a lower 

position, and if you are taller than average, you will 

prefer the shoulder belt anchorage in a higher 

position. After you release the anchorage button, 

try to move it up or down to make sure that it is 

locked in position.

NOTE:

The adjustable upper shoulder belt anchorage is 

equipped with an Easy Up feature. This feature 

allows the shoulder belt anchorage to be adjusted 

in the upward position without pushing or 

squeezing the release button. To verify the 

shoulder belt anchorage is latched, pull downward 

on the shoulder belt anchorage until it is locked 

into position.

First Row Center Seat Belt Operating 

Instructions (Regular Cab Only)

The first row center seat belt (Regular Cab only) 

features a seat belt with a mini-latch plate and 

buckle, which allows the seat belt to detach from 

the lower anchor when the seat is folded. The latch 

plate and regular latch plate can then be stored 

out of the way in the seat for added convenience to 

open up utilization of the storage areas behind the 

front seats when the seat is not occupied.
1. Remove the mini-latch plate and regular latch 

plate from its stowed position on the seat.

Connect Mini-Latch To Mini-Buckle

WARNING!

Wearing your seat belt incorrectly could make 

your injuries in a collision much worse. You 

might suffer internal injuries, or you could 

even slide out of the seat belt. Follow these 

instructions to wear your seat belt safely and 

to keep your passengers safe, too.

Position the shoulder belt across the shoulder 

and chest with minimal, if any slack so that it 

is comfortable and not resting on your neck. 

The retractor will withdraw any slack in the 

shoulder belt.

Misadjustment of the seat belt could reduce 

the effectiveness of the safety belt in a crash.

Always make all seat belt height adjustments 

when the vehicle is stationary.

-------------------------------------------------------------------------------------------------------------------------------------------------------------

SAFETY

311

Mini-Latch And Mini-Buckle Connected

2. Grab the mini-latch plate and pull the seat belt 

over the seat.

3. Route the shoulder belt to the inside of the 

right head restraint.

4. When the seat belt is long enough to fit, insert 

the mini-latch plate into the mini-buckle until 

you hear a “click.”

5. Sit back in seat. Slide the regular latch plate up 

the webbing as far as necessary to allow the 

seat belt to go around your lap.

6. When the seat belt is long enough to fit, insert 

the latch plate into the buckle until you hear a 

“click.”

7. Position the lap belt so that it is snug and lies 

low across your hips, below your abdomen. To 

remove slack in the lap belt portion, pull up on 

the shoulder belt. To loosen the lap belt if it is 

too tight, pull on the lap belt. A snug seat belt 

reduces the risk of sliding under the seat belt 

in a collision.

8. Position the shoulder belt on your chest so that 

it is comfortable and not resting on your neck. 

The retractor will withdraw any slack in the 

seat belt.

9. To release the seat belt, push the red button 

on the buckle.

10. To disengage the mini-latch plate from the 

mini-buckle for storage, insert the regular latch 

plate into the center red slot on the 

mini-buckle. The seat belt will automatically 

retract to its stowed position. If necessary, 

slide the latch plate down the webbing to allow 

the seat belt to retract fully. Insert the 

mini-latch plate and regular latch plate into its 

stowed position.

Detaching Mini-Buckle With Seat Belt Tongue

First Row Center Lap Belt Operating 

Instructions — If Equipped

The center seating position for the Mega Cab and 

Crew Cab front seat has a lap belt only. To buckle 

the lap belt, slide the latch plate into the buckle 

until you hear a "click." To lengthen the lap belt, tilt 

the latch plate and pull.
To remove slack, pull the loose end of the webbing. 

Wear the lap belt snug against the hips. Sit back 

and upright in the seat, then adjust the seat belt as 

tightly as is comfortable.

WARNING!

If the mini-latch plate and mini-buckle are not 

properly connected when the seat belt is used 

by an occupant, the seat belt will not be able 

to provide proper restraint and will increase 

the risk of injury in a collision.

When reattaching the mini-latch plate and 

mini-buckle, ensure the seat belt webbing is 

not twisted. If the webbing is twisted, follow 

the preceding procedure to detach the 

mini-latch plate and mini-buckle, untwist the 

webbing, and reattach the mini-latch plate 

and mini-buckle.

6

-------------------------------------------------------------------------------------------------------------------------------------------------------------

312

SAFETY


Seat Belt Extender 

If a seat belt is not long enough to fit properly, even 

when the webbing is fully extended and the 

adjustable upper shoulder belt anchorage (if 

equipped) is in its lowest position, an authorized 

dealer can provide you with a Seat Belt Extender. 

The Seat Belt Extender should be used only if the 

existing seat belt is not long enough. When the 

Seat Belt Extender is not required for a different 

occupant, it must be removed.

Seat Belts And Pregnant Women 

Seat Belts And Pregnant Women

Seat belts must be worn by all occupants including 

pregnant women: the risk of injury in the event of 

an accident is reduced for the mother and the 

unborn child if they are wearing a seat belt.
Position the lap belt snug and low below the 

abdomen and across the strong bones of the hips. 

Place the shoulder belt across the chest and away 

from the neck. Never place the shoulder belt 

behind the back or under the arm.

Seat Belt Pretensioner 

The front outboard seat belt system is equipped 

with pretensioning devices that are designed to 

remove slack from the seat belt in the event of a 

collision. These devices may improve the 

performance of the seat belt by removing slack 

from the seat belt early in a collision. Pretensioners 

work for all size occupants, including those in child 

restraints.
NOTE:

These devices are not a substitute for proper seat 

belt placement by the occupant. The seat belt still 

must be worn snugly and positioned properly.
The pretensioners are triggered by the Occupant 

Restraint Controller (ORC). Like the air bags, the 

pretensioners are single use items. A deployed 

pretensioner or a deployed air bag must be 

replaced immediately.

Energy Management Feature 

The front outboard seat belt system is equipped 

with an Energy Management feature that may help 

further reduce the risk of injury in the event of a 

collision. The seat belt system has a retractor 

assembly that is designed to release webbing in a 

controlled manner.

Switchable Automatic Locking Retractors 

(ALR) — If Equipped

The seat belts in the passenger seating positions 

may be equipped with a Switchable Automatic 

Locking Retractor (ALR) which is used to secure a 

child restraint system  

Ú

page 330.

The figure below illustrates the locking feature for 

each seating position.

WARNING!

ONLY use a Seat Belt Extender if it is physically 

required in order to properly fit the original 

seat belt system. DO NOT USE the Seat Belt 

Extender if, when worn, the distance between 

the front edge of the Seat Belt Extender 

buckle and the center of the occupant’s body 

is LESS than 6 inches.

Using a Seat Belt Extender when not needed 

can increase the risk of serious injury or death 

in a collision. Only use the Seat Belt Extender 

when the lap belt is not long enough and only 

use in the recommended seating positions. 

Remove and store the Seat Belt Extender 

when not needed.

-------------------------------------------------------------------------------------------------------------------------------------------------------------

SAFETY

313

(Continued)

Regular Cab Automatic Locking Retractor (ALR) Locations

Mega Cab/Crew Cab Automatic Locking Retractor (ALR) 

Locations

If the passenger seating position is equipped with 

an ALR and is being used for normal usage, only 

pull the seat belt webbing out far enough to 

comfortably wrap around the occupant’s 

mid-section so as to not activate the ALR. If the ALR 

is activated, you will hear a clicking sound as the 

seat belt retracts. Allow the webbing to retract 

completely in this case and then carefully pull out 

only the amount of webbing necessary to 

comfortably wrap around the occupant’s 

mid-section. Slide the latch plate into the buckle 

until you hear a "click."
In Automatic Locking Mode, the shoulder belt is 

automatically pre-locked. The seat belt will still 

retract to remove any slack in the shoulder belt. 

Use the Automatic Locking Mode anytime a child 

restraint is installed in a seating position that has 

a seat belt with this feature. Children 12 years old 

and under should always be properly restrained in 

the rear seat of a vehicle with a rear seat.

How To Engage The Automatic Locking Mode
1. Buckle the combination lap and shoulder 

belt.

2. Grab the shoulder portion and pull downward 

until the entire seat belt is extracted.

3. Allow the seat belt to retract. As the seat belt 

retracts, you will hear a clicking sound. This 

indicates the seat belt is now in the Automatic 

Locking Mode.

How To Disengage The Automatic Locking Mode
Unbuckle the combination lap/shoulder belt and 

allow it to retract completely to disengage the 

Automatic Locking Mode and activate the vehicle 

sensitive (emergency) locking mode.

ALR — Switchable Automatic Locking Retractor

ALR — Switchable Automatic Locking Retractor

WARNING!

Never place a rear-facing child restraint in 

front of an air bag. A deploying passenger 

front air bag can cause death or serious injury 

to a child 12 years or younger, including a 

child in a rear-facing child restraint.

Never install a rear-facing child restraint in the 

front seat of a vehicle. Only use a rear-facing 

child restraint in the rear seat. If the vehicle 

does not have a rear seat, do not transport a 

rear-facing child restraint in that vehicle.

WARNING!

6

-------------------------------------------------------------------------------------------------------------------------------------------------------------

314

SAFETY


S

UPPLEMENTAL

 R

ESTRAINT

 S

YSTEMS


(SRS)

Some of the safety features described in this 

section may be standard equipment on some 

models, or may be optional equipment on others. If 

you are not sure, ask an authorized dealer.
The air bag system must be ready to protect you in 

a collision. The Occupant Restraint Controller 

(ORC) monitors the internal circuits and 

interconnecting wiring associated with the 

electrical Air Bag System Components. Your 

vehicle may be equipped with the following Air Bag 

System Components:

Air Bag System Components

Occupant Restraint Controller (ORC)

Air Bag Warning Light 

Steering Wheel and Column

Instrument Panel

Knee Impact Bolsters

Driver and Front Passenger Air Bags

Seat Belt Buckle Switch

Supplemental Side Air Bags

Front and Side Impact Sensors — If Equipped

Seat Belt Pretensioners

Seat Track Position Sensors — If Equipped

Air Bag Warning Light  

The Occupant Restraint Controller (ORC) 

monitors the readiness of the electronic 

parts of the air bag system whenever the 

ignition switch is in the START or ON/RUN 

position. If the ignition switch is in the OFF position 

or in the ACC position, the air bag system is not on 

and the air bags will not inflate.
The ORC contains a backup power supply system 

that may deploy the air bag system even if the 

battery loses power or it becomes disconnected 

prior to deployment.
The ORC turns on the Air Bag Warning Light in the 

instrument panel for approximately four to eight 

seconds for a self-check when the ignition switch is 

first in the ON/RUN position. After the self-check, 

the Air Bag Warning Light will turn off. If the ORC 

detects a malfunction in any part of the system, it 

turns on the Air Bag Warning Light, either 

momentarily or continuously. A single chime will 

sound to alert you if the light comes on again after 

initial startup.
The ORC also includes diagnostics that will 

illuminate the instrument panel Air Bag Warning 

Light if a malfunction is detected that could affect 

the air bag system. The diagnostics also record the 

nature of the malfunction. While the air bag system 

is designed to be maintenance free, if any of the 

following occurs, have an authorized dealer 

service the air bag system immediately.

The Air Bag Warning Light does not come on 

during the four to eight seconds when the igni

-

tion switch is first in the ON/RUN position.

The Air Bag Warning Light remains on after the 

four to eight-second interval.

The Air Bag Warning Light comes on intermit

-

tently or remains on while driving.

NOTE:

If the speedometer, tachometer, or any engine 

related gauges are not working, the Occupant 

Restraint Controller (ORC) may also be disabled. In 

this condition the air bags may not be ready to 

inflate for your protection. Have an authorized 

dealer service the air bag system immediately.

WARNING!

The seat belt assembly must be replaced if the 

switchable Automatic Locking Retractor (ALR) 

feature or any other seat belt function is not 

working properly when checked according to 

the procedures in the Service Manual.

Failure to replace the seat belt assembly 

could increase the risk of injury in collisions.

Do not use the Automatic Locking Mode to 

restrain occupants who are wearing the seat 

belt or children who are using booster seats. 

The locked mode is only used to install 

rear-facing or forward-facing child restraints 

that have a harness for restraining the child.

-------------------------------------------------------------------------------------------------------------------------------------------------------------

SAFETY

315

Redundant Air Bag Warning Light 

If a fault with the Air Bag Warning Light is 

detected, which could affect the 

Supplemental Restraint System (SRS), 

the Redundant Air Bag Warning Light will 

illuminate on the instrument panel. The 

Redundant Air Bag Warning Light will stay on until 

the fault is cleared. In addition, a single chime will 

sound to alert you that the Redundant Air Bag 

Warning Light has come on and a fault has been 

detected. If the Redundant Air Bag Warning Light 

comes on intermittently or remains on while driving 

have an authorized dealer service the vehicle 

immediately.
For additional information regarding the 

Redundant Air Bag Warning Light, see  

Ú

page 113.

Front Air Bags

This vehicle has front air bags and lap/shoulder 

belts for both the driver and front passenger. The 

front air bags are a supplement to the seat belt 

restraint systems. The driver front air bag is 

mounted in the center of the steering wheel. The 

passenger front air bag is mounted in the 

instrument panel, above the glove compartment. 

The words “SRS AIRBAG” or “AIRBAG” are 

embossed on the air bag covers.

Front Air Bag/Knee Bolster Locations

Driver And Passenger Front Air Bag 

Features

2500 Series Truck
The Advanced Front Air Bag system has multistage 

driver and front passenger air bags. This system 

provides output appropriate to the severity and 

type of collision as determined by the Occupant 

Restraint Controller (ORC), which may receive 

information from the front impact sensors (if 

equipped) or other system components.

WARNING!

Ignoring the Air Bag Warning Light in your 

instrument panel could mean you won’t have the 

air bag system to protect you in a collision. If the 

light does not come on as a bulb check when the 

ignition is first turned on, stays on after you start 

the vehicle, or if it comes on as you drive, have 

an authorized dealer service the air bag system 

immediately.

1 — Driver And Passenger Front Air Bags
2 — Driver And Passenger Knee Impact Bolsters

WARNING!

Being too close to the steering wheel or instru

-

ment panel during front air bag deployment 

could cause serious injury, including death. Air 

bags need room to inflate. Sit back, comfort

-

ably extending your arms to reach the steering 

wheel or instrument panel.

Never place a rear-facing child restraint in 

front of an air bag. A deploying passenger 

front air bag can cause death or serious injury 

to a child 12 years or younger, including a 

child in a rear-facing child restraint.

Never install a rear-facing child restraint in the 

front seat of a vehicle. Only use a rear-facing 

child restraint in the rear seat. If the vehicle 

does not have a rear seat, do not transport a 

rear-facing child restraint in that vehicle.

6

-------------------------------------------------------------------------------------------------------------------------------------------------------------


Content      ..     17      18      19      20     ..