RAM Promaster City (2020 year). Manual in english - page 5
 

  Index      Manuals     RAM Promaster City (2020 year). Manual in english


Search            copyright infringement  


Content      ..     3      4      5      6     ..


RAM Promaster City (2020 year). Manual in english - page 5


GETTING TO KNOW YOUR INSTRUMENT PANEL

77

4. Tachometer

• Indicates  the  engine speed in  revolutions per minute

(RPM x 1000).

5. Instrument Cluster Display

• When  the  appropriate  conditions  exist,  this  display

shows the instrument cluster display messages. Refer

to  “Instrument  Cluster  Display”  in  this  chapter  for

further information.

INSTRUMENT CLUSTER DISPLAY 

Your  vehicle  will  be  equipped  with  an  instrument  cluster

display, which offers useful information to the driver. With

the ignition in the OFF mode, opening/closing of a door will

activate the display for viewing, and display the total miles,

or  kilometers,  in  the  odometer.  Your  instrument  cluster

display is designed to display important information about

your vehicle’s systems and features. Using a driver interac

-

tive  display  located  on  the  instrument  panel,  your  instru

-

ment cluster display can show you how systems are working

and give you warnings when they are not. The instrument

cluster display controls allow you to scroll through the main

menus and submenus. You can access the specific informa

-

tion you want and make selections and adjustments.

Location And Controls

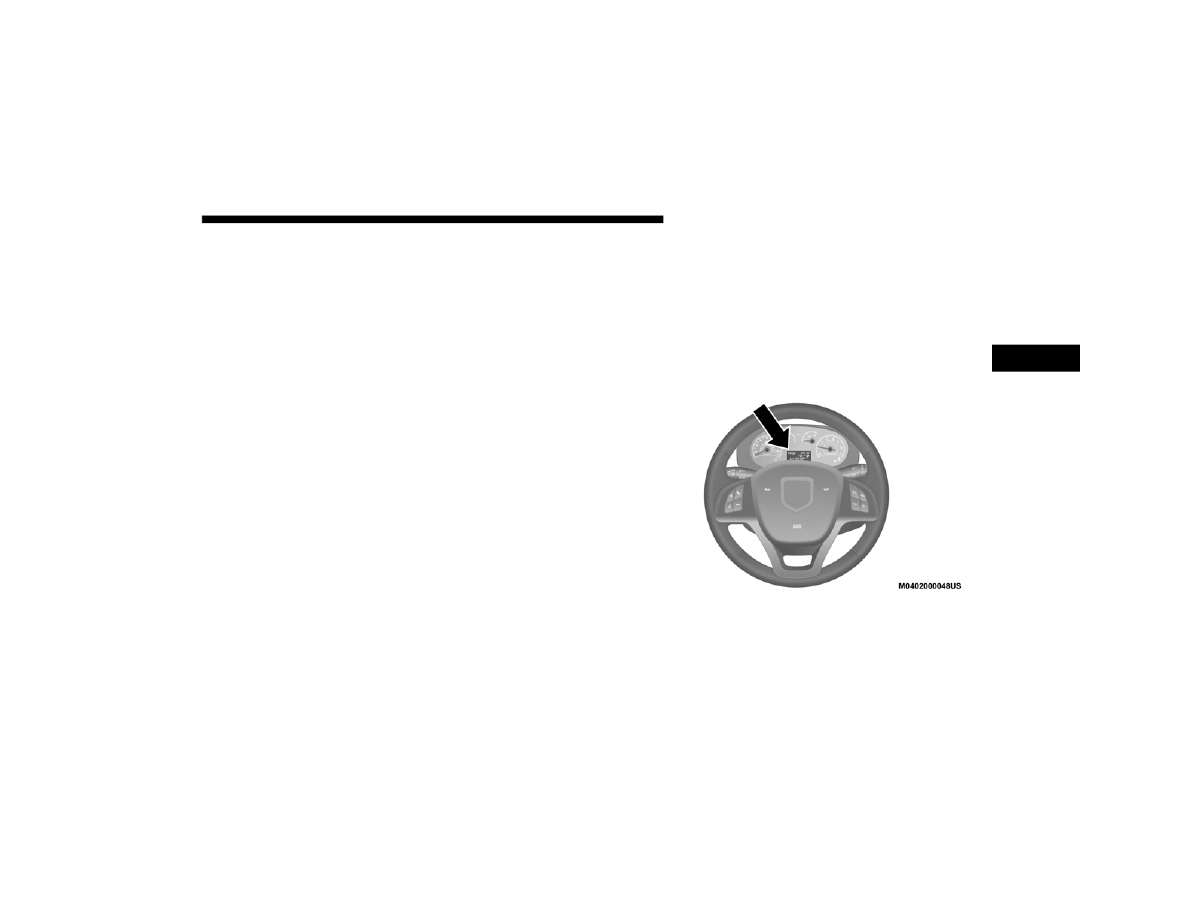
The instrument cluster display features a driver interactive

display that is located in the instrument cluster.

Instrument Cluster Display Location

3

-------------------------------------------------------------------------------------------------------------------------------------------------------------

78 GETTING TO KNOW YOUR INSTRUMENT PANEL

The menu items described below are an example of what can

be found in the vehicle's menu:
• Dimmer
• Speed Beep
• Trip  A  /  B  (options  are  selectable  through  the  steering

wheel stalk)

• Buzzer Volume
The  system  allows  the  driver  to  select  information  by

pushing the following buttons mounted on the instrument

panel to the right of the steering column:

Instrument Cluster Display Control Buttons

MENU Button


Push and release the 

MENU

 button for a time longer than

one  second  to  access/select  the  information  screens  or

submenu screens of a main menu item. Push and hold the

MENU

 button for two seconds to reset displayed/selected

features that can be reset.

-------------------------------------------------------------------------------------------------------------------------------------------------------------

GETTING TO KNOW YOUR INSTRUMENT PANEL

79

UP Arrow Button


Push  and  release  the 

up

  arrow  button  to  scroll  upward

through the main menu and submenus.

DOWN Arrow Button


Push and release the 

down

 arrow button to scroll down

-

ward through the main menu and submenus.

NOTE:

If equipped with a Uconnect system, some of the menu items

will be present in the radio head unit. Refer to “Uconnect

Settings” in “Multimedia” for further information.

Dimmer:

With headlights on and without entering in the menu, push

the 

up

  or 

down

  arrow  button  to  increase  or  decrease  the

brightness of the instrument panel, graphics and command

buttons.

Selecting An Option Of The Main Menu With Submenu:
1. Briefly push and release the 

MENU

 button to display the

first submenu option.

2. Push and release the 

up

 or 

down

 arrow button (by single

pushes) to scroll through all the submenu options.

3. Briefly push and release the 

MENU

 button to select the

displayed submenu option and to open the relevant setup

menu.

4. Push and release the 

up

 or 

down

 arrow button (by single

pushes) to select the new setting for this submenu option.

5. Briefly push and release the 

MENU

 button to store the

new  setting  and  go  back  to  the  previously  selected

submenu option.

6. Push and hold the 

MENU

 button to return to the main

menu (short hold) or the main screen (longer hold).

3

-------------------------------------------------------------------------------------------------------------------------------------------------------------

80 GETTING TO KNOW YOUR INSTRUMENT PANEL

Change Engine Oil — If Equipped   

Your  vehicle  may  be  equipped  with  an  engine  oil  change

indicator  system.  The  “Change  Engine  Oil”  message  will

display  in  the  instrument  cluster  display.  The  engine  oil

change indicator system is duty cycle based, which means

the  engine  oil  change  interval  may  fluctuate,  dependent

upon your personal driving style.
Unless reset, this message will continue to display each time

you turn the ignition switch to the ON/RUN  position. To

turn  off  the  message  temporarily,  push  and  release  the

MENU

 button. To reset the oil change indicator system (after

performing  the  scheduled  maintenance),  refer  to  the

following procedure.
1. Turn the ignition switch to the ON position (do not start

the engine).

2. Fully  push  the  accelerator  pedal  slowly,  three  times,

within 10 seconds.

3. Turn the ignition switch to the OFF/LOCK position.

NOTE:

If  the  indicator  message  illuminates  when  you  start  the

vehicle,  the  oil  change  indicator  system  did  not  reset.  If

necessary, repeat this procedure.

Instrument Cluster Display Menu Items

Speed Beep

This function is used to set a speed limit (MPH or km/h); the

driver is alerted when this limit is exceeded.
To set the desired speed limit:
1. Push the 

MENU

 button briefly. The display will show the

wording (SPEED BEEP) and the unit (MPH) or (km/h)

previously set.

2. If the function is on, push and release the 

up

 or 

down

arrow button to select the required speed limit and then

push 

MENU

 to confirm.

NOTE:

The speed may be set in the range from 20 to 125 MPH (30 to

200 km/h) according to the previously chosen unit.
The setting will increase/decrease by five units each time the

up

 or 

down

 arrow button is pushed. Hold down the 

up

 or

down

 arrow button to automatically increase/decrease the

setting  rapidly.  Complete  the  adjustment  when  you

approach the desired value.

-------------------------------------------------------------------------------------------------------------------------------------------------------------

GETTING TO KNOW YOUR INSTRUMENT PANEL

81

Push the 

MENU

 button briefly to return to the menu screen

or hold the 

MENU

 button down to return to the standard

screen without storing.
To cancel the setting:
1. Briefly push  the 

MENU

 button, “ON” will flash in the

display.

2. Push  the 

down

  arrow  button,  “OFF”  will  flash  in  the

display.

3. Push  the 

MENU

  button  briefly  to  return  to  the  menu

screen or hold the 

MENU

 button down to return to the

standard screen without storing.

Trip B Data

This function can be used to activate (On) or deactivate (Off)

the Trip B display (Partial Trip).
Refer to “Trip Computer” in this section for further informa

-

tion.

To switch the function On/Off:
1. Push the 

MENU

 button briefly. The display will flash On

or Off according to the previous setting.

2. Push and release the 

up

 or 

down

 arrow button to select.

Push the 

MENU

 button briefly to return to the menu screen

or hold the 

MENU

 button down to return to the standard

screen without storing.

Buzzer Volume

With this function, the volume of the acoustic signal which

accompanies the display of failure/warning can be adjusted

according to seven levels.
To set the desired volume:
1. Push the 

MENU

 button, the previously set volume level

will flash on the display.

2. Push and release the 

up

 or 

down

 arrow button to adjust.

3. Push the 

MENU

 button to return to the menu screen or

hold the 

MENU

 button down to return to the standard

screen without storing.

3

-------------------------------------------------------------------------------------------------------------------------------------------------------------

82 GETTING TO KNOW YOUR INSTRUMENT PANEL

Seat Belt Buzzer

Only shows in the instrument cluster display if the seat belt

reminder was previously deactivated by an authorized dealer.

NOTE:

This is a one-time occurrence to enable the acoustic signal.

Exit Menu

This is the last function that closes the cycle of settings listed

in the menu screen.
1. Pushing the 

MENU

 button briefly will return the display

to the standard screen without storing.

2. Push the 

down

 arrow button to return to the first menu

item on the display.

TRIP COMPUTER

The Trip Computer  is  located in the instrument cluster.  It

features  a  driver-interactive  display  (displays  information

such as trip information, range, fuel consumption, average

speed, and travel time).

NOTE:

The Uconnect System also has a Trip Computer display and

menus to customize the information displayed in the cluster.

For  further  information,  refer  to  “Uconnect  Settings”  in

“Multimedia”.

Trip Button

The 

TRIP

 button, located on the right steering column stalk,

can be used to display and to reset the previously described

values.
• A short button push displays the different values.
• A long button push resets the system and then starts a new

trip.

New Trip

To reset:
• Push and hold the TRIP button to reset the system manually.
• When the “Trip distance” reaches 99999.9 miles or kilome

-

ters or when the “Travel time” reaches 999.59 (999 hours

and 59 minutes), the system is reset automatically.

• Disconnecting/Reconnecting the battery resets the system.

NOTE:

If the reset operation occurs in the presence of the screens

concerning Trip A or Trip B, only the information associated

with Trip A or Trip B functions will be reset.

-------------------------------------------------------------------------------------------------------------------------------------------------------------

GETTING TO KNOW YOUR INSTRUMENT PANEL

83

Start Of Trip Procedure

With the ignition on, push and hold the TRIP button for over

two seconds to reset trip information.

Exit Trip

1. To exit the Trip function, wait until all the values have

been displayed or hold the MENU button for longer than

one second.

2. Briefly push and release the MENU button to go back to

the  menu  screen  or  push  and  hold  the  MENU  button

(approximately one second) to go back to the main screen

without storing settings.

Trip Functions 

Both trip functions are resettable (reset — start of new trip).
“Trip A” can be used to display the figures relating to:
• Range
• Trip distance A
• Average Economy A
• Instantaneous Economy

• Average speed A
• Travel time A (driving time)
“Trip B” can be used to display the figures relating to:
• Trip distance B
• Average Economy B
• Average speed B
• Travel time B (driving time)

NOTE:

“Trip B” functions may be excluded (see “Trip B Data”).

“Range” and “Instantaneous Economy” cannot be reset.

Values Displayed

Range

This indicates the distance which may be traveled with the

fuel remaining in the tank, assuming that driving conditions

will  not  change.  The  message  “----”  will  appear  on  the

display in the following cases:
• Distance less than 30 miles (or 50 km).
• The  vehicle  is  parked  for  a  long  time  with  the  engine

running.

3

-------------------------------------------------------------------------------------------------------------------------------------------------------------

84 GETTING TO KNOW YOUR INSTRUMENT PANEL

NOTE:

The range depends on several factors: driving style, type of

route (freeway, residential, mountain roads, etc.), conditions

of use of the vehicle (load, tire pressure, etc.). Trip planning

must take into account the above notes.

Travel Distance

This value shows the distance covered since the last reset.

Average Fuel Consumption

This  value  shows  the  approximate  average  consumption

since the last reset.

Current Fuel Consumption

This indicates the fuel consumption. The value is constantly

updated. The message “----” will appear on the display if the

vehicle is parked with the engine running.

Average Speed

This value shows the vehicle's average speed as a function of

the overall time elapsed since the last reset.

Travel Time

This value shows the time elapsed since the last reset.

WARNING LIGHTS AND MESSAGES

The warning/indicator lights will illuminate in the instrument

panel together with a dedicated message and/or acoustic signal

when applicable. These indications are indicative and precau

-

tionary and as such must not be considered as exhaustive and/

or  alternative  to  the  information  contained  in  the  Owner’s

Manual, which you are advised to read carefully in all cases.

Always refer to the information in this chapter in the event of a

failure indication. All active telltales will display first if appli

-

cable. The system check menu may appear different based upon

equipment options and current vehicle status. Some telltales are

optional and may not appear.

Red Warning Lights

Air Bag Warning Light  

This light will turn on for four to eight seconds as a bulb

check when the ignition is placed in the ON/RUN or

MAR/ON/RUN position. If the light is either not on

during startup, stays on, or turns on while driving, have the

system inspected at an authorized dealer as soon as possible.

This light will illuminate with a single chime when a fault with

the Air Bag Warning Light has been detected, it will stay on until

the  fault  is  cleared.  If  the  light  comes  on  intermittently  or

remains on while driving, have an authorized dealer service the

vehicle immediately.

-------------------------------------------------------------------------------------------------------------------------------------------------------------

GETTING TO KNOW YOUR INSTRUMENT PANEL

85

Brake Warning Light 

This  warning  light  monitors  various  brake  func

-

tions, including brake fluid level and parking brake

application. If the brake light turns on it may indi

-

cate that the parking brake is applied, that the brake fluid

level  is  low,  or  that  there  is  a  problem  with  the  anti-lock

brake system reservoir.
If  the  light  remains  on  when  the  parking  brake  has  been

disengaged,  and  the  fluid  level  is  at  the  full  mark  on  the

master  cylinder  reservoir,  it  indicates  a  possible  brake

hydraulic  system  malfunction  or  that  a  problem  with  the

Brake  Booster  has  been  detected  by  the  Anti-Lock  Brake

System (ABS) / Electronic Stability Control (ESC) system. In

this case, the light will remain on until the condition has been

corrected. If the problem is related to the brake booster, the

ABS pump will run when applying the brake, and a brake

pedal pulsation may be felt during each stop.
The dual brake system provides a reserve braking capacity in

the event of a failure to a portion of the hydraulic system. A

leak in either half of the dual brake system is indicated by the

Brake  Warning  Light,  which  will  turn  on  when  the  brake

fluid level in the master cylinder has dropped below a spec

-

ified level.
The light will remain on until the cause is corrected.

NOTE:

The  light  may  flash  momentarily  during  sharp  cornering

maneuvers, which change fluid level conditions. The vehicle

should  have  service  performed,  and  the  brake  fluid  level

checked.
If brake failure is indicated, immediate repair is necessary.

Vehicles equipped with the Anti-Lock Brake System (ABS)

are also equipped with Electronic Brake Force Distribution

(EBD).  In  the event  of  an  EBD  failure,  the Brake Warning

Light  will  turn  on  along  with  the  ABS  Light.  Immediate

repair to the ABS system is required.

WARNING!

Driving  a  vehicle  with  the  red  brake  light  on  is

dangerous. Part of the brake system may have failed. It

will  take  longer  to  stop  the  vehicle.  You  could  have  a

collision. Have the vehicle checked immediately.

3

-------------------------------------------------------------------------------------------------------------------------------------------------------------

86 GETTING TO KNOW YOUR INSTRUMENT PANEL

Operation of the Brake Warning Light can be checked by turning

the ignition switch from the OFF position to the ON/RUN posi

-

tion. The light should illuminate for approximately two seconds.

The light should then turn off unless the parking brake is applied

or a brake fault is detected. If the light does not illuminate, have

the light inspected by an authorized dealer.
The light also will turn on when the parking brake is applied

with the ignition switch in the ON/RUN position.

NOTE:

This light shows only that the parking brake is applied. It

does not show the degree of brake application.

Battery Charge Warning Light 

This warning light will illuminate when the battery

is  not  charging  properly.  If  it  stays  on  while  the

engine is running, there may be a malfunction with

the charging system. Contact an authorized dealer as soon as

possible.
This indicates a possible problem with the electrical system

or a related component.

Door Open Warning Light  

This  indicator  will  illuminate  when  one  or  more

door(s) are not fully closed.

NOTE:

If the vehicle is moving and a door is opened, there will also

be a single chime.

Electronic Throttle Control (ETC) Warning Light 

This  warning  light  will  illuminate  to  inform  of  a

problem with the Electronic Throttle Control (ETC)

system. If a problem is detected while the vehicle is

running, the light will either stay on or flash depending on

the  nature  of  the  problem.  Cycle  the  ignition  when  the

vehicle is safely and completely stopped and the transmis

-

sion is placed in the PARK (P) position. The light should turn

off. If the light remains on  with the vehicle running, your

vehicle will usually be drivable; however, see an authorized

dealer for service as soon as possible.

-------------------------------------------------------------------------------------------------------------------------------------------------------------

GETTING TO KNOW YOUR INSTRUMENT PANEL

87

If the light continues to flash when the vehicle is running,

immediate  service  is  required  and  you  may  experience

reduced  performance,  an  elevated/rough  idle,  or  engine

stall  and  your  vehicle  may  require  towing.  The  light  will

come  on  when  the  ignition  is  placed  in  the  ON/RUN  or

MAR/ON/RUN  position and  remain on  briefly  as a  bulb

check. If the light does not come on during starting, have the

system checked by an authorized dealer.

Engine Coolant Temperature Warning Light 

This warning light warns of an overheated engine

condition. If the engine coolant temperature is too

high,  this  indicator  will  illuminate  and  a  single

chime will sound. If the temperature reaches the upper limit,

a continuous chime will sound for four minutes or until the

engine is able to cool, whichever comes first.
If the light turns on while driving, safely pull over and stop

the vehicle. If the A/C system is on, turn it off. Also, shift the

transmission into NEUTRAL (N) and idle the vehicle. If the

temperature  reading  does  not  return  to  normal,  turn  the

engine off immediately and call for service.
Refer to “If Your Engine Overheats” in “In Case Of Emer

-

gency” for further information.

Oil Pressure Warning Light  

This  warning  light  will  illuminate  to  indicate  low

engine  oil  pressure.  If  the  light  turns  on  while

driving, stop the vehicle, shut off the engine as soon

as possible, and contact an authorized dealer. A chime will

sound when this light turns on.
Do not operate the vehicle until the cause is corrected. This

light does not indicate how much oil is in the engine. The

engine oil level must be checked under the hood.

Transmission Temperature Warning Light — If Equipped

This warning light will illuminate to warn of a high

transmission fluid temperature. This may occur with

strenuous usage such as trailer towing. If this light

turns  on,  stop  the  vehicle  and  run  the  engine  at  idle  or

slightly  faster,  with  the  transmission  in  PARK  (P)  or

NEUTRAL (N), until the light turns off. Once the light turns

off, you may continue to drive normally.

WARNING!

If  you  continue  operating  the  vehicle  when  the

Transmission Temperature Warning Light is illuminated

you  could cause  the fluid to boil over, come in contact

with hot engine or exhaust components and cause a fire.

3

-------------------------------------------------------------------------------------------------------------------------------------------------------------

88 GETTING TO KNOW YOUR INSTRUMENT PANEL

Seat Belt Reminder Warning Light 

When the ignition is first placed in the ON/RUN or

MAR/ON/RUN position, if the driver’s seat belt is

unbuckled,  a  chime  will  sound  and  the  light  will

turn on. When driving, if the driver or front passenger seat

belt remains unbuckled, the Seat Belt Reminder Light will

flash  or  remain  on  continuously  and  a  chime  will  sound.

Refer  to  “Occupant  Restraint  Systems”  in  “Safety”  for

further information.

Transmission Fault Warning Light

This light will illuminate (together with a message in

the instrument cluster display and a buzzer) to indi

-

cate  a transmission  fault.  Contact  your  authorized

dealer if the message remains after restarting the engine.

Engine Oil Level Warning Light

This warning light appears on the panel when the

engine  oil  level  falls  below  the  minimum  recom

-

mended value. Restore the correct engine oil level or

contact your authorized dealer for service.

Yellow Warning Lights

Anti-Lock Brake System (ABS) Warning Light 

This light monitors the Anti-Lock Brake System (ABS).

The light will turn on when the ignition is placed in the

ON/RUN or MAR/ON/RUN position and may stay

on for as long as four seconds.
If the ABS light remains on or turns on while driving, then

the Anti-Lock portion of the brake system is not functioning

and  service  is  required.  However,  the  conventional  brake

system  will  continue  to  operate  normally  if  the  brake

warning light is not on.
If the ABS light is on, the brake system should be serviced as

soon as possible to restore the benefits of Anti-Lock Brakes.

If the ABS light does not turn on when the ignition is placed

in the ON/RUN or MAR/ON/RUN position, have the light

inspected by an authorized dealer.

CAUTION!

Continuous driving with the Transmission Temperature

Warning Light illuminated will eventually cause severe

transmission damage or transmission failure.

-------------------------------------------------------------------------------------------------------------------------------------------------------------

GETTING TO KNOW YOUR INSTRUMENT PANEL

89

Low Fuel Warning Light

When the fuel level reaches approximately 2–3 gal

(9–11 L) this light will turn on, and remain on until

fuel is added.

Generic Warning Light

The Generic Warning Light will illuminate if any of

the following conditions occur: Engine Oil Pressure

Sensor  Failure,  External  Light  Failure,  Parking

Sensor  Failure,  Fuel  Cut-Off  Fail/Intervention,  Generic

Failure on Trailer, or Air Bag telltale recovery.
The telltale will blink in case of an Air Bag Warning Light

Failure.  Contact  an  authorized  dealer  immediately  for

service.

Tire Pressure Monitoring System (TPMS) Warning Light 

The  warning  light  switches  on  and  a  message  is

displayed to indicate that the tire pressure is lower

than the recommended value and/or that slow pres

-

sure loss is occurring. In these cases, optimal tire duration

and fuel consumption may not be guaranteed.

Should  one  or  more  tires  be  in  the  condition  mentioned

above, the display will show the indications corresponding

to each tire.

Each  tire,  including  the  spare  (if  provided),  should  be

checked  monthly  when  cold  and  inflated  to  the  inflation

pressure recommended by the vehicle manufacturer on the

vehicle placard or tire inflation pressure label. If your vehicle

has  tires  of  a  different  size  than  the  size  indicated  on  the

vehicle placard or tire inflation pressure label, you should

determine the proper tire inflation pressure for those tires.
As an added safety feature, your vehicle has been equipped

with a Tire Pressure Monitoring System (TPMS) that illumi

-

nates a low tire pressure telltale when one or more of your

tires is significantly under-inflated. Accordingly, when the

low tire pressure telltale illuminates, you should stop and

check your tires as soon as possible, and inflate them to the

CAUTION!

Do  not  continue  driving  with  one  or  more  flat  tires  as

handling  may  be  compromised.  Stop  the  vehicle,

avoiding sharp  braking  and steering.  If  a  tire  puncture

occurs,  repair  immediately  using  the  dedicated  tire

repair  kit  and  contact  an  authorized  dealer  as  soon  as

possible.

3

-------------------------------------------------------------------------------------------------------------------------------------------------------------

90 GETTING TO KNOW YOUR INSTRUMENT PANEL

proper  pressure.  Driving  on  a  significantly  under-inflated

tire causes the tire to overheat and can lead to tire failure.

Under-inflation  also  reduces  fuel  efficiency  and  tire  tread

life,  and  may  affect  the  vehicle’s  handling  and  stopping

ability.
Please note that the TPMS is not a substitute for proper tire

maintenance, and it is the driver’s responsibility to maintain

correct tire pressure, even if under-inflation has not reached

the level to trigger illumination of the TPMS low tire pres

-

sure telltale.
Your vehicle has also been equipped with a TPMS malfunc

-

tion indicator to indicate when the system is not operating

properly. The TPMS malfunction indicator is combined with

the  low  tire  pressure  telltale.  When  the  system  detects  a

malfunction,  the  telltale  will  flash  for  approximately  one

minute  and  then  remain  continuously  illuminated.  This

sequence will continue upon subsequent vehicle start-ups as

long as the malfunction exists. When the malfunction indi

-

cator is illuminated, the system may not be able to detect or

signal  low  tire  pressure  as  intended.  TPMS  malfunctions

may occur for a variety of reasons, including the installation

of replacement or alternate tires or wheels on the vehicle that

prevent the TPMS from functioning properly. Always check

the TPMS  malfunction  telltale after  replacing  one or more

tires or wheels on your vehicle to ensure that the replace

-

ment  or  alternate  tires  and  wheels  allow  the  TPMS  to

continue to function properly.

Vehicle Security Warning Light

This warning light will illuminate when the vehicle

security  alarm  system  has  detected  an  attempt  to

break into the vehicle.

CAUTION!

The  TPMS  has  been  optimized  for  the  original

equipment  tires  and  wheels.  TPMS  pressures  and

warning have been established for the tire size equipped

on your vehicle. Undesirable system operation or sensor

damage may result when using replacement equipment

that  is  not  of  the  same  size,  type,  and/or  style.

Aftermarket  wheels  can  cause  sensor  damage.  Using

aftermarket  tire  sealants  may  cause  the  Tire  Pressure

Monitoring  System  (TPMS)  sensor  to  become

inoperable. After using an  aftermarket tire sealant  it  is

recommended  that  you  take  your  vehicle  to  an

authorized dealer to have your sensor function checked.

-------------------------------------------------------------------------------------------------------------------------------------------------------------

GETTING TO KNOW YOUR INSTRUMENT PANEL

91

Engine Check/Malfunction Indicator Warning Light (MIL) 

The  Engine  Check/Malfunction  Indicator  Light

(MIL)  is  a  part  of an Onboard  Diagnostic System

called OBD II that monitors engine and automatic

transmission control systems. This warning light will illu

-

minate when the ignition is in the ON/RUN position before

engine  start.  After  placing  the  ignition  to  the  ON/RUN

position, if there is a problem with the Sentry Key System,

the Vehicle Security Light will turn on. This condition will

result in the engine being shut off after two seconds. If the

bulb  does  not  come on when  turning  the  ignition  switch

from  OFF  to  ON/RUN,  have  the  condition  checked

promptly.

NOTE:

This warning light will illuminate when the vehicle security

alarm  system  has  detected  an  attempt  to  break  into  the

vehicle.
Certain conditions, such as a loose or missing gas cap, poor

quality fuel, etc., may illuminate the light after engine start.

The vehicle should be serviced if the light stays on through

several typical driving styles. In most situations, the vehicle

will drive normally and will not require towing.

When  the  engine  is  running,  the  MIL  may  flash  to  alert

serious  conditions  that  could  lead  to  immediate  loss  of

power  or  severe  catalytic  converter  damage.  The  vehicle

should  be  serviced  by  an  authorized  dealer  as  soon  as

possible if this occurs.

WARNING!

A  malfunctioning  catalytic  converter,  as  referenced

above,  can  reach  higher  temperatures  than  in  normal

operating conditions. This can cause a fire if you drive

slowly  or  park  over  flammable  substances  such  as  dry

plants, wood, cardboard, etc. This could result in death

or serious injury to the driver, occupants or others.

CAUTION!

Prolonged driving with the Malfunction Indicator Light

(MIL)  on  could  cause  damage  to  the  vehicle  control

system.  It  also  could  affect  fuel  economy  and

driveability.  If  the  MIL  is  flashing,  severe  catalytic

converter  damage  and  power  loss  will  soon  occur.

Immediate service is required.

3

-------------------------------------------------------------------------------------------------------------------------------------------------------------

92 GETTING TO KNOW YOUR INSTRUMENT PANEL

Electronic Stability Control (ESC) Warning Light — If 
Equipped

The Electronic Stability Control (ESC) Indicator Light in

the instrument cluster will come on when the ignition is

placed in the ON/RUN or MAR/ON/RUN position, and

when ESC is activated. It should go out with the engine running. If

the “ESC Indicator Light” comes on continuously with the engine

running, a malfunction has been detected in the ESC system. If this

light remains on after several ignition cycles, and the vehicle has

been  driven  several  miles  (kilometers)  at  speeds  greater  than

30 mph (48 km/h), see your authorized dealer as soon as possible

to have the problem diagnosed and corrected.
• The  “ESC  OFF  Indicator  Light”  and  the  “ESC  Indicator

Light”  come  on  momentarily  each  time  the  ignition  is

placed in the ON/RUN or MAR/ON/RUN position.

• Each  time  the  ignition  is  turned  to  ON/RUN  or  MAR/ON/

RUN,  the  ESC  system  will  be  on,  even  if  it  was  turned  off

previously.

• The  ESC  system  will  make  buzzing  or  clicking  sounds

when it is active. This is normal; the sounds will stop when

ESC becomes inactive.

• This light will come on when the vehicle is in an ESC event.

Electronic Stability Control (ESC) OFF Warning Light — 
If Equipped 

This warning light indicates the Electronic Stability

Control (ESC) is off.

Each time the ignition is turned to ON/RUN or ACC/ON/RUN,

the ESC system will be on, even if it was turned off previously.

Green Indicator Lights

Turn Signal Indicator Lights  

When  the left or right turn signal  is activated, the

turn  signal  indicator  will  flash  independently  and

the  corresponding  exterior  turn  signal  lamps  will

flash. Turn signals can be activated when the multifunction

lever is moved down (left) or up (right).

NOTE:

• A  continuous  chime  will  sound  if  the  vehicle  is  driven

more than 1 mile (1.6 km) with either turn signal on.

• Check  for  an  inoperative  outside  light  bulb  if  either

indicator flashes at a rapid rate.

-------------------------------------------------------------------------------------------------------------------------------------------------------------


Content      ..     3      4      5      6     ..