Acura RSX Honda Integra. Manual - part 414
21-63
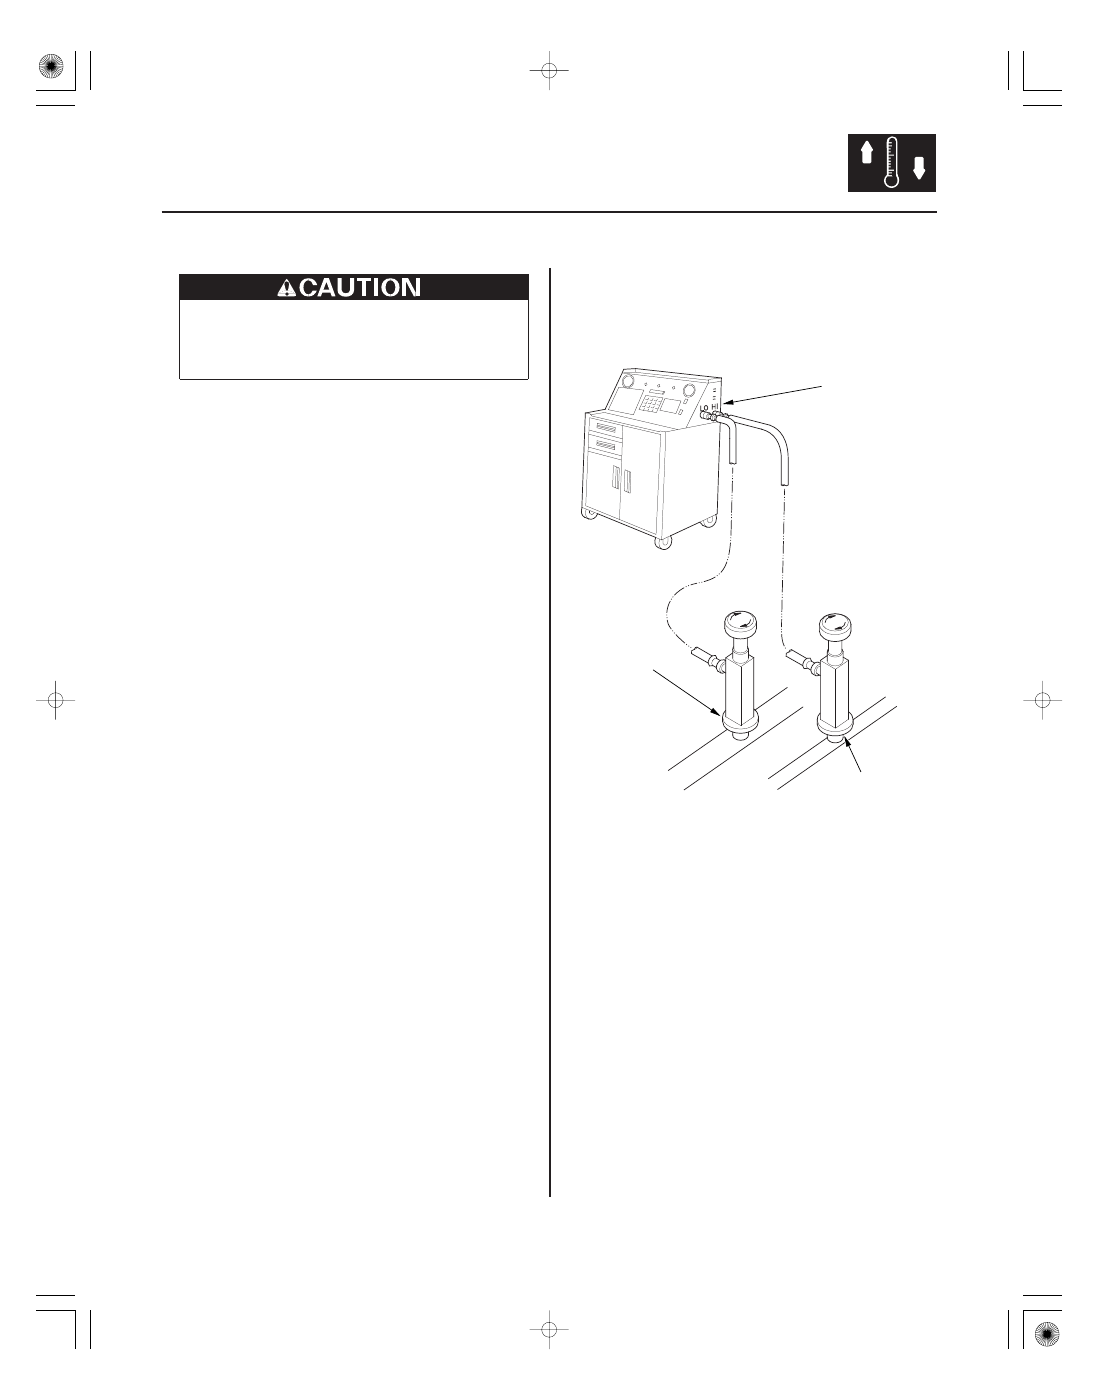
System Evacuation
A
C
B
• Air conditioning refrigerant or lubricant vapor
can irritate your eyes, nose, or throat.
• Be careful when connecting service equipment.
• Do not breathe refrigerant or vapor.
Use only service equipment that is U.L.-listed and is
certified to meet the requirements of SAE J2210 to
remove HFC-134a (R-134a) from the air conditioning
system.
If accidental system discharge occurs, ventilate work
area before resuming service.
Additional health and safety information may be
obtained from the refrigerant and lubricant
manufacturers.
1. When an A/C system has been opened to the
atmosphere, such as during installation or repair, it
must be evacuated using an R-134a refrigerant
recovery/recycling/charging station. (If the system
has been open for several days, the receiver/dryer
should be replaced, and the system should be
evacuated for several hours.)
2. Connect an R-134a refrigerant recovery/recycling/
charging station (A) to the high-pressure service
port (B) and the low-pressure service port (C), as
shown, following the equipment manufacturer’s
instructions. Evacuate the system.
3. If the low-pressure does not reach more than
93.3 kPa (700 mmHg, 27.6 in.Hg) within 15 minutes,
there is probably a leak in the system. Partially
charge the system, and check for leaks (see step 3
on page 21-65).
05/06/27 18:08:06 61S6M040_210_0064