Acura RL (1996-2004 year). Manual - part 409
Emission Control System
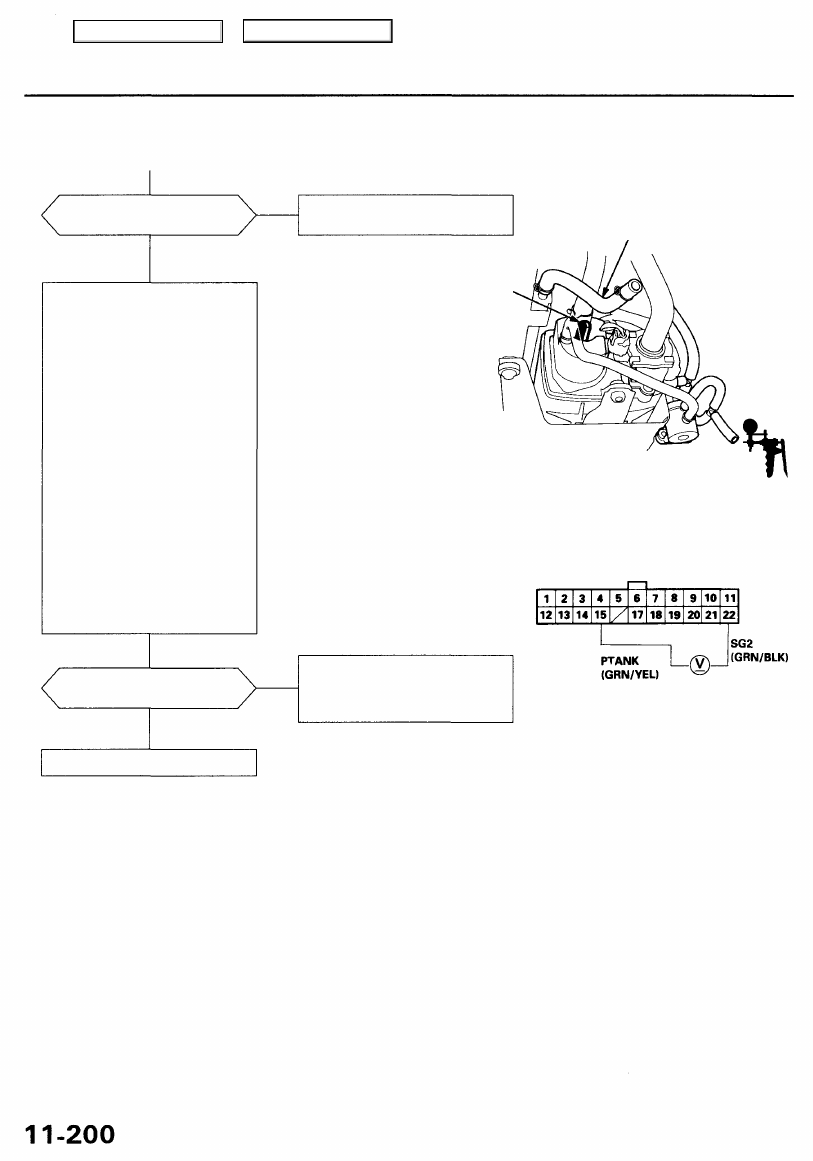
Evaporative Emission (EVAP) Controls (cont'd)
Does the voltage drop to 1.5 V
and hold at least 20 seconds?
NO
Check the EVAP canister purge
valve line and connections:
1. Turn the ignition switch OFF.
2. Disconnect the Purge line
hose from the EVAP canister
and plug the port.
3. Turn the ignition switch ON
(ll).
4. While monitoring the FTP
Sensor voltage with the
Honda PGM Tester, or mea-
suring voltage between PCM
connector terminals D15 and
D22 slowly pump the vacuum
pump using a stroke every 1 -
2 seconds.
5. Continue to pump vacuum
until that voltage drops to
about 1.5 V.
NOTE: Make sure that the
engine coolant temperature
still above 95°F (35°C) and your
vacuum pump has no leak.
6. Monitor that voltage for 20
seconds.
Does the voltage drop to 1.5 V
and holds at least 20 seconds?
Inspect the fuel tank vapor vent
line and connections.
PURGE
LINE
CAP
VACUUM
PUMP/GAUGE, 0 - 30 in.Hg
PCM CONNECTOR D (22P)
Inspect the EVAP canister purge
valve line and connections. If
they are OK, do the EVAP two
way valve test (see page
).
Wire side of female terminals
Replace the EVAP canister.
NO
YES
YES
Main Menu
Table of Contents