Acura RL (1996-2004 year). Manual - part 17
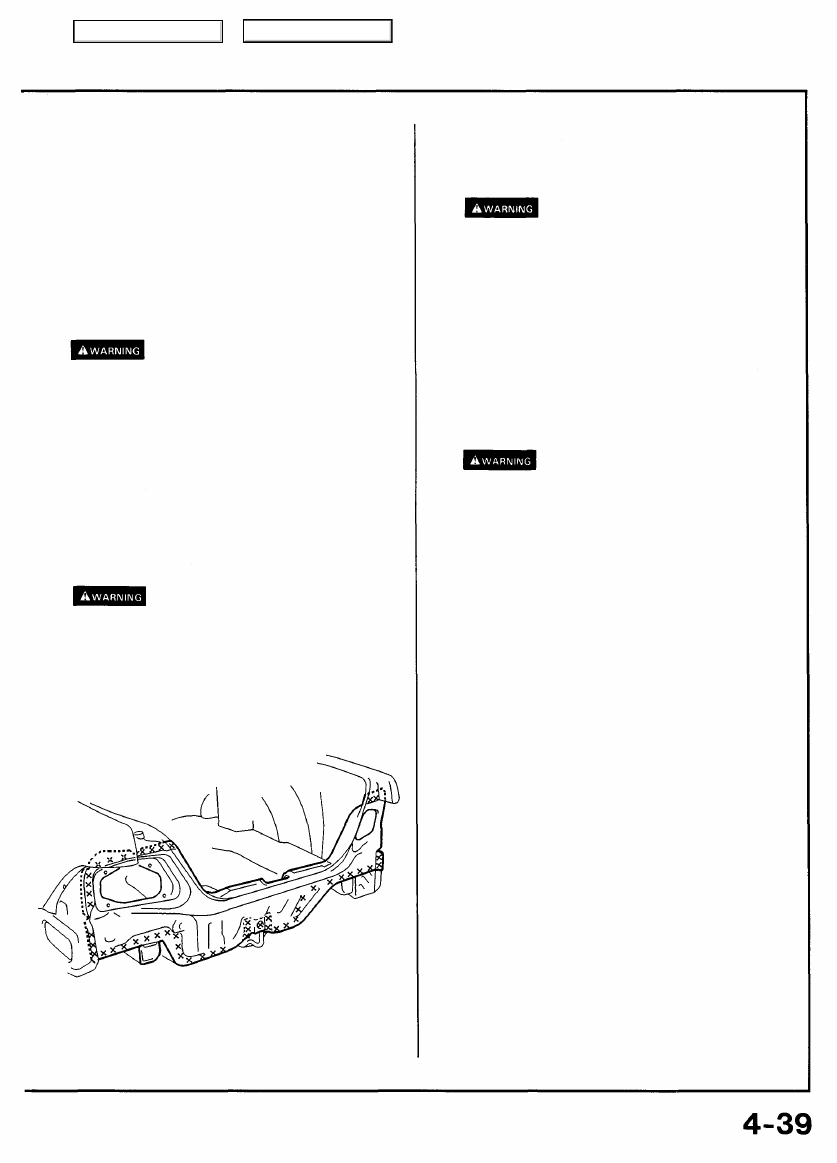
• Install the new rear panel and clamp it with vise-
grips.
NOTE: Apply the spot sealer to the welding surface when
spot welding.
• Check the rear panel position using the body dimen-
).
6. Tack weld the rear panel.
• Weld the clamped sections for temporary installa-
tion.
To prevent eye injury and burns
when welding, wear an approved welding helmet,
gloves and safety shoes.
7. Open and close the trunk lid to check for proper
installation.
NOTE: Make sure the trunk lid or locks securely.
Position the rear panel in its correct position with the rear
bumper and taillight installed.
8. Perform the main welding.
To prevent eye injury and burns
when welding, wear an approved welding helmet,
gloves and safety shoes.
• Make 20% to 30% more spot welds than there were
holes drilled.
9. Finish the welding areas.
• Level the welded areas with a disc sander, then even
out high areas with a hammer. Be careful not to de-
form them.
To prevent eye injury, wear goggles
or safety glasses whenever sanding, cutting or
grinding.
• Even out the spot welded flange area with a hammer
and dolly.
).
• Apply sealer to the rear side outer joint and around
the taillight areas of the rear panel.
• Apply sealer to the rear panel and rear floor joint.
11. Apply the paint.
See Paint Repair section.
• Ventilate when spraying paint. Most paint
contains substances that are harmful if inhaled
or swallowed. Read the paint label before
opening the paint container.
• Avoid contact with skin. Wear an approved
respirator, gloves, eye protection and appropriate
clothing when painting.
• Paint is flammable. Store it in a safe place, and
keep it away from sparks, flames or cigarettes.
12. Apply anti-rust agent (see
).
• Apply agent to the outer panel, rear panel and rear
floor joint.
• Apply agent to the inside of the jack-up stiffener.
13. Install the related parts.
Install in the reverse order in which they were removed.
14. Inspect, check, and clean.
• Adjust the clearance with the trunk lid, then adjust the
level difference and fit. Check operation.
• Test for leaks in the trunk compartment.
• Clean the trunk floor.
Main Menu
Table of Contents