Acura RL. Manual - part 443


  Index      Acura     Acura RL - service repair manual 2005-2008 year


Search            


Content   ..  441  442  443  444   ..


Acura RL. Manual - part 443


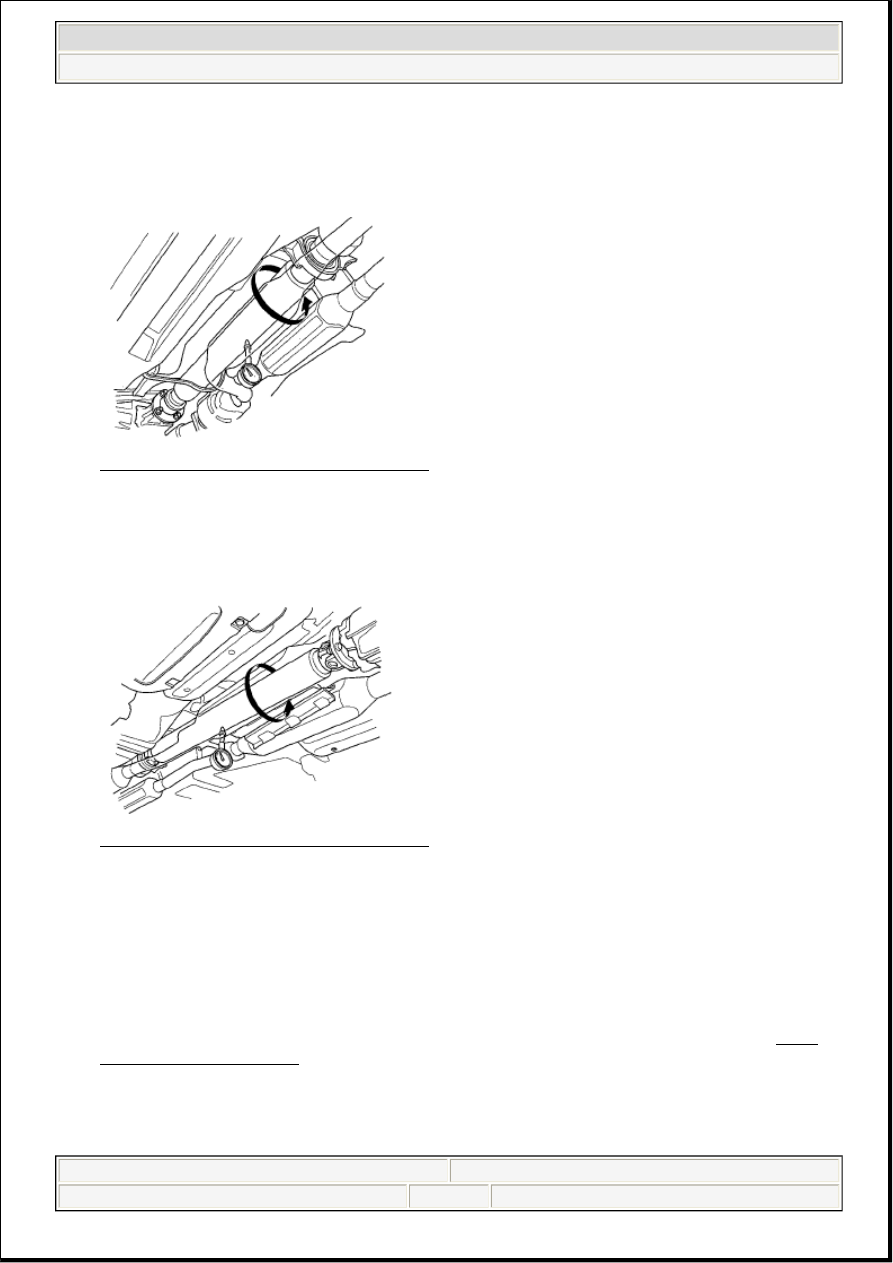
No. 1 Propeller Shaft Runout  

Service Limit: 1.5 mm (0.06 in.)  

Fig. 129: Checking Propeller Shaft Runout 
Courtesy of AMERICAN HONDA MOTOR CO., INC. 

No. 2 Propeller Shaft Runout  

Service Limit: 1.5 mm (0.06 in.)  

Fig. 130: Checking Propeller Shaft Runout 
Courtesy of AMERICAN HONDA MOTOR CO., INC. 

3. If the runout on either propeller shaft exceeds the service limit, replace the propeller shaft assembly.  

PROPELLER SHAFT REMOVAL 

1. Raise the vehicle off the ground, and support it with safety stands in the proper locations (see LIFT 

AND SUPPORT POINTS ).  

2. Remove the muffler (A) and the exhaust pipe B. 

NOTE:

Do not drop or damage the propeller shaft during removal.


2007 Acura RL 

2005-08 DRIVELINE/AXLES Driveline/Axle - RL


me 


Friday, June 05, 2009 3:01:08 PM

Page 58 

© 2005 Mitchell Repair Information Company, LLC. 

Fig. 131: Identifying Muffler And Exhaust Pipe 
Courtesy of AMERICAN HONDA MOTOR CO., INC. 

3. Remove the No. 1 propeller shaft protector. 

Fig. 132: Identifying No. 1 Propeller Shaft Protector 
Courtesy of AMERICAN HONDA MOTOR CO., INC. 

4. Make a reference mark (A) across the propeller shaft (B) and transfer companion flange (C). 

NOTE:

Wrap the length of each propeller shaft with cardboard, at least 5 mm 
thick, before removing the propeller shaft.


2007 Acura RL 

2005-08 DRIVELINE/AXLES Driveline/Axle - RL


me 


Friday, June 05, 2009 3:01:08 PM

Page 59 

© 2005 Mitchell Repair Information Company, LLC. 

Fig. 133: Making Match Mark On Propeller Shaft And Transfer Companion Flange 
Courtesy of AMERICAN HONDA MOTOR CO., INC. 

5. Remove the nuts (D).  

6. Make a reference mark (A) across the propeller shaft (B) and rear differential companion flange (C). 

Fig. 134: Making Match Mark On Propeller Shaft And Rear Differential Companion Flange 
Courtesy of AMERICAN HONDA MOTOR CO., INC. 

7. Remove the bolts (D).  

8. Remove the center support bearing mounting bolts. 

NOTE:

Do not exceed the angle of center support bearing joint.


2007 Acura RL 

2005-08 DRIVELINE/AXLES Driveline/Axle - RL


me 


Friday, June 05, 2009 3:01:08 PM

Page 60 

© 2005 Mitchell Repair Information Company, LLC. 

Fig. 135: Identifying Center Support Bearing Mounting Bolts 
Courtesy of AMERICAN HONDA MOTOR CO., INC. 

9. Slide the propeller shaft (A) toward the rear differential, then flex the No. 2 joint (B), and remove the 

No. 1 propeller shaft from the transfer. 

Fig. 136: Removing Propeller Shaft 
Courtesy of AMERICAN HONDA MOTOR CO., INC. 

10. Remove the propeller shaft from the vehicle.  

PROPELLER SHAFT INSTALLATION 

1. Install the No. 1 propeller shaft (A) to the transfer by flexing the No. 2 joint (B), then install the 

propeller shaft to the vehicle. 

NOTE:

Keep the protector on the propeller shaft after removing it from the 
vehicle. Be careful not to damage the propeller shaft.

NOTE:

Wrap the length of each propeller shaft with cardboard, at least 5 mm thick 
to protect the carbon fiber shaft during removal and installation, before 
removing the propeller shaft.


2007 Acura RL 

2005-08 DRIVELINE/AXLES Driveline/Axle - RL


me 


Friday, June 05, 2009 3:01:08 PM

Page 61 

© 2005 Mitchell Repair Information Company, LLC. 


Content   ..  441  442  443  444   ..