Kia Sedona (2008 year). Manual - part 356


  Главная      Kia     Kia Sedona (2008 year) - Service Repair Manual


поиск по сайту           правообладателям


содержание   ..  354  355  356  357   ..


Kia Sedona (2008 year). Manual - part 356
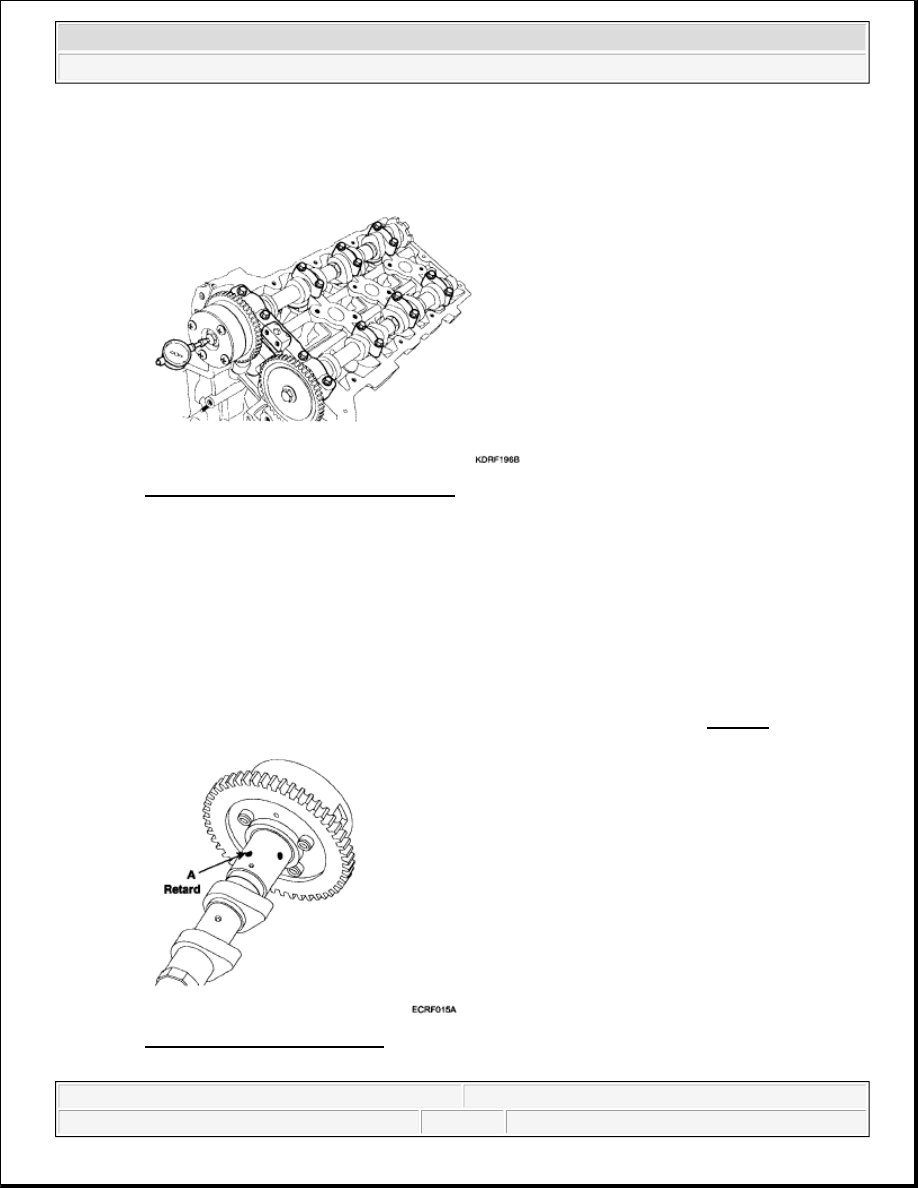


Camshaft end play  

[Standard value]: 0.02-0.18 mm (0.0008-0.0071 in.) 

Fig. 118: Measuring Camshaft End Play 
Courtesy of KIA MOTORS AMERICA, INC. 

If the end play is greater than maximum, replace the camshaft. If necessary, replace cylinder head. 

3. Remove the camshafts.  

CVVT ASSEMBLY 

1. Inspect CVVT assembly. 

1. Check that the CVVT assembly will not turn.  

2. Apply vinyl tape to the retard hole except the one indicated by the arrow. See Fig. 119

Fig. 119: Locating Retard Hole 
Courtesy of KIA MOTORS AMERICA, INC.


2008 Kia Sedona 

2008 ENGINE Mechanical - Sedona


Microsoft 


Saturday, May 22, 2010 3:54:37 PM

Page 82 

© 2006 Mitchell Repair Information Company, LLC. 

3. Wind tape around the tip of the air gun and apply air of approx. 150 kPa (1.5 kgf/cm

2

 , 21 psi) to 

the port of the camshaft. 

(Perform this order to release the lock pin for the maximum delay angle locking.) 

4. Under the condition of (3), turn the CVVT assembly to the advance angle side (the arrow marked 

direction in the illustration) with your hand. 

Depending on the air pressure, the CVVT assembly will turn to the advance side without applying 
force by hand. Also, If excessive air leaks from the port, the lock pin may not be fully released. 

Fig. 120: Identifying Retard And Advance Angle 
Courtesy of KIA MOTORS AMERICA, INC. 

5. Except the position where the lock pin meets at the maximum delay angle, let the CVVT assembly 

turn back and forth and check the movable range and that there is no resistance to movement. 

Standard: Movable smoothly in the range about 22.5° 

6. Turn the CVVT assembly with your hand and lock it at the maximum delay angle position (counter 

clockwise).  

REASSEMBLY 

Thoroughly clean all parts to be assembled. 

Before installing the parts, apply fresh engine oil to all sliding and rotating surfaces. 

Replace oil seals with new ones. 

1. Install valves. 

NOTE:

When the oil splashes, wipe it off with a shop rag.


2008 Kia Sedona 

2008 ENGINE Mechanical - Sedona


Microsoft 


Saturday, May 22, 2010 3:54:37 PM

Page 83 

© 2006 Mitchell Repair Information Company, LLC. 

1. Using SST (09222-3C100), push in a new oil seal. 

Fig. 121: Identifying SST (09222-3C100) 
Courtesy of KIA MOTORS AMERICA, INC. 

2. Install the valve, valve spring and spring retainer. 

3. Using the SST (09222 - 3K000, 09222-3C300), compress the spring and install the retainer locks. 

After installing the valves, ensure that the retainer locks are correctly in place before releasing the 
valve spring compressor. 

Fig. 122: Identifying SST (09222-3K000, 09222-3C300)

NOTE:

Do not reuse old valve stem seals. 
Incorrect installation of the seal could result in oil leakage past the 
valve guides.

NOTE:

Place valve springs so that the side coated with enamel faces toward 
the valve spring retainer and then install the retainer.


2008 Kia Sedona 

2008 ENGINE Mechanical - Sedona


Microsoft 


Saturday, May 22, 2010 3:54:37 PM

Page 84 

© 2006 Mitchell Repair Information Company, LLC. 

Courtesy of KIA MOTORS AMERICA, INC.

4. Lightly tap the end of each valve stem two or three times with the wooden handle of a hammer to 

ensure proper seating of the valve and retainer lock.  

2. Install MLAs. 

Check that the MLA rotates smoothly by hand. 

Fig. 123: Identifying MLA 
Courtesy of KIA MOTORS AMERICA, INC. 

3. Install OCV (A). 

Tightening torque  

9.80-11.76 N.m (1.0-1.2 kgf.m, 7.23-8.68 lb-ft) 

NOTE:

MLA can be reinstalled in its original position.


2008 Kia Sedona 

2008 ENGINE Mechanical - Sedona


Microsoft 


Saturday, May 22, 2010 3:54:37 PM

Page 85 

© 2006 Mitchell Repair Information Company, LLC. 


содержание   ..  354  355  356  357   ..