Kia Sedona (2008 year). Manual - part 49


  Главная      Kia     Kia Sedona (2008 year) - Service Repair Manual


поиск по сайту           правообладателям


содержание   ..  47  48  49  50   ..


Kia Sedona (2008 year). Manual - part 49
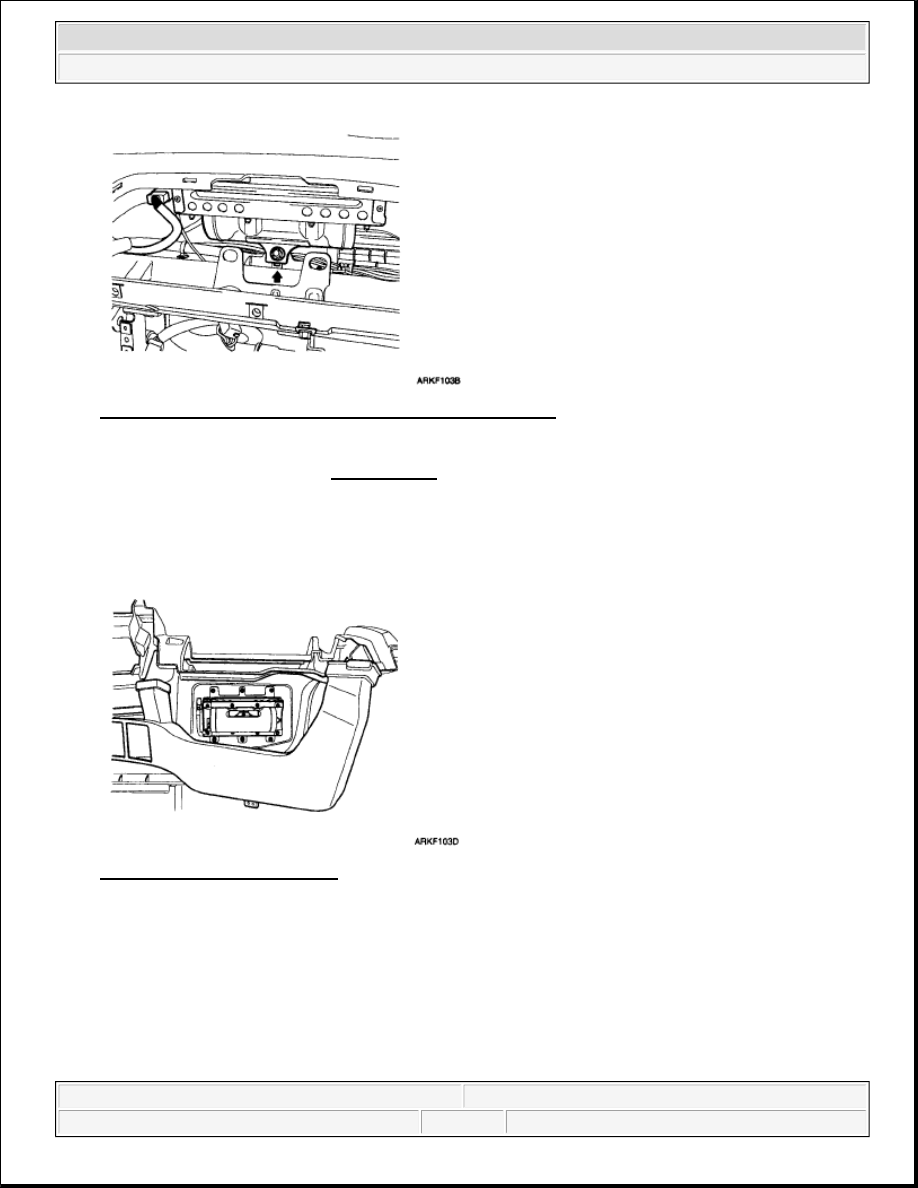


Fig. 2: Locating Passenger Air Bag Module Mounting Bolts 
Courtesy of KIA MOTORS AMERICA, INC. 

4. Remove the crash pad. Refer to CRASH PAD . 

5. Remove the heater duct from the crash pad. 

Fig. 3: Identifying Heater Duct 
Courtesy of KIA MOTORS AMERICA, INC. 

6. Remove the mounting nuts from the crash pad. Then remove the passenger airbag. 

NOTE:

Replace the crash pad which is damaged while PAB is deployed.

CAUTION: The removed airbag module should be stored In a clean, dry place 

with the airbag cushion up.


2008 Kia Sedona EX 

2008 RESTRAINTS Air Bag Module (Passenger Side) - Sedona


Microsoft 


Monday, May 24, 2010 3:53:08 PM

Page 2 

© 2006 Mitchell Repair Information Company, LLC. 

Fig. 4: Identifying Crash Pad Mounting Nuts 
Courtesy of KIA MOTORS AMERICA, INC. 

INSTALLATION 

1. Disconnect the negative (-) cable from battery and wait for at least three minutes.  

2. Remove ignition key from the vehicle.  

3. Place a Passenger Airbag (PAB) on the crash pad and tighten the Passenger Airbag (PAB) mounting nuts. 

Tightening Torque: 

0.7-0.8 kgf.m (7.0-8.0 N.m, 5.2-5.9 lb. ft) 

4. Install the heater duct to the crash pad.  

5. Install the crash pad. Refer to CRASH PAD .  

6. Tighten the PAB mounting bolts. 

Tightening Torque: 

1.2-1.3 kgf.m (12.0-13.0 N.m, 8.9-9.6 lb. ft) 

7. Connect the Passenger Airbag (PAB) harness connector to the SRS main harness connector.  

8. Reinstall the glove box. Refer to GLOVE BOX REPLACEMENT .  

9. Reconnect the battery negative cable.  

10. After installing the Passenger Airbag (PAB), confirm proper system operation: 

Turn the ignition switch ON; the SRS indicator light should be turned on for about 6 seconds and 
then go off.  


2008 Kia Sedona EX 

2008 RESTRAINTS Air Bag Module (Passenger Side) - Sedona


Microsoft 


Monday, May 24, 2010 3:53:08 PM

Page 3 

© 2006 Mitchell Repair Information Company, LLC. 

2008 RESTRAINTS

Troubleshooting (Airbag) - Sedona 

DESCRIPTION 

HI-SCAN CHECK 

1. Turn the ignition switch off.  

2. Connect the Hi-Scan Pro connector to the data link connector located under the crash pad. 

Fig. 1: Connecting Hi-Scan Pro Connector To Data Link Connector 

3. Turn the ignition switch on and power on the Hi-Scan Pro.  

4. Read DTCs.  

5. Find and repair the trouble, and clear the DTCs using Hi-Scan Pro.  

6. Disconnect the Hi-Scan Pro.  

DIAGNOSTIC TROUBLESHOOTING FLOW 


2008 Kia Sedona EX 

2008 RESTRAINTS Troubleshooting (Airbag) - Sedona


2008 Kia Sedona EX 

2008 RESTRAINTS Troubleshooting (Airbag) - Sedona


Microsoft 


Monday, May 24, 2010 3:55:00 PM

Page 1 

© 2006 Mitchell Repair Information Company, LLC. 

Microsoft 


Monday, May 24, 2010 3:55:06 PM

Page 1 

© 2006 Mitchell Repair Information Company, LLC. 

Fig. 2: Diagnostic Troubleshooting Flow Chart 

TERMINAL & CONNECTOR INSPECTION 

Be sure to perform "TERMINAL & CONNECTOR INSPECTION" before doing "INSPECTION 
PROCEDURE" for troubleshooting of each DTC. 

1. Visually inspect all connectors related to the affected circuit for damage and secure connection.  

2. Inspect terminals for damage and corrosion. 

3. Are any problems found?  

NO  

Go to next step (INSPECTION PROCEDURE).  

YES  

After repairing the trouble part, check whether DTC occurs or not. 

CAUTION: Avoid damaging connectors during the inspection process.


2008 Kia Sedona EX 

2008 RESTRAINTS Troubleshooting (Airbag) - Sedona


Microsoft 


Monday, May 24, 2010 3:55:01 PM

Page 2 

© 2006 Mitchell Repair Information Company, LLC. 


содержание   ..  47  48  49  50   ..