FANUC Series Series 16i-TB, Series 18i-TB, Series 160i-TB, Series 180i-TB. OPERATOR’S MANUAL - page 24
B-63524EN/01
OPERATION
9. EDITING PROGRAMS
9.6.2
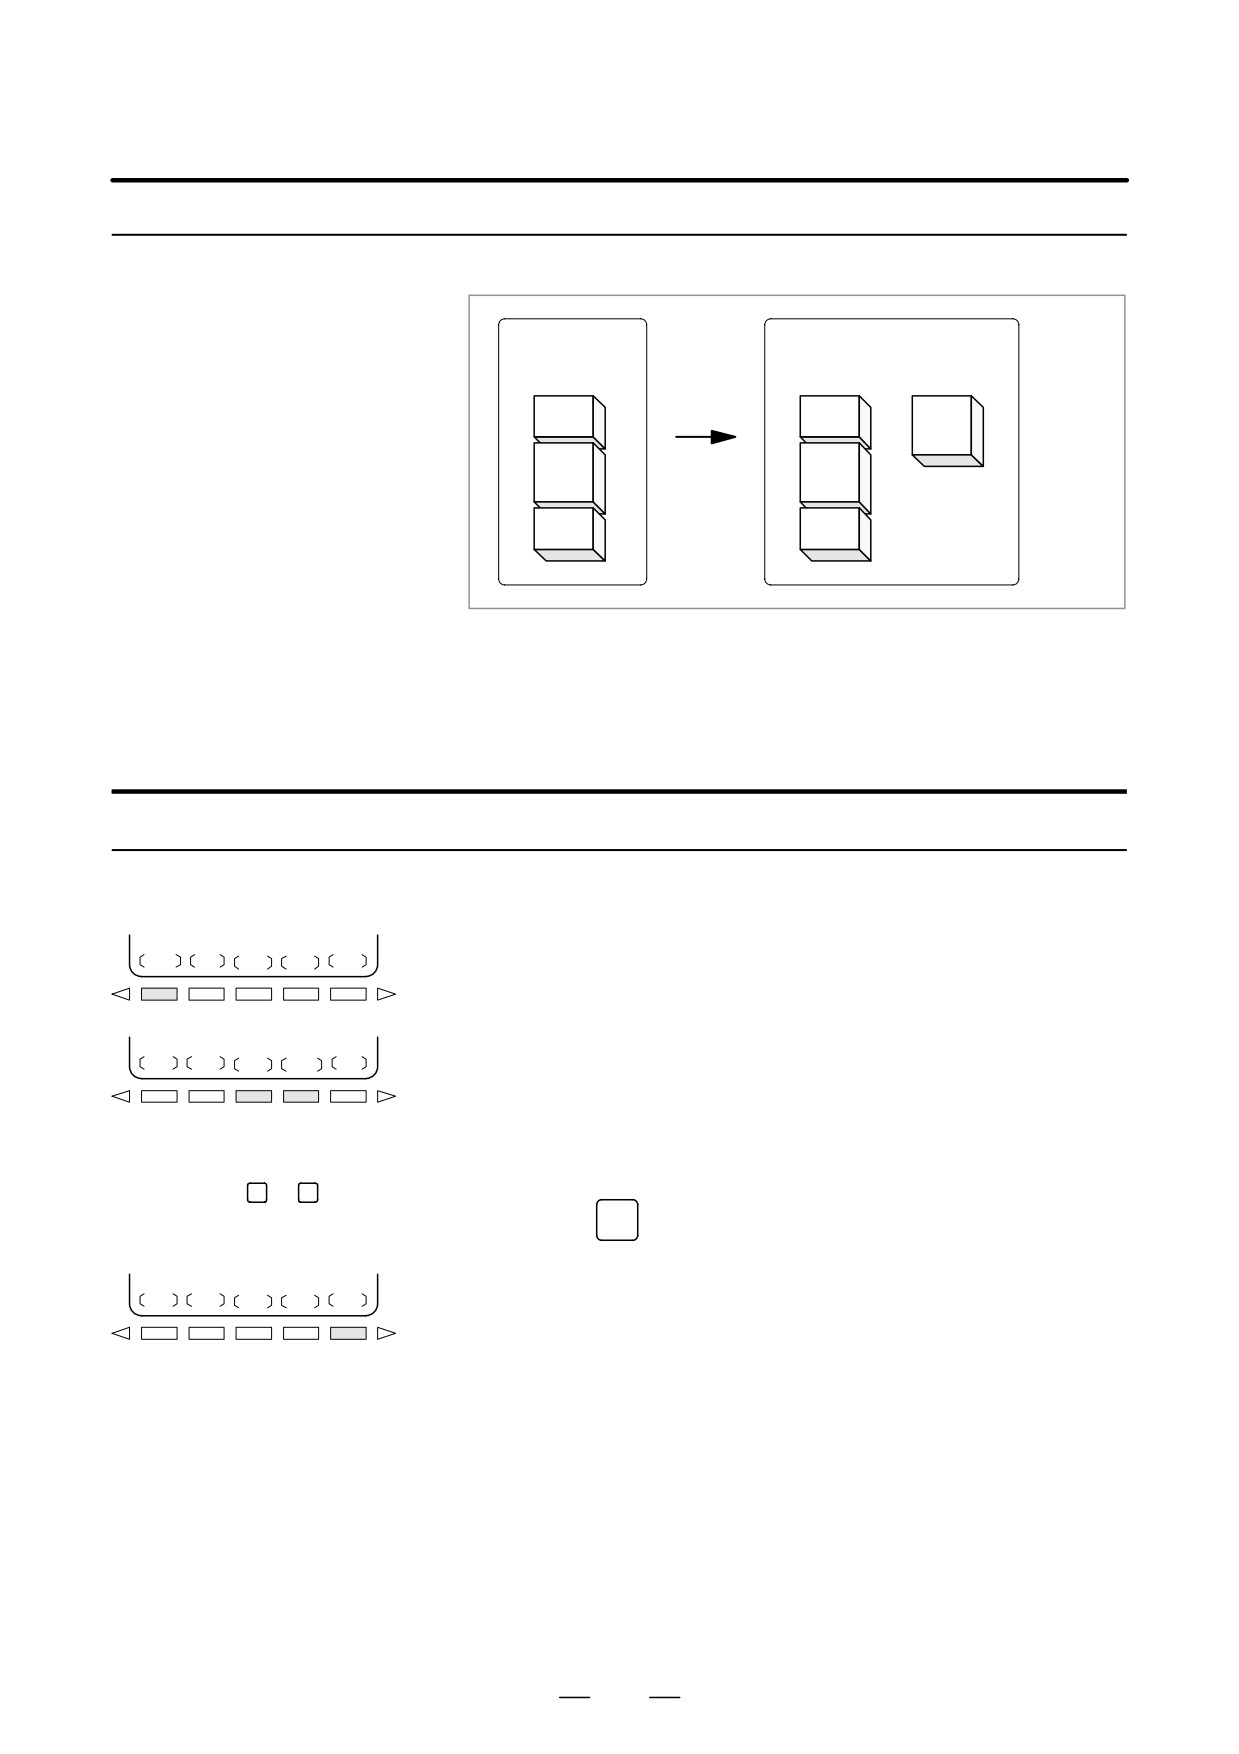
A new program can be created by copying part of a program.
Copying Part of a
Program
Before copy
After copy
Oxxxx
Oxxxx
Oyyyy
A
Copy
A
B
B
B
C
C
Fig. 9.6.2 Copying Part of a Program
In Fig. 9.6.2, part B of the program with program number xxxx is copied
to a newly created program with program number yyyy. The program for
which an editing range is specified remains unchanged after copy
operation.
Procedure for copying part of a program
1
Perform steps 1 to 6 in subsection III-9.6.1.
CRSR ∼
2
Move the cursor to the start of the range to be copied and press soft key
[CRSR∼].
∼CRSR
∼BTTM
3
Move the cursor to the end of the range to be copied and press soft key
[∼CRSR] or [∼BTTM] (in the latter case, the range to the end of the
program is copied regardless of the position of the cursor).
4
Enter the number of the new program (with only numeric keys) and
Numeric keys
0
to
9
press the
INPUT
key.
EXEC
5
Press soft key [EXEC].
669
9. EDITING PROGRAMS
OPERATION
B-63524EN/01
9.6.3
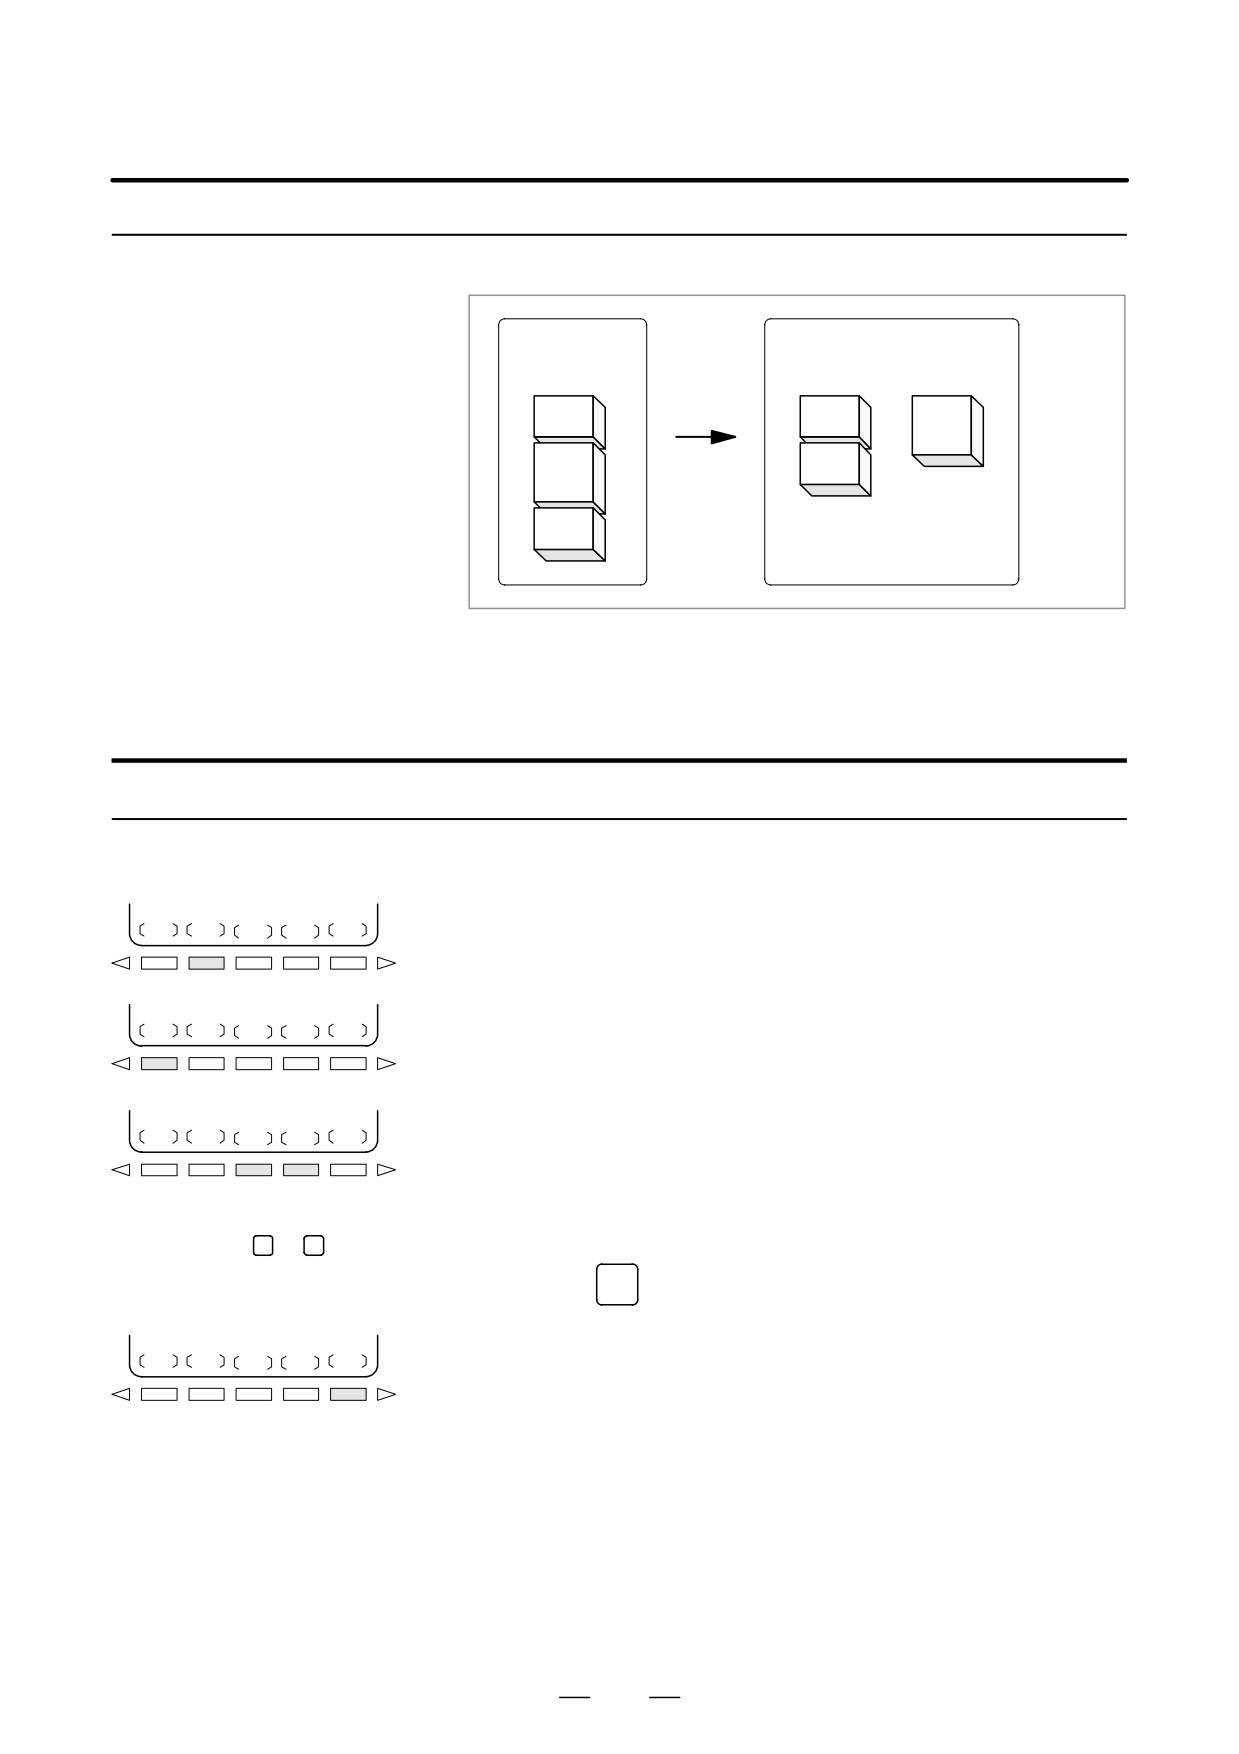
A new program can be created by moving part of a program.
Moving Part of a
Program
Before copy
After copy
Oxxxx
Oxxxx
Oyyyy
Copy
A
A
B
C
B
C
Fig. 9.6.3 Moving Part of a Program
In Fig. 9.6.3, part B of the program with program number xxxx is moved
to a newly created program with program number yyyy; part B is deleted
from the program with program number xxxx.
Procedure for moving part of a program
1
Perform steps 1 to 5 in subsection III-9.6.1.
MOVE
2
Check that the screen for the program to be moved is selected and
press soft key [MOVE].
CRSR ∼
3
Move the cursor to the start of the range to be moved and press soft
key [CRSR∼].
4
Move the cursor to the end of the range to be moved and press soft key
∼CRSR
∼BTTM
[∼CRSR] or [∼BTTM] (in the latter case, the range to the end of the
program is copied regardless of the position of the cursor).
Numeric keys
0
to
9
5
Enter the number of the new program (with only numeric keys) and
press the
INPUT
key.
EXEC
6
Press soft key [EXEC].
670
B-63524EN/01
OPERATION
9. EDITING PROGRAMS
9.6.4
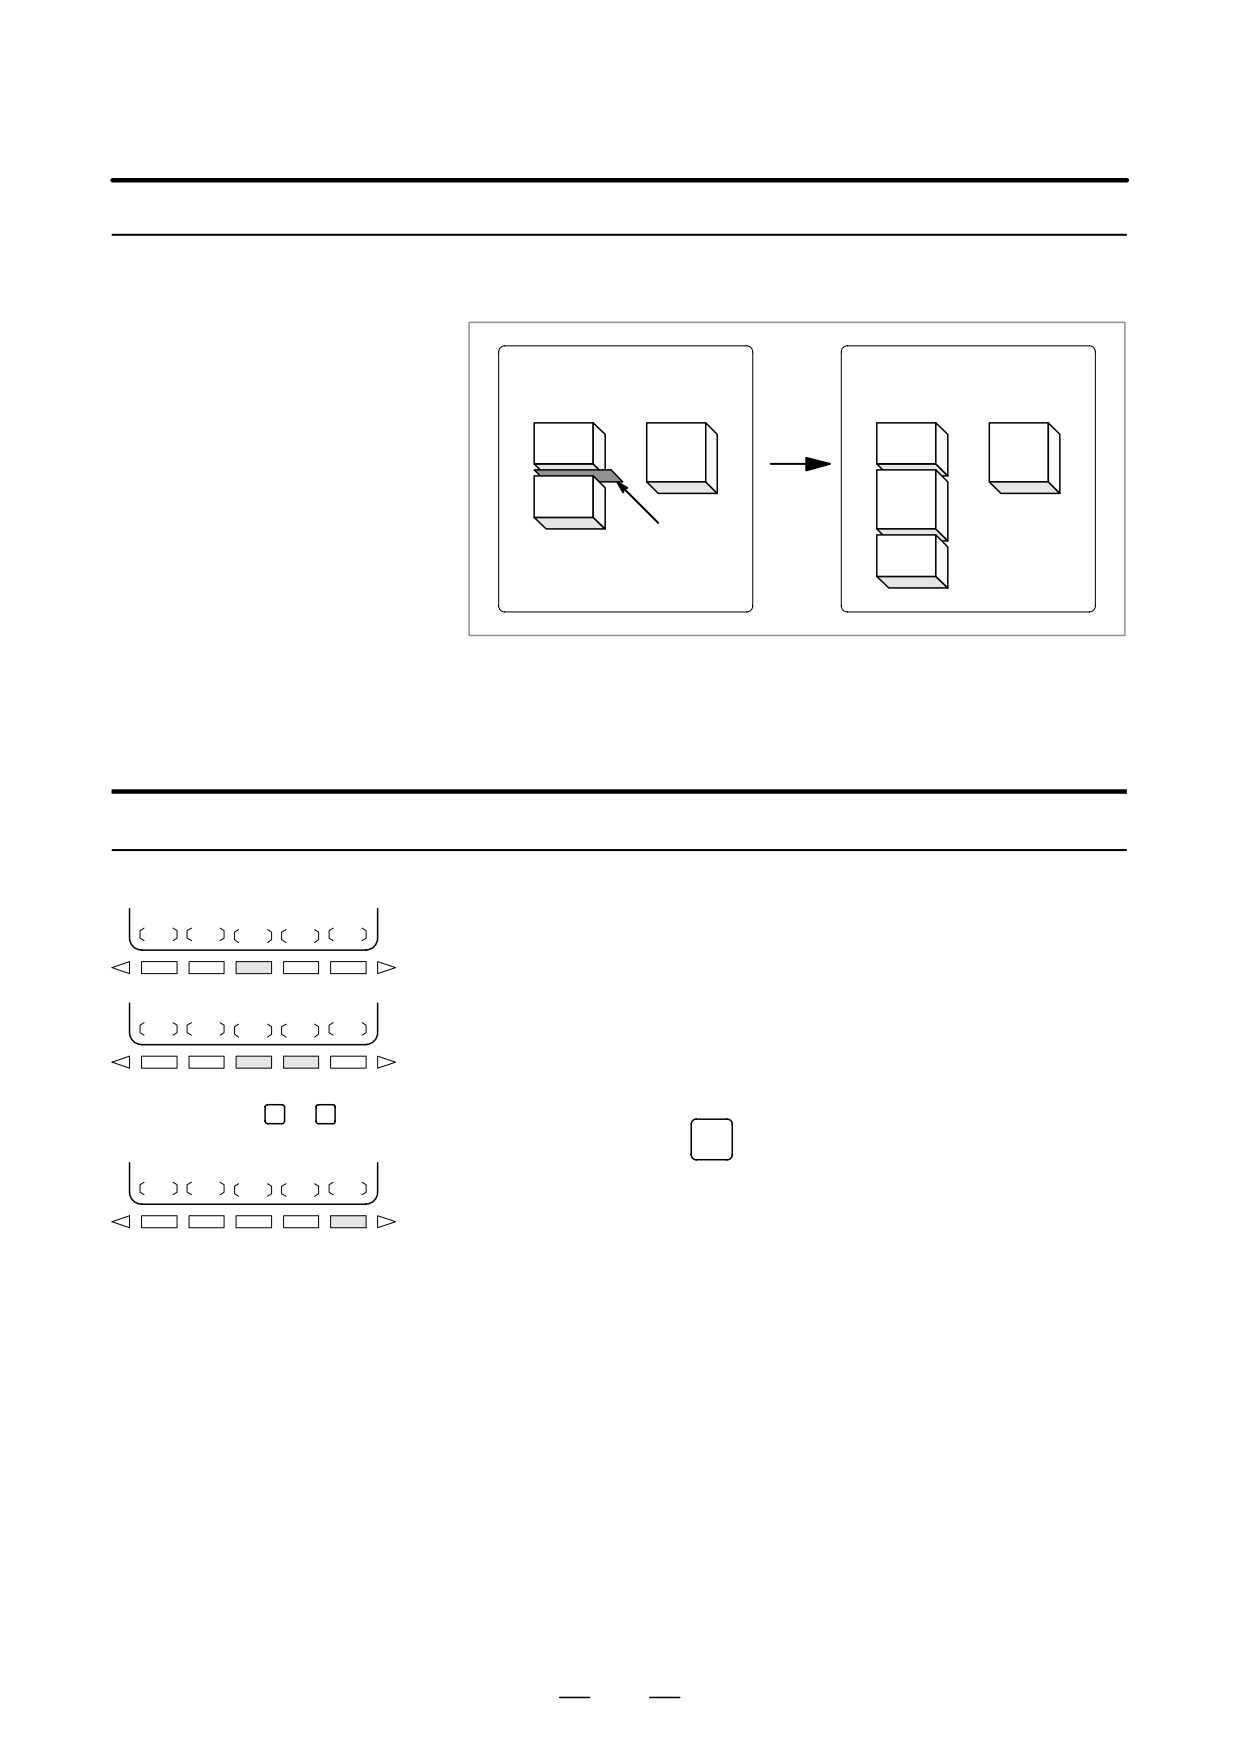
Another program can be inserted at an arbitrary position in the current
program.
Merging a Program
Before merge
After merge
Oxxxx
Oyyyy
Oxxxx
Oyyyy
A
Merge
A
B
B
C
B
Merge
location
C
Fig. 9.6.4 Merging a program at a specified location
In Fig. 9.6.4, the program with program number XXXX is merged with the
program with program number YYYY. The OYYYY program remains
unchanged after merge operation.
Procedure for merging a program
1
Perform steps 1 to 5 in subsection III-9.6.1.
MERGE
2
Check that the screen for the program to be edited is selected and press
soft key [MERGE].
3
Move the cursor to the position at which another program is to be
∼’CRSR
∼BTTM’
inserted and press soft key [∼’CRSR] or [∼BTTM’] (in the latter case,
the end of the current program is displayed).
4
Enter the number of the program to be inserted (with only numeric
Numeric keys
0
to
9
keys) and press the
INPUT
key.
EXEC
5
Press soft key [EXEC].
The program with the number specified in step 4 is inserted before the
cursor positioned in step 3.
671
9. EDITING PROGRAMS
OPERATION
B-63524EN/01
9.6.5
Supplementary
Explanation for
Copying, Moving and
Merging
Explanations
D Setting an editing range
The setting of an editing range start point with [CRSR∼] can be changed
freely until an editing range end point is set with [∼CRSR] or [∼BTTM].
If an editing range start point is set after an editing range end point, the
editing range must be reset starting with a start point.
The setting of an editing range start point and end point remains valid until
an operation is performed to invalidate the setting.
One of the following operations invalidates a setting:
D An edit operation other than address search, word search/scan, and
search for the start of a program is performed after a start point or end
point is set.
D Processing is returned to operation selection after a start point or end
point is set.
D Without specifying a
In copying program and moving program, if [EXEC] is pressed without
program number
specifying a program number after an editing range end point is set, a
program with program number O0000 is registered as a work program.
This O0000 program has the following features:
D The program can be edited in the same way as a general program. (Do
not run the program.)
D If a copy or move operation is newly performed, the previous
information is deleted at execution time, and newly set information
(all or part of the program) is re-registered. (In merge operation, the
previous information is not deleted.) However, the program, when
selected for foreground operation, cannot be re-registered in the
background.
(A BP/S140 alarm is raised.) When the program is
re-registered, a free area is produced. Delete such a free area with the
RESET
key.
D When the program becomes unnecessary, delete the program by a
normal editing operation.
D Editing when the system
When the system is waiting for a program number to be entered, no edit
waiting for a program
operation can be performed.
number to be entered
Restrictions
D Number of digits for
If a program number is specified by 5 or more digits, a format error is
program number
generated.
672

B-63524EN/01
OPERATION
9. EDITING PROGRAMS
Alarm
Alarm No.
Contents
70
Memory became insufficient while copying or inserting a pro-
gram. Copy or insertion is terminated.
101
The power was interrupted during copying, moving, or inserting
a program and memory used for editing must be cleared.
When this alarm occurs, press the key
while pressing func-
RESET
tion key
PROG
Only the program being edited is deleted.
673
9. EDITING PROGRAMS
OPERATION
B-63524EN/01
9.6.6
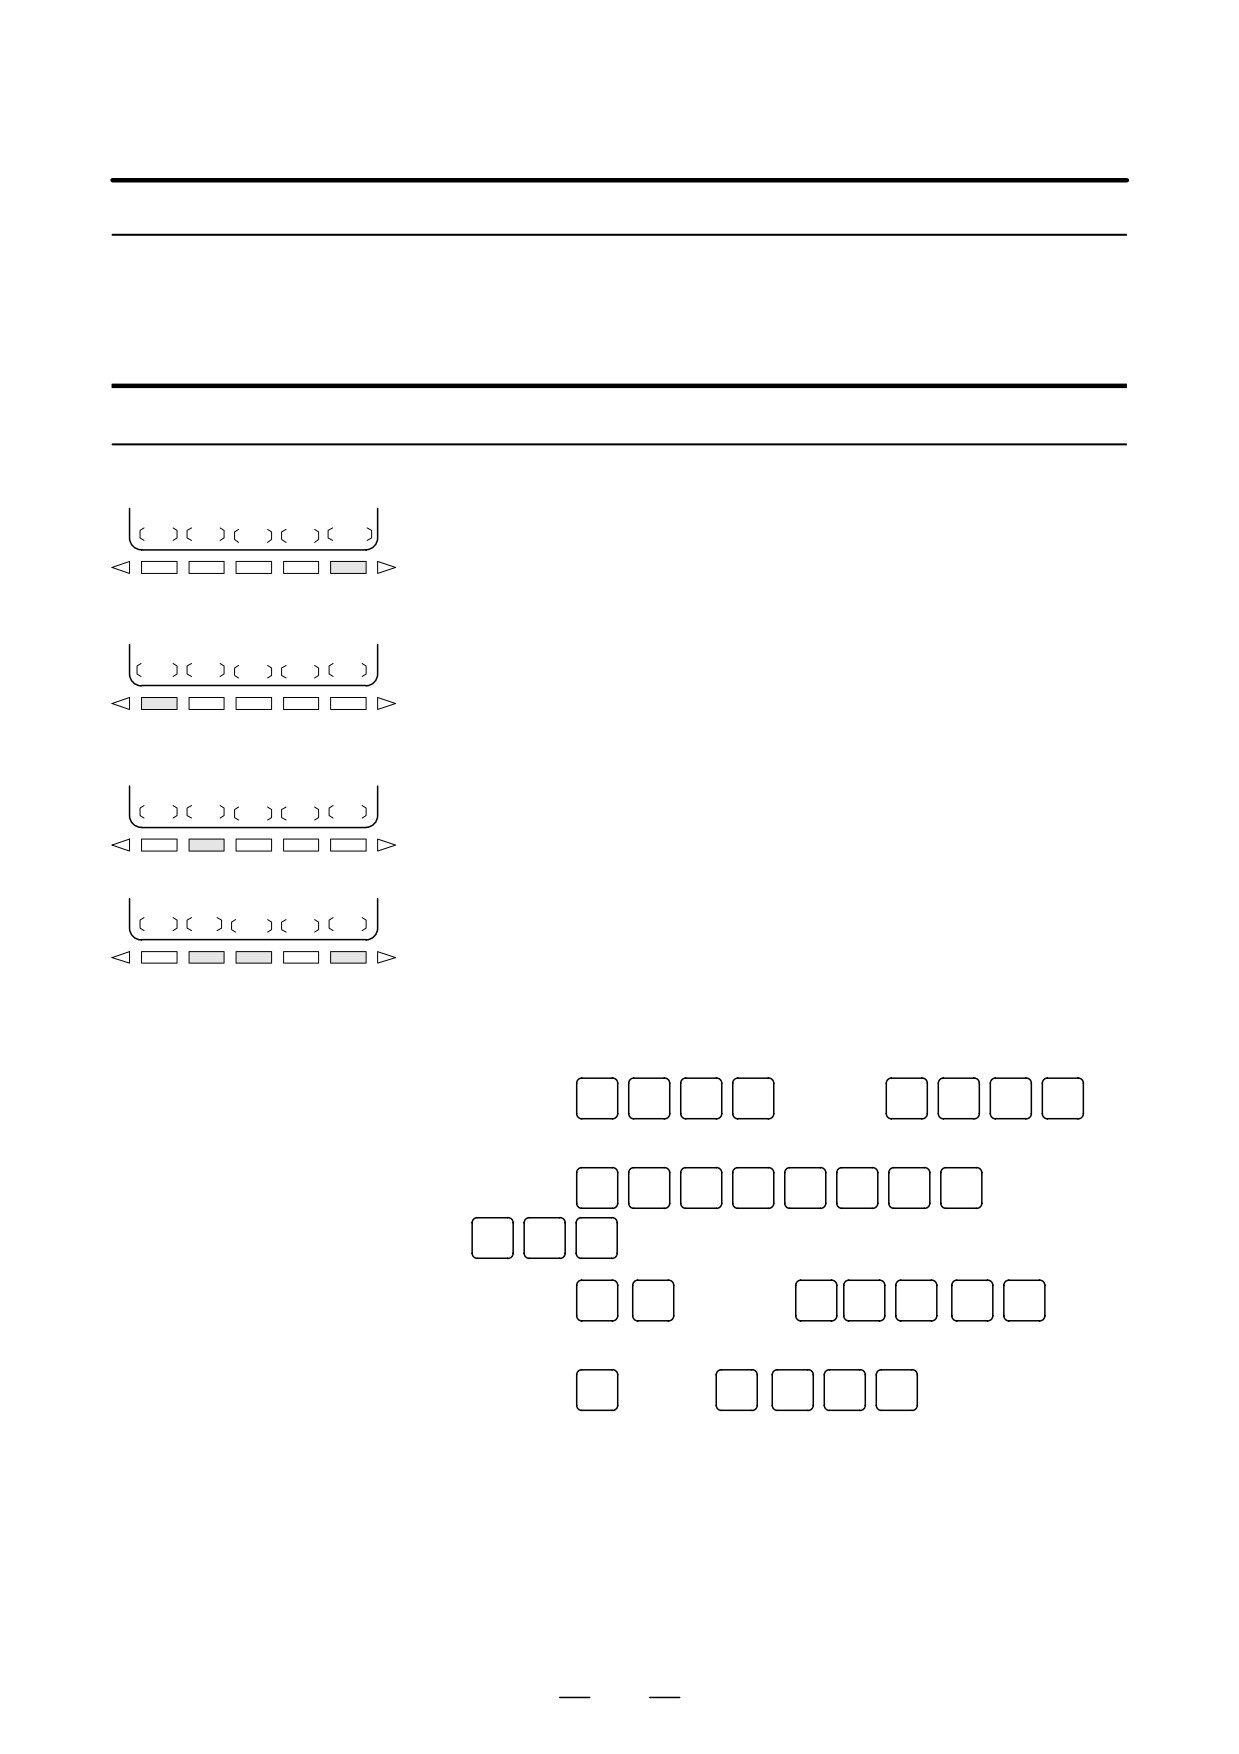
Replace one or more specified words.
Replacement can be applied to all occurrences or just one occurrence of
Replacement of Words
specified words or addresses in the program.
and Addresses
Procedure for change of words or addresses
1
Perform steps 1 to 5 in subsection 9.6.1.
CHANGE
2
Press soft key [CHANGE].
3
Enter the word or address to be replaced.
4
Press soft key [BEFORE].
BEFORE
5
Enter the new word or address.
6
Press soft key [AFTER].
AFTER
7
Press soft key [EXEC] to replace all the specified words or addresses
after the cursor.
Press soft key [1-EXEC] to search for and replace the first occurrence
of the specified word or address after the cursor.
Press soft key [SKIP] to only search for the first occurrence of the
SKIP
1-EXEC
EXEC
specified word or address after the cursor.
EXAMPLES
D Replace X100 with Z200
[CHANGE]
X
1
0
0
[BEFORE]
Z
2
0
0
[AFTER] [EXEC]
D Replace X100Z200 with
[CHANGE]
X
1
0
0
Z
2
0
0
[BEFORE]
X30
X
3
0
[AFTER] [EXEC]
D Replace IF with WHILE
[CHANGE]
I
F
[BEFORE]
W
H
I
L
E
[AFTER] [EXEC]
D Replace X with ,C10
[CHANGE]
X
[BEFOR]
,
C
1
0
[AFTER] [EXEC]
Explanation
D Replacing custom
The following custom macro words are replaceable:
macros
IF, WHILE, GOTO, END, DO, BPRNT, DPRNT, POPEN, PCLOS
The abbreviations of custom macro words can be specified.
When abbreviations are used, however, the screen displays the
abbreviations as they are key input, even after soft key [BEFORE] and
[AFTER] are pressed.
674
B-63524EN/01
OPERATION
9. EDITING PROGRAMS
Restrictions
D The number of
Up to 15 characters can be specified for words before or after replacement.
characters for
(Sixteen or more characters cannot be specified.)
replacement
D The characters for
Words before or after replacement must start with a character representing
replacement
an address. (A format error occurs.)
675
9. EDITING PROGRAMS
OPERATION
B-63524EN/01
Unlike ordinary programs, custom macro programs are modified,
9.7
inserted, or deleted based on editing units.
EDITING OF CUSTOM
Custom macro words can be entered in abbreviated form.
MACROS
Comments can be entered in a program.
Refer to the section 10.1 for the comments of a program.
Explanations
D Editing unit
When editing a custom macro already entered, the user can move the
cursor to each editing unit that starts with any of the following characters
and symbols:
(a) Address
(b) # located at the start of the left side of a substitution statement
(c) /, (,=, and ;
(d) First character of IF, WHILE, GOTO, END, DO, POPEN, BPRNT,
DPRNT and PCLOS
On the CRT screen, a blank is placed before each of the above
characters and symbols.
(Example) Head positions where the cursor is placed
N001 X-#100 ;
#1 =123 ;
N002 /2 X[12/#3] ;
N003 X-SQRT[#3/3:[#4+1]] ;
N004 X-#2 Z#1 ;
N005 #5 =1+2-#10 ;
IF[#1NE0] GOTO10 ;
WHILE[#2LE5] DO1 ;
#[200+#2] =#2:10 ;
#2 =#2+1 ;
END1 ;
D Abbreviations of custom
When a custom macro word is altered or inserted, the first two characters
macro word
or more can replace the entire word.
Namely,
WHILE → WH GOTO → GO XOR → XO AND → AN
SIN → SI
ASIN → AS
COS → CO ACOS → AC
TAN → TA
ATAN → AT
SQRT → SQ ABS → AB
BCD → BC
BIN → BI
FIX → FI
FUP → FU
ROUND → RO
END → EN
POPEN → PO
BPRNT → BP
DPRNT → DP
PCLOS→PC
EXP → EX
THEN → TH
(Example) Keying in
WH [AB [#2 ] LE RO [#3 ] ]
has the same effect as
WHILE [ABS [#2 ] LE ROUND [#3 ] ]
The program is also displayed in this way.
676

B-63524EN/01
OPERATION
9. EDITING PROGRAMS
Editing a program while executing another program is called background
9.8
editing. The method of editing is the same as for ordinary editing
BACKGROUND
(foreground editing).
EDITING
A program edited in the background should be registered in foreground
program memory by performing the following operation:
During background editing, all programs cannot be deleted at once.
Procedure for background editing
1
Enter EDIT or MEMORY mode.
Memory mode is allowed even while the program is being executed.
2
Press function keym
PROG
3
Press soft key [(OPRT)], then press soft key [BG-EDT].
The background editing screen is displayed
(PROGRAM
(BG-EDIT) is displayed at the top left of the screen).
4
Edit a program on the background editing screen in the same way as
for ordinary program editing.
5
After editing is completed, press soft key [(OPRT)], then press soft
key [BG-EDT]. The edited program is registered in foreground
program memory.
Explanation
D Alarms during
Alarms that may occur during background editing do not affect
background editing
foreground operation. Conversely, alarms that may occur during
foreground operation do not affect background editing. In background
editing, if an attempt is made to edit a program selected for foreground
operation, a BP/S alarm (No. 140) is raised. On the other hand, if an
attempt is made to select a program subjected to background editing
during foreground operation (by means of subprogram calling or program
number search operation using an external signal), a P/S alarm (Nos. 059,
078) is raised in foreground operation. As with foreground program
editing, P/S alarms occur in background editing. However, to distinguish
these alarms from foreground alarms, BP/S is displayed in the data input
line on the background editing screen.
677

9. EDITING PROGRAMS
OPERATION
B-63524EN/01
The password function (bit 4 (NE9) of parameter No. 3202) can be locked
9.9
using parameter No.
3210
(PASSWD) and parameter No.
3211
PASSWORD
(KEYWD) to protect program Nos. O9000 to O9999. In the locked state,
FUNCTION
parameter NE9 cannot be set to 0. In this state, program Nos. O9000 to
O9999 cannot be modified unless the correct keyword is set.
A locked state means that the value set in the parameter PASSWD differs
from the value set in the parameter KEYWD. The values set in these
parameters are not displayed. The locked state is released when the value
already set in the parameter PASSWD is also set in parameter KEYWD.
When 0 is displayed in parameter PASSWD, parameter PASSWD is not
set.
Procedure for locking and unlocking
Locking
1
Set the MDI mode.
2
Enable parameter writing. At this time, P/S alarm No. 100 is issued
on the CNC.
3
Set parameter No. 3210 (PASSWD). At this time, the locked state is
set.
4
Disable parameter writing.
5
Press the
RESET
key to release the alarm state.
Unlocking
1
Set the MDI mode.
2
Enable parameter writing. At this time, P/S alarm No. 100 is issued
on the CNC.
3
In parameter No. 3211 (KEYWD), set the same value as set in
parameter No. 3210 (PASSWD) for locking. At this time, the locked
state is released.
4
Set bit 4 (NE9) of parameter No. 3202 to 0.
5
Disable parameter writing.
6
Press the
RESET
key to release the alarm state.
7
Subprograms from program Nos. 9000 to 9999 can now be edited.
678
B-63524EN/01
OPERATION
9. EDITING PROGRAMS
Explanations
D Setting parameter
The locked state is set when a value is set in the parameter PASSWD.
PASSWD
However, note that parameter PASSWD can be set only when the locked
state is not set (when PASSWD = 0, or PASSWD = KEYWD). If an
attempt is made to set parameter PASSWD in other cases, a warning is
given to indicate that writing is disabled. When the locked state is set
(when PASSWD = 0 and PASSWD = KEYWD), parameter NE9 is
automatically set to 1. If an attempt is made to set NE9 to 0, a warning
is given to indicate that writing is disabled.
D Changing parameter
Parameter PASSWD can be changed when the locked state is released
PASSWD
(when PASSWD = 0, or PASSWD = KEYWD). After step 3 in the
procedure for unlocking, a new value can be set in the parameter
PASSWD. From that time on, this new value must be set in parameter
KEYWD to release the locked state.
D Setting 0 in parameter
When 0 is set in the parameter PASSWD, the number 0 is displayed, and
PASSWD
the password function is disabled. In other words, the password function
can be disabled by either not setting parameter PASSWD at all, or by
setting
0 in parameter PASSWD after step 3 of the procedure for
unlocking. To ensure that the locked state is not entered, care must be
taken not to set a value other than 0 in parameter PASSWD.
D Re-locking
After the locked state has been released, it can be set again by setting a
different value in parameter PASSWD, or by turning the power to the NC
off then on again to reset parameter KEYWD.
CAUTION
Once the locked state is set, parameter NE9 cannot be set
to 0 and parameter PASSWD cannot be changed until the
locked state is released or the memory all-clear operation
is performed. Special care must be taken in setting
parameter PASSWD.
679
9. EDITING PROGRAMS
OPERATION
B-63524EN/01
For a 2-path control CNC, setting bit 0 (PCP) of parameter No. 3206 to
9.10
1 enables the copying of a specified machining program from one path to
COPYING A
another. Single-program copy and specified-range copy are supported.
PROGRAM
BETWEEN TWO
PATHS
Procedure for copying a program between two paths
Procedure
1
Select EDIT mode for both paths.
2
Press function key
PROG
3
Press soft key [(OPRT)].
4
Press soft key [P COPY]
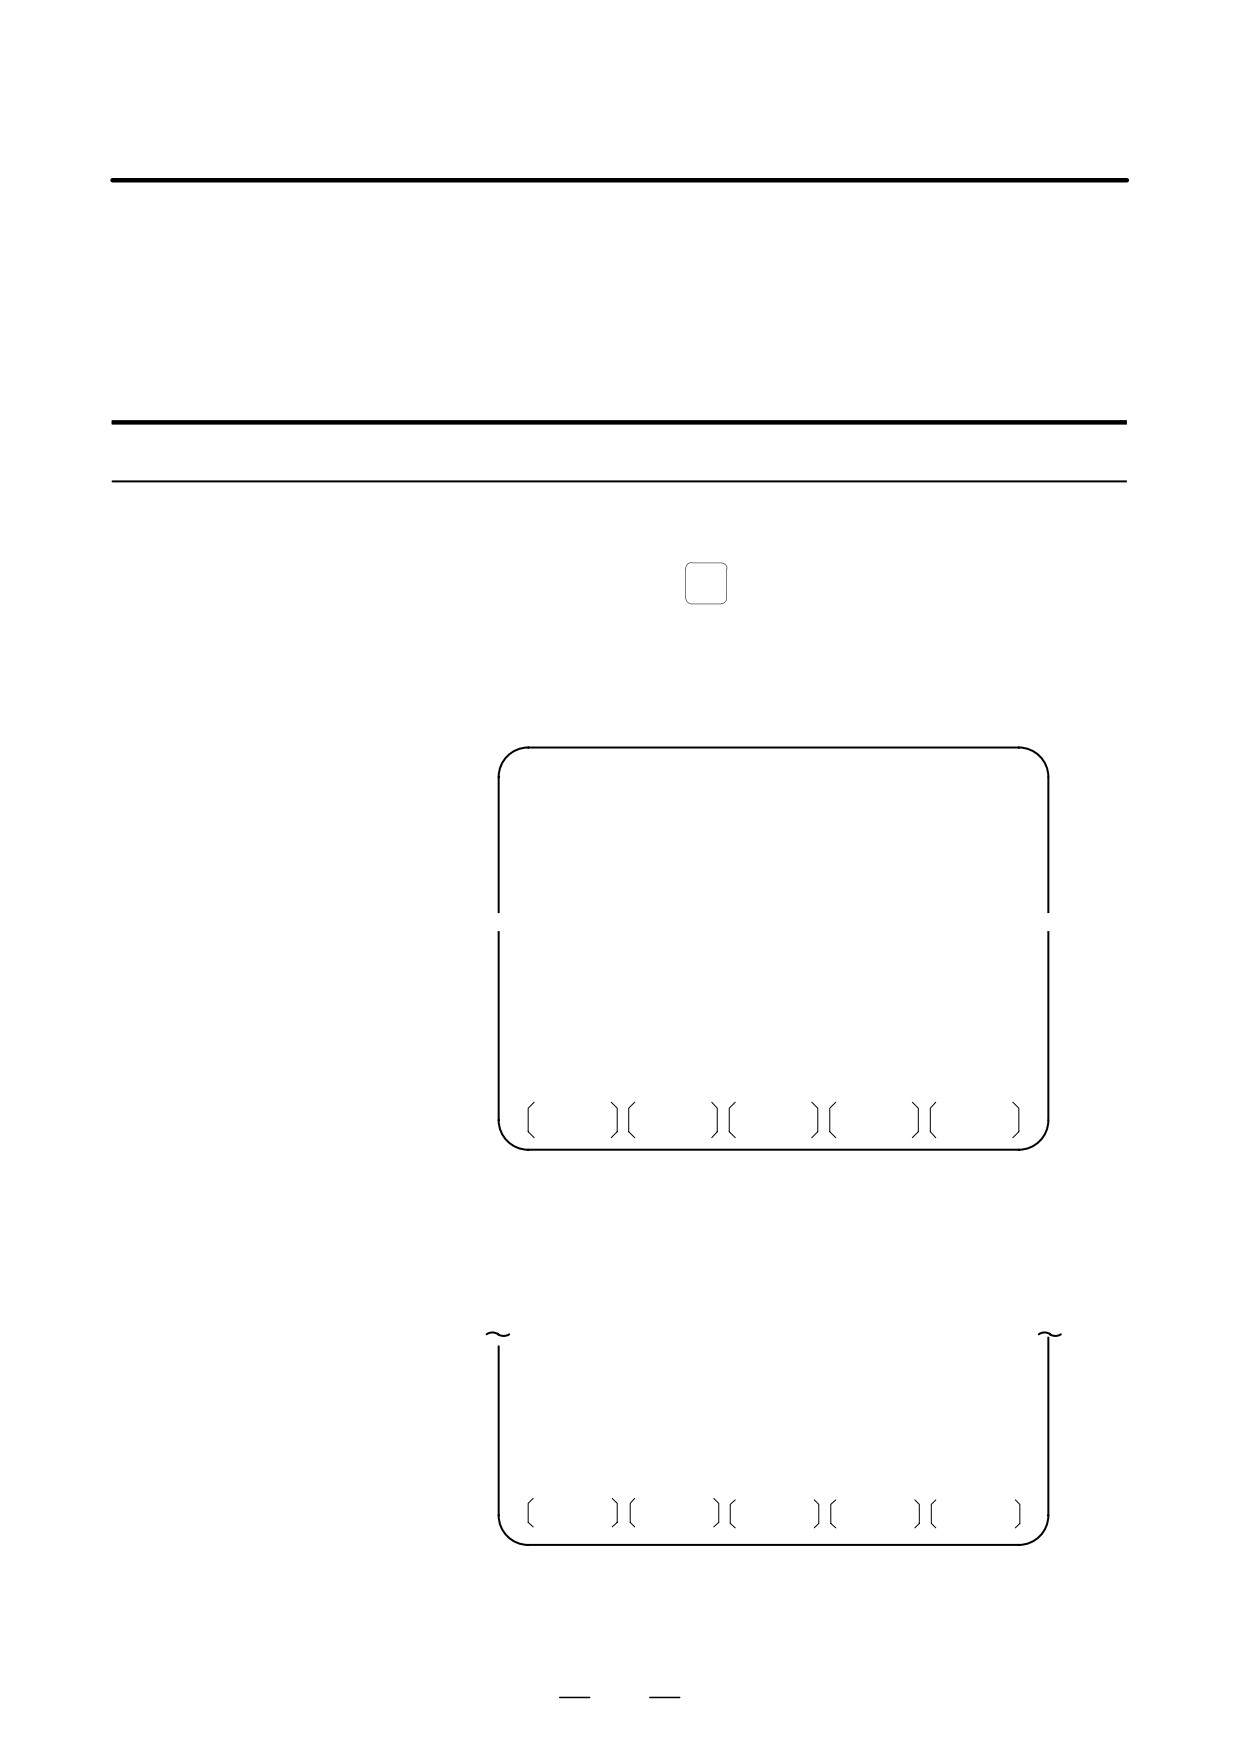
The following soft keys appear:
PROGRAM
O1357
N00130
O1357
(HEAD-1 MAIN PROGRAM) ;
N010
G90 G00 X200.0 Z220.0 ;
N020
T0101;
N030
S30000 M03 ;
N040
G40 G00 X40.0 Z180.0 ;
X
X
N080
X100.0 Z80.0 ;
N090
Z60.0 ;
N100
X140.0 Z40.0 ;
>_
EDIT
* * * *
* * *
* * *
14 : 25 : 36 HEAD1
PATH1
PATH2
CAN
5
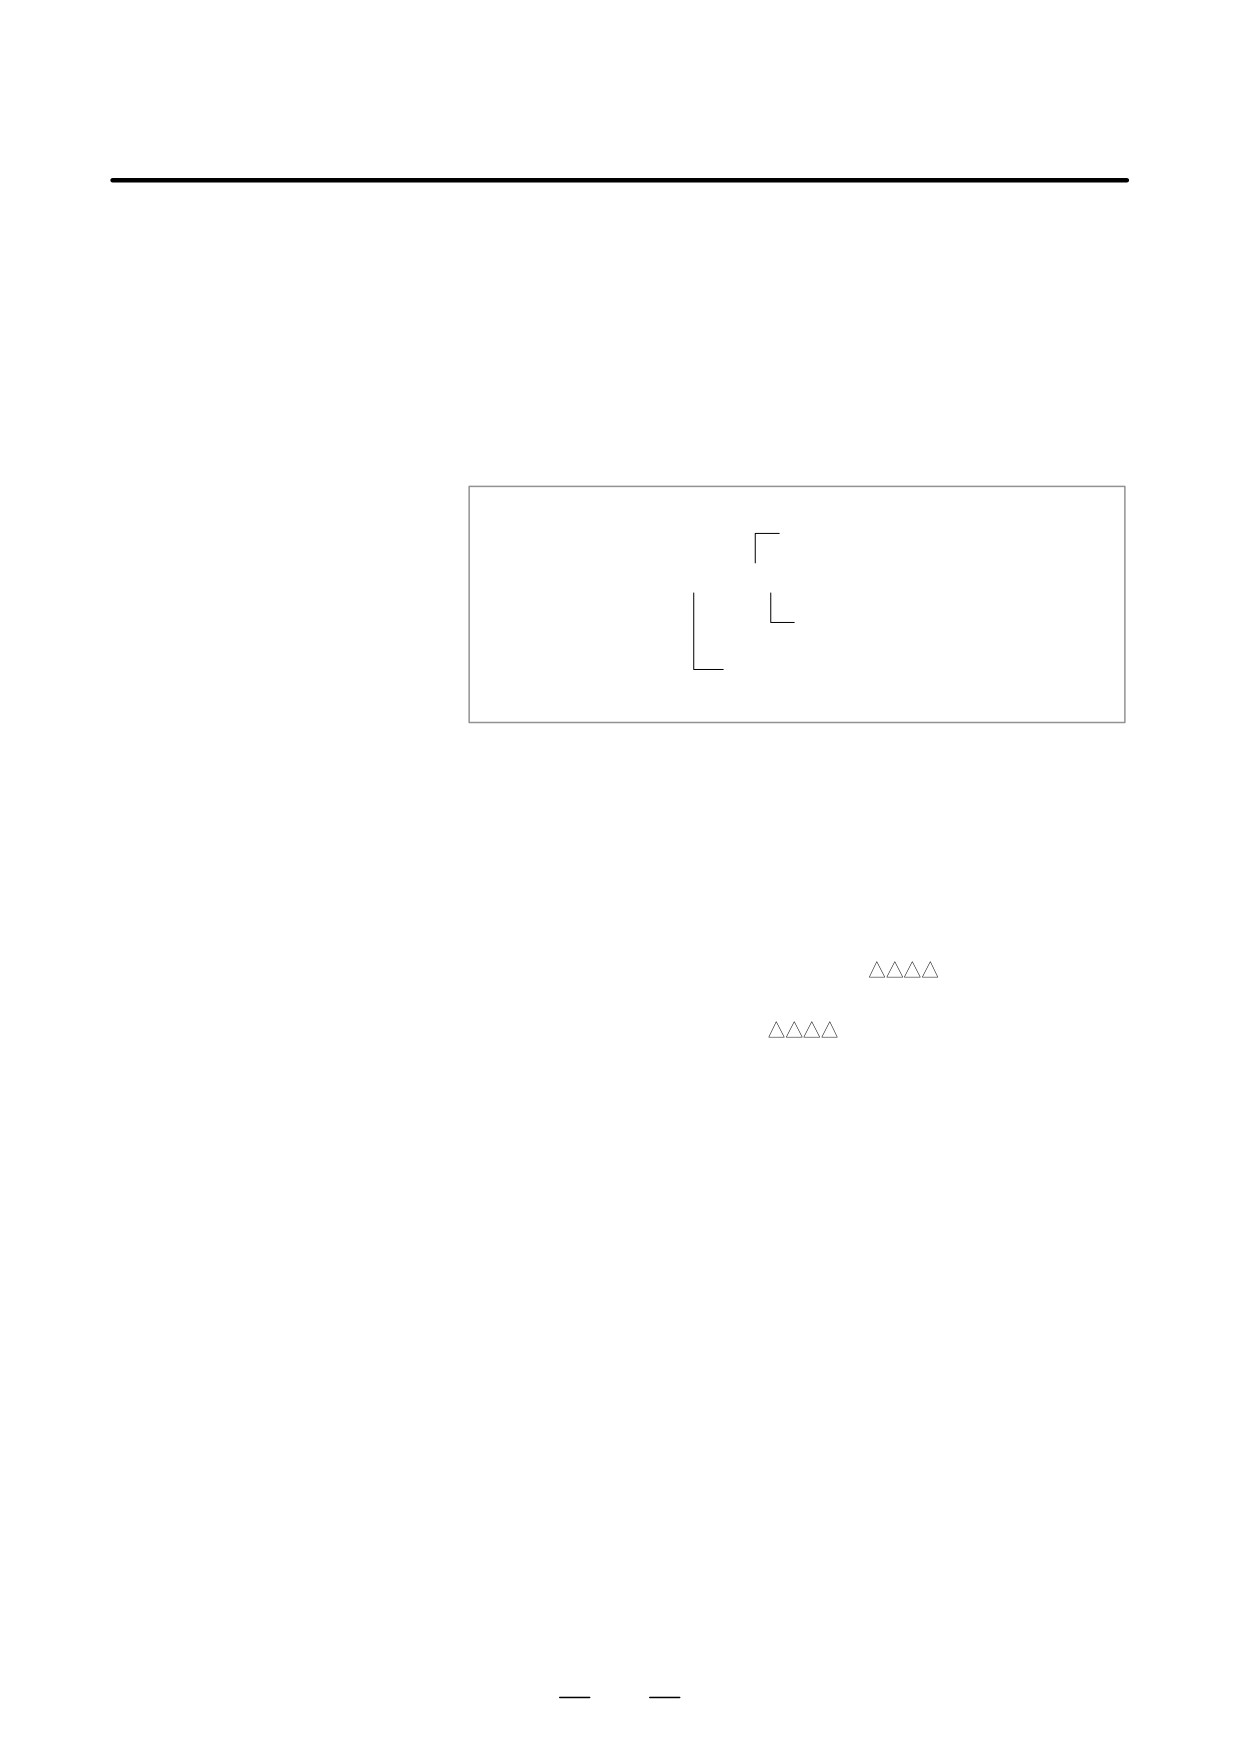
Press soft key [PATH1] to [PATH2] to select the path from which a
program is to be copied.
(Example) Pressing soft key [PATH1] causes an operation guidance,
shown below, to appear on the screen.
SOURCE : PATH1 =1357
DEST : PATH2
=
REPLACE
: OFF
>_
EDIT
* * * *
* * *
* * *
14:25:36
HEAD1
SOURCE
DEST
REPLACE
CAN
EXEC
First, the program currently selected for the copy source path is
displayed as the program to be copied. If no program has been selected
for the copy source path, “0000” is displayed.
680
B-63524EN/01
OPERATION
9. EDITING PROGRAMS
6
Select one or more programs to be copied.
D Single-program copy
(1) Enter the number of the program to be copied. ³ “
”
(2) Press soft key [SOURCE] to set the number.
³ SOURCE:PATH?=“
”
D Specified-range copy
(1) Enter the range of the programs to be copied, as a number.
³ “
-jjjj”
Range symbol
[Entry format]
-jjjj
Range end (largest) number
Range start (smallest) number
(2) Press soft key [SOURCE] to set the number.
³ “
-jjjj”
D To cancel the selection of the program(s) to be copied, press
[SOURCE] again
7
Select the copy destination number.
The selected program(s) can be copied by assigning numbers other
than their original numbers.
(1) Type the destination number.
³ “
”
(2) Press soft key [DEST] to set the number.
³ DEST:PATH?=“
”
D Pressing [DEST] without entering any number causes the
original program number(s) to be used as is.
D To cancel the set number, press [DEST] again.
D For specified-range copy, the set number is assigned to the first
program of the specified range. The subsequent programs are
assigned numbers obtained by repeatedly incrementing the set
number by one.
8
Specify replacement.
If any number to be assigned to a program to be copied is already
being used for a program registered for the destination path, specify
whether the existing program is to be replaced with that to be copied.
If replacement is currently disabled, pressing soft key [REPLACE]
enables replacement. Pressing [REPLACE] repeatedly toggles
between replacement being enabled and disabled.
“REPLACE=ON” indicates that replacement is enabled.
“REPLACE=OFF” indicates that replacement is disabled.
9
Press soft key [EXEC] to start copying.
681
9. EDITING PROGRAMS
OPERATION
B-63524EN/01
Explanations
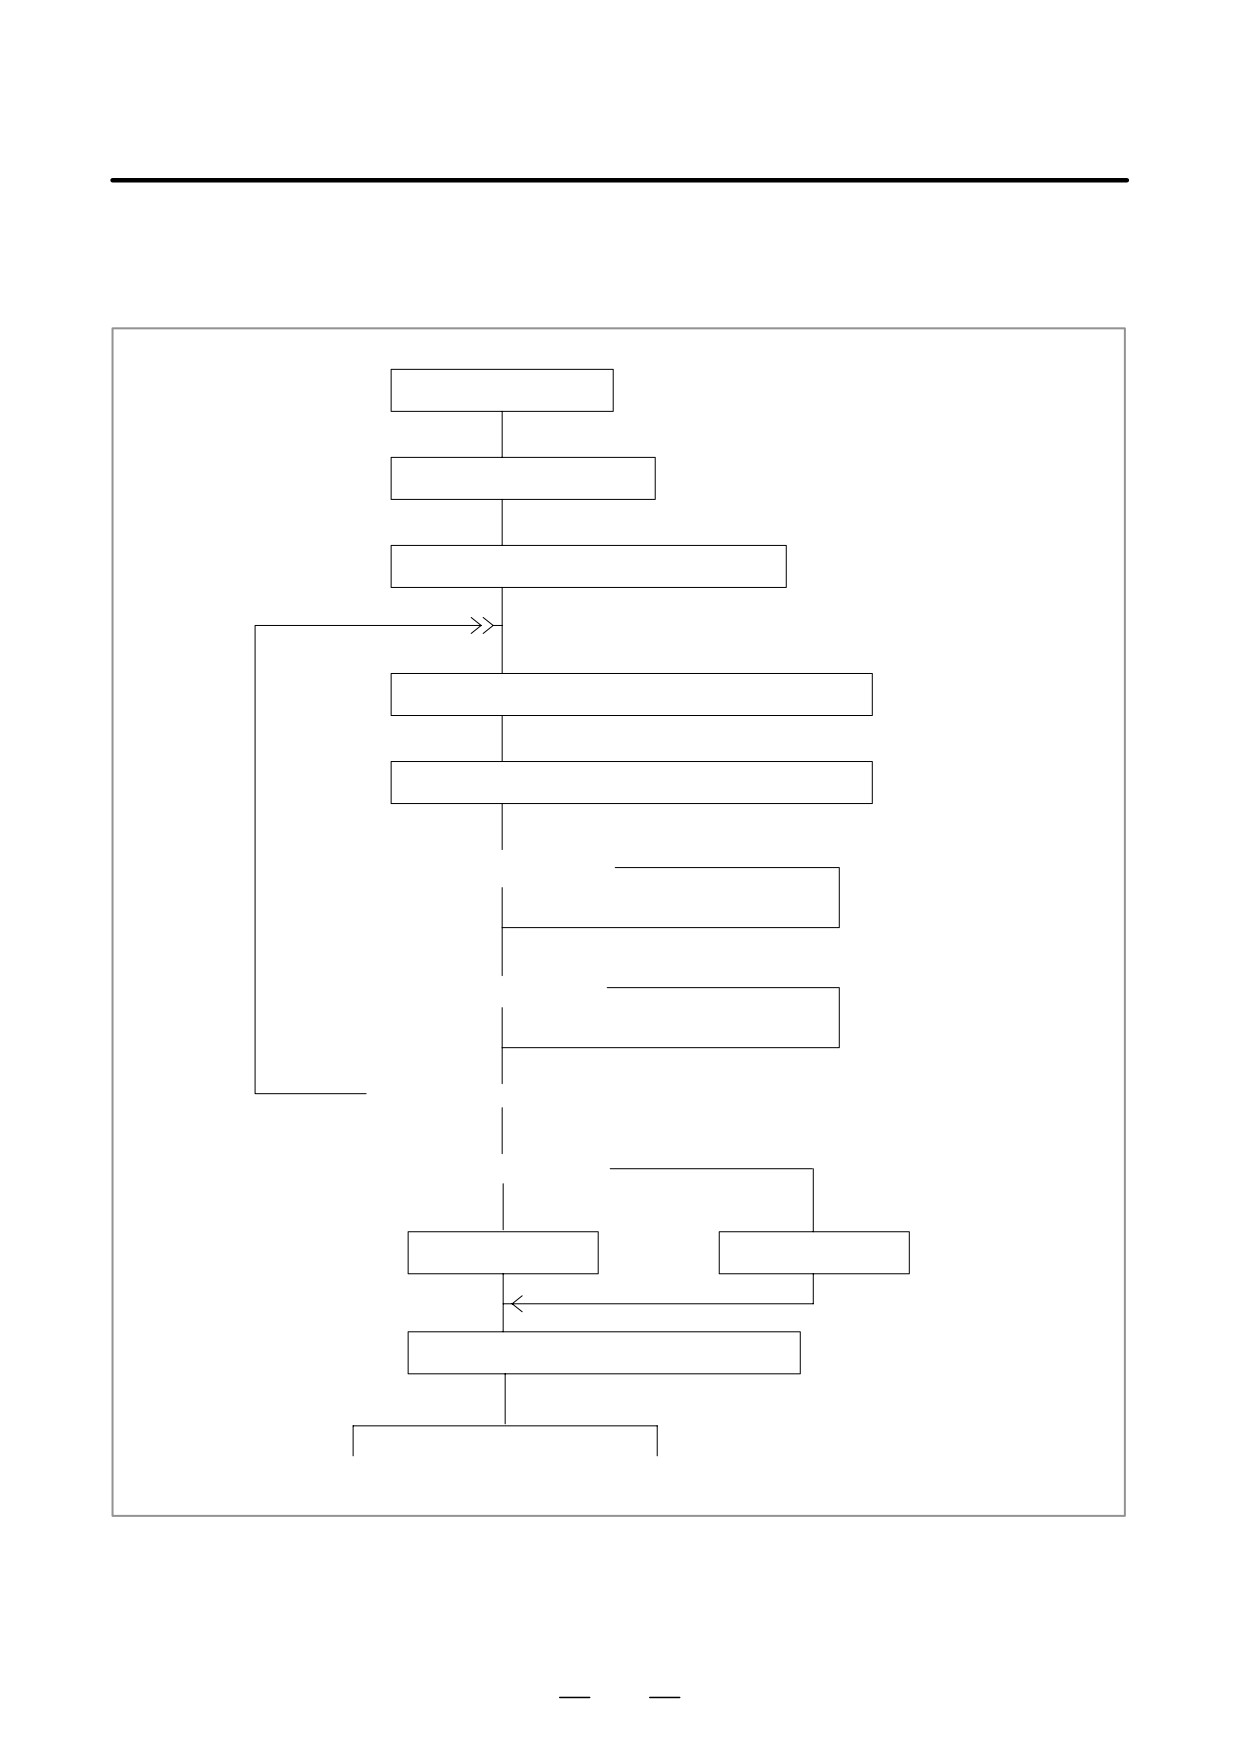
D Operation flow
Program screen
Edit mode/BG edit mode
Set the data protection key to ON (enable editing)
Soft key for starting setting for copy between paths [P COPY]
Copy source selection soft key [PATH1] or [PATH2]
Not set (selected O number)
<“SOURCE” set?>
Set
Not set (selected O number)
<“DEST” set?>
Set
Yes
<Operation cancel soft key [CAN]?>
No
<Replacement setting?>
To be replaced
Not to be replaced
REPLACE=ON
REPLACE=OFF
Start copying: soft key [EXEC]
Copy completed
Alarm termination
D Background editing
Copying can also be performed during background editing.
682
B-63524EN/01
OPERATION
9. EDITING PROGRAMS
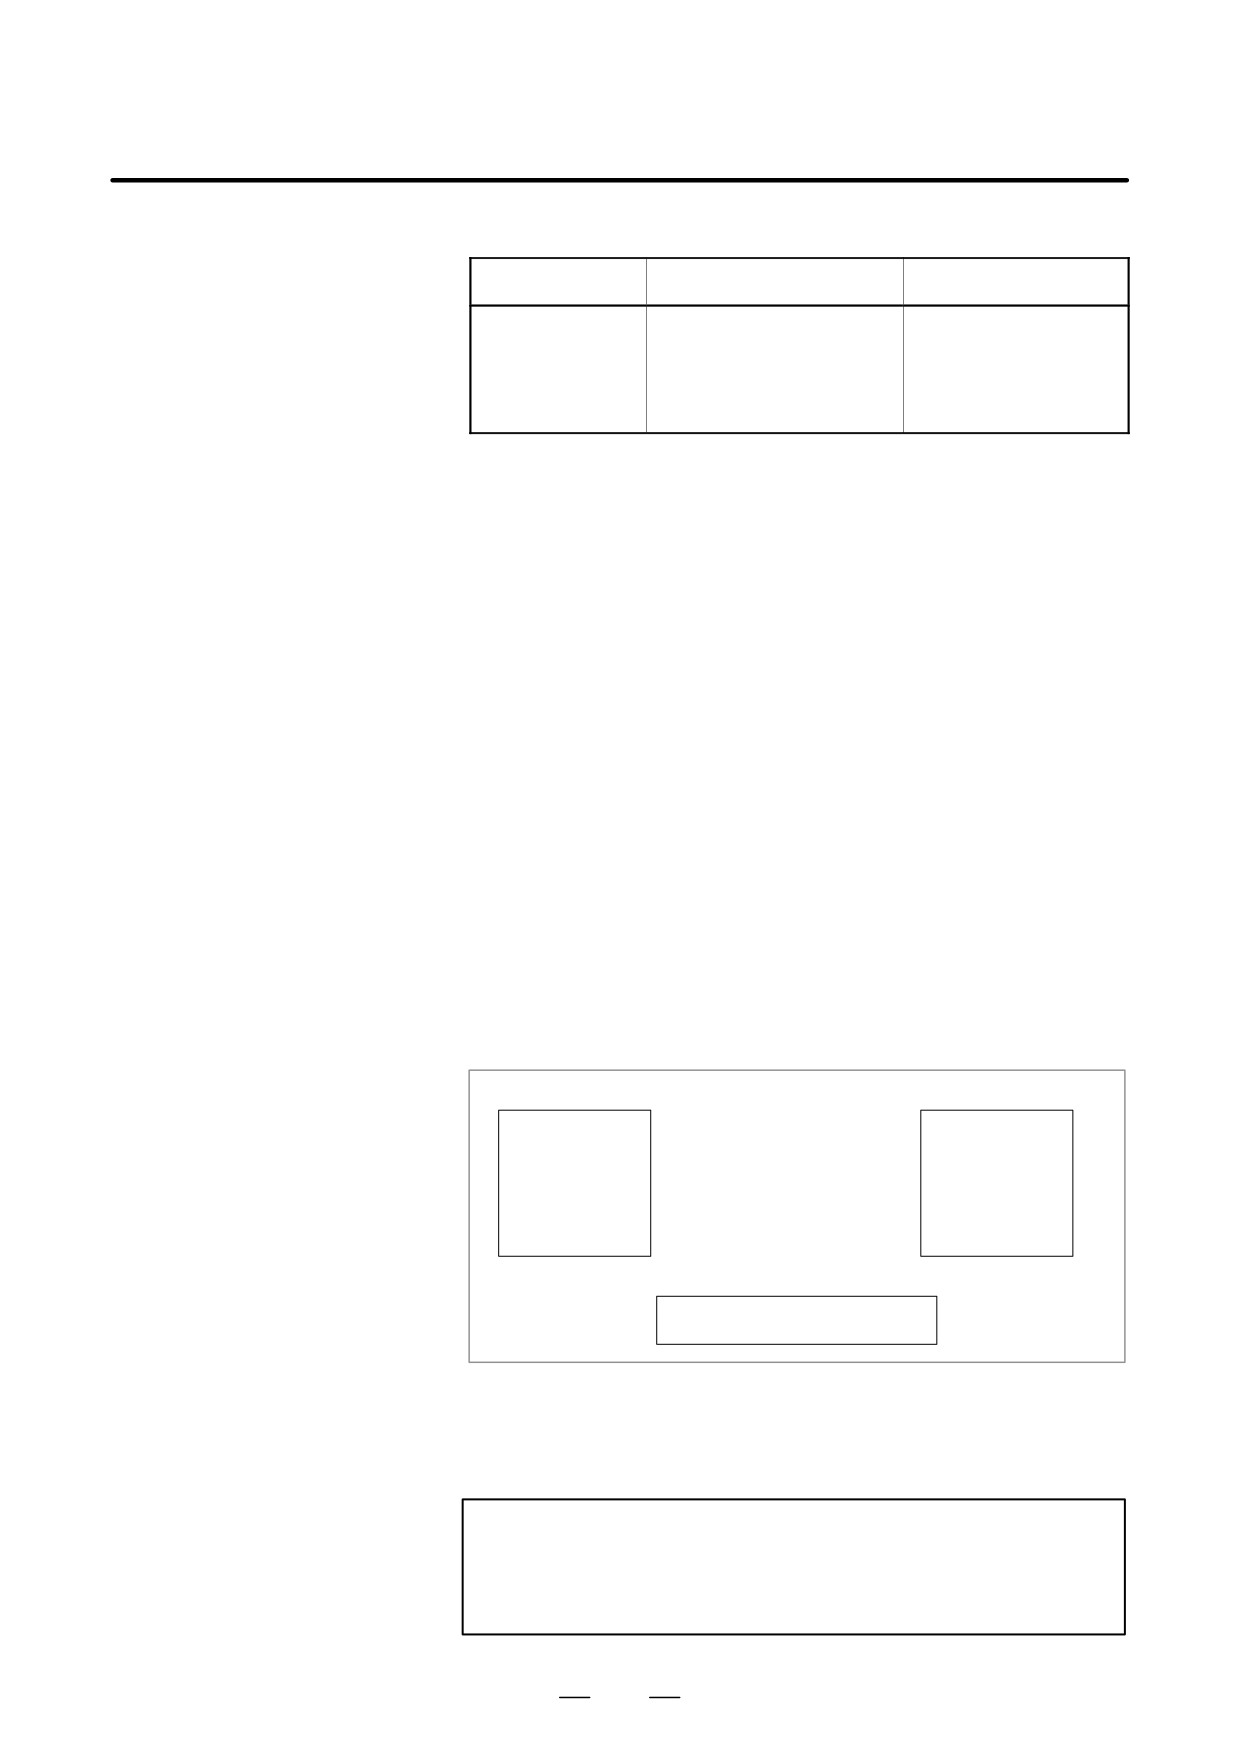
D Major related alarms
Major related alarm numbers
Alarm number
Description
Relevant path
P/S 70,70 BP/S0
Insufficient free memory
Copy destination
P/S 71,71 BP/S
Specified program not found
Copy source
P/S 72,72 BPS
Too many programs
Copy destination
P/S 73,73 BP/S
Duplicate registration
Copy destination
P/S 75,75 BP/S
Protected program number
Copy source/destination
D BP/S indicates an alarm output during background editing.
D Each alarm is issued to the path for which the operation causing the
alarm is being performed.
Restrictions
D Conditions under which
Copying is not performed under any of the following conditions:
copying cannot be
D The data protection key for the copy destination path is set to OFF.
performed
D The specified O number is protected.
D The specified O number is already being used for a program registered
for the copy destination path (if replacement is disabled).
D The part program storage for the copy destination path does not have
sufficient free space.
D The copy source or destination path is placed in the alarm state.
During background editing, however, only P/S alarms 000 and 101
disable copying.
During specified-range copy, if the part program storage for the copy
D Specified-range copy
destination path becomes insufficient, if the maximum number of
programs which can be registered for the destination path is exceeded, if
a specified program number has already been registered for the
destination path, or if a specified program number is protected, an alarm
is issued immediately and copying is stopped.
Copy destination
Copy source
O0001
²
O0001
O0020
²
O0020
O0200
²
O0200
Insufficient storage, duplicate
O1100
registration, protected number,
O2000
or maximum number of pro-
grams exceeded
↓
Alarm issued, copying stopped
D Replacement
Even if replacement is enabled, the program is not replaced if the part
program storage for the copy destination path does not have sufficient free
space. During background editing, copying by replacing the currently
running program is not allowed.
CAUTION
Once the copying of a program between paths has been
started, it cannot be canceled. Carefully confirm all the
settings before starting copying.
683
10. CREATING PROGRAMS
OPERATION
B-63524EN/01
CREATING PROGRAMS
10
Programs can be created using any of the following methods:
⋅ MDI keyboard
⋅ PROGRAMMING IN TEACH IN MODE
⋅ CONVERSATIONAL PROGRAMMING INPUT WITH GRAPHIC
FUNCTION
⋅ CONVERSATIONAL AUTOMATIC PROGRAMMING FUNCTION
⋅ AUTOMATIC PROGRAM PREPARATION DEVICE (FANUC
SYSTEM P)
This chapter describes creating programs using the MDI panel, TEACH
IN mode, and conversational programming with graphic function. This
chapter also describes the automatic insertion of sequence numbers.
684

B-63524EN/01
OPERATION
10. CREATING PROGRAMS
Programs can be created in the EDIT mode using the program editing
10.1
functions described in Chapter III-9.
CREATING
PROGRAMS USING
THE MDI PANEL
Procedure for Creating Programs Using the MDI Panel
Procedure
1
Enter the EDIT mode.
2
Press the
PROG
key.
3
Press address key
O
and enter the program number.
4
Press the
INSERT
key.
5
Create a program using the program editing functions described in
Chapter 9.
Explanation
D Comments in a program
Comments can be written in a program using the control in/out codes.
Example)O0001 (FANUC SERIES 16) ;
M08
(COOLANT ON) ;
D When the
INSERT
key is pressed after the control-out code
“(”,
comments, and control-in code “)” have been typed, the typed
comments are registered.
D When the
INSERT
key is pressed midway through comments, to enter the
rest of comments later, the data typed before the
INSERT
key is pressed
may not be correctly registered (not entered, modified, or lost) because
the data is subject to an entry check which is performed in normal
editing.
Note the following to enter a comment:
D Control-in code “)” cannot be registered by itself.
D Comments entered after the
INSERT
key is pressed must not begin with
a number, space, or address O.
D If an abbreviation for a macro is entered, the abbreviation is converted
into a macro word and registered (see Section 9.7).
D Address O and subsequent numbers, or a space can be entered but are
omitted when registered.
685

10. CREATING PROGRAMS
OPERATION
B-63524EN/01
Sequence numbers can be automatically inserted in each block when a
10.2
program is created using the MDI keys in the EDIT mode.
AUTOMATIC
Set the increment for sequence numbers in parameter 3216.
INSERTION OF
SEQUENCE
NUMBERS
Procedure for automatic insertion of sequence numbers
Procedure
1
Set 1 for SEQUENCE NO. (see subsection III-11.4.3).
2
Enter the EDIT mode.
3
Press
PROG
to display the program screen.
4
Search for or register the number of a program to be edited and move
the cursor to the EOB (;) of the block after which automatic insertion
of sequence numbers is started.
When a program number is registered and an EOB (;) is entered with
the
INSERT
key, sequence numbers are automatically inserted starting
with 0. Change the initial value, if required, according to step 10, then
skip to step 7.
5
Press address key
N
and enter the initial value of N.
6
Press
INSERT
key.
7
Enter each word of a block.
8
Press
EOB
key.
686
B-63524EN/01
OPERATION
10. CREATING PROGRAMS
9
Press
INSERT
. The EOB is registered in memory and sequence numbers
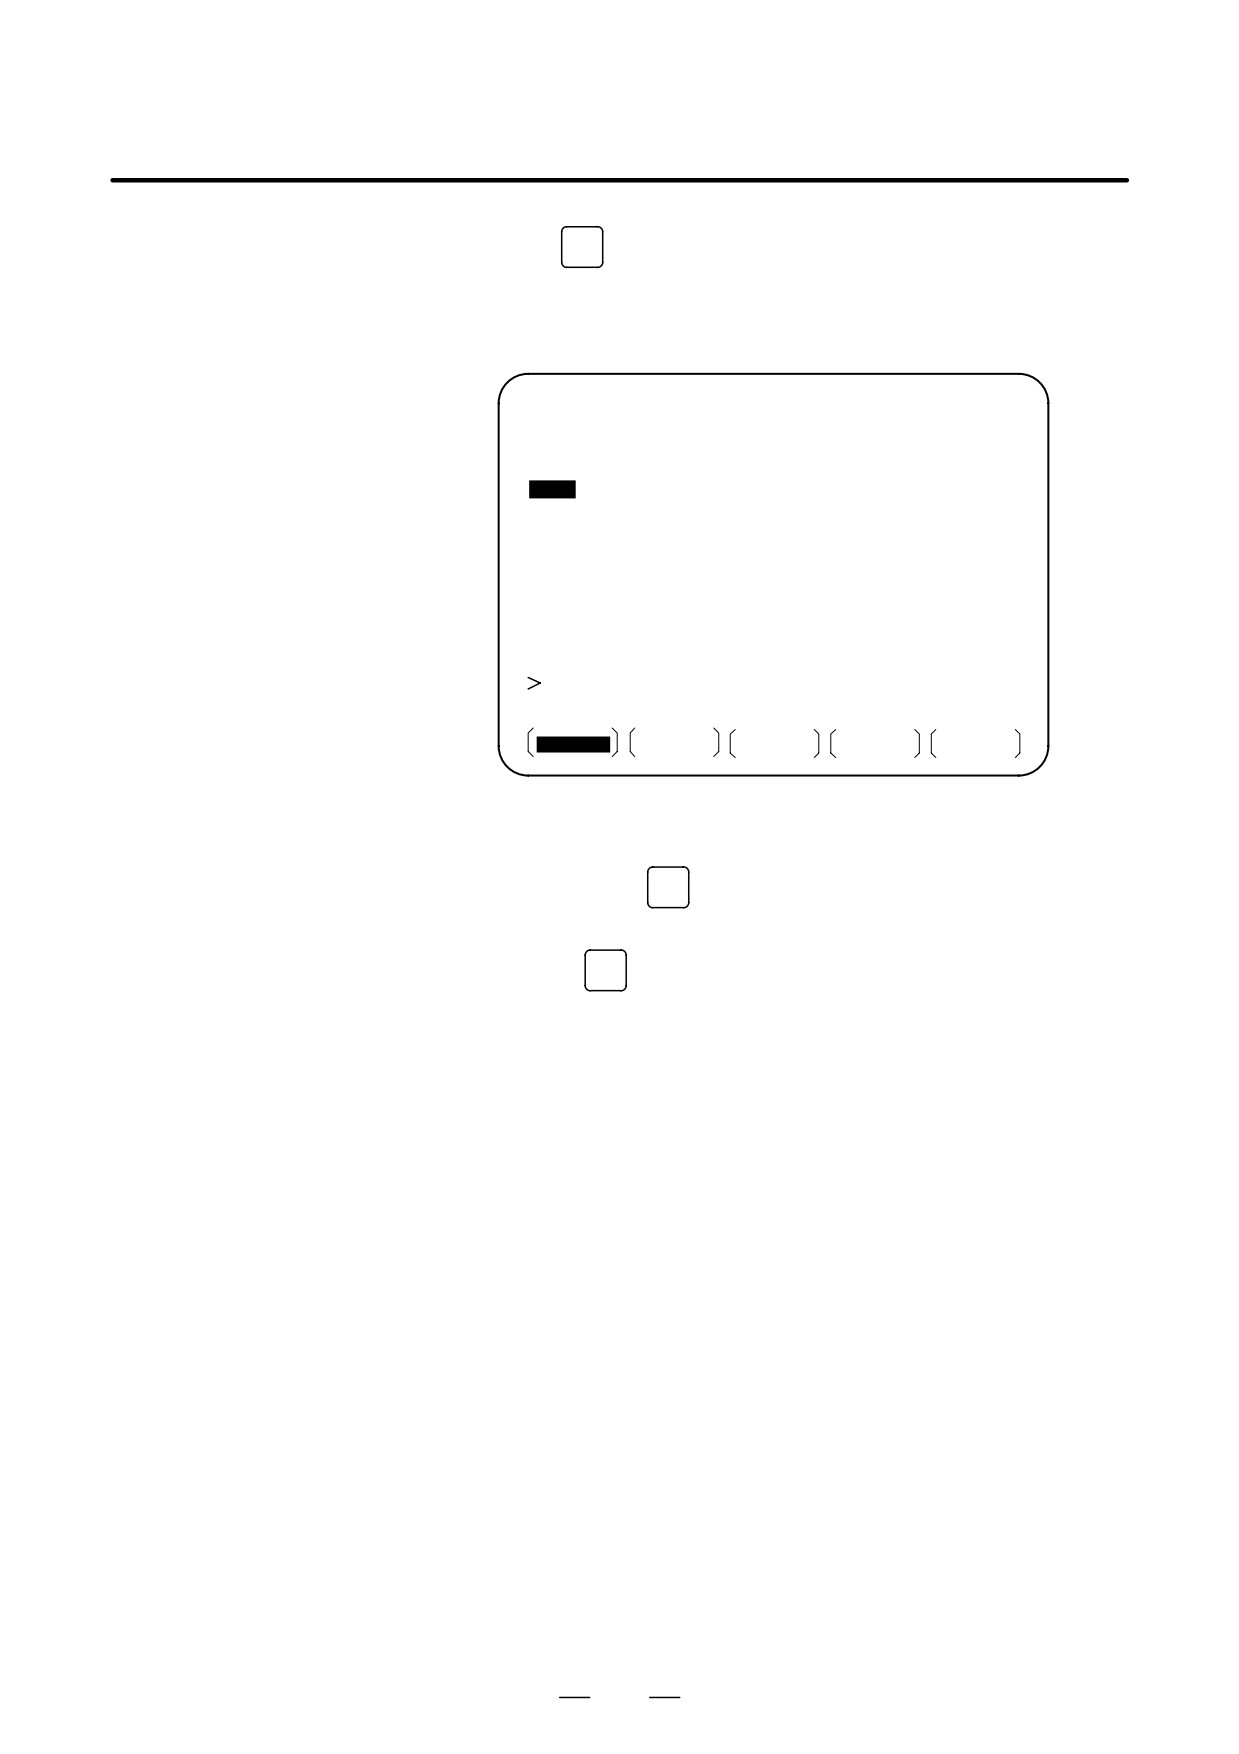
are automatically inserted. For example, if the initial value of N is 10
and the parameter for the increment is set to 2, N12 inserted and
displayed below the line where a new block is specified.
PROGRAM
O0040 N00012
O0040 ;
N10 G92 X0 Y0 Z0 ;
N12
%
_
EDIT
* * * *
* * *
* * *
13 : 18 : 08
PRGRM
LIB
C.A.P
(OPRT)
10
D In the example above, if N12 is not necessary in the next block,
pressing the
DELETE
key after N12 is displayed deletes N12.
D To insert N100 in the next block instead of N12, enter N100 and
press
ALTER
after N12 is displayed. N100 is registered and initial
value is changed to 100.
687

10. CREATING PROGRAMS
OPERATION
B-63524EN/01
When the playback option is selected, the TEACH IN JOG mode and
10.3
TEACH IN HANDLE mode are added. In these modes, a machine position
CREATING
along the X, Z, and Y axes obtained by manual operation is stored in
PROGRAMS IN
memory as a program position to create a program.
TEACH IN MODE
The words other than X, Z, and Y, which include O, N, G, R, F, C, M, S,
T, P, Q, and EOB, can be stored in memory in the same way as in EDIT
(PLAYBACK)
mode.
Procedure for Creating Programs in TEACH IN Mode
The procedure described below can be used to store a machine position
along the X, Z, and Y axes.
1
Select the TEACH IN JOG mode or TEACH IN HANDLE mode.
2
Move the tool to the desired position with jog or handle.
3
Press
PROG
key to display the program screen. Search for or register
the number of a program to be edited and move the cursor to the
position where the machine position along each axis is to be
registered (inserted).
4
Key in address
X
5
Press the
INSERT
key. Then a machine position along the X axis is
stored in memory.
(Example) X10.521 Absolute position (for mm input)
X10521
Data stored in memory
6
Similarly, key in
Z
, then press the
INSERT
key. Then a machine
position along the Z axis is stored in memory. Further, key in
Y
,
then press the
INSERT
key. Then a machine position along the Y axis is
stored in memory.
All coordinates stored using this method are absolute coordinates.
688
B-63524EN/01
OPERATION
10. CREATING PROGRAMS
Examples
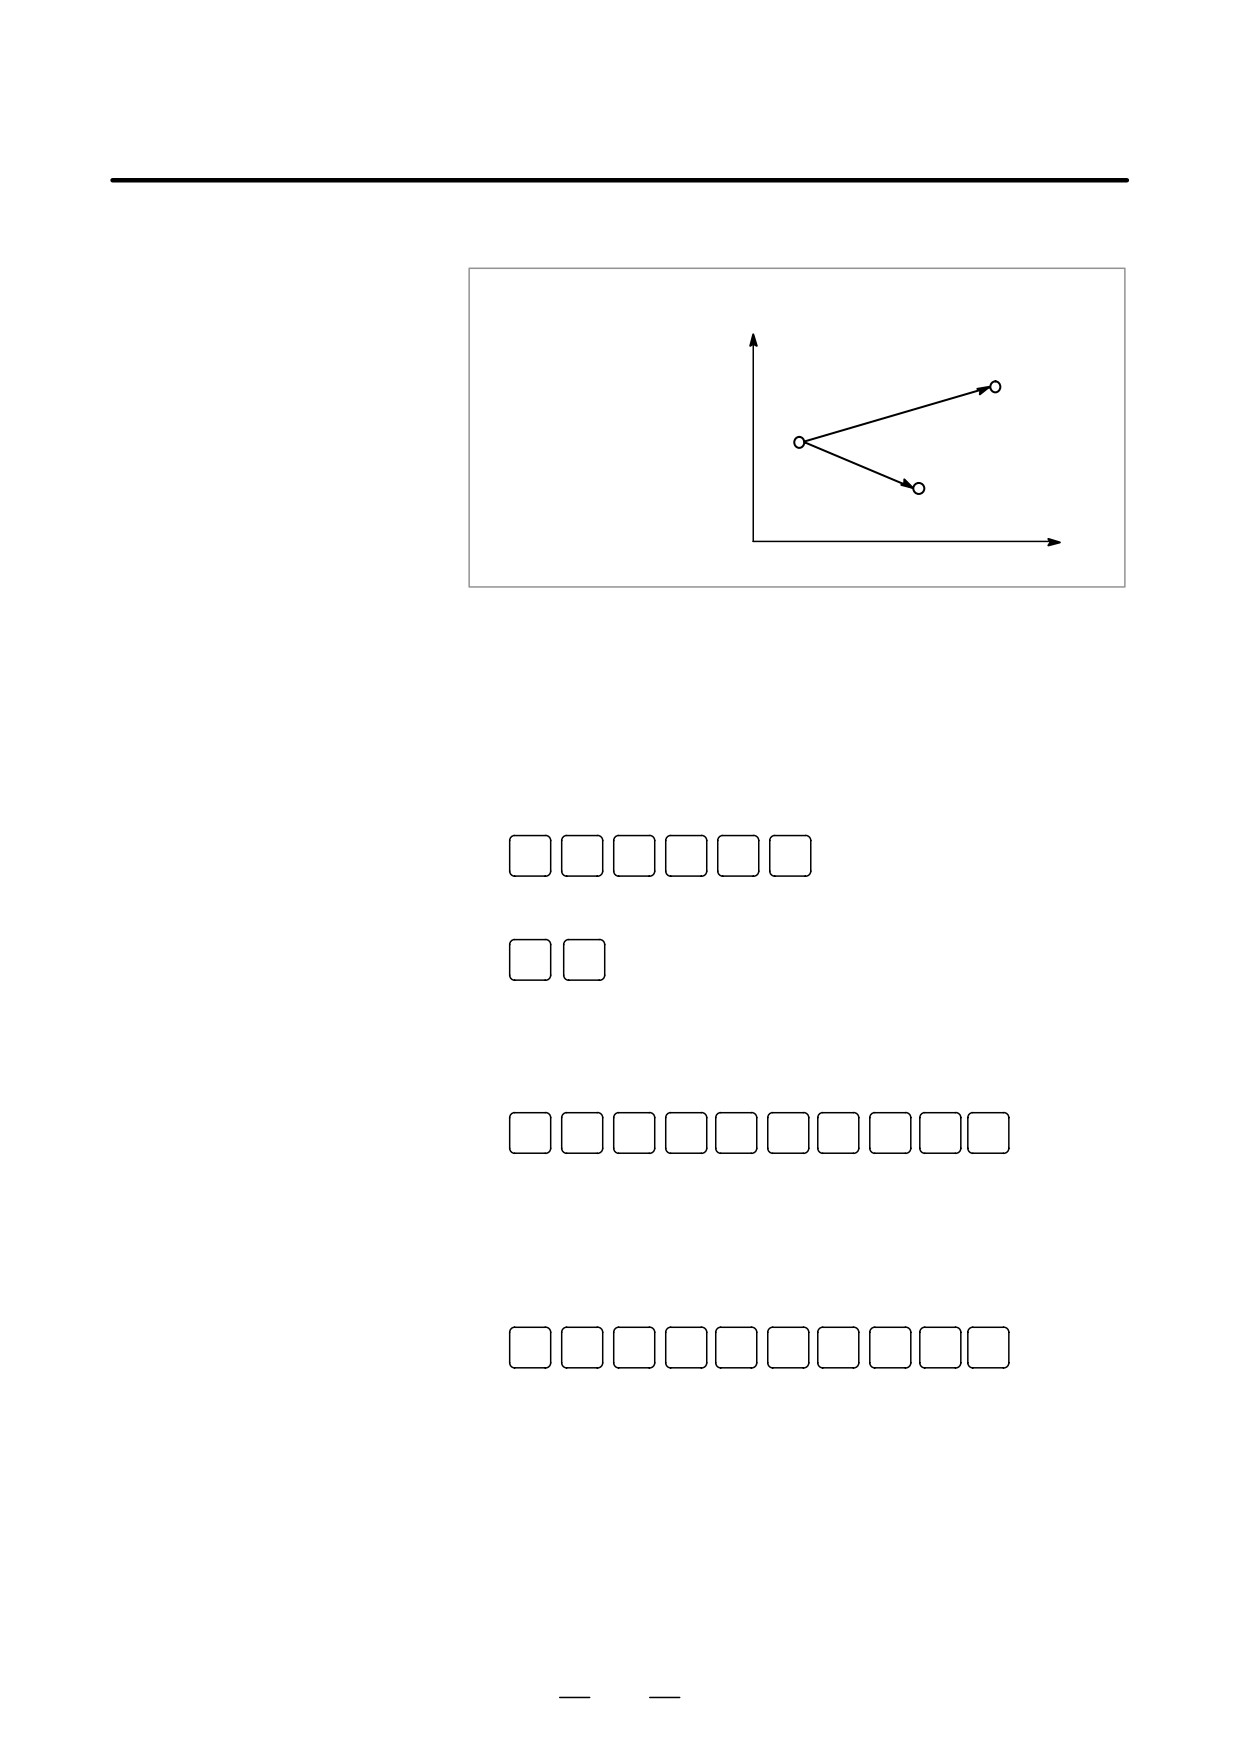
O1234 ;
N1 G50 X100000 Z200000 ;
X
N2 G00 X14784 Z8736 ;
N3 G01 Z103480 F300 ;
P0 (100000,200000)
N4 M02 ;
P1
(14784,8736)
P2 (10000,103480)
Z
1
Set the setting data SEQUENCE NO. to 1 (on).
(The incremental
value parameter (No. 3212) is assumed to be “1”.)
2
Select the TEACH IN HANDLE mode.
3
Make positioning at position P0 by the manual pulse generator.
4
Select the program screen.
5
Enter program number O1234 as follows:
O
1
2
3
4
INSERT
This operation registers program number O1234 in memory.
Next, press the following keys:
EOB
INSERT
An EOB (;) is entered after program number O1234. Because no
number is specified after N, sequence numbers are automatically
inserted for N0 and the first block (N1) is registered in memory.
6
Enter the P0 machine position for data of the first block as follows:
INSERT
INSERT
INSERT
EOB
INSERT
G
5
0
X
Z
This operation registers G50 X100000 Z200000 ; in memory. The
automatic sequence number insertion function registers N2 of the
second block in memory.
7
Position the tool at P1 with the manual pulse generator.
8
Enter the P1 machine position for data of the second block as follows:
INSERT
INSERT
INSERT
EOB
INSERT
G
0
0
X
Z
This operation registers G00 X14784 Z8736; in memory. The
automatic sequence number insertion function registers N3 of the
third block in memory.
9
Position the tool at P2 with the manual pulse generator.
689
10. CREATING PROGRAMS
OPERATION
B-63524EN/01
10
Enter the P2 machine position for data of the third block as follows:
G
0
1
INSERT
Z
INSERT
F
3
0
0
INSERT
EOB
INSERT
This operation registers G01 Z103480 F300; in memory.
The automatic sequence number insertion function registers N4 of the
fourth block in memory.
11
Register M02; in memory as follows:
INSERT
EOB
INSERT
M
0
2
N5 indicating the fifth block is stored in memory using the automatic
sequence number insertion function. Press the
DELETE
key to delete it.
This completes the registration of the sample program.
Explanations
D Checking contents of the
The contents of memory can be checked in the TEACH IN mode by using
memory
the same procedure as in EDIT mode.
PROGRAM
O1234 N00004
(RELATIVE)
(ABSOLUTE)
U
-85.216
X
14.784
W -191.264
Z
8.736
O1234 ;
N1 G50 X100000 Y0 Z20000 ;
N2 G00 X14784 Z8736 ;
N3 G01 Z103480 F300 ;
N4 M02
;
%
_
THND
* * * *
* * *
* * *
14 : 17 : 27
PRGRM
LIB
(OPRT)
D Registering a position
When a value is keyed in after keying in address
X
,
Z
, or
Y
,
with compensation
then the
INSERT
key is pressed, the value keyed in for a machine position
is added for registration. This operation is useful to correct a machine
position by key-in operation.
D Registering commands
Commands to be entered before and after a machine position must be
other than position
entered before and after the machine position is registered, by using the
commands
same operation as program editing in EDIT mode.
690
B-63524EN/01
OPERATION
10. CREATING PROGRAMS
Programs can be created block after block on the conversational screen
10.4
while displaying the G code menu.
CONVERSATIONAL
Blocks in a program can be modified, inserted, or deleted using the G code
PROGRAMMING
menu and conversational screen.
WITH GRAPHIC
FUNCTION
Procedure for Conversational Programming with Graphic Function
Procedure 1
1
Enter the EDIT mode.
Creating a program
2
Press
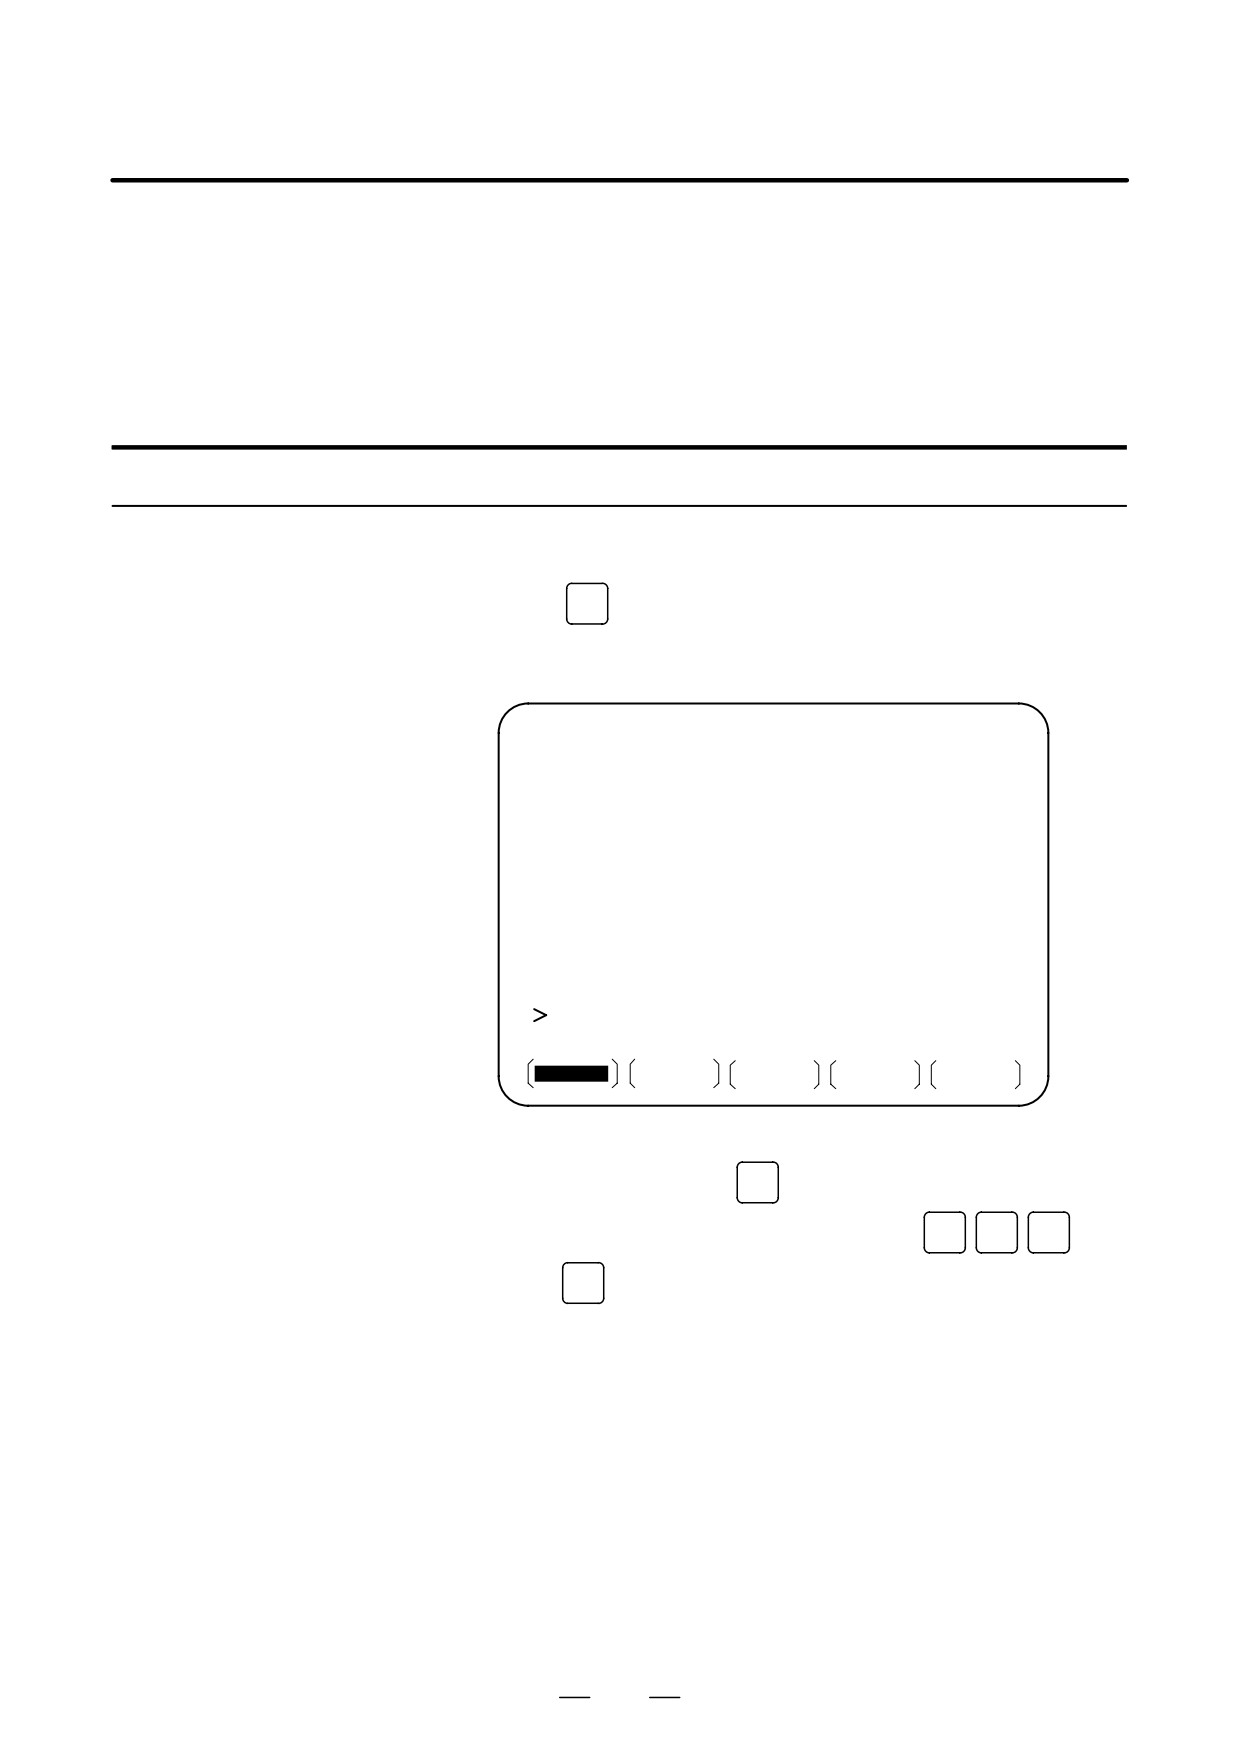
PROG
. If no program is registered, the following screen is
displayed. If a program is registered, the program currently selected
is displayed.
PROGRAM
O0000 N00000
_
EDIT
* * * *
* * *
* * *
11 : 59 : 46
PRGRM
LIB
(C.A.P)
(OPRT)
3
Key in the program number of a program to be registered after keying
in address O, then press
INSERT
. For example, when a program with
program number 10 is to be registered, key in
O
1
0
, then
press
INSERT
. This registers a new program O0010.
691
10. CREATING PROGRAMS
OPERATION
B-63524EN/01
4
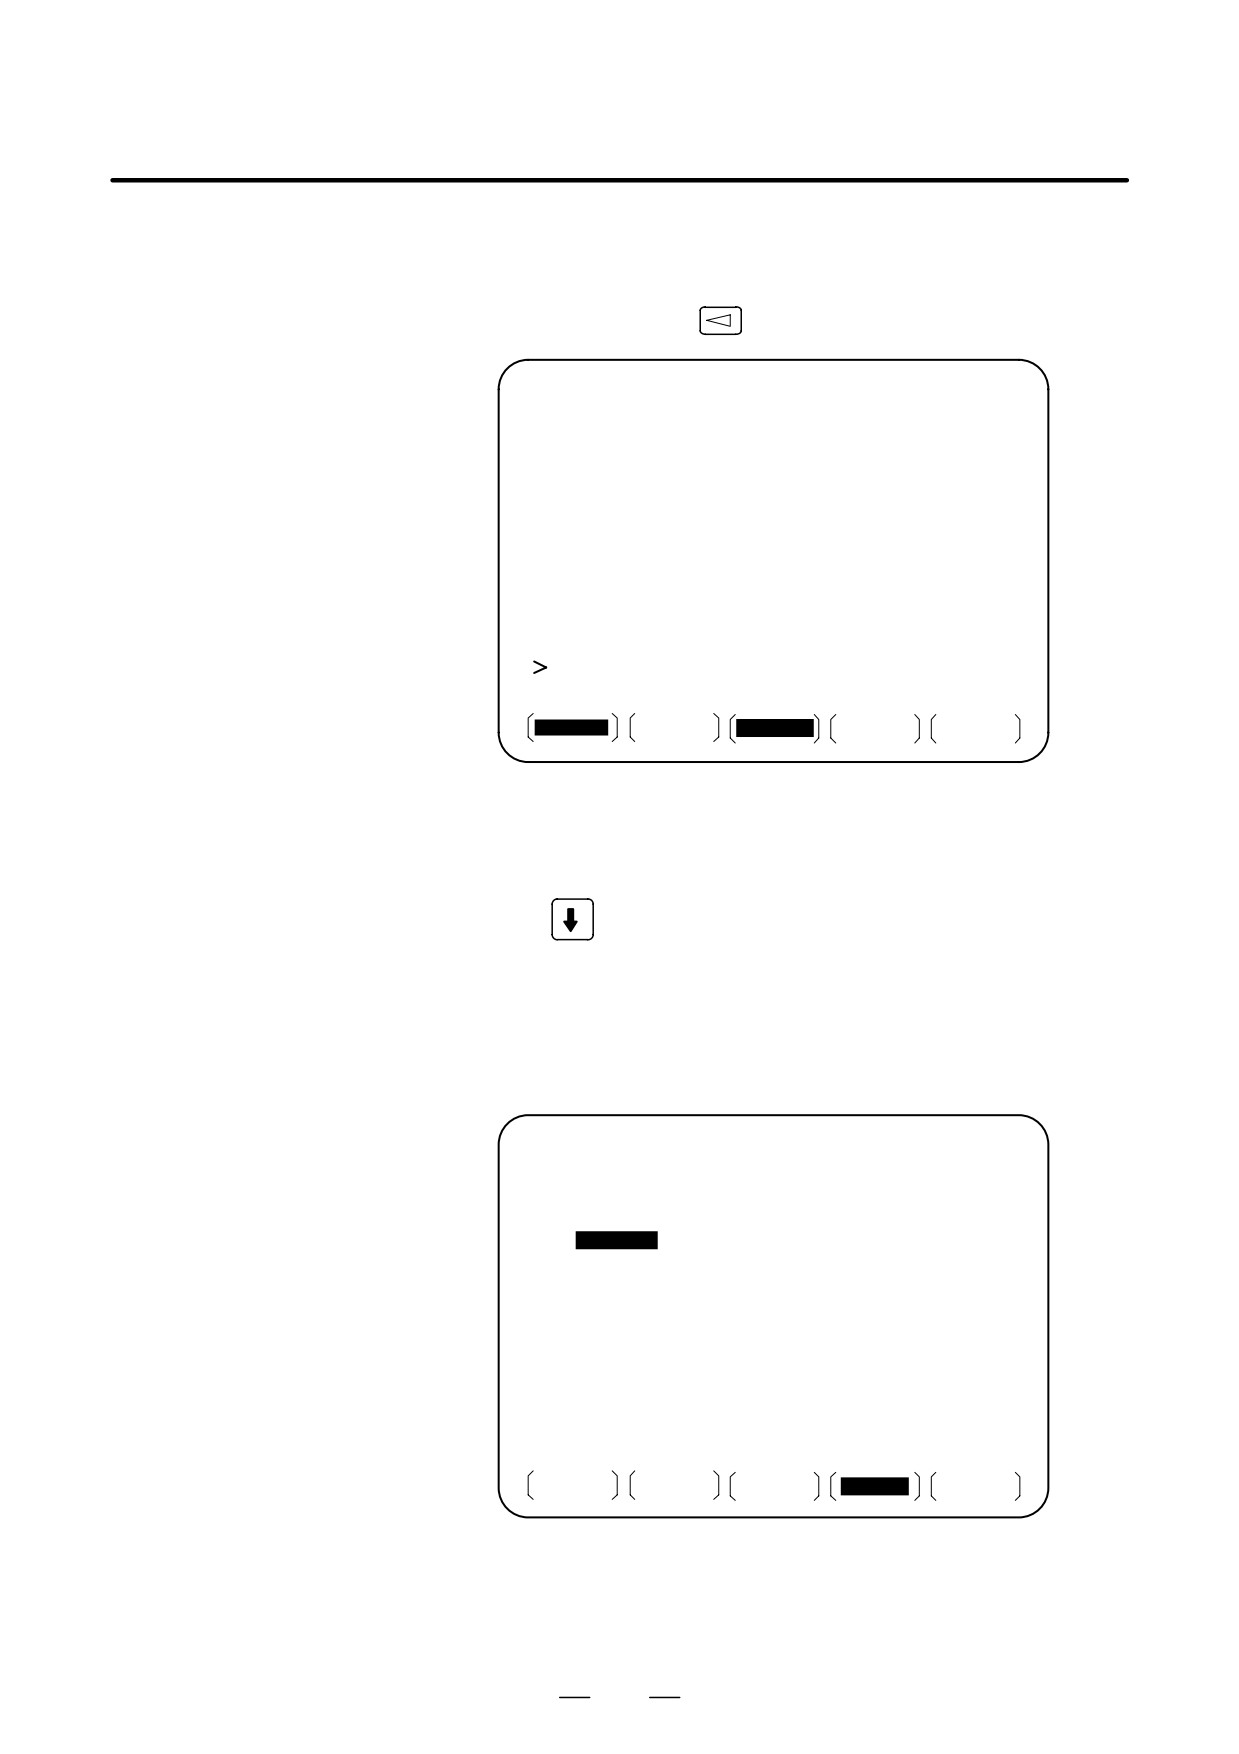
Press the [C.A.P] soft key. The following G code menu is displayed
on the screen.
If soft keys different from those shown in step 2 are displayed, press
the menu return key
to display the correct soft keys.
PROGRAM
O1234 N00004
G00
: POSITIONING
G01
: LINEAR IPL
G02
: CIRCULAR IPL. CW
G03
: CIRCULAR IPL. CCW
G04
: DWELL
G10
: OFFSET VALUE SETTING
(0)
G20
: INCH
G21
: METRIC
G22
: STORED STROKE CHECK ON
(0)
G23
: STORED STROKE CHECK OFF
(0)
G25
: SPINDLE SPEED DETECT OFF
G26
: SPINDLE SPEED DETECT ON
_
EDIT
* * * *
* * *
* * *
14 : 26 : 15
PRGRM
G.MENU
BLOCK
5
Key in the G code corresponding to a function to be programmed.
When the positioning function is desired, for example, the G code
menu lists the function with the G code G00. So key in G00. If the
screen does not indicate a function to be programmed, press the page
key
to display the next G code menu screen. Repeat this
operation until a desired function appears. If a desired function is not
a G code, key in no data.
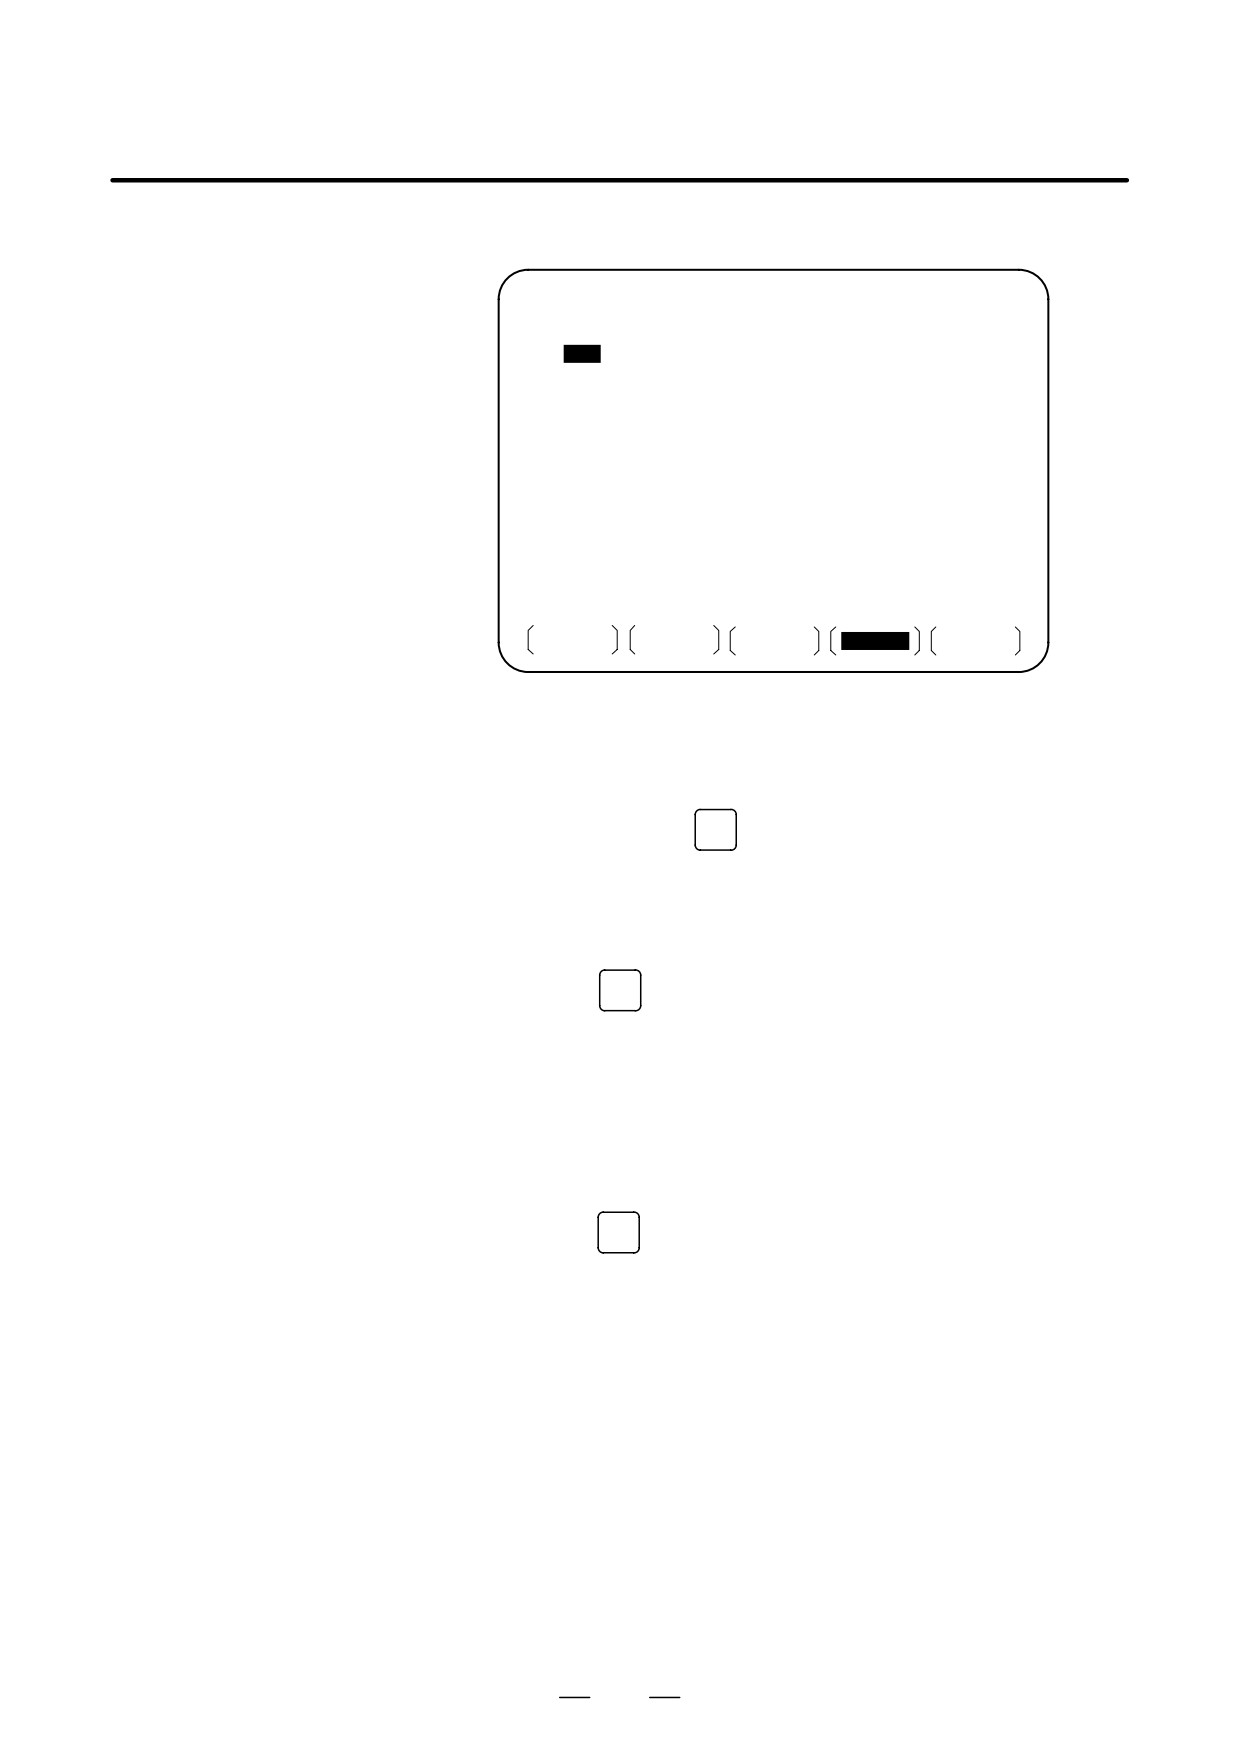
6
Press the soft key [BLOCK] to display a detailed screen for a keyed in
G code. The figure below shows an example of detailed screen for
G00.
PROGRAM
O1234 N00000
G00 : POSITIONING
G00
G
G G X
X
U
Z
W
(X, Z)
M
S
T
:
U
W
Z
EDIT
* * * *
* * *
* * *
14 : 32 : 57
PRGRM
G.MENU
BLOCK
(OPRT)
692
B-63524EN/01
OPERATION
10. CREATING PROGRAMS
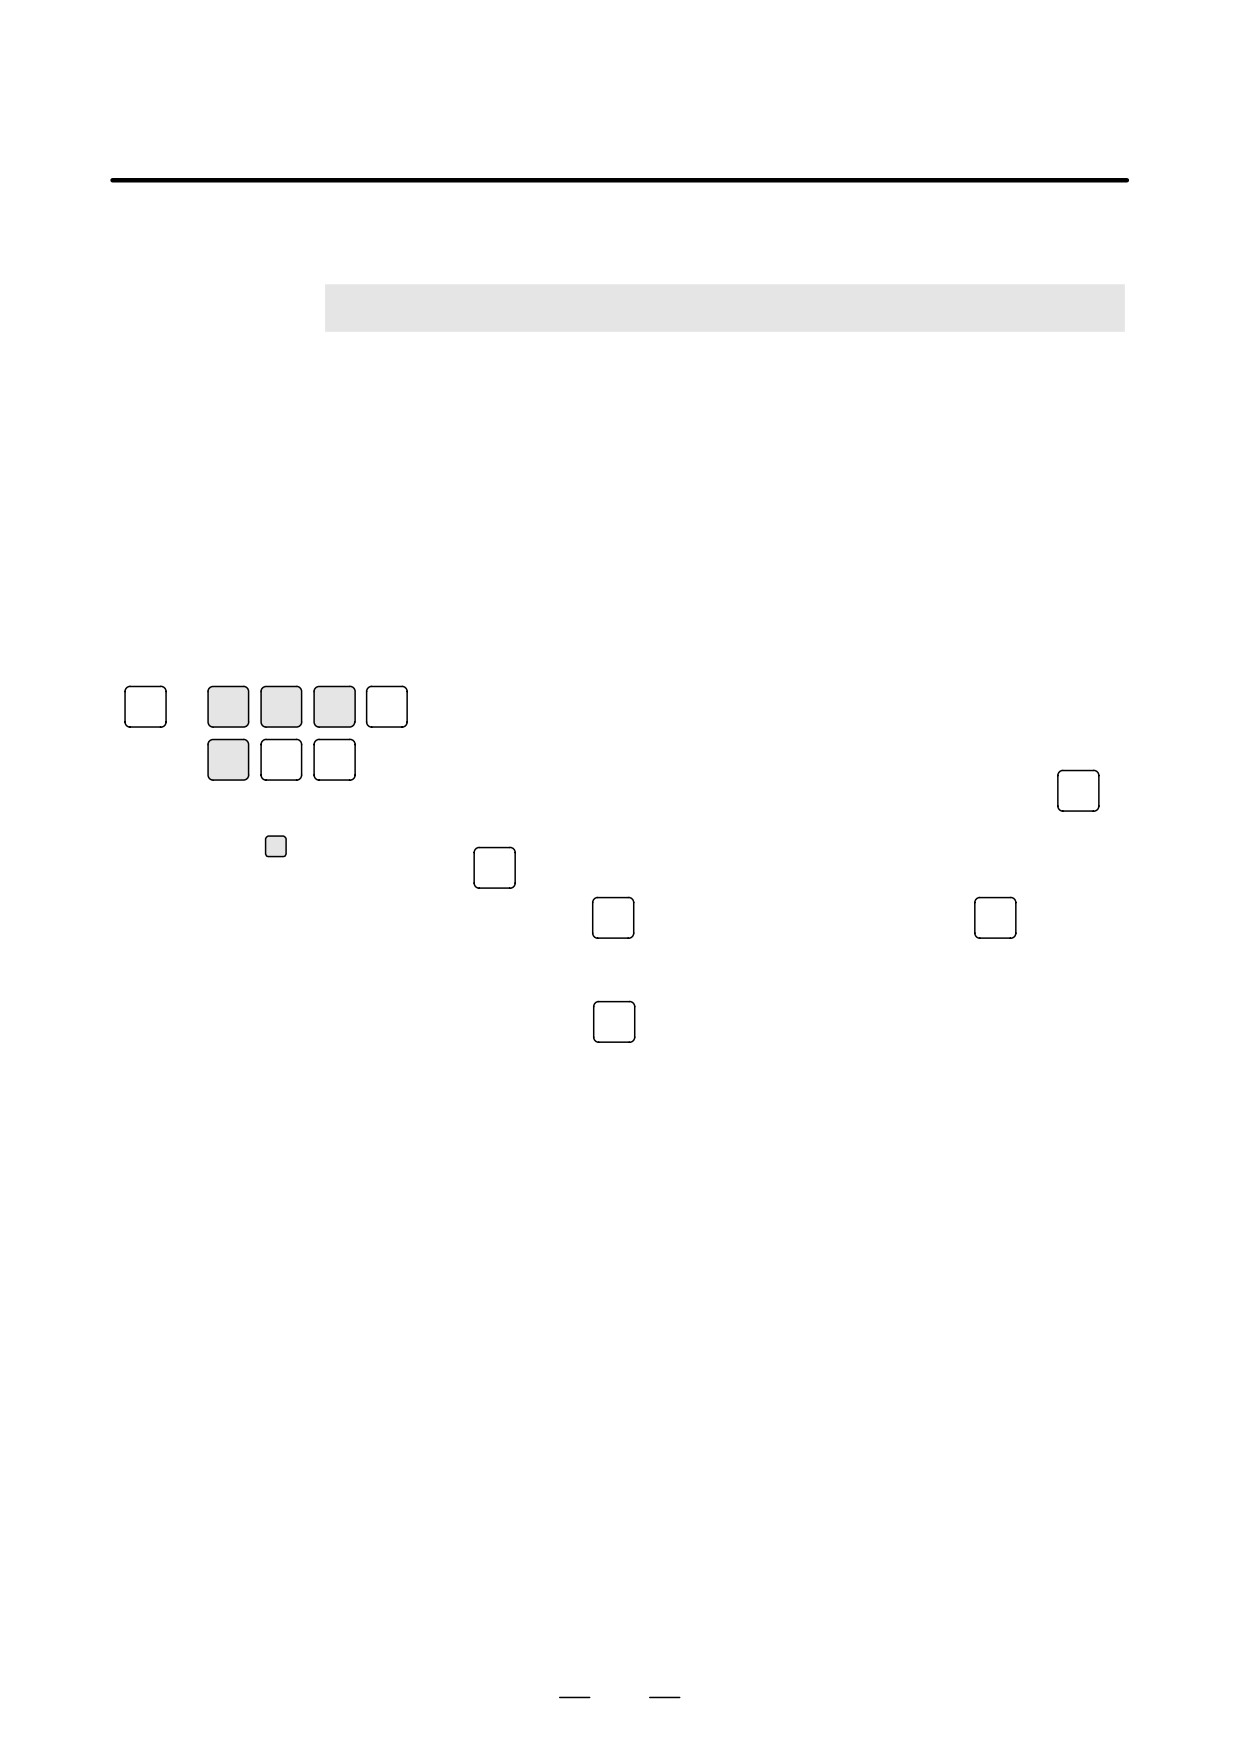
When no keys are pressed, the standard details screen is displayed.
PROGRAM
O0010 N00000
G
G
G
G
X
U
Z
W
A
C
F
H
I
K
P
Q
R
M
S
T
:
EDIT
* * * *
* * *
* * *
14 : 41 : 10
PRGRM
G.MENU
BLOCK
(OPRT)
7
Move the cursor to the block to be modified on the program screen.
At this time, a data address with the cursor blinks.
8
Enter numeric data by pressing the numeric keys and press the
[INPUT] soft key or
INPUT
key. This completes the input of one data
item.
9
Repeat this operation until all data required for the entered G code is
entered.
10
Press the
INSERT
key. This completes the registration of data of one
block in program memory. On the screen, the G code menu screen is
displayed, allowing the user to enter data for another block. Repeat
the procedure starting with 5 as required.
11
After registering all programs, press the [PRGRM] soft key. The
registered programs are converted to the conversational format and
displayed.
12
Press the
RESET
key to return to the program head.
693

10. CREATING PROGRAMS
OPERATION
B-63524EN/01
Procedure 2
1
Move the cursor to the block to be modified on the program screen
Modifying a block
and press the [C.A.P] soft key. Or, press the [C.A.P] soft key first to
display the conversational screen, then press the
or
page
key until the block to be modified is displayed.
2
When data other than a G code is to be altered, just move the cursor to
the data and key in a desired value, then press the [INPUT] soft key or
INPUT
key.
3
When a G code is to be altered, press the menu return key
and the
soft key [G.MENU]. Then the G code menu appears. Select a desired
G code, then key in the value. For example, to specify a cutting feed,
since the G code menu indicates G01, key in G01. Then press the soft
key [BLOCK]. The detailed screen of the G code is displayed, so enter
the data.
4
After data is changed completely, press the
ALTER
key. This operation
replaces an entire block of a program.
Procedure 3
1
On the conversational screen, display the block immediately before a
Inserting a block
new block is to be inserted, by using the page keys. On the program
screen, move the cursor with the page keys and cursor keys to
immediately before the point where a new block is to be inserted.
2
Press the soft key [G.MENU] to display the G code menu. Then enter
new block data.
3
When input of one block of data is completed in step 2, press the
INSERT
key. This operation inserts a block of data.
Procedure 4
1
On the conversational screen, display the contents of a block to be
Deleting a block
deleted, then press the
DELETE
key.
2
The contents of the block displayed are deleted from program
memory. Then the contents of the next block are displayed on the
conversational screen.
694
B-63524EN/01
OPERATION
11. SETTING AND DISPLAYING DATA
SETTING AND DISPLAYING DATA
11
General
To operate a CNC machine tool, various data must be set on the CRT/MDI
or LCD/MDI for the CNC. The operator can monitor the state of
operation with data displayed during operation.
This chapter describes how to display and set data for each function.
Explanations
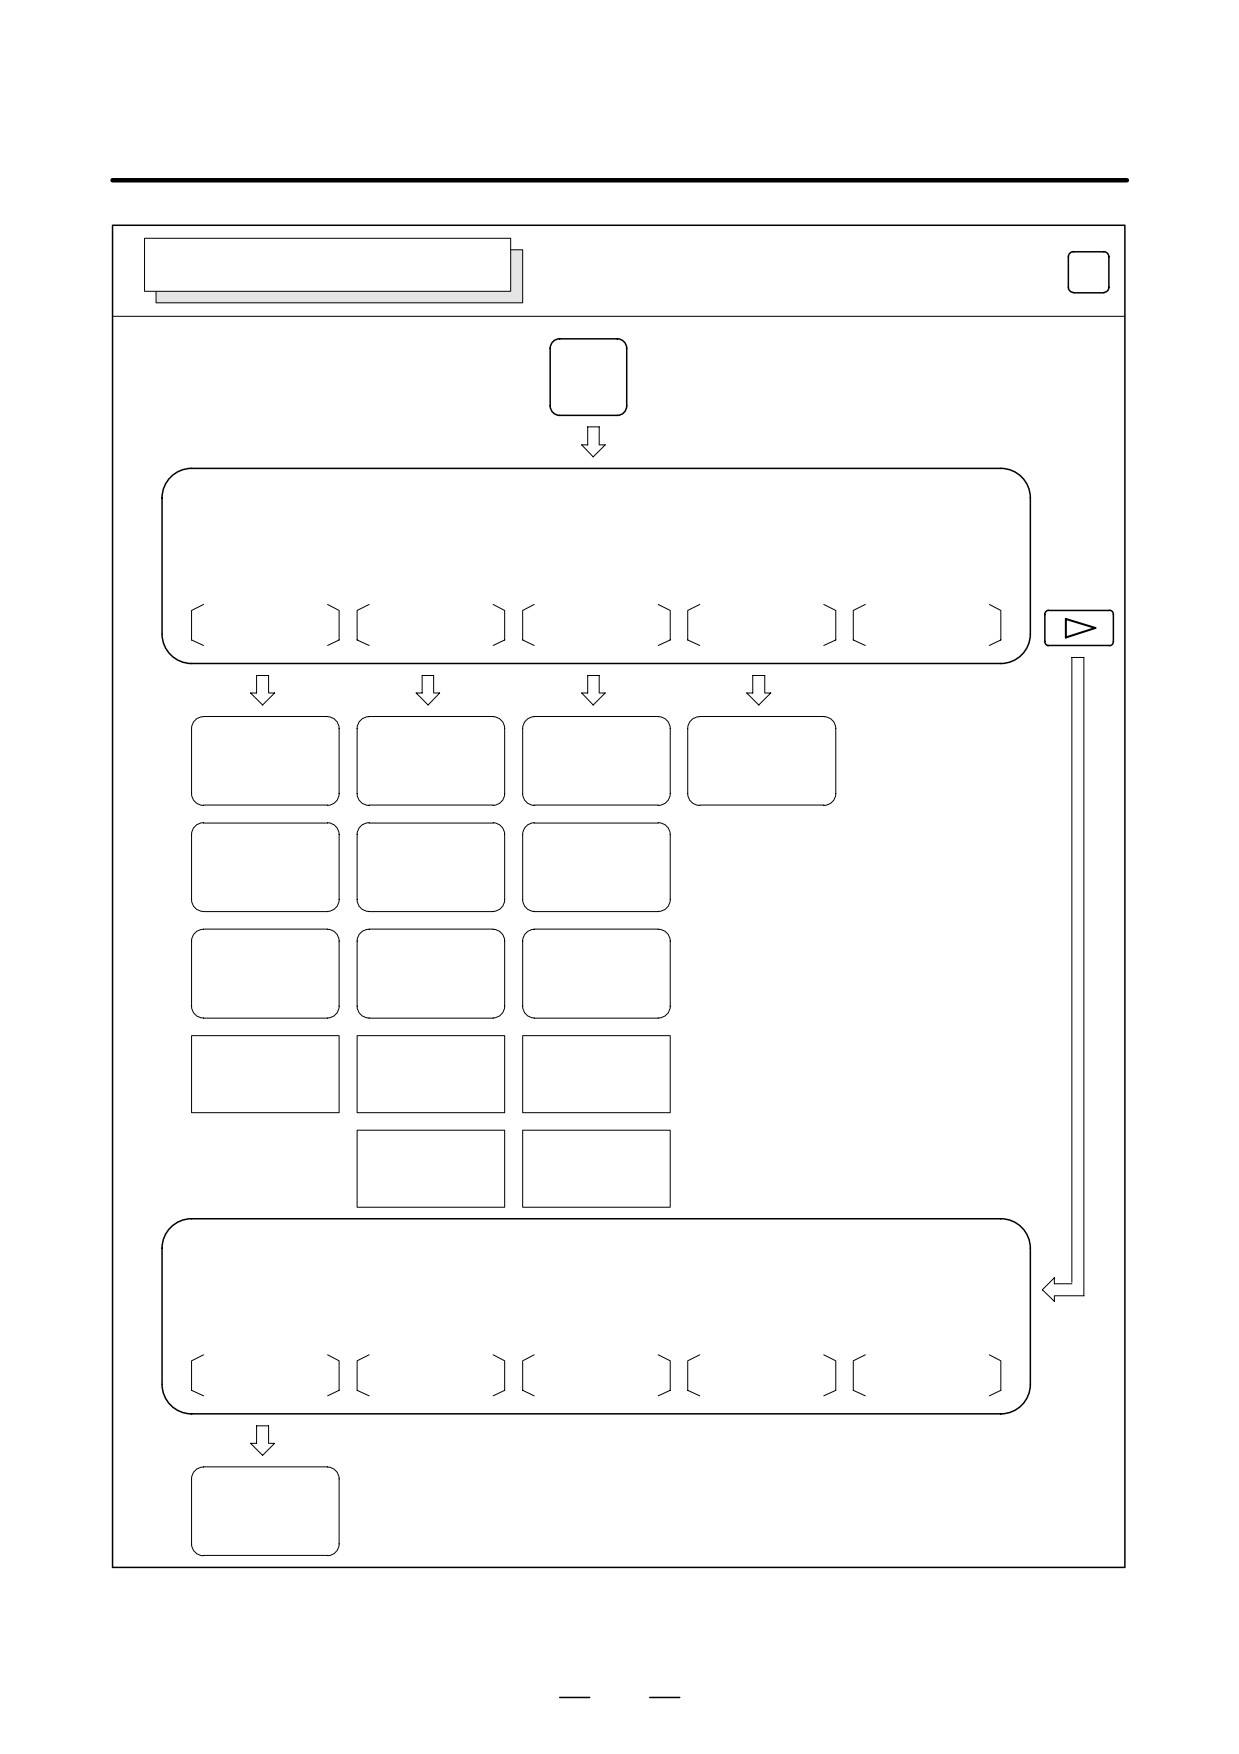
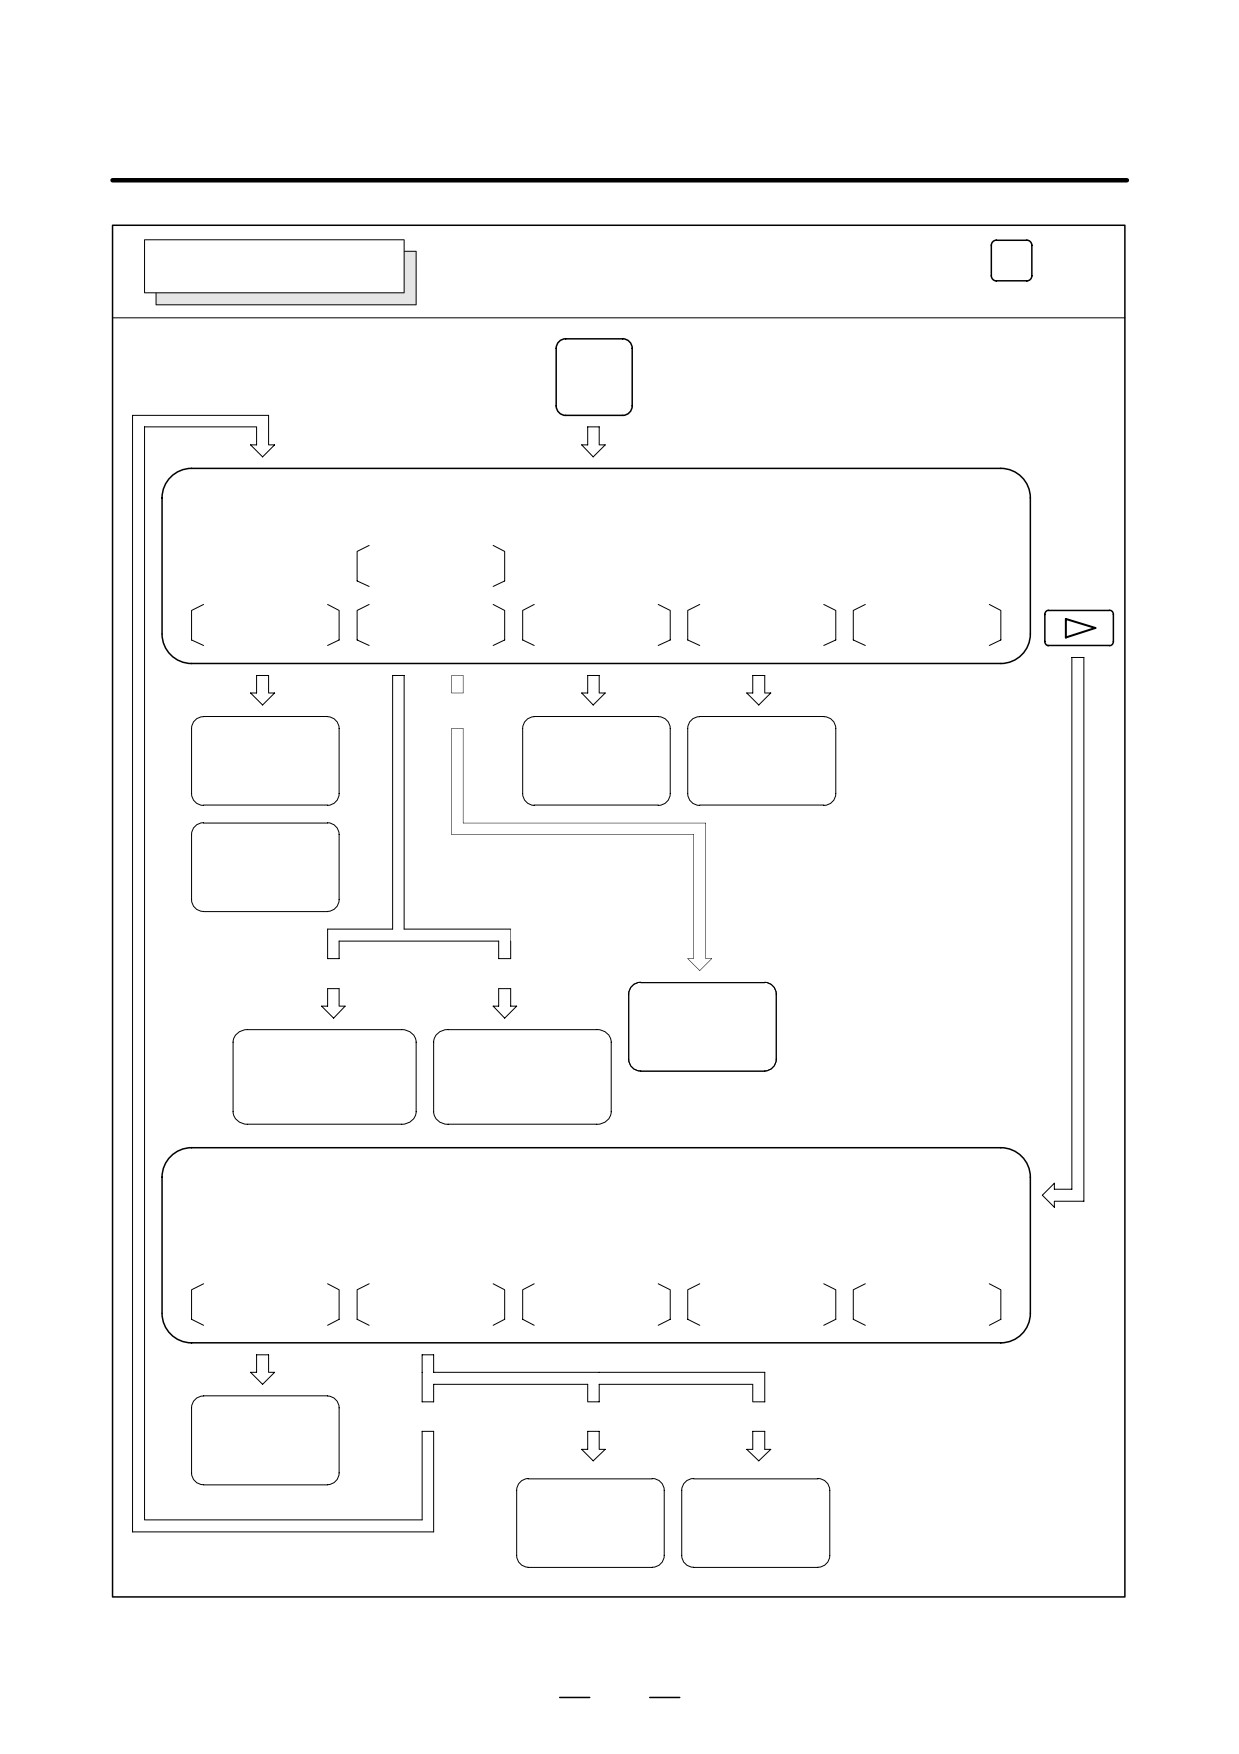
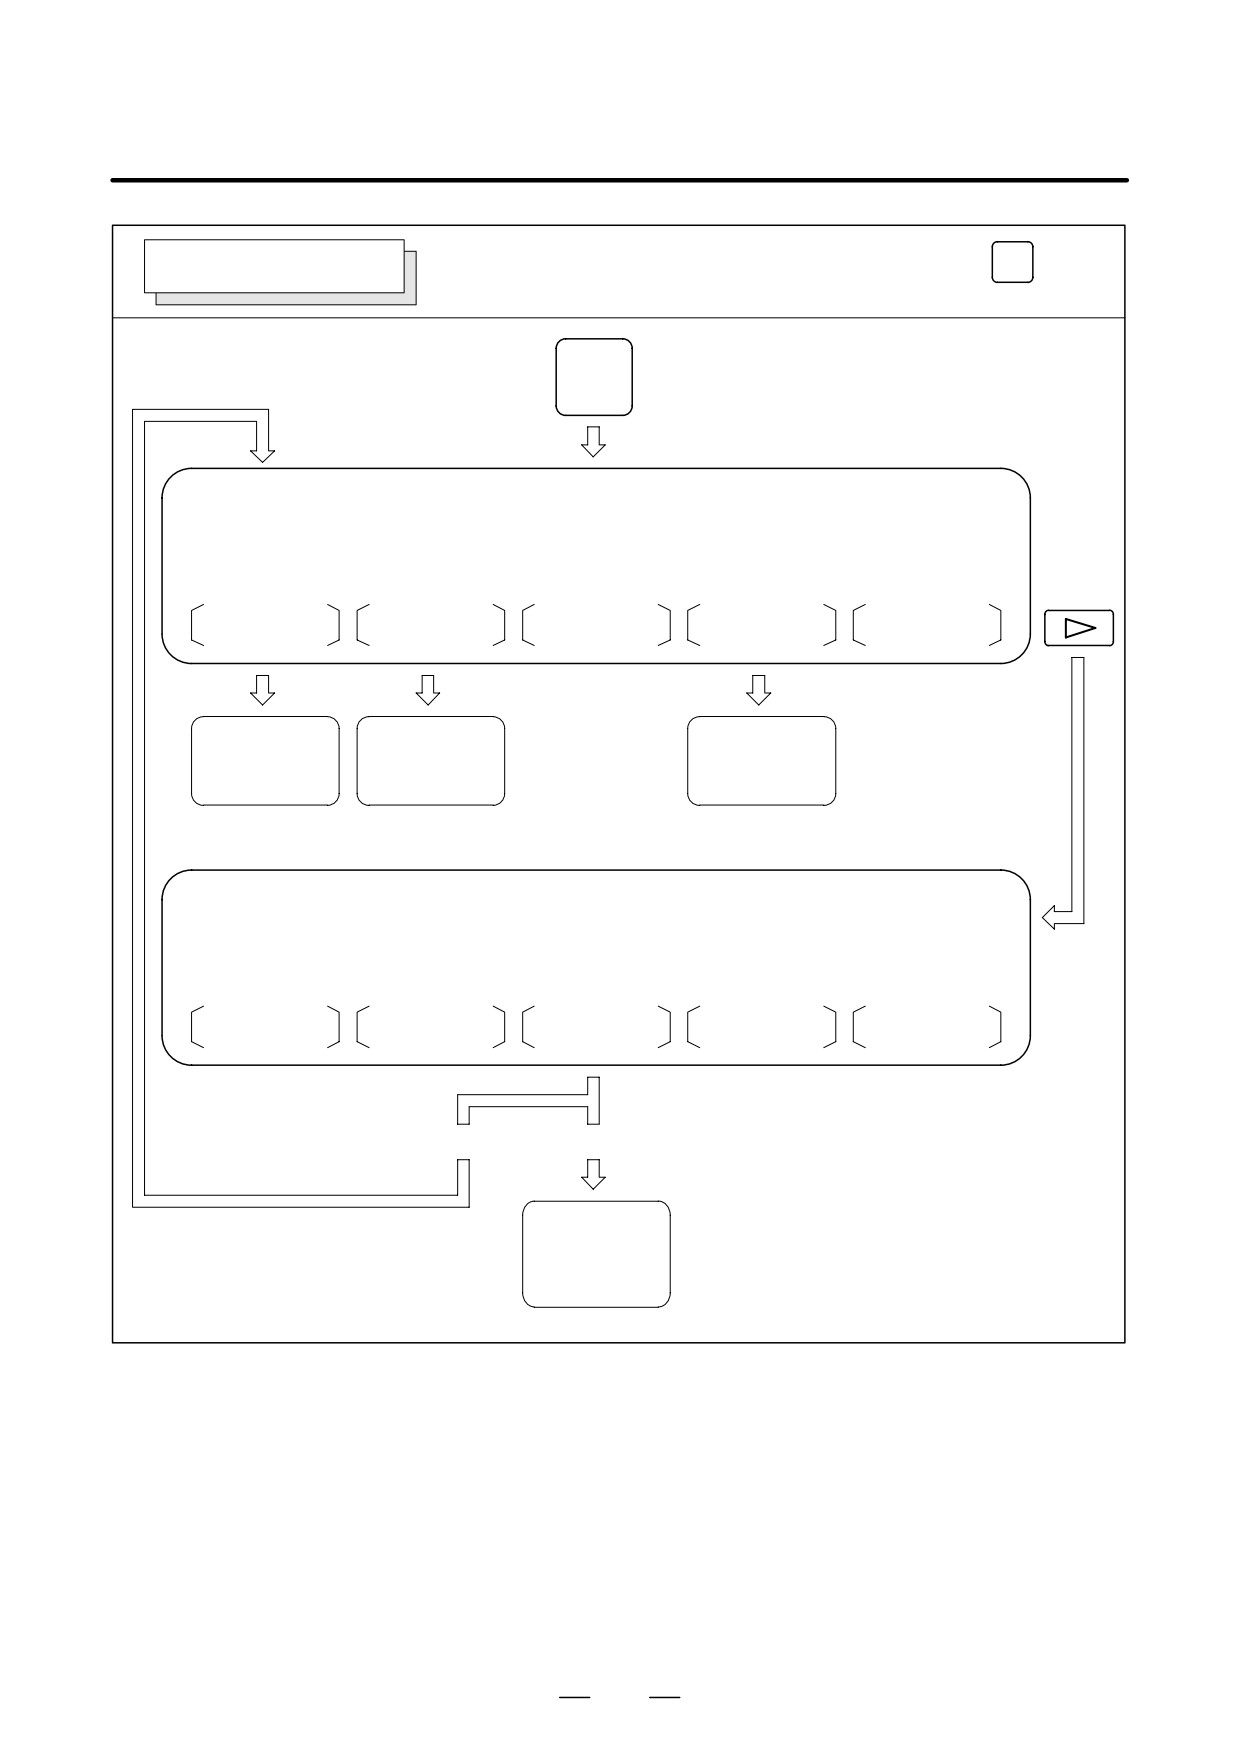
D Screen transition chart
The screen transition for when each function key on the MDI panel is
pressed is shown below. The subsections referenced for each screen are
OFFSET
CUSTOM
also shown. See the appropriate subsection for details of each screen and
HELP
POS
PROG
SETTING
the setting procedure on the screen. See other chapters for screens not
SYSTEM
MESSAGE
GRAPH
described in this chapter.
See Chapter III-7 for the screen that appears when function key
MESSAGE
is
MDI function keys
pressed. See Chapter III-12 for the screen that appears when function key
(Shaded keys (
) are described
in this chapter.)
GRAPH
is pressed. See Chapter III-13 for the screen that appears when
function key
HELP
is pressed. In general, function key
CUSTOM
is prepared
by the machine tool builder and used for macros. Refer to the manual
issued by the machine tool builder for the screen that appears when
function key
CUSTOM
is pressed.
D Data protection key
The machine may have a data protection key to protect part programs, tool
compensation values, setting data, and custom macro variables. Refer to
the manual issued by the machine tool builder for where the data
protection key is located and how to use it.
695
11. SETTING AND DISPLAYING DATA
OPERATION
B-63524EN/01
POSITION DISPLAY SCREEN
Screen transition triggered by the function key
POS
POS
Current position screen
ABS
REL
ALL
HNDL
(OPRT)
Position display of
Position displays
Total position display
Manual handle in-
work coordinate
relative coordinate
of each coordinate
terruption
system
system
system
⇒See III-4.6.
⇒See III-11.1.3.
⇒See III-11.1.1.
⇒See III-11.1.2.
Display of part
Display of part
Display of part
count and run time
count and run
count and run
⇒See III-11.1.6.
time
time
⇒See III-11.1.6.
⇒See III-11.1.6.
Display of actual
Display of actual
Display of actual
speed
speed
speed
⇒See III-11.1.5.
⇒See III-11.1.5.
⇒See III-11.1.5.
Setting of floating
Setting of floating
Setting of floating
reference position
reference position
reference position
⇒See III-11.1.7.
⇒See III-11.1.7.
⇒See III-11.1.7.
Setting of relative
Setting of relative
coordinate values
coordinate values
⇒See III-11.1.2.
⇒See III-11.1.2.
Current position screen
MONI
(OPRT)
Display of oper-
ating monitor
⇒See III-11.1.8.
696
B-63524EN/01
OPERATION
11. SETTING AND DISPLAYING DATA
PROGRAM SCREEN
Screen transition triggered by the function key
PROG
in the MEMORY or MDI mode
*: Displayed in MDI mode
PROG
Program screen
MDI
*
MDI
MEM
PRGRM
CHECK
CURRNT
NEXT
(OPRT)
[MDI] *
Display of pro-
Display of current
Display of current
gram contents
block and modal
block and next
data
block
⇒See III-11.2.1.
⇒See III-11.2.2.
⇒See III-11.2.3.
Display of pro-
gram number and
sequence number
⇒See III-11.6.1.
[ABS]
[REL]
Command
for MDI operation
Program being executed
Program being executed
⇒See III-11.2.5.
Absolute coordinate value
Relative coordinate value
Distance to go
Distance to go
Modal values
Modal values
(Displayed in the
⇒See III-11.2.4.
⇒See III-11.2.4.
MDI mode)
Program screen
MEM
RSTR
FL.SDL
(OPRT)
Program restart
[PRGRM]
[DIR]
[SCHDUL]
screen
⇒See III-4.3.
Display of file
Setting of
directory
schedule
⇒See III-4.4.
⇒See III-4.4.
697
11. SETTING AND DISPLAYING DATA
OPERATION
B-63524EN/01
PROGRAM SCREEN
Screen transition triggered by the function key
PROG
in the EDIT mode
PROG
Program screen
EDIT
PRGRM
LIB
C.A.P.
(OPRT)
Conversational
Program editing
Program memory
programming
screen
and program di-
screen
⇒See III-10
rectory
⇒See III-10
⇒See III-11.3.1.
Program screen
EDIT
FLOPPY
(OPRT)
[PRGRM]
[DIR]
File directory
screen for
floppy disks
⇒See III-8
698