IDEXX Cornerstone. Administrator’s Manual (8.3 NEXT version 8.3.6) - page 1
Contents
Click within the Contents listing below to go directly to a section or page.
Preface
10
About This Manual
10
Additional Resources
11
Training File Details
11
Getting Help
12
Section 1-System Setup
13
Chapter 1: Getting Started with Cornerstone* Setup
14
Introduction
14
Designating a Cornerstone Administrator
14
Setting Security
14
Backing Up Your Cornerstone Data
14
Viewing Current User Information: Exclusive Use
14
Changing IDs
15
Setting Up a Signature Capture Device
16
Chapter 2: Setting Up Cornerstone* Controls
18
Overview
18
Updating Controls
18
Deleting Unused Controls
18
User Defined Prompts
18
Classifications
20
Patient Colors
22
Reasons for Visit
22
Patient Sexes
24
Payment Types
25
Credit and Debit Payment Types
26
Credit Codes
28
Taxes
29
Discounts
30
Billing Messages
30
Estimate Messages
31
Invoice Types
32
Units of Measure
32
Price Change Reasons
33
Controlled Substance Export List
33
Controlled Substance Reasons
35
Problem List
36
Initial Setup Reports
37
Chapter 3: Setting Up Lists and Information
40
Overview
40
Updating List Items
40
Deleting Unused List Items
40
Practice Information
41
iii
Contents
Staff Information
57
Staff Reports
61
Species and Breeds
64
Diagnostic Codes
67
Cashier IDs
68
Rooms
69
Patient Hospital Status
70
Wards/Locations
71
Postal Codes
71
Revenue Centers
71
Partnerships
73
Call Back Notes
74
Travel Sheets
75
Departing Instructions
78
Prescription Instructions
79
Staff Commission
80
Section 2-Cornerstone* Defaults Setup
82
Chapter 4: Setting Practice and Workstation Defaults
83
Overview
83
Accessing Practice and Workstation Defaults
83
Account Defaults
84
Alerts Defaults
85
Compliance Alerts Defaults
87
Appointment Scheduler Defaults
87
Boarding Defaults
91
Check-in Defaults
94
Client Defaults
96
Daily Entries Report Defaults
98
Daily Planner Defaults
98
Documents Defaults
100
End of Period Defaults
102
Estimate Defaults
103
IDEXX VetLab* Settings
107
Imaging Defaults
108
Inventory Defaults
109
Invoice Defaults
112
Invoice Item Defaults
116
Labs Defaults
117
Messages Defaults
118
Password Defaults
119
Patient Defaults
120
Physical Exam/Patient Advisor* Defaults
121
Performance Tracker Defaults
123
Pharmacy Formulary Defaults
126
Practice Defaults
127
Prescriptions Defaults
128
Purging Defaults
130
Report Language Defaults
131
Required Data Defaults
132
iv
Contents
Statement Print Options Defaults
132
Toolbar Defaults
134
Unattended End of Period (EOP) Defaults
135
Vaccination Bookmarks Defaults
138
Vaccine Tag Defaults
140
Web Links Defaults
143
Whiteboard Defaults
144
Workstation Defaults
146
Chapter 5: Setting Staff Defaults
150
Overview
150
Accessing Staff Defaults
150
Staff Defaults for Patient Clipboard
150
Staff Defaults for the Toolbar Display
151
Staff Defaults for Miscellaneous Settings
152
Staff Defaults for Inventory
153
Staff Defaults for Favorite Document Templates
154
Chapter 6: Setting Cornerstone* Imaging Defaults
155
Overview
155
Image Archiving Defaults
155
Modality Layout Defaults
156
Image Email Defaults
158
Cornerstone Imaging Defaults
160
Image Keywords Defaults
161
Telemedicine Provider Defaults
162
Section 3-Items and Inventory Setup
164
Chapter 7: Getting Started with Cornerstone* Inventory Setup
165
Overview
165
Inventory Setup-Single or Multiple Location
165
Setting Up Your List of Vendors
167
Setting Up Internal Cost Centers
169
Setting Up Inventory Adjustment Reasons
170
Chapter 8: Setting Up a Single Location Inventory System
171
Overview
171
Setting Up Locations for Single Location Inventory
172
Chapter 9: Setting Up a Multiple Location Inventory System
174
Overview
174
Location Groups, Locations, and Location Types
175
Setting Up Location Types
176
Setting Up Location Groups
177
Setting Up Locations for Multiple Location Inventory
178
Chapter 10: Setting Up Your Invoice Items
180
Overview
180
Inventory Calculations
180
Setting Up Invoice Item Classifications and Subclasses
182
The Invoice Item List
184
Setting Up Invoice Item Information
186
Inactivating Invoice Items
190
Deleting Invoice Items
190
v
Contents
Linking Instructions to Invoice Items
190
Adding Reminder Information to Invoice Items
192
Linking Taxes and Discounts to Invoice Items
194
Adding Inventory Information to an Invoice Item
196
Linking Inventory Items
200
Setting Up Invoice Items to Initiate a Special Action
202
Setting Up Vaccine Invoice Items
206
Placing Invoice Items on Travel Sheets
210
Setting Up Pick Lists
211
Setting Up Invoice Item Groups
213
Setting Up Smart Codes
216
Setting Up Dispensing Items
221
Setting Up Taxes and Discounts on Dispensing Items
223
Linking a Dispensing Item to an Inventory Item
224
Setting Up Whiteboard Patient Order Item Defaults
225
Adding Dispensing Items Using Mass Markup
227
Changing Invoice Item Pricing Information Using Mass Markup
231
Changing Linked Taxes and Discounts Using Mass Markup
234
Using the Invoice Item Setup Tool
236
Setting Whiteboard Patient Order Defaults for Multiple Items at Once
243
Invoice Item Reports
246
Chapter 11: Other Inventory Setup Tasks
251
Overview
251
Receiving Past Invoices
251
Transferring Items to the Appropriate Locations (Multiple Location Inventory Only)
253
Viewing and Confirming a Stock Transfer (Multiple Location Inventory Only)
255
Performing a Cycle Count
256
Viewing and Adjusting Quantity on Hand (View Quantity on Hand window)
257
Adjusting Quantity on Hand and Cost (Adjustment List window)
259
Section 4-Scheduling and Patient Visit Setup
262
Chapter 12: Setting Up the Appointment Scheduler
263
Overview
263
Creating an Appointment Scheduling Plan
264
Setting Up Staff Schedules
264
Setting Daily Revenue Goals for Staff
265
Link to Reasons for Visit
267
Designing a Schedule Template
269
Assigning Practice Templates to Days of Week
271
Setting Up Appointment Suites
272
Chapter 13: Setting Up the Electronic Whiteboard
273
Overview
273
Setting Up Treatment Categories
273
Setting Up Treatment Areas
274
Setting Up Treatment Frequencies
274
Setting Up Whiteboard Alerts
276
Chapter 14: Setting Up a Reminder System
277
Overview
277
What Information Prints on a Reminder?
278
Reminder Strategies
278
vi
Contents
Setting Up a Reminder System
281
Cornerstone Reminder Card Setup
283
Microsoft Word Reminder Card Setup
287
Generating Your Reminders
288
Using the IDEXX Reminder Service
291
Printing Reminders from Microsoft Word
293
Troubleshooting: Letter Reminders
294
Emailing Reminders from Microsoft Word
294
Section 5-Pet Health Management Setup
296
Chapter 15: Setting Up Physical Exam and Pet Health Report Card
297
Overview
297
Creating Your Own System Templates
297
Creating and Updating Observation Text
298
Chapter 16: Setting Up Vital Signs/Weight
301
The Default Vital Sign List
301
About the Vital Sign List
302
Vital Sign Types
303
Setting Up the Vital Sign List for Your Practice
305
Editing the Weight Vital Sign
309
Setting the Vital Signs Display Order
310
Copying a Vital Sign from the Vital Sign List
311
Deleting a Vital Sign from the Vital Sign List
311
Chapter 17: Setting Up Medical Notes and Correspondence
312
Overview
312
Template Types
312
Getting Ready Checklist
316
Cornerstone Editor-Template Setup/Update Window
317
Page Setup and Formatting Tools
321
Document Template Setup Tools
323
Cornerstone Editor Features and Limitations in Text-Only Mode
334
Customizing the Default Setup Document Template
335
Designating the Text-Only Template to Use for Adding Quick Text Medical Notes
337
Creating a New Document Template for Medical Notes or Correspondence
338
Importing a Document Template
340
Creating a Copy of an Existing Document Template
340
Using “Save As” to Save an Existing Template as a Different Template Type
341
Showing Correspondence with Medical Notes in History
341
Converting Medical Note Templates
342
Inactivating a Document Template
345
Setting Up a Special Action to Associate a Document Template with an Invoice Item
345
Customizing Document Templates for PetDetect* Collars
346
Customizing Document Templates for ID Cards
347
LifeLearn® ClientEd Online™ Integration with Cornerstone
349
Loading LifeLearn® CD Documents in Cornerstone
349
Chapter 18: Setting Up Classic Medical Notes
351
Overview
351
About Classic Medical Note Templates
351
Creating a New Classic Medical Note Template
352
Creating a New Classic Medical Note Template Based on an Existing Template
355
vii
Contents
Inactivating a Classic Medical Note Template
355
Chapter 19: Setting Up Correspondence in Microsoft® Word
356
Overview
356
Adding Bookmarks to a Microsoft Word Document
356
Linking Microsoft Word Documents to Cornerstone Data
359
Section 6-End of Period Processing
361
Chapter 20: End of Day Processing
362
Overview
362
Performing End of Day Processes
363
Printing End of Day Reports
363
End of Day Reports
366
Chapter 21: End of Month Processing
380
Overview
380
Performing End of Month Processes
381
Printing End of Month Reports
383
End of Month Reports
385
Printing Monthly Invoices and Statements
400
Chapter 22: End of Year Processing
404
Overview
404
Performing End of Year Processes
405
Printing End of Year Reports
405
End of Year Reports
407
Section 7-Other Management Tools and Tasks
413
Chapter 23: Setting Up Referral Relationship Management
414
Overview
414
Setting Up Referring Hospitals
414
Setting Up Doctor Classifications
416
Setting Up Referring Doctors
416
Creating a Referral Letter Template
417
Tracking Referral Sales
419
Referral Reports
419
Chapter 24: Setting Up Hill’s® Feeding Guide Software
420
Setting Up the Feeding Guide Software
420
Chapter 25: Using General Ledger
422
Overview
422
Extract Data Using the General Ledger Interface
422
GL Batch Report
425
Using the Batch File in QuickBooks
426
Chapter 26: Using the Compliance Assessment Tool*
427
Overview
427
Using Check-In Dates vs. Invoice Dates
427
Compliance Comparison Types
427
Setting Up Protocols
428
Placing Protocols into Groups
435
Extracting Compliance Results
437
Compliance Reports
438
Understanding Compliance Results
438
viii
Contents
Chapter 27: Using Cornerstone Performance Tracker
441
Overview
441
Tracking Performance
441
Chapter 28: Using the Backup Verification Assistant
446
Overview
446
How the Backup Verification Assistant Works
446
Enabling the Backup Verification Assistant in Cornerstone
447
Viewing the Backup Verification Assistant
447
Chapter 29: Purging Data from Cornerstone*
448
Overview
448
Options for Purging Data from Cornerstone
448
Purging Clients and Patients
449
Purging Patients
451
Purging Specific Types of Client or Patient Information
452
Purging Patient Reminders
454
Purging Inventory Records
455
Chapter 30: Using the Time Clock
456
Overview
456
Time Clock Toolbar Buttons
456
Setting Up Security
456
Setting Up Staff Members
456
The Timesheet
457
Clocking In and Out
457
Recording Absences
458
Changing Previously Recorded Times
459
Entering Hours Using the Edit Times Dialog Box
459
Printing Attendance Reports
460
Chapter 31: Setting Up the Mobile Computing Module
462
Overview
462
Mobile Computing Functionality—Mobile Computer vs. Main System
462
Setting Up the Mobile Computing Module
463
Setting Mobile Computing Defaults
463
Copying Images to a Mobile Computer
465
Viewing the Mobile Computer List
465
Deleting a Mobile Computer
466
Generating a Mobile Computing Checkout Report
466
ix
Preface
About This Manual
This manual provides setup and system configuration information for your IDEXX Cornerstone* Practice
Management System. This information is intended for the person designated as the Cornerstone
Administrator and any other staff members responsible for setting up and maintaining the Cornerstone
system at your practice. This manual provides information on:
• Setting up your Cornerstone system
• Setting up Cornerstone defaults
• Setting up items and inventory
• Setting up scheduling and patient visit functions
• Setting up pet health management functions
• Completing End of Period processing tasks
• Other management tools and tasks
How to Use This Manual
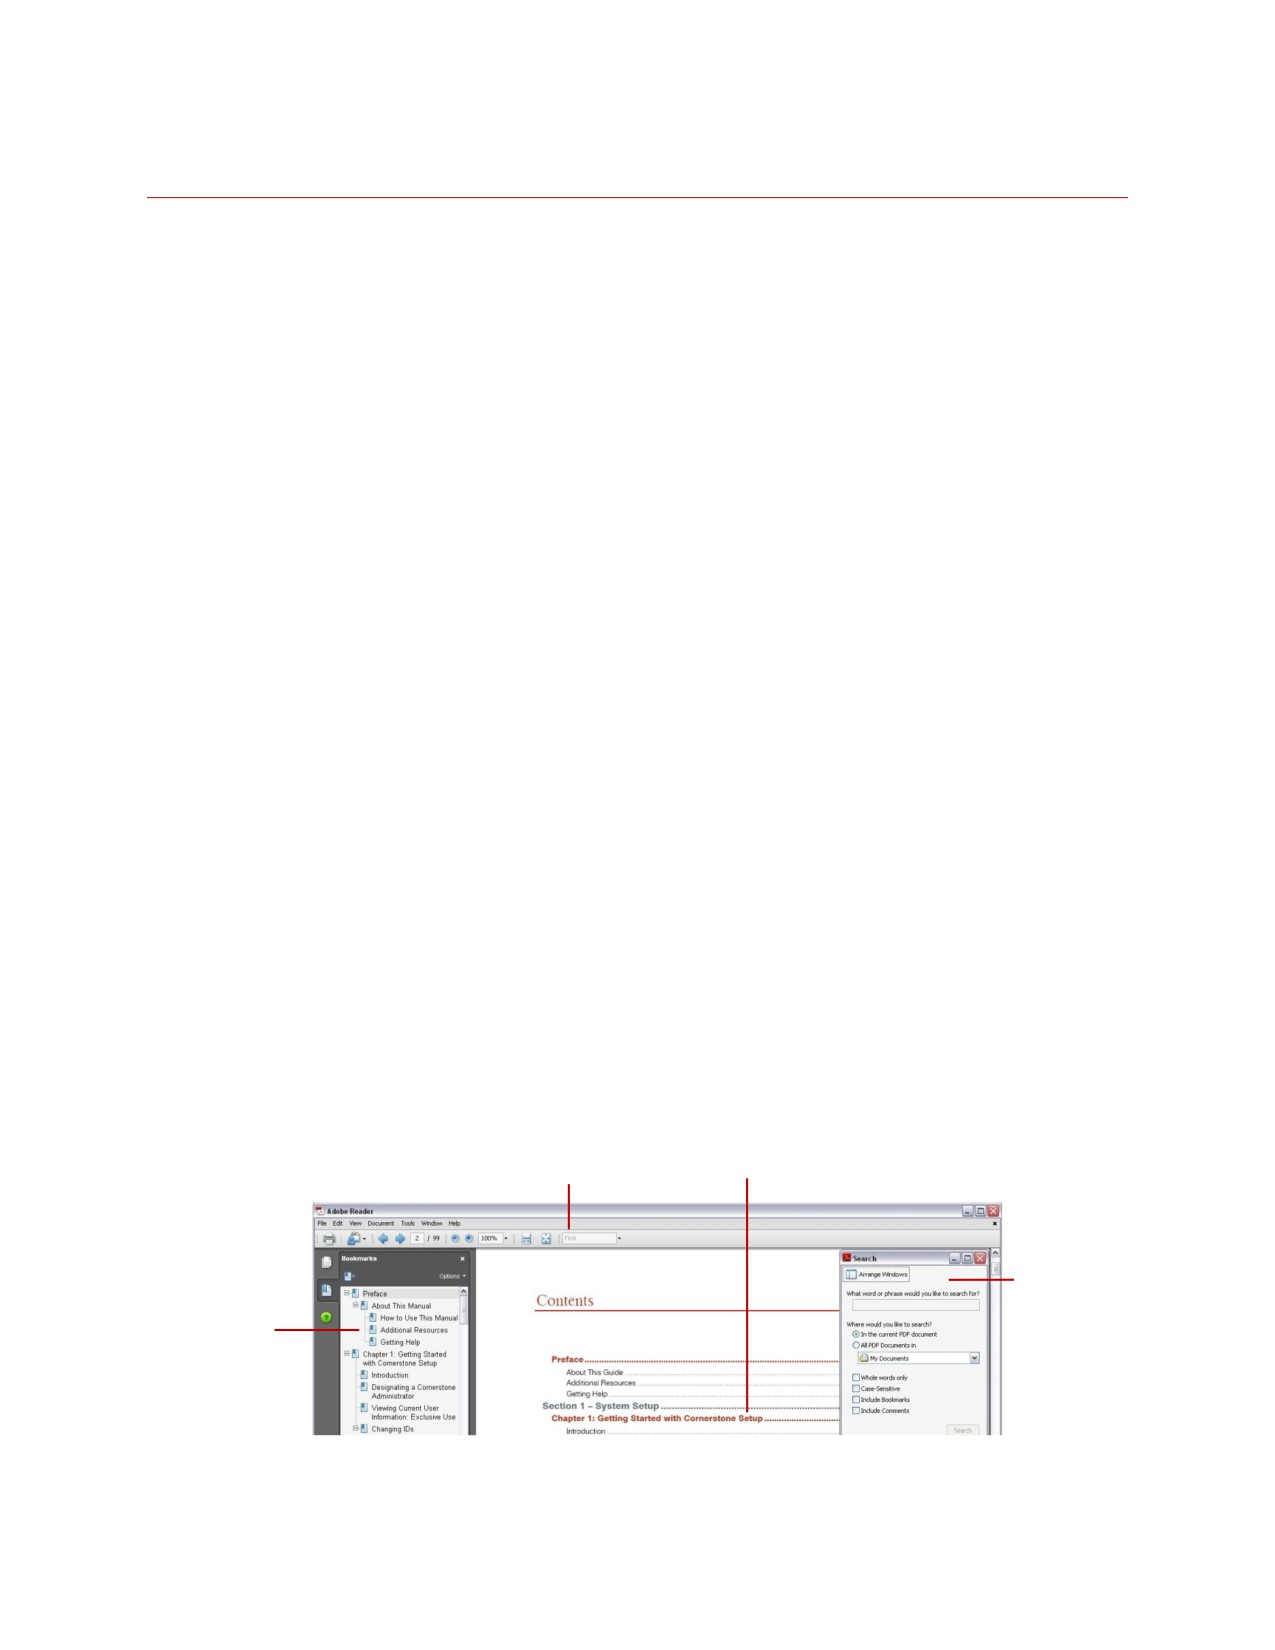
This manual takes advantage of the searching and linking tools available within Adobe® Reader® PDF
(Portable Document Format) files. Use the following tools to search and navigate within this manual:
• Bookmarks panel-The Bookmarks panel acts as an always-visible linked Table of Contents,
available on the left side of the document window.
• Clickable TOC-This Contents section provides direct links to each page—just click the
page/chapter/section text in the Contents listing to go to that page.
• Find toolbar-Select Edit > Find in Adobe Reader and use the Find toolbar to do a quick search for
a word or phrase in the current PDF.
• Search window-Select Edit > Search in Adobe Reader and use the Search window to look for
words in the current PDF or in multiple PDFs or to use advanced search options.
Click anywhere within the
Select Edit > Find and use
Contents listing to go
the Find toolbar to quickly
directly to that page
find a word or phrase
Select Edit > Search
and use the Search
Click a bookmark
window to set up
in the Bookmarks
search criteria or do
panel to go directly
an advanced search
to that section in
the manual
10

Preface
Additional Resources
The following resources are available for additional help with your Cornerstone software:
Resource
Recommended Use
Location
Cornerstone User’s Manual
Find reference information and
• Icon installed on your desktop
procedural steps for using Cornerstone
• Start > Programs >
to perform daily tasks
Cornerstone > Manuals
Note: In Windows® 8, you can find
the Cornerstone folder on the
Apps screen.
• idexx.com/cornerstoneresources
Cornerstone Help System
Find window-specific information and
• Press F1 on any Cornerstone
procedural steps for setting up your
window or dialog box
Cornerstone system and performing
• On the Cornerstone menu,
daily tasks
select Help > Contents
Cornerstone Tutorial Training
Work with the Cornerstone Tutorial
• Start > Programs >
Files & Print-Based Courses
Training Files data to complete
Cornerstone > Training Files
exercises that mimic everyday tasks in
• Start > Programs >
your practice without jeopardizing the
Cornerstone > Training Files-
integrity of your real medical records
Print Based Courses
Note: In Windows® 8, you can find
the Cornerstone folder on the
Apps screen.
IDEXX Learning Center
Access online courses, webinars, video
• idexxlearningcenter.com
snippets, tutorials, and podcasts
Training File Details
In the training files (including the Cornerstone Assistant training files), functionality is limited for some
Cornerstone 8.3 features which ordinarily communicate with systems outside of Cornerstone:
• Pet Health Network* Pro—You can see and use Pet Health Network Pro features like the share
button and the IDEXX Message Center alerts for appointment requests; however, these actions
won’t be reflected on pethealthnetworkpro.com or petly.com.
• Inventory Ordering using IDEXX SmartOrder* with MWI® Veterinary Supply—Although you can’t
use IDEXX SmartOrder, you can view the windows used for working with this feature. Also, Purchase
Order 1000 in the training files shows an example of a purchase order created using IDEXX
SmartOrder.
• IDEXX Faxing Service—Although you can’t send faxes from the training files with the IDEXX Faxing
Service, this feature is very close to the new email feature that is usable in the training files. Also,
completed faxes are shown on the Communications Log in the training files.
• Antech Diagnostics® Module—A training version of this module is not available in the training files.
However, training is included when you purchase the Antech module or upgrade from the previous
version of the module.
11
Preface
• Lifelearn® ClientEd™ Online—You can set up and synchronize Cornerstone with LifeLearn ClientEd
Online documents only from your live Cornerstone database.
• VetConnect* PLUS—You can view VetConnect PLUS information for the following patients:
o Zeke—Patient ID 15329 (Feline)
o Blake—Patient ID 3679K-1 (Canine)
o Twister—Patient ID 120Q-1 (Canine)
• Electronic signature capture for the integrated payment solution with XCharge®—In the training
files, you can view XCharge features except the ability to capture electronic signatures.
• Activation—You cannot activate or set up any of the above features from the training files; you can
do that only from your live Cornerstone database. Also, in the configuration windows for a multi-
location single database environment, the training files do not allow you to apply primary settings to
a secondary practice.
Getting Help
If you have a problem or question that you cannot find the answer to in the Cornerstone Help system or
documentation, the following support options are available:
• Visit our online support center at cornerstonehelp.com.
• Email Cornerstone Support at cornerstone@idexx.com.
• Call Cornerstone Support at 1-800-695-2877.
12
Section 1-System Setup
Chapter 1: Getting Started with Cornerstone* Setup
Chapter 2: Setting Up Cornerstone* Controls
Chapter 3: Setting Up Lists and Information
13
Chapter 1: Getting Started with Cornerstone* Setup
Introduction
Because the IDEXX Cornerstone* Practice Management System is a flexible tool, you decide how to set
up Cornerstone software to work effectively in your practice’s environment. If you don’t have a detailed
plan now, you can start with general settings and add more detailed settings later. You can always add
and modify settings as your practice changes. Remember, however, that the more customized settings
and preferences you set up in your system now, the less likely you’ll have to make changes in client,
patient, staff, and invoice item information later.
Designating a Cornerstone Administrator
Before you can begin to set up and customize your Cornerstone system to meet the needs of your
practice, you must set up staff information and security for at least one staff member, ideally the
designated Cornerstone Administrator or system manager. This staff member needs access to all dialog
boxes/windows and reports.
Setting Security
Due to its confidential nature, specific security setup instructions are not provided in this manual. To set
up security for each staff member, select Security Setup on the File menu and follow the Staff Security
Guide you received separately when you purchased your Cornerstone software.
Tip: When setting up security, remember that if the dialog box name or report is selected, the staff
member can access it.
Backing Up Your Cornerstone Data
There are a number of ways that data can be backed up, and your procedure may vary from that of
another practice. Please refer to the instructions from your trainer or contact Cornerstone Support at
1-800-695-2877 for documentation and instructions specific to your computer system and needs.
IMPORTANT: We strongly recommend backing up your Cornerstone files daily.
Backup Tips
• Close all of the programs on the taskbar to ensure a proper backup.
• If you use tapes, replace them every 12 to 18 months.
• Keep tapes and CDs stored away from extreme cold and heat.
• Store the backups off the premises every night.
• Store tapes in the upright position to avoid creating slack.
• Keep tapes away from magnetic fields.
Note: If your practice uses one of the supported backup software packages, you can set up
Cornerstone to automatically verify your backup. See “Chapter 28: Using the Backup Verification
Assistant” beginning on page 446 for more information.
Viewing Current User Information: Exclusive Use
If you are running Cornerstone on a network, it is important to be the only user logged into Cornerstone
when performing a mass mark up and when purging data.
14
Chapter 1: Getting Started with Cornerstone* Setup
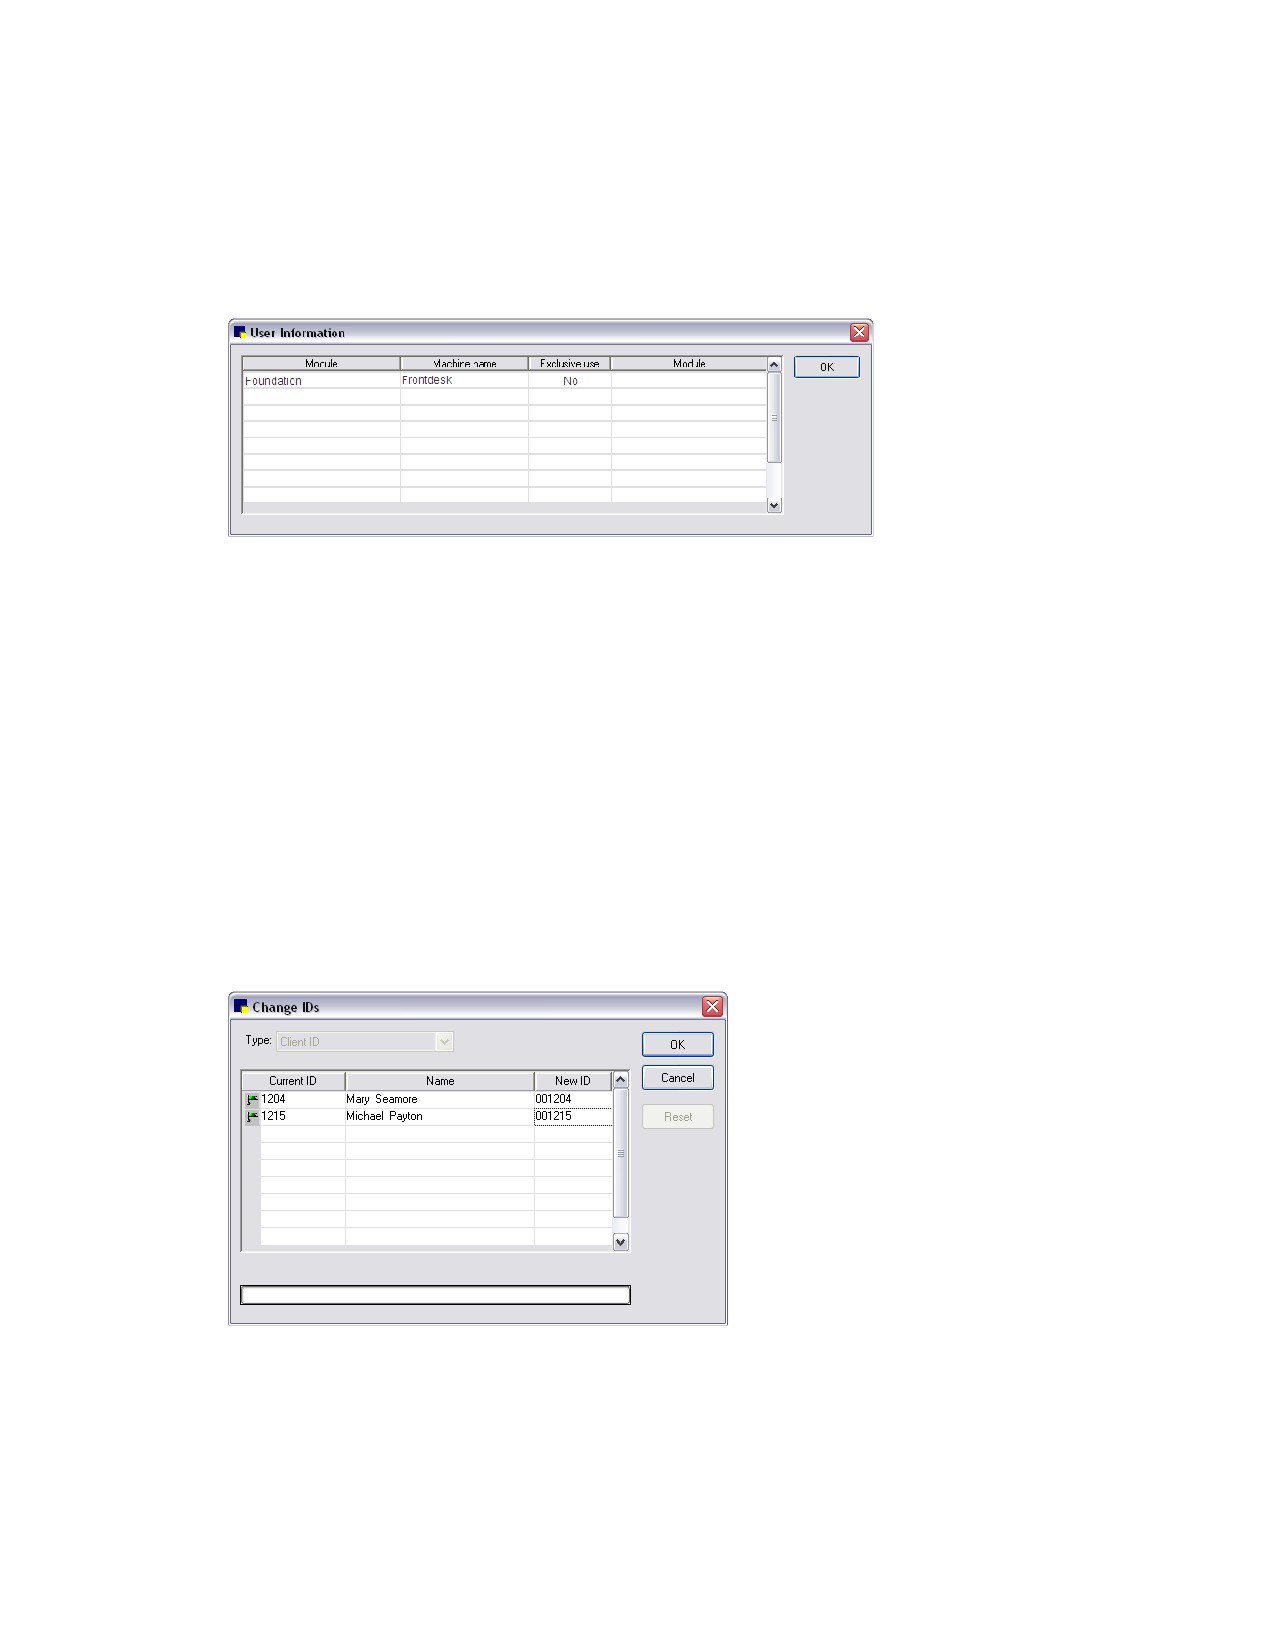
To check which computers are logged into Cornerstone at any time, open the User Information dialog
box.
To view computers logged into Cornerstone:
1. On the File menu, select User Information. The User Information dialog box displays a list of the
computers currently logged into Cornerstone.
User Information dialog box
2. Click OK to close the dialog box.
Changing IDs
If you need to change a client ID, patient ID, or invoice item ID, you can do this using the Change IDs
tool.
IMPORTANT: We strongly advise making a backup of your database before changing IDs.
Before You Begin
• Identify which client, patient, or invoice item IDs to change. Verify that the IDs you want to
change them to are not being used.
• Back up your Cornerstone database.
To change an ID:
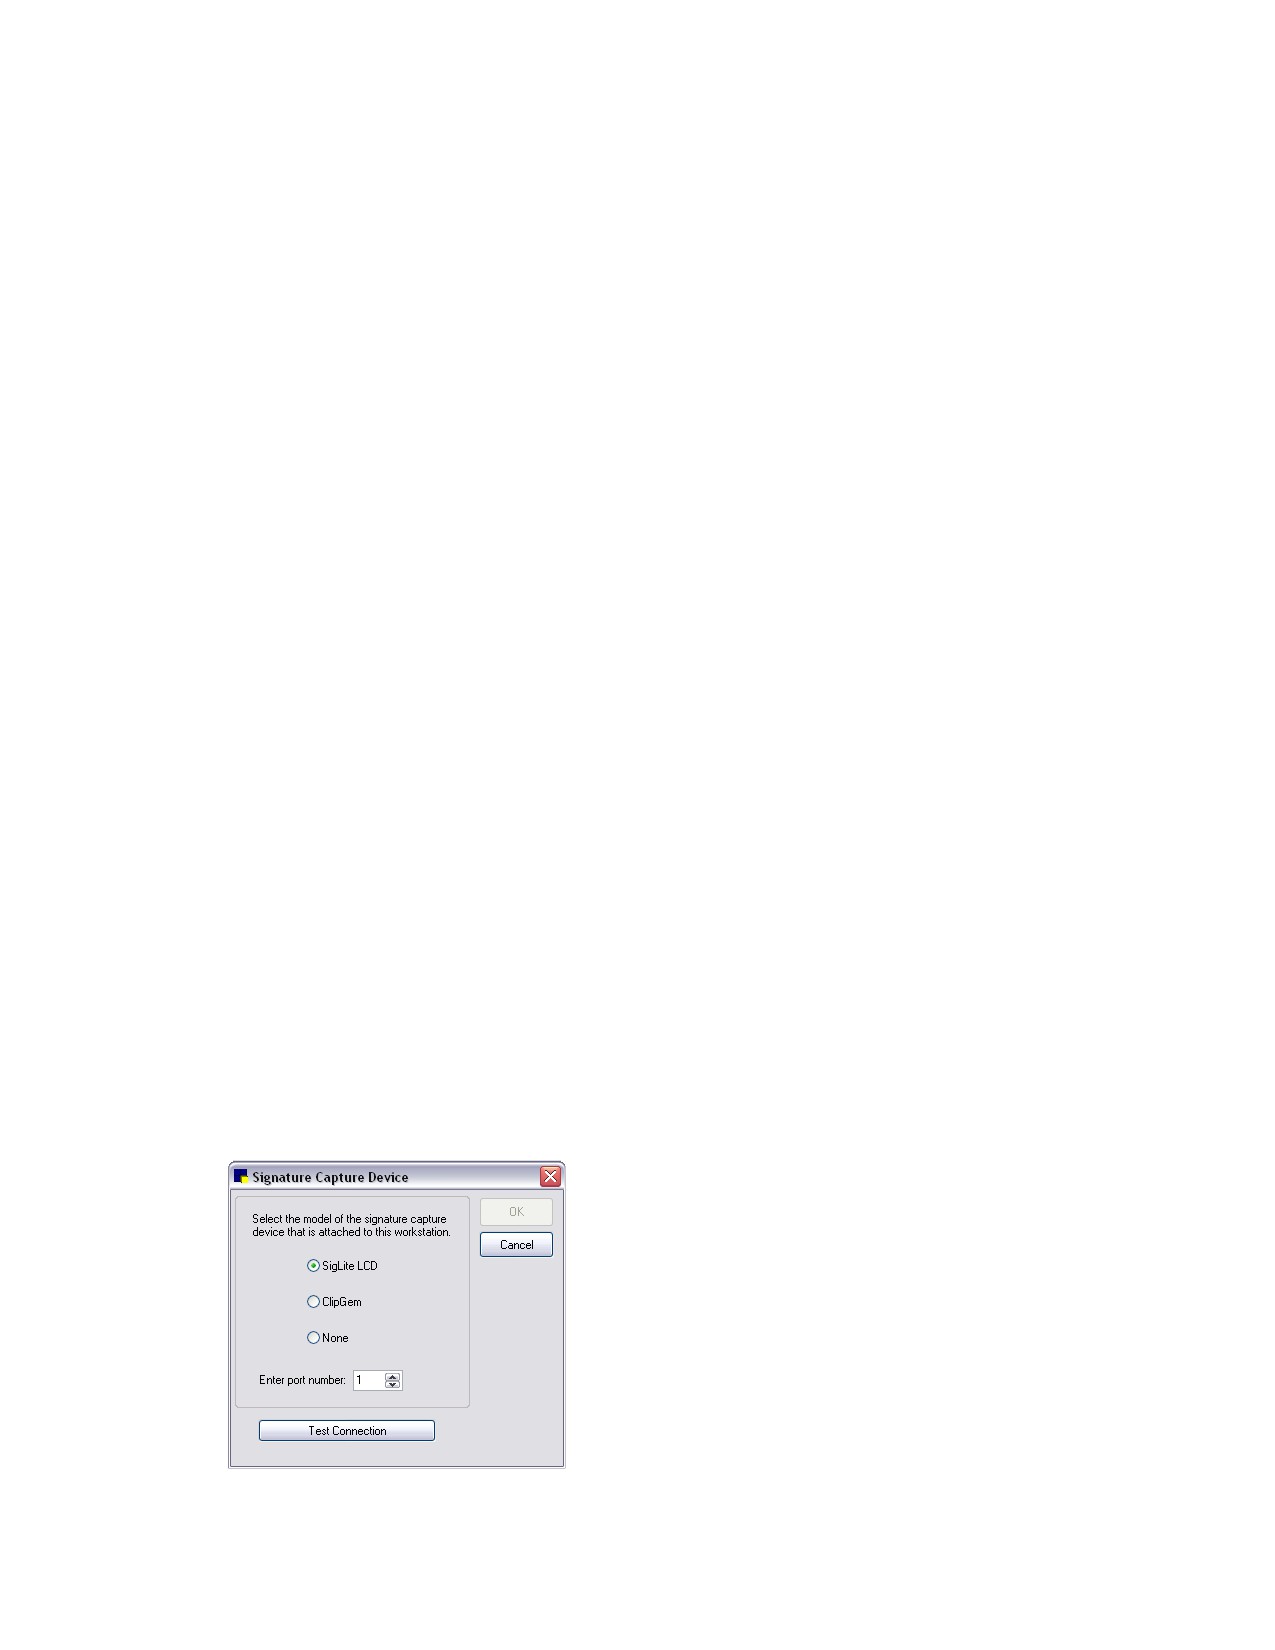
1. On the Tools menu, select Change ID. The Change IDs dialog box appears.
Change IDs dialog box
2. From the Type drop-down list, select Client ID, Invoice Item ID, or Patient ID.
3. In the first available row in the Current ID column, type the ID or press F2 to search for and select
the client, patient, or invoice item ID that you want to change. The name of the client, patient, or
invoice item is displayed.
15
Chapter 1: Getting Started with Cornerstone* Setup
4. In the New ID column, type the new ID you want to use for this client, patient, or invoice item.
Note: You can change an ID only to a currently unused ID.
5. To change additional IDs (of the same type of ID), in the next available row, repeat steps 3 and 4.
6. Click OK to process the ID change. When you are prompted to confirm the change, click Yes.
When the IDs have been processed, a message appears to notify you of the number of changes.
The checkered flag indicates that the ID change was successful.
Setting Up a Signature Capture Device
Signature capture devices, such as signature pads and clipboards, allow you to collect, store, and
include electronic signatures on documents. Compatible signature pads and clipboards can be used
with your Cornerstone software to:
• Collect staff members’ signatures and store them in your software for later use.
• Allow staff members and clients to sign documents electronically.
• Capture electronic signatures when you are using the integrated third-payment solution. For
more information, see “XCharge® Card Payment Processing Software” on page 26.
You can store electronic signatures on documents in patient history. Once a document that includes an
electronic client signature is saved, you cannot change the document.
Supported Signature Capture Devices
The following signature capture devices are supported in Cornerstone:
• Topaz® ClipGem®
• Topaz SignatureGem® (SigGem)
• Topaz SigLite®
In addition, you can use a supported tablet PC to capture an electronic signature.
For information on purchasing a signature capture device or tablet PC, call IDEXX Practice Solutions at
1-888-224-4408.
Note: If a signature capture device will be used on a thin-client workstation, the device may need to be
connected to an AnywhereUSB® device, depending on the type of signature capture device being used.
To set up your system to use a signature capture device:
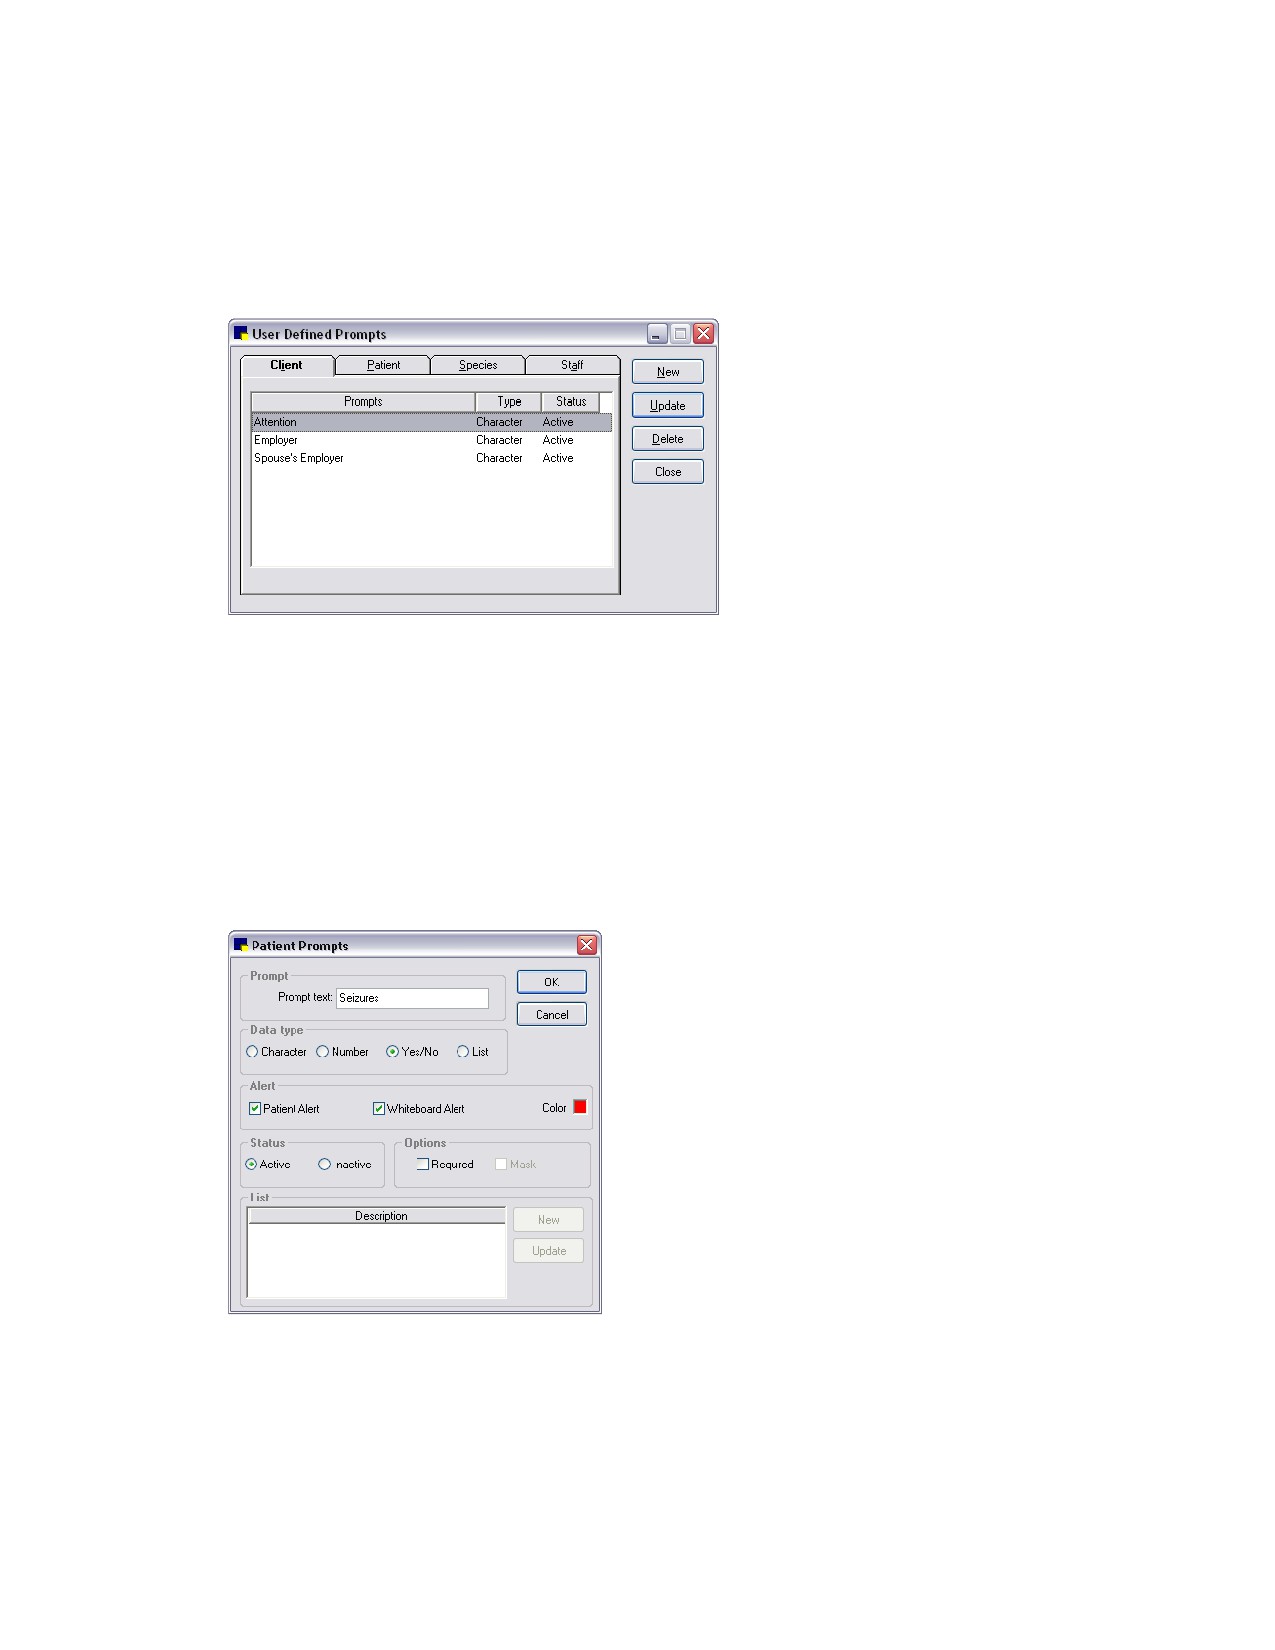
1. On the Tools menu, select Signature Capture Device. The Signature Capture Device dialog box
appears.
Signature Capture Device dialog box
16
Chapter 1: Getting Started with Cornerstone* Setup
2. Select SigLite LCD, ClipGen, or None, and then enter the port number.
3. Click Test Connection to test the device’s connection to Cornerstone.
4. Click OK.
17
Chapter 2: Setting Up Cornerstone* Controls
Overview
Controls allow you to set up your IDEXX Cornerstone* Practice Management System so that customized
options (such as those for classifications, colors, reason for visit, billing messages, and units of
measure) you use every day are available from predefined drop-down lists and other fields throughout
the program.
When setting up Controls menu options in Cornerstone, you can:
• Activate or deactivate the status of specific settings (such as prompts, taxes, and discounts).
• Activate or deactivate specific settings that cause alerts (such as classifications and credit
codes).
• Change descriptions to customize them to your practice’s needs and make them more
meaningful.
Note: Cornerstone defaults are a subset of Cornerstone controls. Defaults are covered in “Chapter 4:
Setting Practice and Workstation Defaults” beginning on page 83.
Updating Controls
To update items set up through the Controls menu:
1. On the Controls menu, select the type of control you want to change.
2. From the list of settings, select the setting to modify, and then click Update. The corresponding
dialog box appears.
3. Update the description or other options, as applicable.
4. Click OK to save your changes.
Deleting Unused Controls
You can delete any item in a Controls menu list if the item is not linked to a patient or client record.
Deleting items you’ll never use saves you time when you select information in dialog boxes.
If a controls item is being used for a client, patient, staff, invoice item, census, or other record, you
cannot deleted it.
To delete items set up through the Controls menu:
1. On the Controls menu, select the type of control you want to delete.
2. From the list of settings, select the setting to remove and click Delete. When you are prompted to
confirm the deletion, click OK.
The deleted controls item no longer appears as a choice in dialog boxes.
User Defined Prompts
Add User Defined Prompts to customize Cornerstone for your practice. Set up prompts for standard
information you record (that is not already included in Cornerstone) and then answer the prompts on the
Prompts/Notes tab when adding or editing client, patient, or staff information.
Note: You should never store sensitive client data, such as credit card numbers or Social Security
numbers, in Cornerstone. If you want to use Cornerstone to process payments in a manner that is PCI
18
Chapter 2: Setting Up Cornerstone* Controls
PA-DSS (Payment Credit Industry Payment Application Data Security Standard) certified, be sure to use
one of our approved Cornerstone payment processing integrations.
To add or edit a prompt:
1. On the Controls menu, select User Defined Prompts. The User Defined Prompts dialog box
appears.
User Defined Prompts dialog box
2. Click the Client, Patient, Species, or Staff tab.
3. If setting up a species prompt, on the Species tab, in the Species ID text box, type the species ID
or press F2 to select the species from the Species List.
Note: Species prompts appear only in the Patient Information Prompts/Notes tab for patients of
that particular species. For example, the Feline prompt Declawed? does not appear in a Canine
patient’s prompts.
4. Click New to add a new prompt or double-click an existing prompt to update it. The applicable
Prompts dialog box appears.
Patient Prompts dialog box
5. In the Prompt text text box, type the prompt or question that staff will complete when entering a
patient’s information in Cornerstone. This prompt text appears in the Client Information, Patient
Information, or Staff Information window and in an alert box if you use this prompt as an alert.
6. In the Data type area, select one of the following to determine the method for answering the prompt:
19
Chapter 2: Setting Up Cornerstone* Controls
• Character-Answered by entering alphanumeric characters (standard text).
• Number-Answered by entering numeric characters (only numbers accepted).
• Yes/No-Answered by selecting Yes or No in response to a question prompt.
• List-Answered by selecting the information from a prepared list. To set up a list, select the List
data type and then in the List area, click New. In the Prompt List box, type an answer to add to
the list, and then click OK.
7. On the Client or Patient tabs, select the Client Alert or Patient Alert check box if you want to use
this prompt as an alert (display an alert when the client or patient records are accessed). To select a
color for the alert text, click the colored square and then select a color or define a custom color.
8. On the Patient tab, if you want this prompt to display as an alert on the Electronic Whiteboard
windows, select the Whiteboard Alert check box. If you want to select a color for the alert text, click
the colored square and then select a color or define a custom color.
Note: If designating a Patient prompt as both a patient alert and a Whiteboard alert, the selected
color will be used for both types of alerts.
9. In the Status area, select Active or Inactive. (Change the status to Inactive only if you no longer
want this prompt to appear.)
10. Select the Required check box if you want the answer to this prompt to be required in order to
complete the record.
11. Click OK, and then click Close.
For a complete list of Client prompts currently set up in Cornerstone, print an Initial Client Setup
Report.
For a complete list of Species prompts currently set up in Cornerstone, print an Initial Patient Setup
Report sorted by Species Prompt.
For a complete list of Staff prompts currently set up in Cornerstone, print an Initial Staff Prompt
Report sorted by Staff Defined Prompts.
Classifications
Use Classifications to categorize clients, patients and staff members into groups. Classifications
determine:
• Which clients receive reminders.
• The types of clients or patients that need special attention (using the alert Classification).
• How some reports are organized.
Classifications appear in the Client Information, Patient Information, and Staff Information windows.
20
Chapter 2: Setting Up Cornerstone* Controls
Before You Begin
• Before you assign an alert to a client or patient classification, you should understand how alerts
are used. See “Alerts Defaults” on page 85.
• Before deciding which client classifications should receive reminders, you should have a
reminder strategy. See “Reminder Strategies” on page 278.
To add or edit a classification:
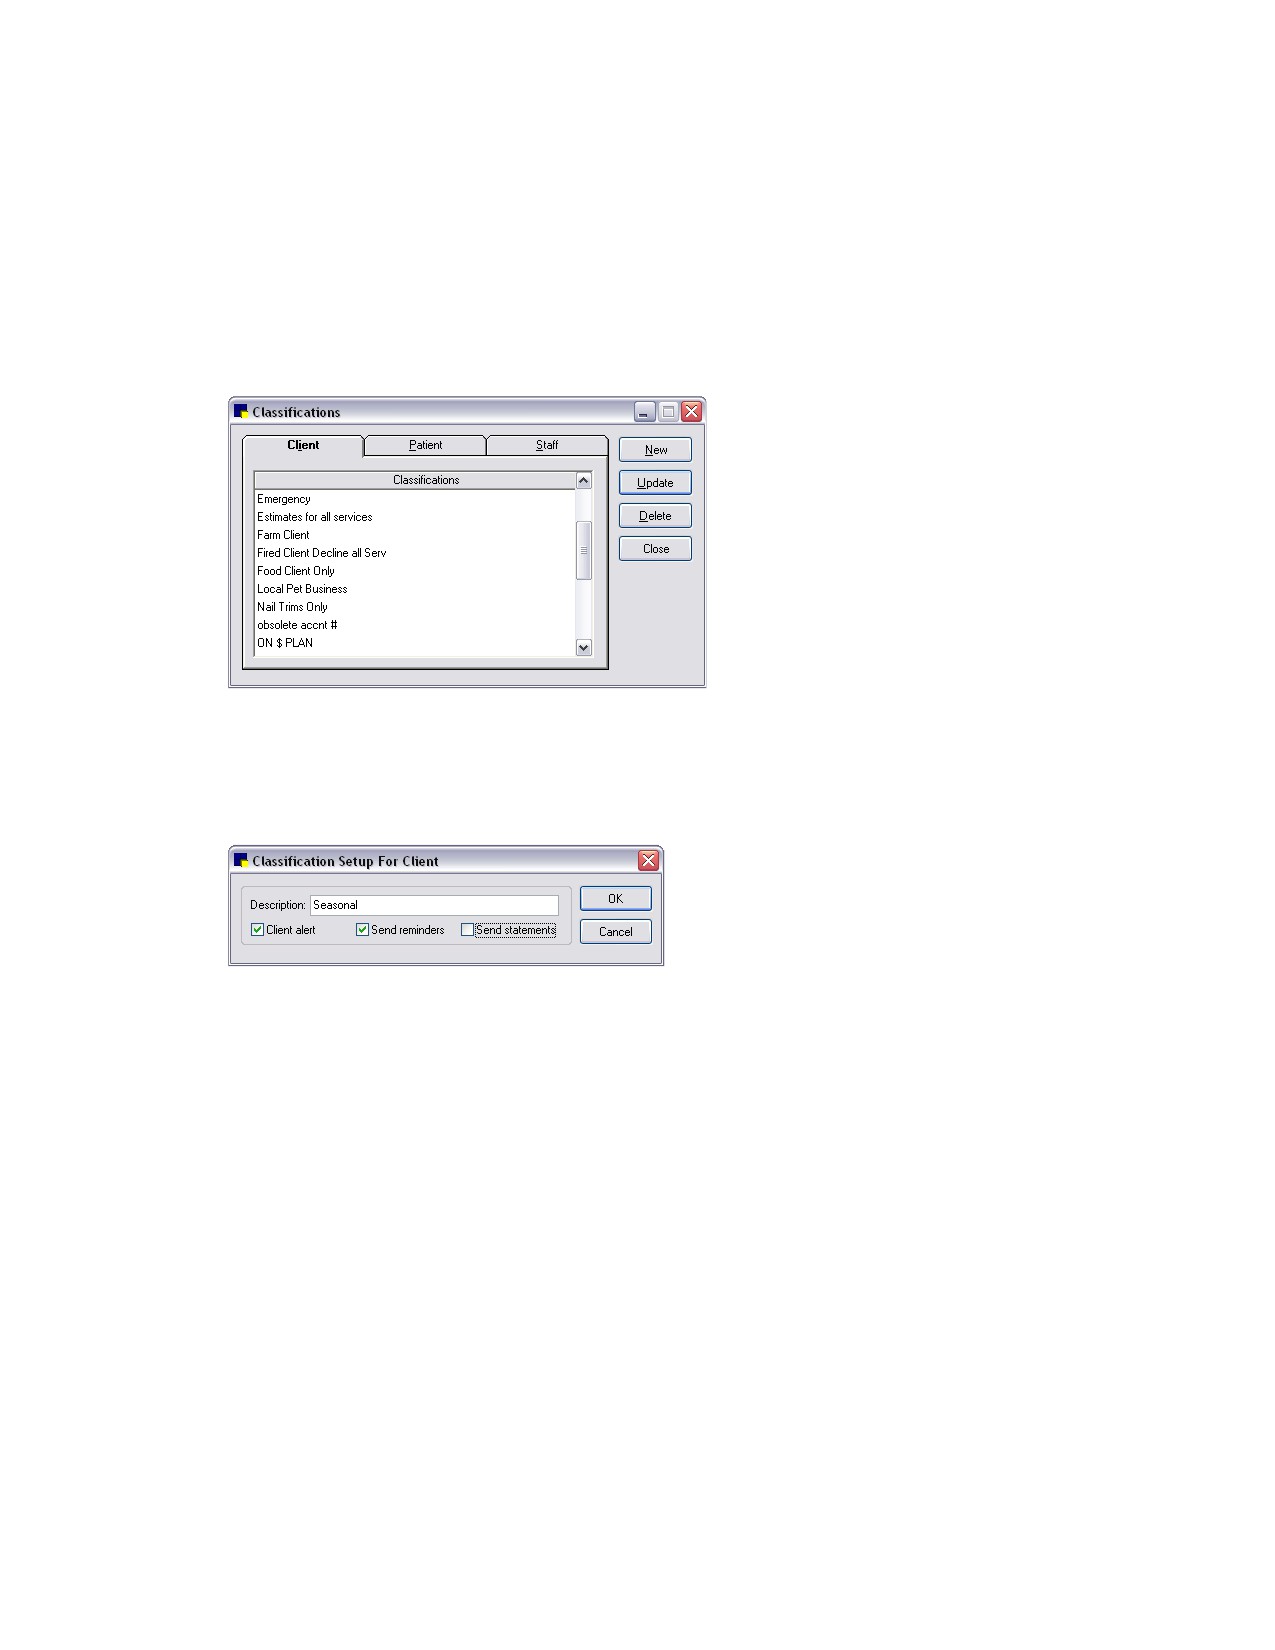
1. On the Controls menu, select Classifications. The Classifications dialog box appears.
Classifications dialog box
2. Click the Client, Patient, or Staff tab.
3. Click New to add a new classification, or double-click an existing classification to update it. The
Classification Setup dialog box appears.
Classification Setup (For Client) dialog box
4. In the Description text box, type an identifying name for the classification.
5. For Client classifications, do any of the following:
• Select the Client alert check box if you want an alert to display when client records are
accessed for this type of client.
• Select the Send reminders check box if you want this type of client to receive reminders. `
For example, for seasonal clients, you could select the Send reminders check box in the
summer months and clear the check box in the winter months when the client leaves your
vicinity.
Note: You do not have to select Send reminders for client classifications at this time. After you
set up your client classifications, you can print an Initial Client Setup Report to help you decide
where to apply the Send reminders option to client classifications based on your reminder
strategy.
• Select the Send statements check box if you want to send statements to this type of client.
6. For Patient classifications, do any of the following:
21
Chapter 2: Setting Up Cornerstone* Controls
• Select the Patient alert check box if you want an alert to display when patient records are
accessed for this type of patient.
• Select the Whiteboard alert check box if you want this classification to display as an alert on
the Electronic Whiteboard windows.
7. Click OK, and then click Close.
Note: You can set up a default classification to use when entering new clients and patients. See “Client
Defaults” on page 96 and “Patient Defaults” on page 120.
For a complete list of client classifications currently set up in Cornerstone, print an Initial Client
Setup Report sorted by Classifications.
Patient Colors
You can use Colors to help identify your patients. The selected color displays on the Patient Clipboard*
Patient information area and in the Patient Information window.
Before You Begin
¾ If you started with a Fastart* or FastInstall database, review the colors that are already set up in the
Colors dialog box before adding new colors.
To add or edit a patient color:
1. On the Controls menu, select Colors. The Colors dialog box appears.
2. Click New to add a new patient color, or double-click an existing color to update it. The Patient Color
Setup dialog box appears.
3. In the Description text box, type an identifying name for this color.
4. Click OK, and then click Close.
Note: While you are can manually enter a color when setting up a patient record, the new color is not
added to the list of colors. Only patient colors added using Controls > Colors are included in reports.
Reasons for Visit
The Reason for Visit feature allows you to assign primary and secondary reasons to a patient’s visit to
indicate why the patient is being seen at the practice. This information helps staff to better prepare for
scheduled appointments and monitor inpatients on the Electronic Whiteboard.
When you set up reasons for visit, keep in mind that the primary reason typically indicates the general
type of visit, and the secondary reason is typically used to provide more detail on the specific problem or
procedure. For example, if the primary reason is Surgery, the secondary reason might be Spay/Neuter,
Hip replacement, Cruciate, or Orthopedic.
Note that secondary reasons are not tied to any particular primary reason—at the time of use, any
secondary reason can be selected along with any primary reason. Also note that at the time of use, the
primary reason must be selected from your predefined list, but you can type any secondary reason in
the Secondary text box (you do not have to select it from a list).
Tip: To avoid staff having to select from a long list of secondary reasons, you may want to set up the
predefined list with only the most common secondary reasons and instruct staff to type other secondary
reasons as needed.
If you use the Appointment Scheduler, once you have set up your reasons for visit, you can then set up
the color codes, fees, staff, and staff time involved for appointments using these reasons for visit (in
22
Chapter 2: Setting Up Cornerstone* Controls
Controls > Appointment Scheduler > Reasons for Visit). See “Chapter 12: Setting Up the
Appointment Scheduler” beginning on page 263.
To add or update reasons for visit:
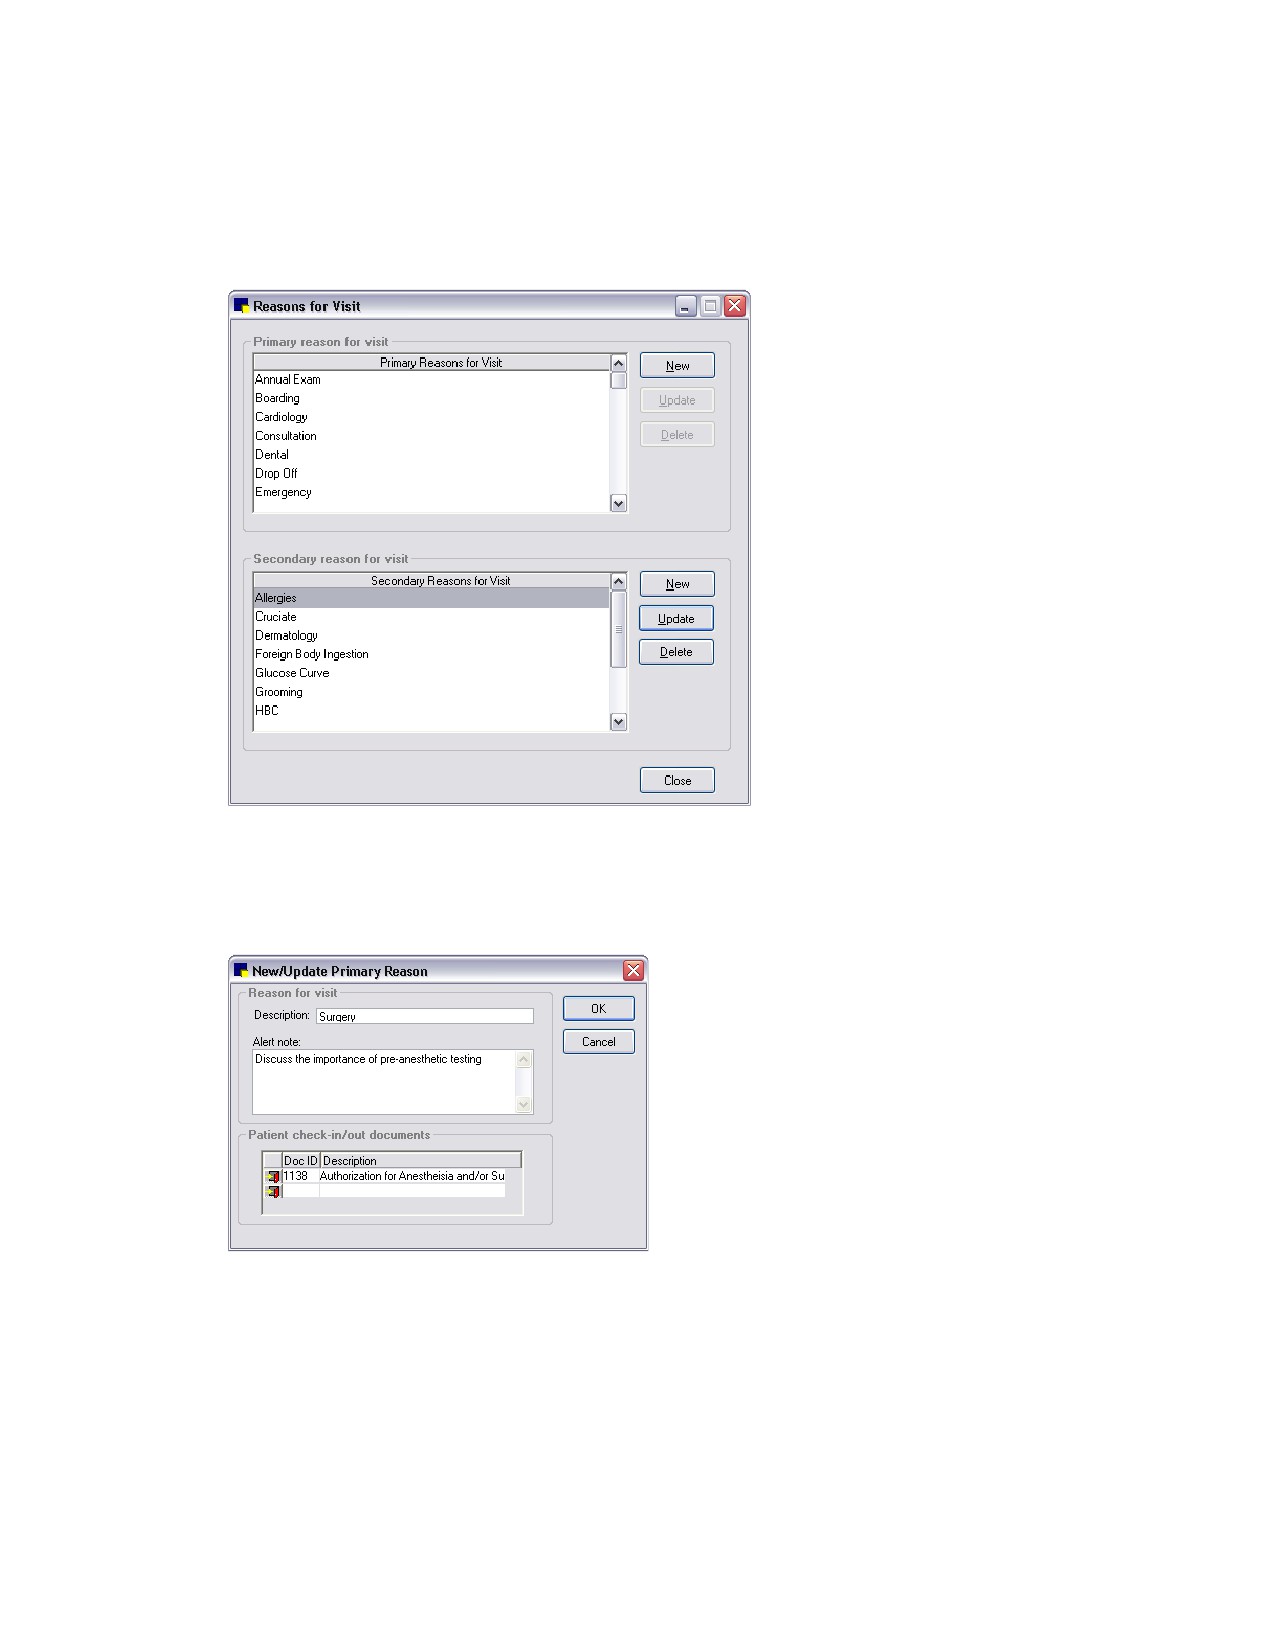
1. On the Controls menu, select Reason For Visit. The Reasons for Visit dialog box appears.
Reasons for Visit dialog box
2. To add or update a primary reason for visit, in the Primary reason for visit area, click New to add a
new primary reason, or double-click an existing reason to update it. The New/Update Primary
Reason dialog box appears.
New/Update Primary Reason dialog box
3. In the Description text box, type a brief identifying name for this primary reason (for example;
Surgery, Annual Exam, Grooming).
4. To display a pop-up window that reminds staff of specific information related to this reason for visit,
type the information in the Alert note text box (to start a new line, press CTRL+ENTER). When this
reason is selected while making an appointment or checking in a patient, a pop-up window displays
the information for staff.
23
Chapter 2: Setting Up Cornerstone* Controls
For example, when Surgery is selected as the reason for visit, you may want to alert staff with a
reminder to discuss the importance of preanesthetic testing. Another example would be displaying
an alert to remind staff that a CBC is required when an Annual Exam reason is selected.
5.
To link a specific Cornerstone document or documents with this reason for visit so the document
prints when the patient is checked in or checked out (for example, link a surgery consent form to
Surgery), do the following:
a. in the Doc ID column of the Patient check-in/out documents area, type the document ID or
press F2 to select the document from the Document Template List.
b. Click the Check-in/out icon to specify if the document should print at check-in time or check-out
time:
• Yellow arrow “in”
icon-Document prints at check-in time.
• Green arrow “out”
icon-Document prints at check-out time.
c. Repeat steps a-b for each document you want to link to this reason for visit.
Note: You can also add or remove documents at check-in time.
6.
Click OK to save and return to the Reasons for Visit dialog box.
7.
To add or update a secondary reason for visit, in the Secondary reason for visit area, click New to
add a new secondary reason, or double-click an existing reason to update it. The New/Update
Secondary Reason dialog box appears.
8.
In the Add/Update Secondary Reason for Visit text box, type a brief identifying name for this
secondary reason (for example; Cruciate, Glucose Curve, Foreign Body Ingestion) and click OK.
9.
Click OK.
Patient Sexes
Use Patient Sex to identify and classify patients, as well as assign the Modified sex to apply if a sex
changes when certain surgeries (such as ovariohysterectomy) are performed.
Note: For a service that changes a patient’s sex, you can set up the service’s invoice item to initiate the
Sex Modification special action. When the service is invoiced, if you have assigned a Modified sex for
the applicable patient sex, Cornerstone automatically processes the special action during invoicing. See
”Setting Up Invoice Items to Initiate a Special Action” on page 202 for more information.
Before You Begin
¾ If you started with a Fastart or FastInstall database, review the patient sexes and modified sexes
already set up in the Patient Sex dialog box.
To add or edit a patient sex designation:
1. On the Controls menu, select Sex. The Patient Sex dialog box appears.
2. Click New to add a new patient sex, or double-click an existing patient sex designation to update it.
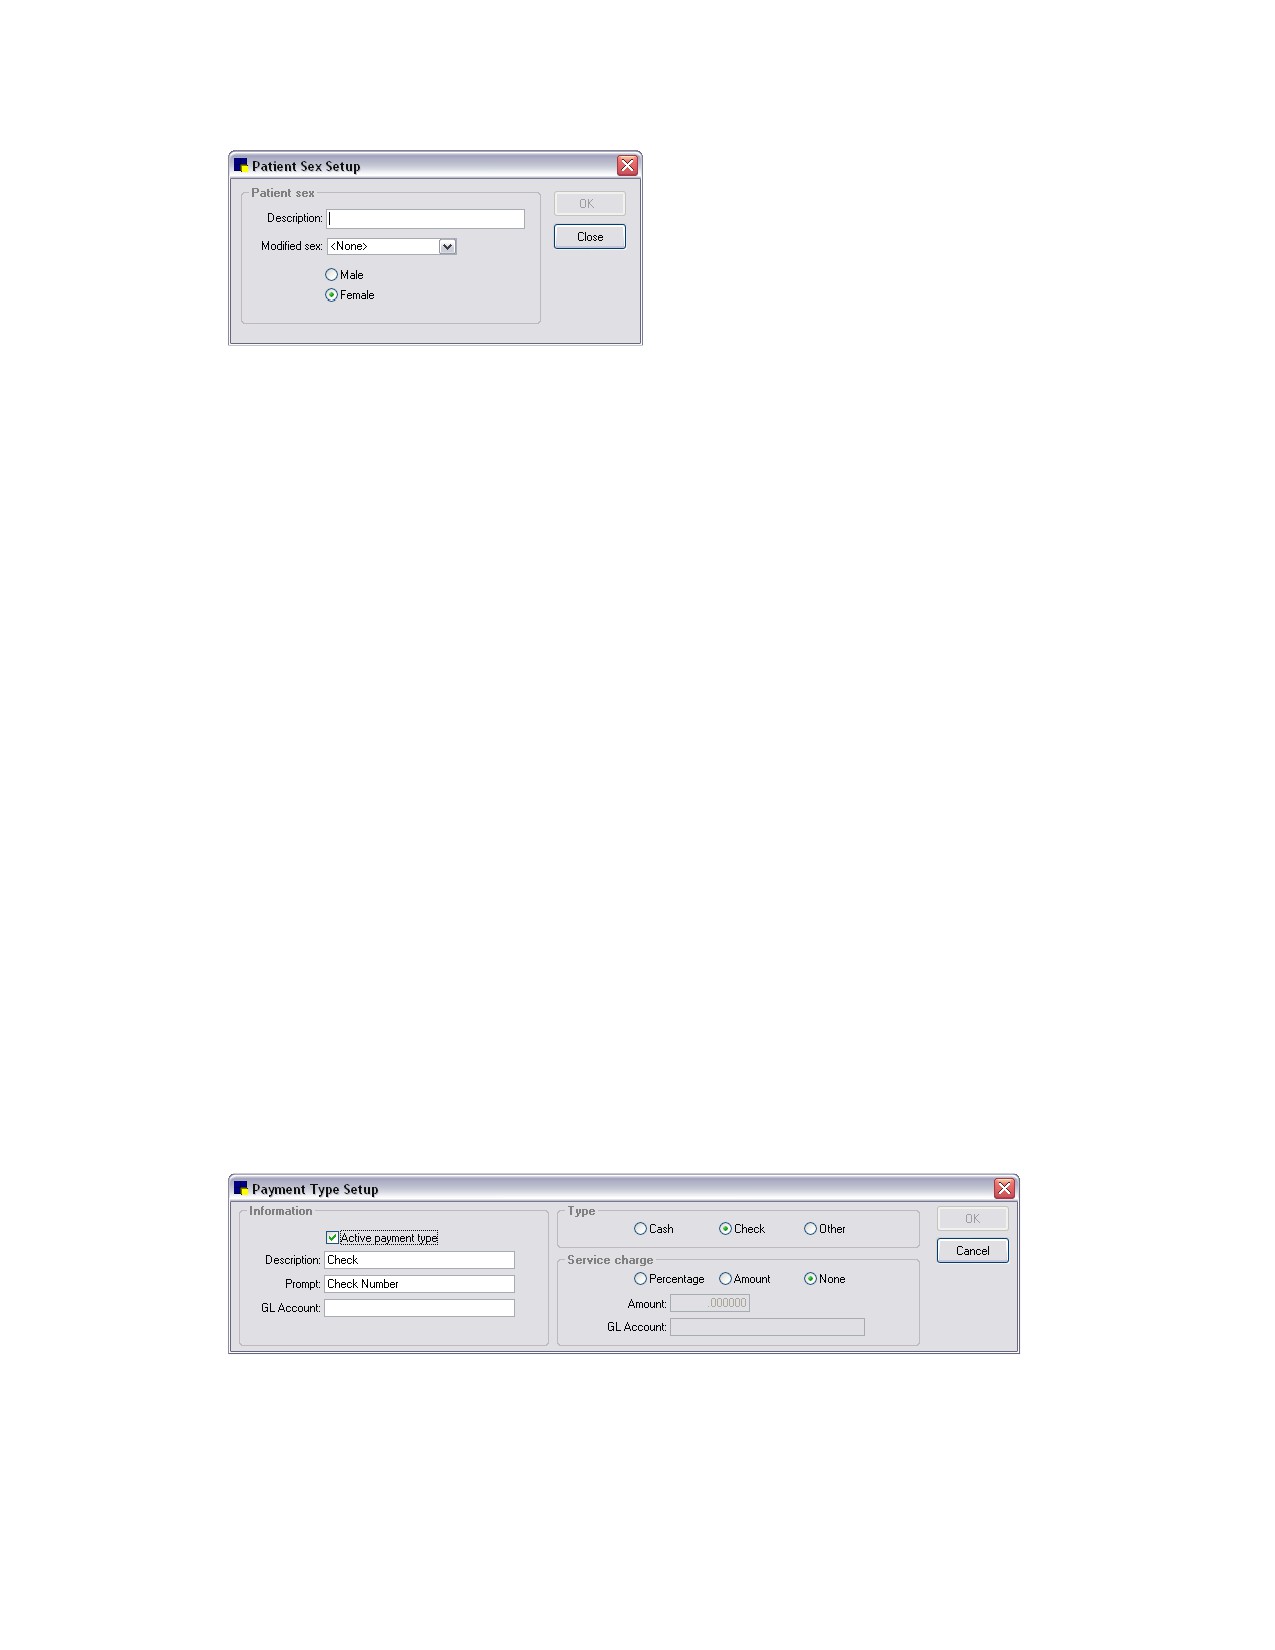
The Patient Sex Setup dialog box appears.
24
Chapter 2: Setting Up Cornerstone* Controls
Patient Sex Setup dialog box
3. In the Description text box, type an identifying name for the patient sex designation you are adding.
4. If this sex changes when certain surgeries are performed, select the appropriate Modified sex.
5. If you need to provide state-required controlled substance information, select the applicable Male or
Female option. See “Controlled Substance Export List” on page 33 for more information on the
controlled substance export program.
6. Click OK and then click Close.
Payment Types
Use Payment Types to set up the types of payments you accept in your practice. When a client makes
a payment, you must enter a payment type in the Payment dialog box. Payment Types are important
because they determine how payments appear in certain reports. For example, any payment type of
Check appears on the Deposit Report - Checks. Cornerstone uses Cash, Check, and Other as general
payment categories in other reports.
You can also add a prompt to a payment type. For example, add a Check Number prompt to a Check
payment type to collect detailed information about the payment.
Before You Begin
¾ If you started with a Fastart or FastInstall database, review the payment types already set up in the
Payment Types dialog box.
To set up a payment type (for non-credit/debit card payment types):
Note: For information on setting up credit or debit card payment types in Cornerstone, see “Credit and
Debit Payment Types” on page 26.
1. On the Controls menu, select Payment Types. The Payment Type dialog box appears.
2. Click New to add a new payment type, or double-click an existing payment type to update it. The
Payment Type Setup dialog box appears.
Payment Type Setup dialog box
3. In the Description text box, type an identifying name for this payment type.
4. In the Prompt text box, if applicable, type a prompt to appear when this payment type is selected.
25
Chapter 2: Setting Up Cornerstone* Controls
5. If your practice uses the General Ledger Interface, type an account name or number in the GL
Account box.
6. In the Type area, select, Check or Other.
7. If your practice uses the General Ledger Interface, use the options in the Service charge area to
automatically calculate a service charge total amount. For example, if you want to know how much
in service charges your practice owes American Express, you can set up your payment type to
calculate this total. Select one of the following service charge options:
• To calculate a percentage, select Percentage and enter the percentage amount in the Amount
text box.
• To calculate a flat amount, select Amount and enter the total in the Amount text box.
• If you don’t want to calculate a service charge on this payment, select None.
Note: This information is available only on the GL Batch Report. It does not appear on any other
Cornerstone reports.
8. Click OK, and then click Close.
9. If this is a new payment type, be sure to add it to the applicable credit codes you have set up in
Cornerstone. See “Credit Codes” on page 28 for information.
Credit and Debit Payment Types
Cornerstone offers a simple and secure solution for integrated credit card processing. Cornerstone
works with a third-party payment provider to process credit and debit card transactions through an
Internet connection.
XCharge® Card Payment Processing Software
XCharge® software, developed by Accelerated Payment Technologies™, provides third-party card
payment processing for Cornerstone. XCharge is a secure and simple-to-use solution that processes
both credit and debit card transactions in the United States and Canada.
Note: Credit card numbers are not stored within Cornerstone—the XCharge software, which functions
outside of Cornerstone, shields Cornerstone from this information.
Getting Started with XCharge
Step 1-Apply for an XCharge Merchant Account
Contact Accelerated Payment Technologies at 1-888-412-3433 to get started on setting up your
XCharge merchant account. You will need to have your business and banking information (Tax ID
number, bank account number, bank routing number, etc.) ready when you call. Once approved,
you will receive your merchant account number (merchant ID).
Note: If your practice plans to require address verification and/or the CVV2/CVC2 (Card Verification
Value/Card Verification Code) when a credit card number is manually entered, notify Accelerated
Payment Technologies of this requirement at application time when setting up your merchant
account. (Address and CVV2/CVC2 verification is available only in the United States.)
Step 2-Install, set up, and receive training on the XCharge software
An XCharge representative will work with you to install the XCharge software and configure the
settings to meet the needs of your practice. In a phone-based installation and training session, your
XCharge representative will provide training on setting up users, receipt printing and PIN pad and/or
26
Chapter 2: Setting Up Cornerstone* Controls
card swipe reader devices. Your XCharge representative will also walk you through a basic
transaction and answer any questions that may arise.
Step 3-Set up your payment types in Cornerstone
In Cornerstone, set up payment types for credit and debit payments and specify XCharge as the
provider for these payment types. See “Credit and Debit Payment Types” on page 26 for more
information.
Step 4 (Optional)-Set up a signature capture device
Use a supported signature capture device or tablet PC to capture a client’s electronic signature for
all credit card payments. This helps you have fewer paper receipts to manage. For more
information, see “Setting Up a Signature Capture Device. For more information, see “Setting Up a
Signature Capture Device” on page 16.
If You Need Help Processing Card Payments with XCharge
Once you have installed the XCharge software, you can access the XCharge Help and manual from the
Help menu within the XCharge software.
If you cannot find the answer to your question in the Help or manual, you can contact Accelerated
Payment Technologies Customer Care for technical support toll-free at 1-800-338-6614.
Setting Up Payment Types for Credit and Debit Payments
Like other payment types in Cornerstone, the credit card and debit card payment types are set up using
Controls > Payment Types. These payment types, however, include special setup options that you
must be configure in addition to the standard payment type options.
To set up credit/debit card payment types in Cornerstone:
Note: There are two separate card processing payment types available for use with Cornerstone—the
Credit Card Payment type and the Debit Card Payment type. You can set up either or both of these
payment types, depending on the credit and debit payment options you plan to offer to your clients.
1. On the Controls menu, select Payment Types.
2. Select the Credit Card Payment (or Debit Card Payment) payment type and click Update. A
Payment Type Setup message appears. Click OK to close the message box.
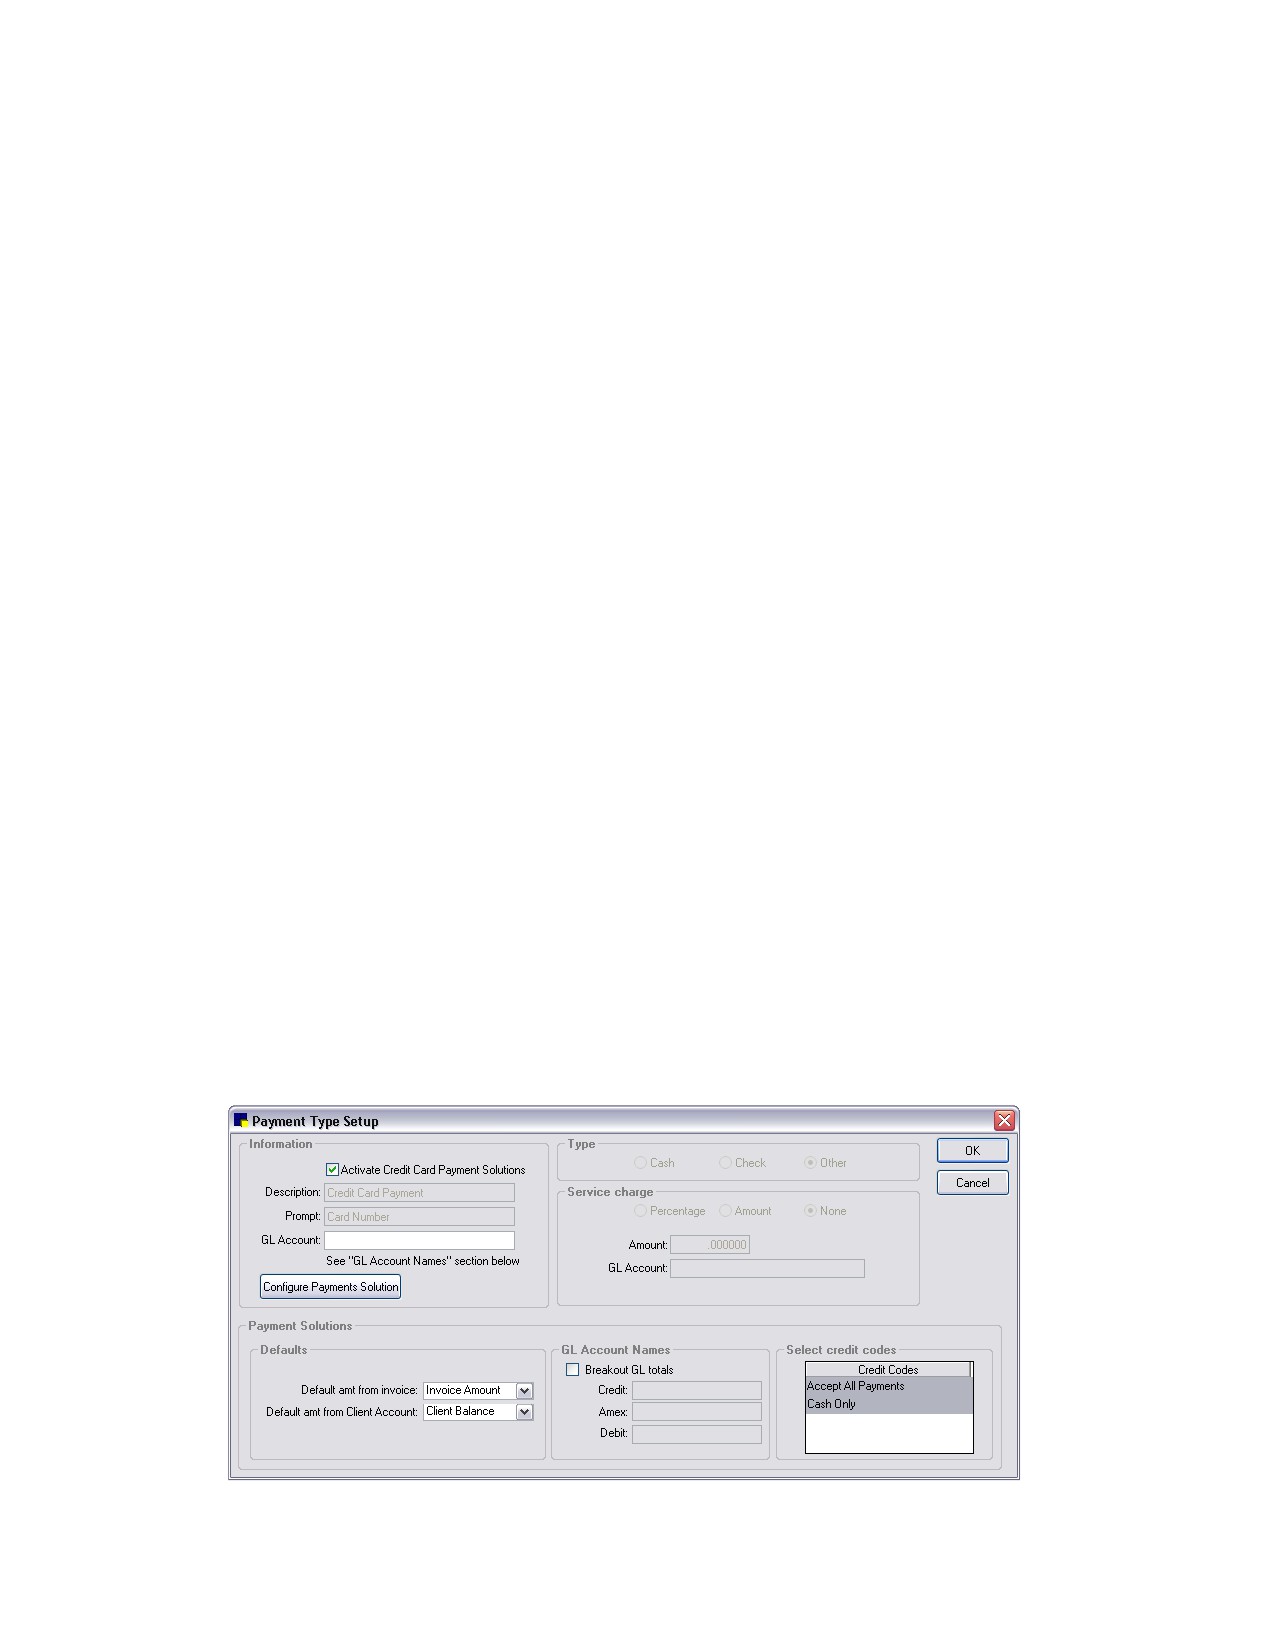
3. On the Payment Type Setup dialog box, select the Activate Credit Card Payment Solutions check
box (or the Activate Debit Card Payment Solutions check box).
27
Chapter 2: Setting Up Cornerstone* Controls
Payment Type Setup for Credit Card Payments
4.
Click Configure Payments Solution. The Credit/Debit Payment Setup dialog box appears.
5.
From the Provider drop-down list, select the third-party payment solution.
6.
Complete the associated fields in the Settings area and, if available, click Setup to specify additional
provider setup options.
Note: If you are using a signature capture device for electronic signatures, select the Enable
electronic signature capture check box.
7.
When you complete the setup for the third-party provider settings, click OK on the Credit/Debit
Payment Setup dialog box to return to the Payment Type Setup dialog box.
8.
In the Defaults area, set the following options as needed for your practice:
• Default amt from invoice-Select the default payment amount to use if you access the Payment
dialog box through an invoice. If you want the default payment amount to come from an open
invoice, select Invoice Amount. If you want the default payment amount to come from the
client’s account balance, select Client Balance.
• Default amt from Client Account-Select the default payment amount to use if you access the
Payment dialog box through a client account. If you want the default payment amount to come
from the client’s account balance, select Client Balance.
9.
If your practice uses the General Ledger (GL) interface for exporting financial data to a file, you can
select one of the following options for exporting the card payment data:
• In the Information area’s GL Account text box, type an account name to use for exporting credit
(or debit) card payment data—all payments for this payment type will be listed together under
this one account name.
• In the GL Account Names area, select the Breakout GL totals check box, and then in each of
the corresponding text boxes (Credit, Amex, Debit), type the account name to use for each
card type when exporting data.
10. In the Select credit codes area, add this payment type to the applicable credit codes you have set
up in Cornerstone (in Controls > Credit Codes) by selecting the credit code(s) in the list.
11. Click OK, and then click Close to close the Payment Types dialog box.
Credit Codes
Cornerstone uses Credit Codes to group payment types so that you can specify what types of
payments you accept from a particular client. When specific payment types are linked to credit codes, a
message appears if you try to post an unacceptable payment type.
For example, for a credit code called No Checks, you could allow all payment types except for Check.
After setting up credit codes, you can assign a default credit code to use when setting up new clients.
See “Client Defaults” on page 96.
IMPORTANT: You must assign a credit code to each client. (Credit codes are assigned in the A/R
Information tab in the Client Information window.)
Before You Begin
¾ Make sure that you have set up all of your payment types before setting up credit codes.
28
Chapter 2: Setting Up Cornerstone* Controls
To add or edit a credit code:
1. On the Controls menu, select Credit Codes. The Credit Codes dialog box appears.
2. Click New to add a new credit code, or double-click an existing code to update it. The Credit Code
Setup dialog box appears.
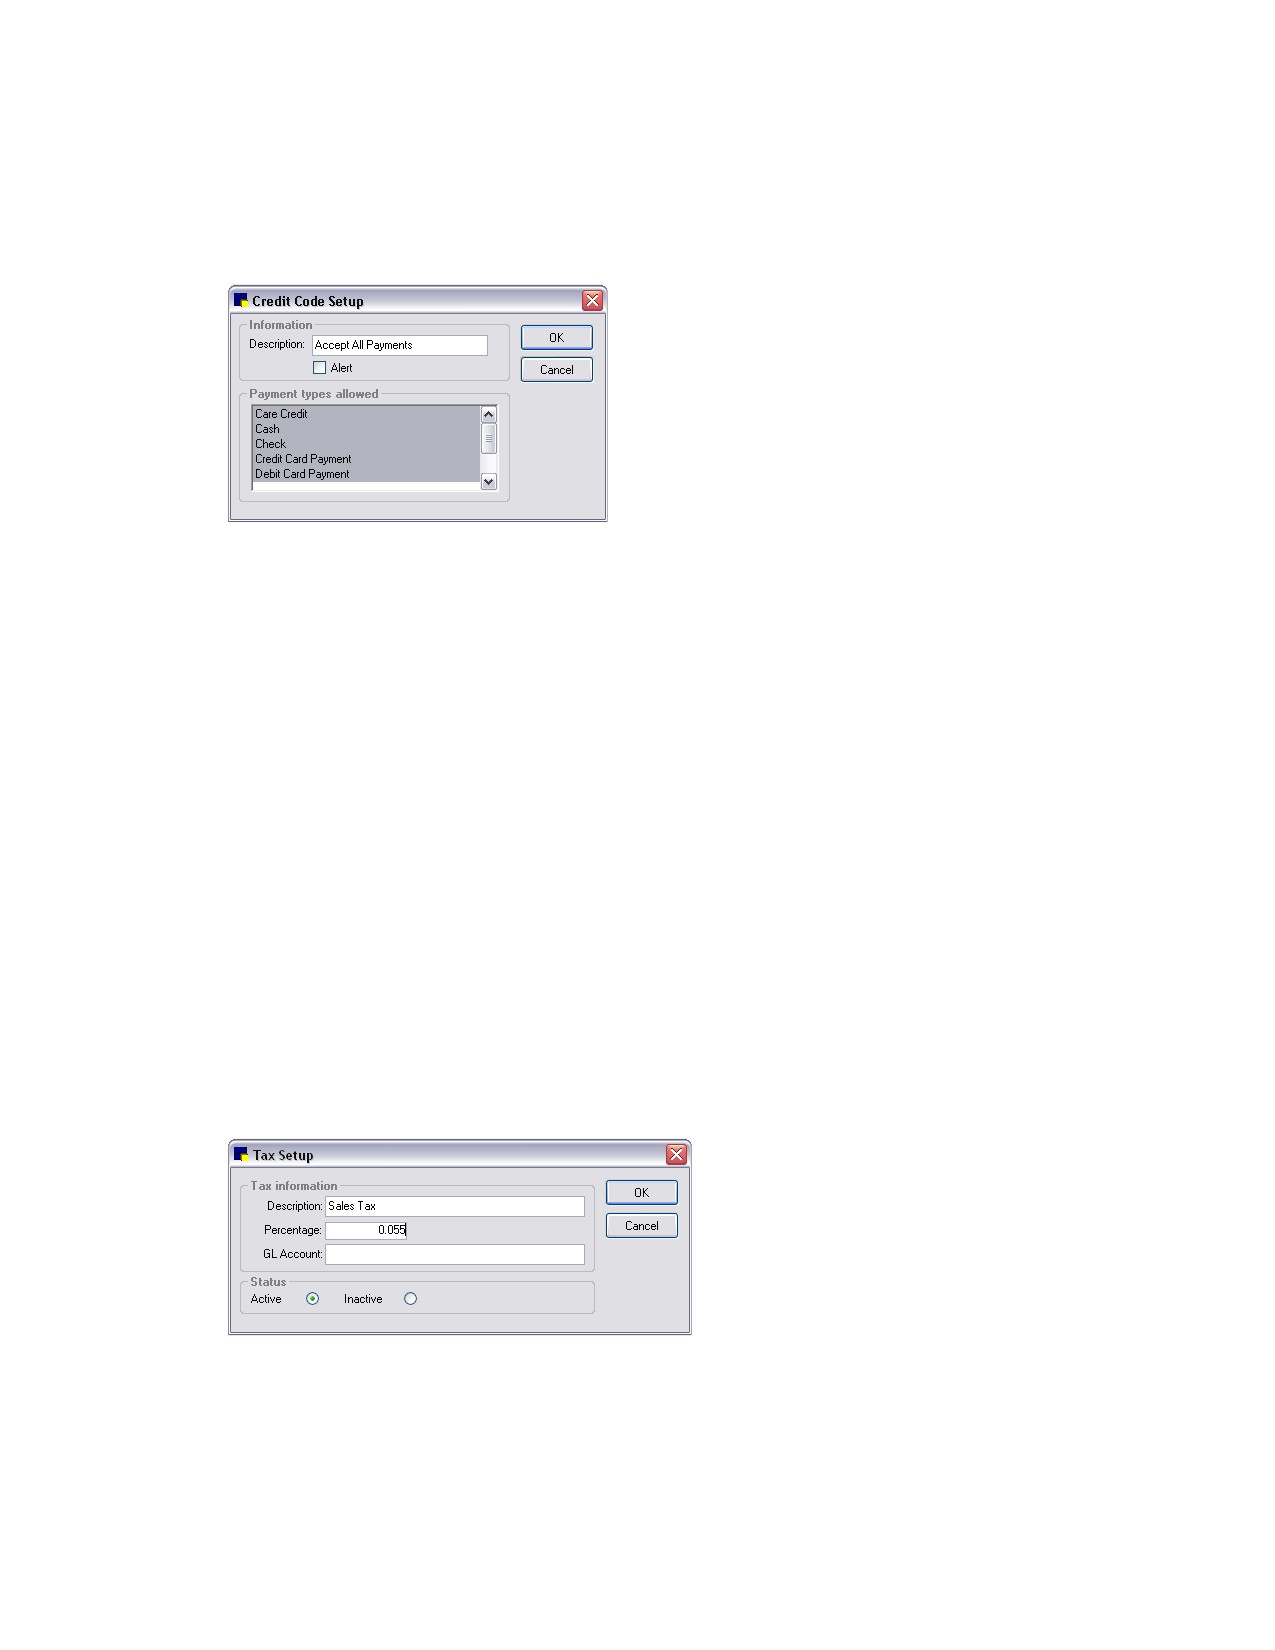
Credit Code Setup dialog box
3. In the Description text box, type an identifying name for this credit code.
4. Select the Alert check box if you want an alert to appear when accessing information for a client
who is set up with this credit code. The alert displays in red.
5. In the Payment types allowed list, select one or more payment types allowed under this credit
code.
Note: Only payment types selected in the Payment types allowed list are used during invoicing.
6. Click OK, and then click Close.
For a complete list of credit codes currently set up in Cornerstone, print an Initial Practice Setup
Report by Credit Codes.
Taxes
You can set up Taxes to use multiple tax rates in Cornerstone. This is convenient if you need to apply
different taxes to certain invoice items or if you have more than one tax per item.
To add or edit a tax:
1. On the Controls menu, select Taxes. The Taxes dialog box appears.
2. Click New to add a new tax, or double-click an existing tax to update it. The Tax Setup dialog box
appears.
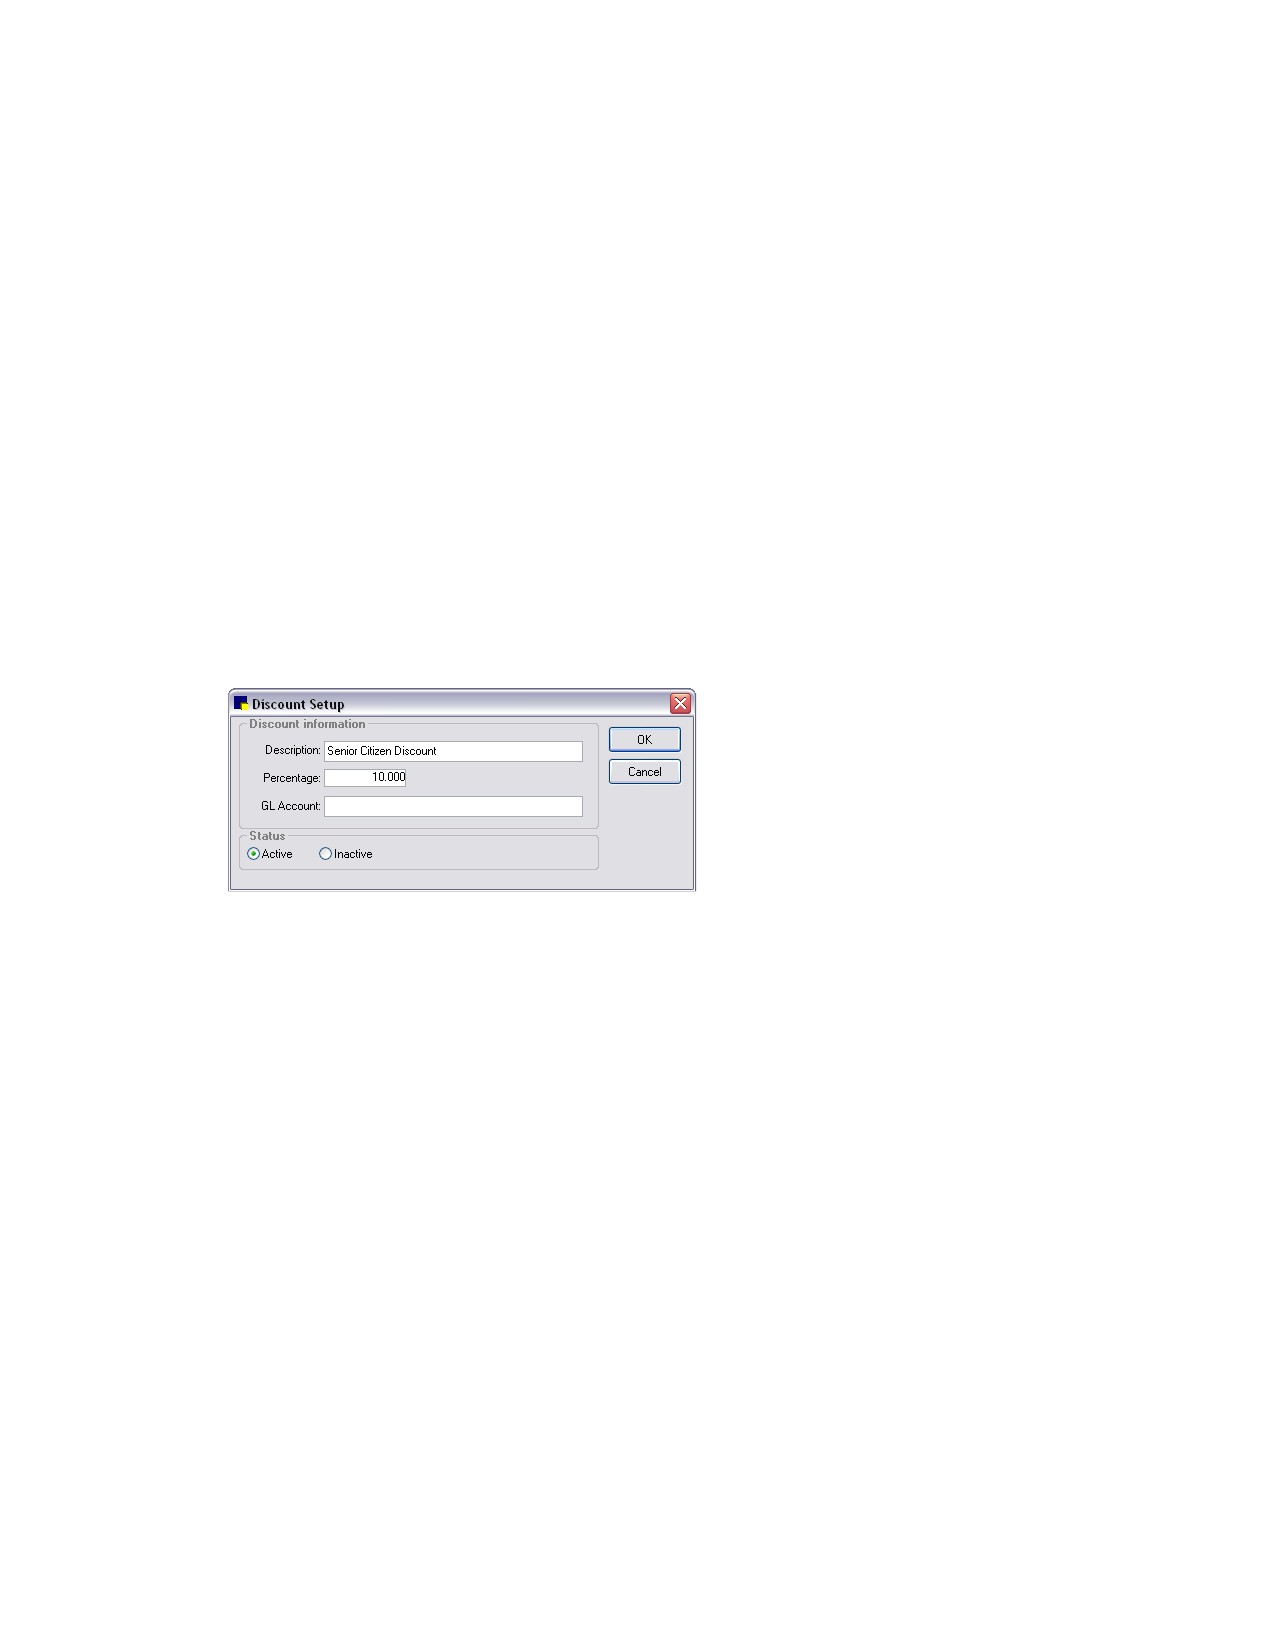
Tax Setup dialog box
3. In the Description text box, type an identifying tax name to appear on the invoice.
4. In the Percentage text box, type the percentage to use for this tax.
29
Chapter 2: Setting Up Cornerstone* Controls
5. If your practice uses the General Ledger Interface, type an account name or number in the GL
Account text box.
6. In the Status area, select Active or Inactive. Only Active taxes are used in invoices. (Change the
status to Inactive only if you no longer want to use a tax.)
7. Click OK, and then click Close.
Discounts
You can set up Discount percentages in Cornerstone. Client discounts vary from one practice to
another. If you plan to use a discount provided in the Cornerstone database, you must set the discount
percentage (the percentages are initially set at 0).
Discounts are tied to invoice items and clients. If a discount is assigned to an invoice item and the same
discount is assigned to a client’s account, when the client is invoiced for the invoice item, the discount is
applied to that specific invoice item.
To add or edit a discount:
1. On the Controls menu, select Discounts. The Discounts dialog box appears.
2. Click New to add a new discount, or double-click an existing discount to update it. The Discount
Setup dialog box appears.
Discount Setup dialog box
3. In the Description text box, type an identifying discount name to appear on the invoice.
4. In the Percentage text box, type the percentage to use for this discount.
5. If your practice uses the General Ledger Interface, type an account name or number in the GL
Account text box.
6. In the Status area, select Active or Inactive. Inactive discounts do not appear in any of the lists of
available discounts and are not applied to invoice items. Any previous links to invoice items or
clients are broken. (Change the status to Inactive only if you no longer want to use a discount.)
7. Click OK and then click Close.
Billing Messages
You can print customized Billing Messages at the bottom of invoices, statements, and estimates.
You can use these billing messages as part of your marketing plan for making announcements or for
communicating general information. You can set up an unlimited number of messages and then
determine which message you want to print by default on invoices, statements, and estimates.
Tip: Change your billing messages periodically to work with your marketing plan.
To add or edit a billing message:
1. On the Controls menu, select Billing Messages. The Billing Messages dialog box appears.
30
Chapter 2: Setting Up Cornerstone* Controls
2. Click New to add a new message, or double-click an existing message to update it. The Billing
Message Setup dialog box appears.
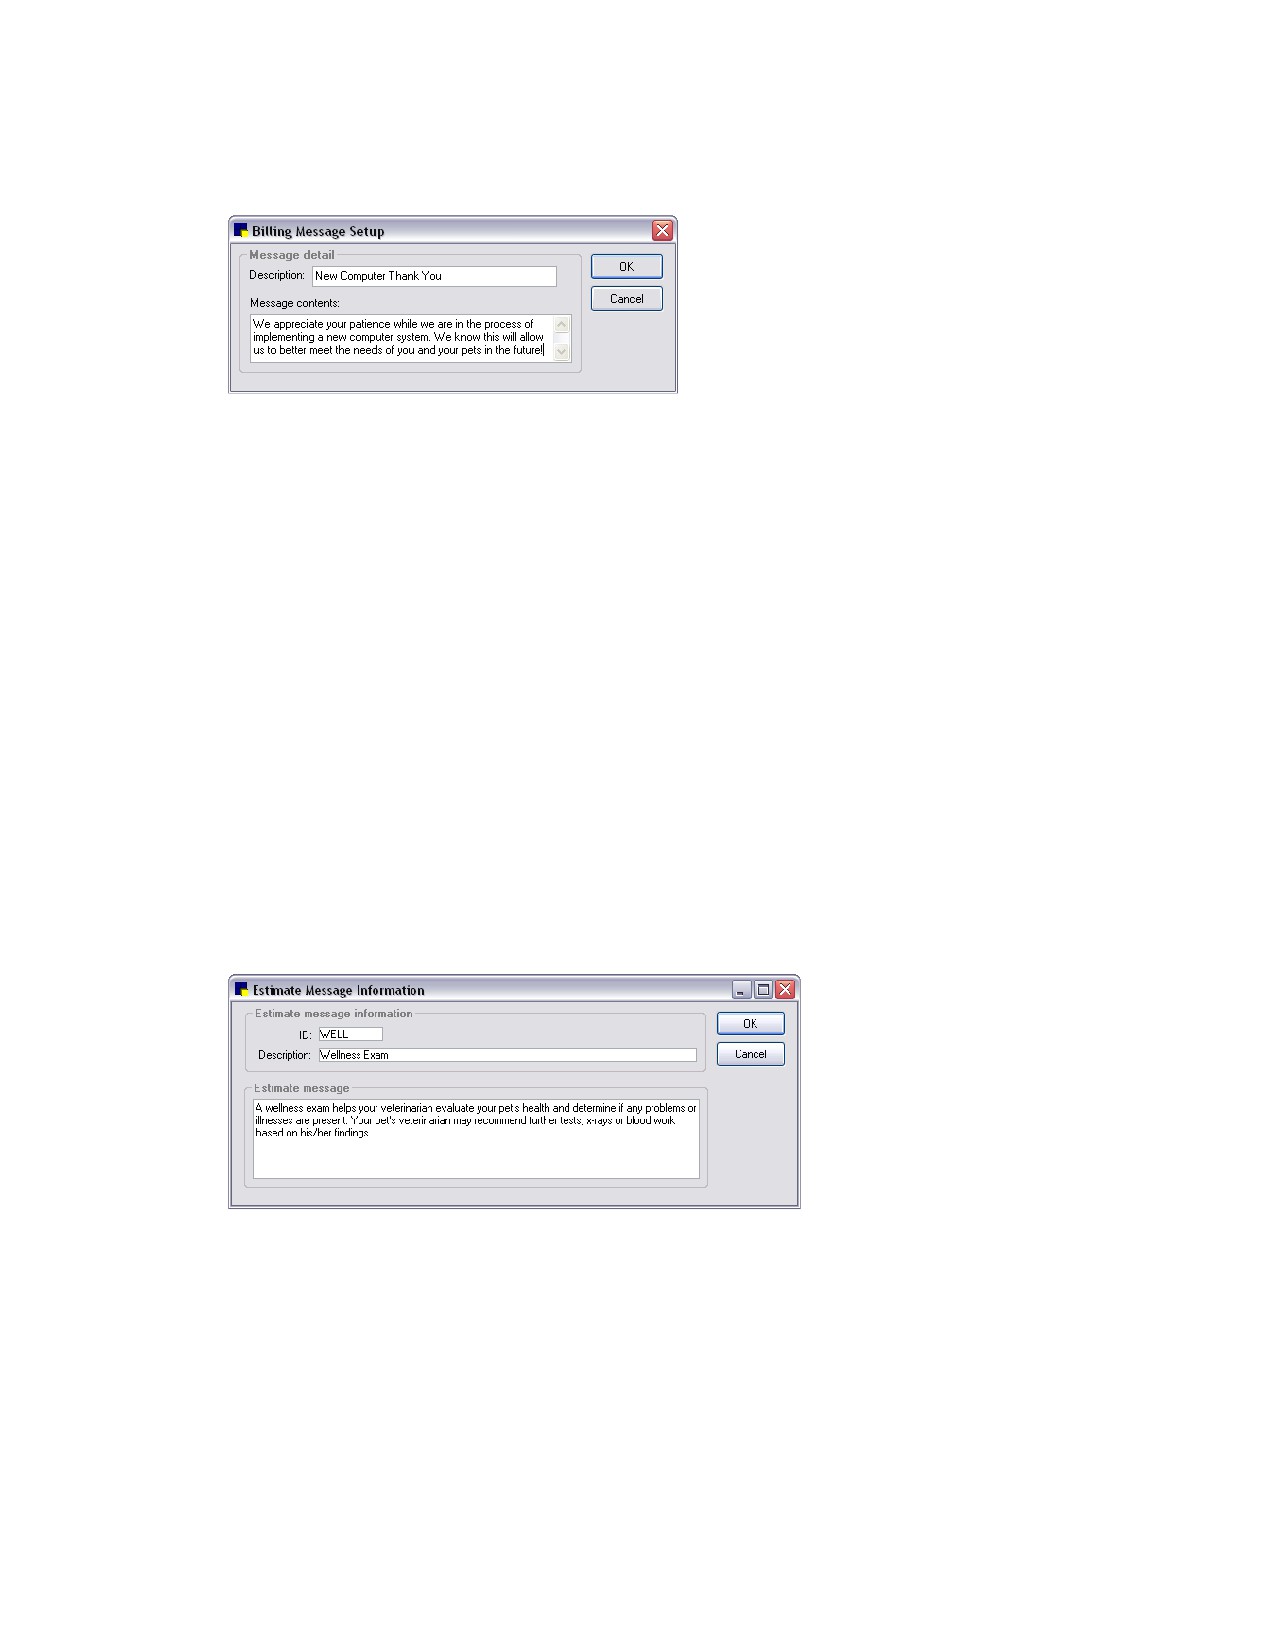
Billing Message Setup dialog box
3. In the Description text box, type an identifying name for this billing message.
4. In the Message contents box, type the message text to appear for this billing message.
5. Click OK, and then click Close.
Tip: Set up a billing message named Blank with no text to use when you want to type a customized
message on an invoice, estimate, or statement.
For a complete list of billing messages currently set up in Cornerstone, print an Initial Practice Setup
Report by Billing Messages.
Estimate Messages
You can create Estimate Messages to be used on estimates at your practice. When you generate
estimates for patients, click the Messages button to access a list of predefined estimate messages.
Multiple messages can be printed on an estimate.
To add or edit an estimate message:
1. On the Controls menu, select Estimate Messages. The Estimate Message List dialog box appears.
2. Click New to add a new message, or double-click an existing message to update it. The Estimate
Message Information window appears.
Estimate Message Information window
3. In the ID text box, type the ID to use for the estimate message.
4. In the Description text box, type an identifying name for this estimate message.
5. Under Estimate message, type the text for this estimate message
6. Click OK, and then click Close.
31
///////////////////////////////////////