Sun Microsystems System Administration Guide, Volume 1 (2000) - page 15
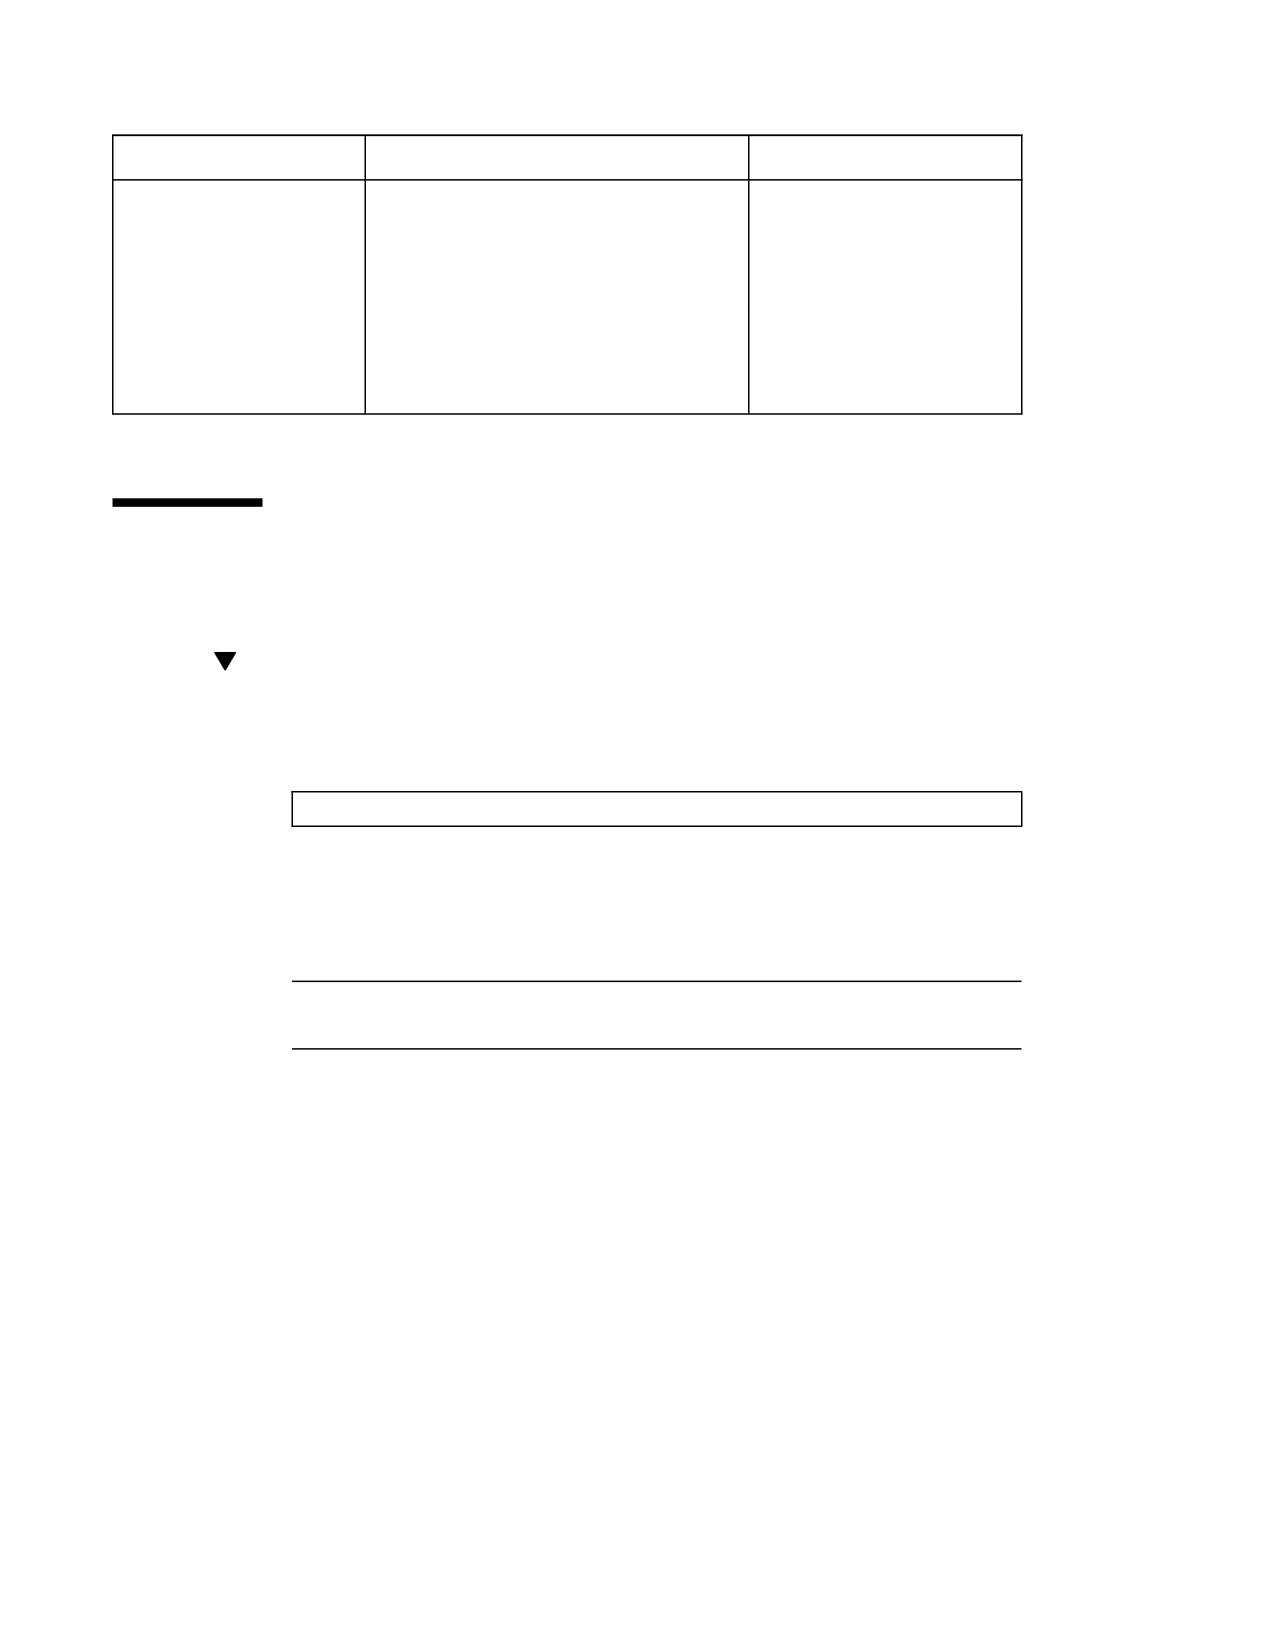
TABLE 37-1
Setting Up a Cached File System Task Map
(continued)
Task
Description
For Instructions, Go To
Cache a file system by editing the /etc/
“How to Mount a File System
vfstab file.
in a Cache by Editing the
/etc/vfstab File” on page
468
Cache a file system by using AutoFS.
“How to Mount a File System
in a Cache With AutoFS” on
page 469
Creating a Cache
The following procedure describes how to create a cache directory.
How to Create a Cache
1. Become superuser.
2. Create a cache using the cfsadmin -c command.
# cfsadmin -c cache-directory
Indicates the name of the directory where the cache
cache-directory
resides. For more information, see cfsadmin(1M).
Note - After you have created the cache, do not perform any operations within
the cache directory itself. This causes conflicts within the CacheFS software.
Example—Creating a Cache
The following example creates a cache in the /local/mycache directory by using
the default cache parameter values.
464
# mkdir /local
# cfsadmin -c /local/mycache
Specifying a File System to Be Mounted
in the Cache
You specify file systems to be mounted in the cache so that users can locally access
files in the file system you’ve specified. The files do not actually get placed in the
cache until the user accesses the files.
The table below describes three ways to mount cached file systems:
To Mount A Cached File System By ...
You Need To Do This ...
Using the mount(1M) command
Every time the system reboots in order to
access the same file system.
Editing the /etc/vfstab file
Only once. The /etc/vfstab file remains
unchanged after the system reboots.
Using AutoFS
Only once. AutoFS maps remain unchanged
after the system reboots.
Choose the method of mounting file systems that best suits your environment.
Note - Caching of the root (/) and /usr file systems is not supported in CacheFS. To
cache the root (/) and /usr file systems, you must purchase the Solstice AutoClient
product. For more information about the AutoClient product, see the Solstice
AutoClient
2.1
Administration Guide.
How to Specify a File System to Be Mounted in a
Cache With mount
1. Become superuser.
2. Create a mount point.
The mount point allows user access to the file system specified under that mount
point. You can create the mount point from anywhere. The CacheFS options used
The Cache File System (Tasks)
465

with the mount command, as shown in the next step, will determine that the
mount point you created will be cached in the cache directory you specified.
3. Mount a file system in a cache with the mount command.
# mount -F cachefs -o backfstype=fstype,cachedir=cache-directory[, options]
back-filesystem mount-point
Indicates the file system type of the back file system (can
fstype
be either NFS or HSFS).
cache-directory
Indicates the name of the directory where the cache
resides. This is the same name you specified when you
created the cache in “How to Create a Cache” on page 464.
Specifies other mount options that you can include when
options
mounting a file system in a cache. See
mount_cachefs(1M) for a list of CacheFS mount options.
The mount point of the back file system to cache. If the
back-filesystem
back file system is an NFS file system, you must specify
the host name of the server from which you are mounting
the file system and the name of the file system to cache
(separated by a colon). For example, merlin: /usr/openwin.
Indicates the directory where the file system is mounted.
mount-point
4. Verify that the cache you created was actually mounted by using the
cachefsstat(1M) command, as follows:
# cachefsstat mount-point
For example:
# cachefsstat /docs
/docs
cache hit rate:
100% (0 hits, 0 misses)
consistency checks:
1
(1 pass, 0 fail)
modifies:
0
(continued)
466
(Continuation)
garbage collection:
0
The mount point is the cached file system you created. For more information
about the cachefsstat command, see “CacheFS Statistics” on page 489.
If the file system was not mounted in the cache, you will receive an error message
similar to the following:
# cachefsstat mount-point
cachefsstat: mount-point: not a cachefs mountpoint
Examples—Specifying a File System to be Mounted in a
Cache With mount
The following example creates the mount point /docs, and mounts the NFS file
system merlin:/docs as a cached file system named /docs in the cache named
/local/mycache.
# mkdir /docs
# mount -F cachefs -o backfstype=nfs,cachedir=/local/mycache merlin:/docs /docs
The following example makes a CD-ROM (HSFS file system) available as a cached
file system named /docs. Because you cannot write to the CD-ROM, the ro
argument is specified to make the cached file system read-only. You must specify the
backpath option because Volume Management automatically mounts the CD-ROM
when it is inserted. The mount point is in the /cdrom directory and is determined
by the name of the CD-ROM. The special device to mount is the same as the value
for the backpath command.
The Cache File System (Tasks)
467
# mount -F cachefs -o backfstype=hsfs,cachedir=/local/mycache,ro backpath=/cdrom/cdrom_name
/cdrom/cdrom_name /docs
The following example uses the demandconst option to specify consistency
checking on demand for the NFS cached file system /docs, whose back file system
is merlin:/docs. See “Consistency Checking of Cached File Systems With the Back
File System” on page 496 for more information.
# mount -F cachefs -o backfstype=nfs,cachedir=/local/mycache,demandconst merlin:/docs /docs
How to Mount a File System in a Cache by
Editing the /etc/vfstab File
1. Become superuser.
2. Using an editor, specify the file systems to be mounted in the /etc/vfstab
file:
#device
device
mount FS
fsck mount
mount
#to mount
to fsck
point type
pass at boot options
#
/dev/dsk/devicename /dev/rdsk/devicename
/mount-point cachefs
2
yes
-
This line represents the new entry.
3. Mount the cached file system using the mount command, as follows:
# mount /mount-point
or reboot.
Example—Mounting a File System in a Cache by Editing the
/etc/vfstab File
The following example shows the /etc/vfstab entry for the cache file system.
468
#device
device
mount
FS
fsck mount
mount
#to mount
to fsck
point
type
pass at boot options
#
/dev/dsk/c0t1d0s0 /dev/rdsk/c0t1d0s0 /usr/local cachefs
2
yes
-
The /usr/local directory is mounted in the cache directory.
# mount /usr/local
How to Mount a File System in a Cache With
AutoFS
You can mount a file system in a cache with AutoFS by specifying the
−fstype=cachefs mount option in your automount map. Note that CacheFS
mount options (for example, backfstype and cachedir) are also specified in the
automount map. See automount(1M) for details on automount maps. Also see
System Administration Guide, Volume
3.
1. Become superuser.
2. Using an editor, add the following line to the auto_direct map:
/mount-point -fstype=cachefs,cachedir=/directory,backfstype=nfs
server:/file-system
3. Using an editor, add the following line to the auto_master map:
/-
The /- entry is a pointer to check the auto_direct map.
4. Reboot the system.
5. Verify that the entry was made correctly by changing to the file system you
mounted in the cache, and then list the contents, as follows:
The Cache File System (Tasks)
469
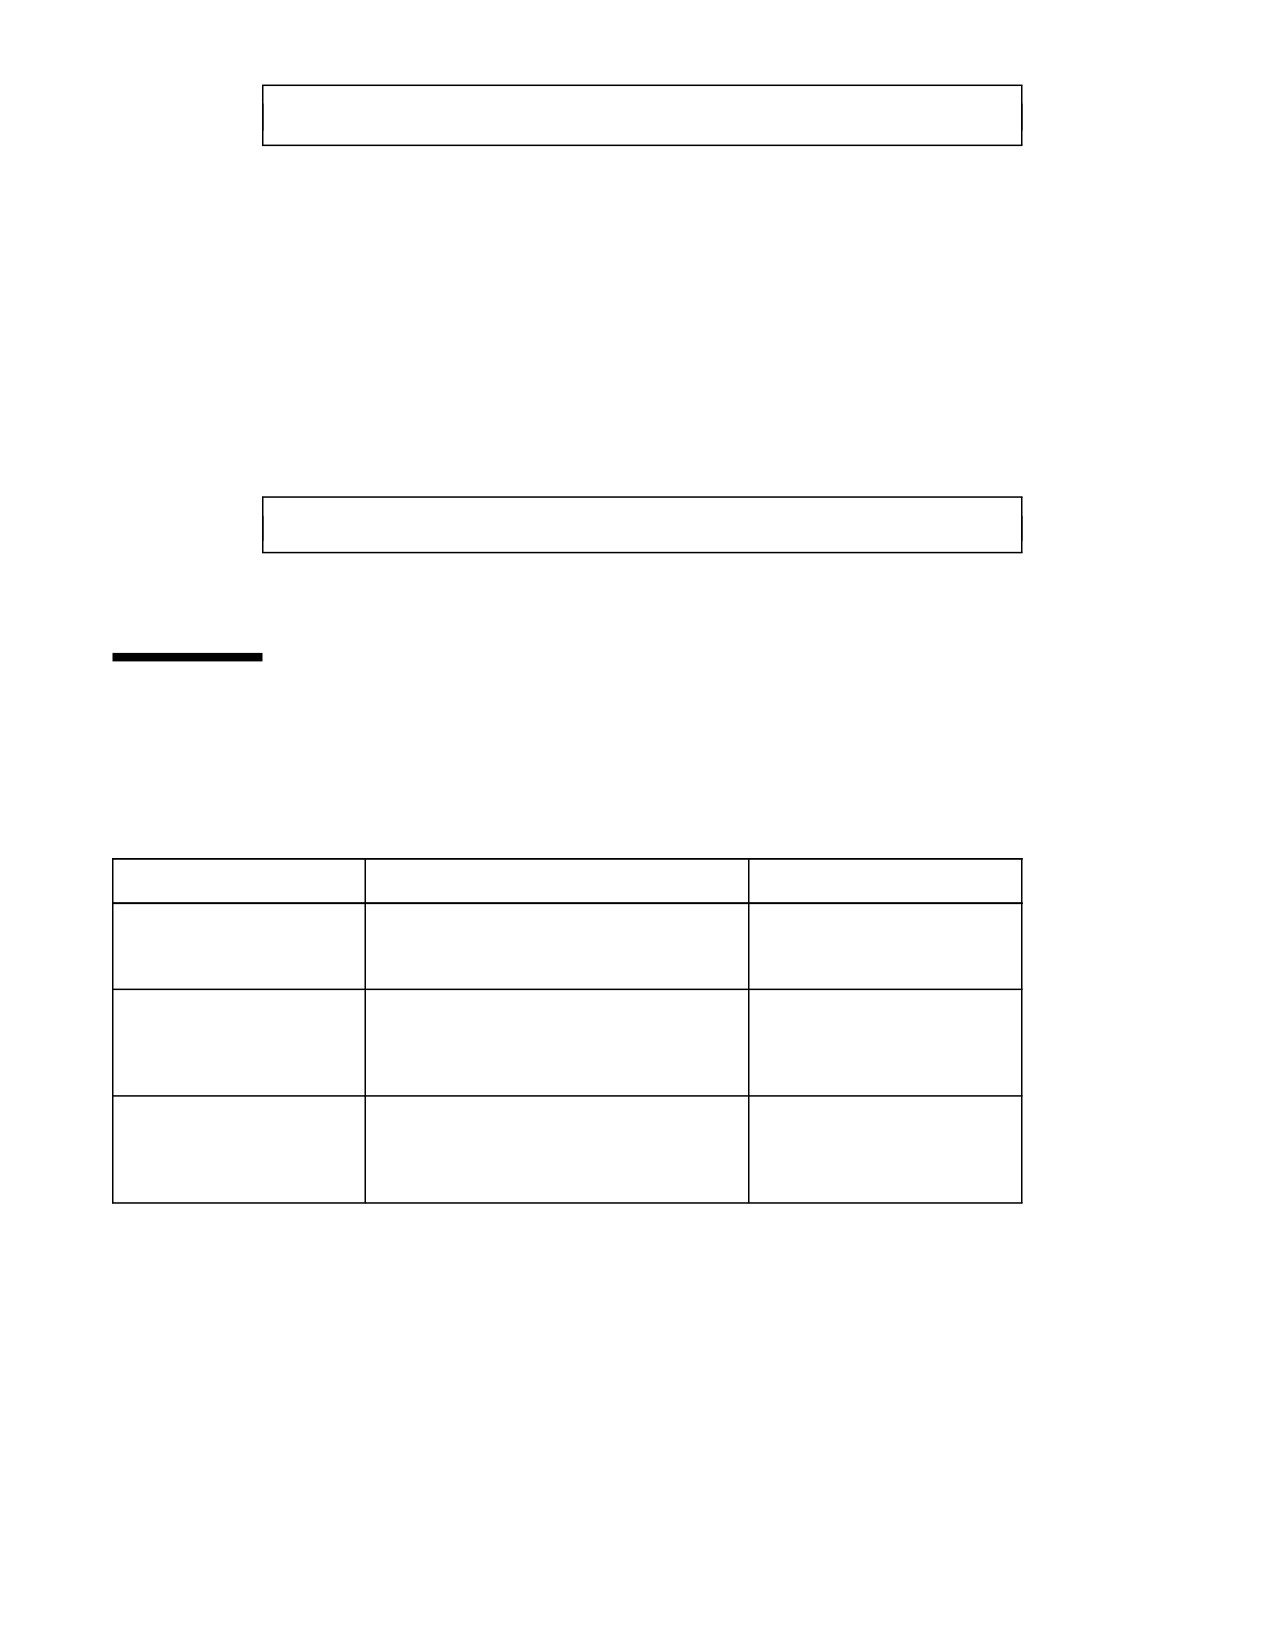
# cd filesystem
# ls filesystem
For more information about AutoFS and how to edit the maps, refer to the AutoFS
chapter of the System Administration Guide, Volume
3.
Example—Mounting a File System in a Cache With AutoFS
The following auto_master entry automatically mounts the cache file system in the
/docs directory.
/docs
-fstype=cachefs,cachedir=/local/mycache,backfstype=nfs
merlin:/docs
Maintaining a Cached File System Task
Map
TABLE 37-2
Maintaining a Cached File System Task Map
Task
Description
For Instructions, Go To
1. Modify the Cache
Modify the cache behavior.
“How to Modify File Systems
in a Cache” on page 471
2. Display Cache Information
Display information about cached file
“How to Display Information
systems by using the cfsadmin command.
About Cached File Systems” on
page 472
3. Perform Consistency
Perform consistency checking on demand by
“How to Specify Consistency
Checking
using the cfsadmin command.
Checking on Demand” on page
473
470
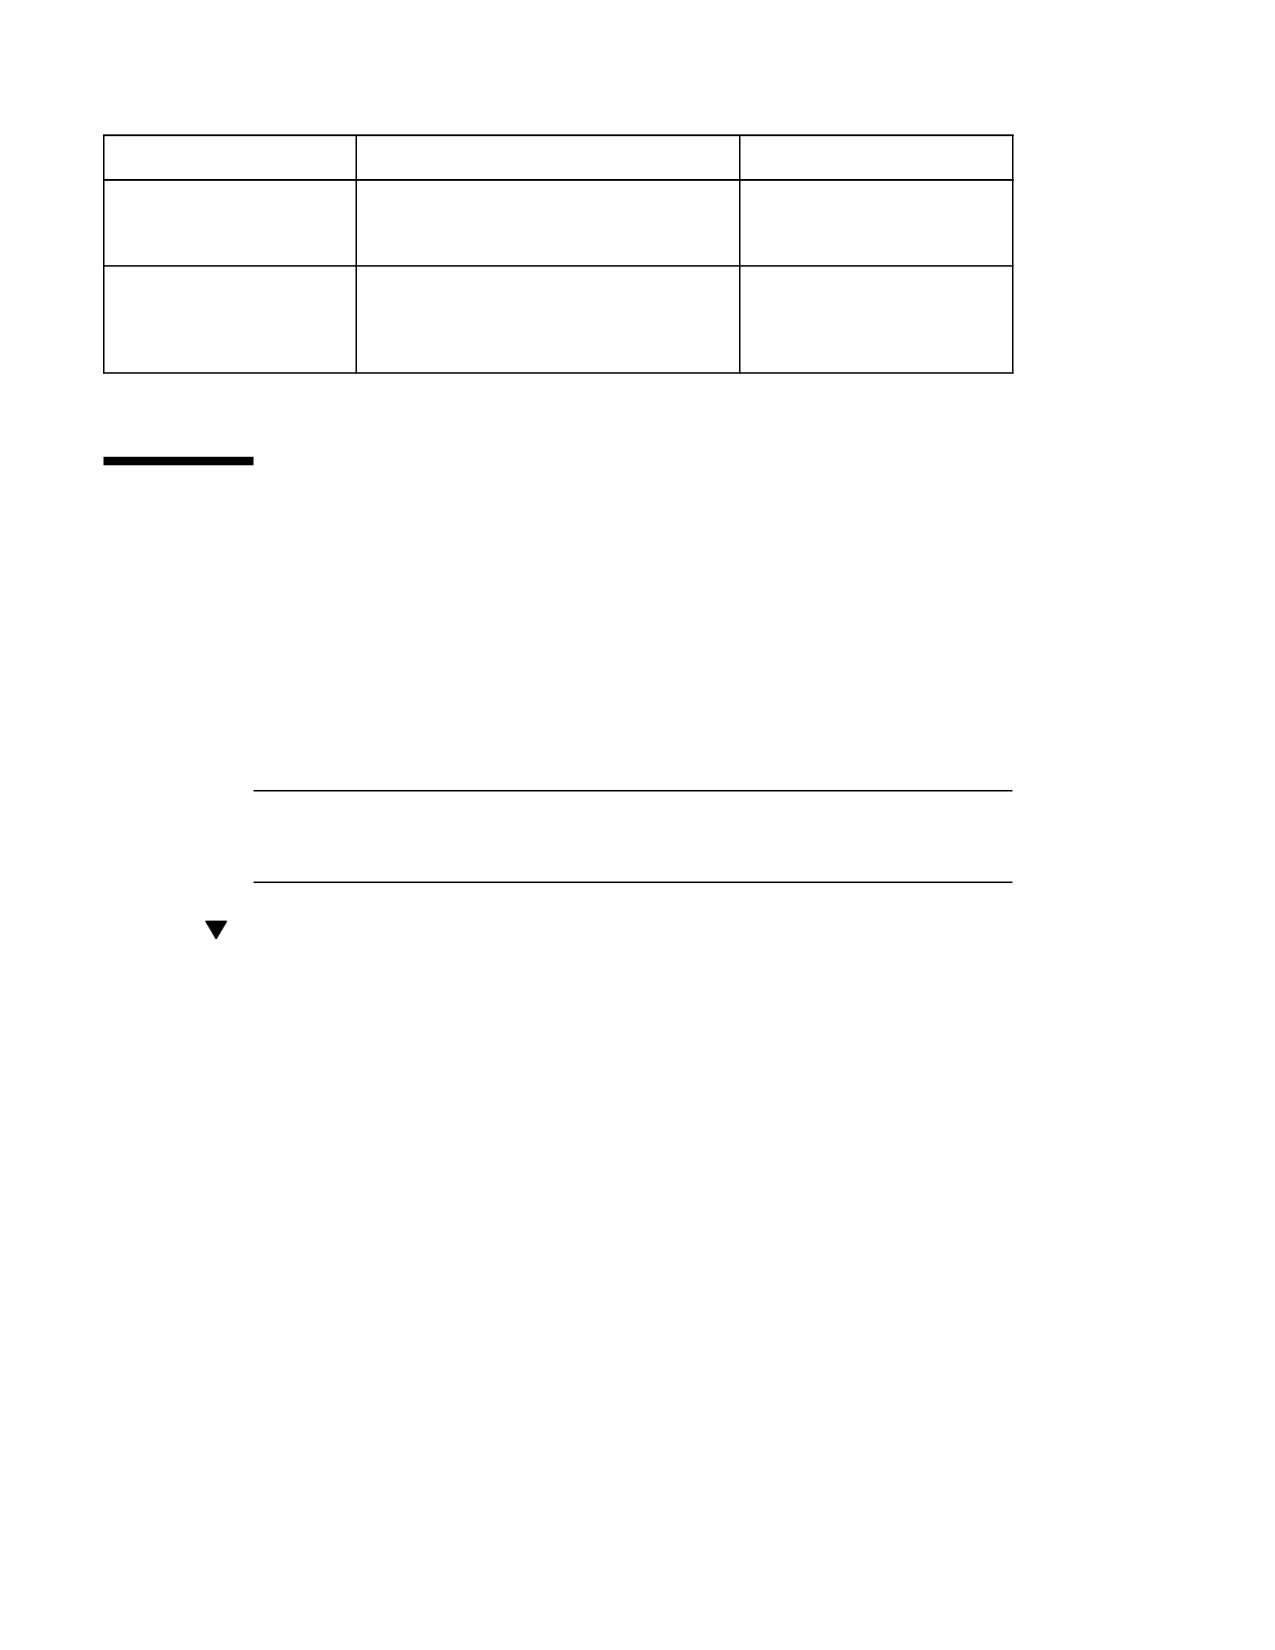
TABLE 37-2
Maintaining a Cached File System Task Map
(continued)
Task
Description
For Instructions, Go To
4. Delete a Cache
Delete cached file systems by using the
“How to Delete a Cached File
umount command and the cfsadmin
System” on page 473
command.
5. Check File System
Check the integrity of cached file systems by
“How to Check the Integrity of
Integrity
using the fsck_cachefs command.
Cached File Systems” on page
475
Maintaining the Cache
After you set up the cache, you can perform the following maintenance tasks on it:
Modify file systems in the cache (by unmounting, deleting, recreating, and
remounting the cache)
Display cache information
Check cache consistency
Delete a file system from the cache
Check cached file system integrity
Note - If you are using the /etc/vfstab file to mount file systems, you modify the
cache by editing the file systems options in the /etc/vfstab file. If you are using
AutoFS, you modify the cache by editing the file systems options in the AutoFS maps.
How to Modify File Systems in a Cache
For information on how to modify specific options of a file system, refer to Chapter
36. When you modify a file system in the cache, you need to delete the cache and
then recreate it. You might also need to reboot your machine in single user mode,
depending on how your file systems are shared and accessed.
The following example shows some of the steps involved in this procedure.
The Cache File System (Tasks)
471

Example—Modifying File Systems in a Cache
In the following example, the cache is deleted, then re-created, and then mounted
again with the demandconst option specified for the file system /docs. This
example shows the steps including rebooting to single user mode. You might have
other commands you prefer to use to accomplish some of the tasks shown in this
example.
# shutdown -g30 -y
Type Cntrl-d to proceed with normal startup,
(or give root password for system maintenance):
# enter password:
Here is where you might be prompted from system to run fsck on the
file system where the cache is located.
# fsck /local
# mount /local
# cfsadmin -d all /local/mycache
# cfsadmin -c /local/mycache
# init 6
console login:
password:
# mount -F cachefs -o backfstype=nfs,cachedir=/local/cache1, demandconst merlin:/docs /docs
#
If you did not successfully remount the file system in the cache, the system displays
an error message similar to the following:
cachefsstat: /doc: not a cachefs mount point
How to Display Information About Cached File
Systems
1. Become superuser.
2. Display information about all file systems cached under a specified cache.
# cfsadmin -l cache-directory
cache-directory is the name of the directory where the cache resides.
472

Example—Displaying Information About Cached File Systems
The following example shows information about the cache directory named
/local/mycache. In this example, the file system /docs is cached in
/local/mycache. The last line displays the name of the cached file system.
# cfsadmin -l /local/mycache
cfsadmin: list cache FS information
maxblocks
90%
minblocks
0%
threshblocks
85%
maxfiles
90%
minfiles
0%
threshfiles
85%
maxfilesize
3MB
merlin:_docs:_docs
#
How to Specify Consistency Checking on Demand
1. Become superuser.
2. Mount the file system in the cache specifying the demandconst option of the
mount command, as follows:
# mount -F cachefs -o backfstype=nfs,cachedir=/directory,demandconst
server:/file-system
/mount-point
3. To initiate consistency checking on a specific cached file system, use the
cfsadmin -s command as follows:
# cfsadmin -s /mount-point
For more information about consistency checking, see “Consistency Checking of
Cached File Systems With the Back File System” on page 496.
How to Delete a Cached File System
1. Become superuser.
The Cache File System (Tasks)
473
2. Unmount the cached file system.
# umount mount-point
mount-point specifies the cached file system that you want to delete.
3. Determine the cache ID from the cfsadmin -l output, as follows:
# cfsadmin -l cache-directory
cfsadmin: list cache FS information
maxblocks
90%
minblocks
0%
threshblocks
85%
maxfiles
90%
minfiles
0%
threshfiles
85%
maxfilesize
3MB
cache-ID
#
4. Delete a cached file system from a specified cache.
# cfsadmin -d cache-id cache-directory
Indicates the name of the cached file system, which is the
cache-id
last line of the cfsadmin -l output. See “How to Display
Information About Cached File Systems” on page 472 for
more information. You can delete all the cached file
systems in a particular cache by specifying all for
cache-id.
Specifies the directory where the cache resides.
cache-directory
5. Verify that the file system has been deleted.
The cache ID of the file system you just deleted should be missing from the
output of the following command. Refer to cfsadmin(1M) for more information
about the fields specified in the command output.
474
# cfsadmin -l cache-directory
cfsadmin: list cache FS information
maxblocks
90%
minblocks
0%
threshblocks
85%
maxfiles
90%
minfiles
0%
threshfiles
85%
maxfilesize
3MB
#
Examples—Deleting a Cached File System
The following example unmounts a cached file system and deletes the cached file
system from the cache.
# umount /docs
# cfsadmin -d merlin:_docs:_docs /local/mycache
The following example deletes all the cached file systems in the /local/mycache
cache. This also deletes the cache.
# cfsadmin -d all /local/mycache
How to Check the Integrity of Cached File Systems
Use the fsck command to check the integrity of cached file systems. The CacheFS
version of fsck automatically corrects problems without requiring user interaction.
You should not need to run fsck manually for cached file systems; fsck is run
automatically at boot time or when the file system is mounted. If you want to
manually check the integrity, you can use the following procedure.
See fsck_cachefs(1M) for more information.
1. Become superuser.
2. Check the cached file systems under a specified cache.
# fsck -F cachefs [-m -o noclean] cache-directory
The Cache File System (Tasks)
475
Causes fsck to check the cached file systems without
−m
making any repairs.
Forces a check on the cached file systems only. Does not
−o noclean
make any repairs.
Indicates the name of the directory where the cache
cache-directory
resides.
Example—Checking the Integrity of Cached File Systems
The following example checks the cached file systems that are part of the
/local/mycache cache.
# fsck -F cachefs /local/mycache
#
Managing Your Cache File Systems
With cachefspack
For general use, CacheFS operates automatically, without requiring any action from
the user. Files are cached on a most recently used basis. With the packing feature, you
can take a more active role in managing your cache by ensuring that certain files or
directories are always updated in the cache.
Packing enables you to specify files and directories to be loaded in the cache. It
ensures that current copies of these files are available in the cache.
The packing list contains the names of specific files and directories. It can also contain
other packing lists. This saves you having to specify individual files and directories
in case you have many items to pack in your cache.
The cachefspack command provides you with added control of your CacheFS file
systems, employing the packing functionality.
How to Pack Files in the Cache
Pack files in the cache using the cachefspack command.
$ cachefspack -p filename
476

Specifies that you want the file or files packed. This is also
−p
the default.
Specifies the name of the file or directory you want packed
filename
in the cache. When you specify a directory, all of its
subdirectories are also packed. For more information, see
cachefspack(1M).
Examples—Packing Files in the Cache
The following example shows the file projects specified to be packed in the cache.
$ cachefspack -p projects
The following example shows several files specified to be packed in the cache.
$ cachefspack -p projects updates master_plan
The following example shows a directory specified to be packed in the cache.
$ cachefspack -p /usr/openwin/bin
Packing Lists
One of the features of the cachefspack command is the ability to pack packing
lists. This saves the time of having to specify each individual file that you want
packed in the cache.
A packing list contains files or directories to be packed in the cache. If a directory is
in the packing list, all of its subdirectories and files will also be packed.
How to Create a Packing List
To create a packing list, open a file by using vi or the editor of your choice. The
packing list file format uses the same format as the filesync command. See
filesync(1) for more information.
Example—Creating a Packing List
The following example shows the contents of a packing list file.
BASE /home/ignatz
LIST plans
The Cache File System (Tasks)
477
(Continuation)
LIST docs
IGNORE *.ps
The path identified with the BASE statement is the directory where you have items
you wish to pack.
The two LIST statements identify specific files within that directory to pack.
The IGNORE statement identifies the file type of .ps, which you do not wish to
pack.
How to Pack Files in the Cache as Specified in a
Packing List
To pack files using the packing list, use the cachefspack -f command, as follows:
$ cachefspack -f packing-list
This means you want the software to read the packing list and pack files based on
the information specified in the packing list.
Specifies that you want to use a packing list.
−f
packing-list
Specifies the name of the packing list.
Example—Packing Files in the Cache as Specified in a Packing
List
This examples uses the list.pkg file as the packing list for the cachefspack
command.
$ cachefspack -f list.pkg
How to Specify Files in the Packing List to be
Treated as Regular Expressions
To specify that one or more files in the packing list should be treated as regular
expressions (not as literal file names), use the −r option with the −f option of the
cachefspack command. The −r option cannot be used alone.
478

$ cachefspack -rf packing_list
where packing_list contains a LIST command defined as follows:
LIST *.doc
Specifies that you want the file or files defined in the LIST
−r
command treated as regular expressions, and not as literal
file names.
Specifies that you want the packing list packed in the cache.
−f
packing_list
Indicates the name of the packing list that contains the LIST
command with the file or files you want treated as regular
expressions.
Example—Specifying Files in the Packing List to be Treated as
Regular Expressions
The following example shows the packing list list.pkg specified to be packed in
the cache. list.pkg contains a LIST command that defines a regular expression.
$ cachefspack -rf list.pkg
The software will pack the file list.pkg into the cache and treat the file names
defined in the LIST command as regular expressions, and not as literal file names.
How to Pack Files From a Shared Directory
1. To pack files from a shared directory, and to ensure that you pack only those
files that you own, define the LIST command within the packing list file as
follows:
LIST !find . -user your_user_name -print
2. Pack the packing list in the cache using the cachefspack -sf command.
$ cachefspack -sf packing_list
The Cache File System (Tasks)
479
Adjusts the output of the find command to be suitable for
−s
the packing list.
Specifies a packing list to read.
−f
filename
Specifies the name of the packing list to read.
Note - The −s option must be used with the −f option. The −s option cannot be
used alone.
Example—Packing Files From a Shared Directory
The following example shows how to define a LIST command in the packing list to
pack only the files from the base directory that you own:
LIST !find . -user jones -print
The following example shows how you would then specify packing the packing list.
$ cachefspack -sf /projects/proj_1
Unpacking Files
You might need to remove, or unpack, a file from the cache. Perhaps you have some
files or directories that are a higher priority than others, so you need to unpack the
less critical files. For example, you finished up a project and have archived the files
associated with that project. You are now working on a new project, and therefore, a
new set of files.
How to Unpack Files or Packing Lists From the
Cache
Unpack files or packing lists from the cache using the −u or −U option of the
cachefspack command.
$ cachefspack -u filename | -U cache-directory
480

Specifies that you want the file or files unpacked. You must
−u
specify a filename with this option.
Specifies the name of the file or packing list you want
filename
unpacked in the cache. For more information about the
cachefspack command, see the man page.
Specifies that you want to unpack all files in the cache.
−U
Examples—Unpacking Files or Packing Lists From the Cache
The following example shows the file /usr/openwin/bin/xlogo specified to be
unpacked from the cache.
$ cachefspack -u /usr/openwin/bin/xlogo
The following example shows several files specified to be unpacked from the cache.
$ cd /usr/openwin/bin
$ cachefspack -u xlogo xview xcolor
You can also unpack a packing list, which is a file that contains the path to a
directory of files, as follows:
$ cachefspack -uf list.pkg
The following example uses the -U option to specify all files in a cache directory to
be unpacked.
$ cachefspack -U /local/mycache
You cannot unpack a cache that does not have at least one file system mounted. With
the -U option, if you specify a cache that does not contain mounted file systems, you
will see output similar to the following:
$ cachefspack -U /local/mycache
cachefspack: Could not unpack cache /local/mycache, no mounted
filesystems in the cache.
The Cache File System (Tasks)
481
Displaying Packed Files Information
You might want to view information about the files that you’ve specified to be
packed, and what their packing status is.
How to Display Packed Files Information
To display packed files information, use cachefspack -i command.
$ cachefspack -i[v] cached-filename-or-directory
Specifies you want to view information about your packed
−i
files.
The verbose option.
−v
cached-filename-or-directory
Specifies the name of the file or directory for which to
display information.
Example—Displaying Packed Files Information
The following example shows that a file called doc_file is successfully packed.
$ cachefspack -i doc_file
cachefspack: file doc_file marked packed YES, packed YES
The following example shows a directory called /usr/openwin, which contains a
subdirectory bin. The subdirectory bin has three files: xterm, textedit, and
resize. Although the files xterm and resize are specified to be packed, they are
not. The file textedit is successfully packed.
$ cd /usr/openwin
$ cachefspack -i bin
cachefspack: file /bin/xterm marked packed YES, packed NO
cachefspack: file /bin/textedit marked packed YES,
packed YES
cachefspack: file /bin/resize marked packed YES,
packed NO
(continued)
482
(Continuation)
If you use the −iv options in combination, you will get additional information as to
whether or not the file or directory specified has been flushed from the cache. For
example:
$ cd /usr/openwin
$ cachefspack -iv bin
cachefspack: file /bin/xterm marked packed YES, packed NO,
nocache YES
cachefspack: file /bin/textedit marked packed YES,
packed YES, nocache NO
cachefspack: file /bin/resize marked packed YES,
packed NO
nocache NO
The last line of the example above shows that the directory contents have not been
flushed from the cache.
Viewing Help on the cachefspack
Command
You can print out a brief help summary of all the cachefspack options and what
they mean by using the -h option as follows:
$ cachefspack -h
Must select 1 and only 1 of the following 5 options
-d Display selected filenames
-i Display selected filenames packing status
-p Pack selected filenames
-u Unpack selected filenames
-U Unpack all files in directory ’dir’
-f Specify input file containing rules
-h Print usage information
The Cache File System (Tasks)
483
(Continuation)
-r Interpret strings in LIST rules as regular expressions
-s Strip ’./’ from the beginning of a pattern name
-v Verbose option
files - a list of filenames to be packed/unpacked
cachefspack Errors
You might see the following error messages when you use the cachefspack
command.
cachefspack: pathname - can’t open directory: permission denied
Cause
You might not have the correct permissions to access the file or directory.
Action
Set the correct permissions.
cachefspack: pathname - can’t open directory: no such file
or
directory
Cause
You might not have the correct file or directory.
Action
Check for a possible typo.
cachefspack: pathname - can’t open directory: stale NFS file handle
Cause
The file or directory might have been moved or deleted from the server at the time
you attempted to access it.
484

Action
Verify that the file or directory on the server is still accessible.
cachefspack: pathname - can’t open directory: interrupted
system
call
Cause
You might have pressed Control-c inadvertently while issuing the command.
Action
Reissue the command.
cachefspack: pathname - can’t open directory: I/O error
Cause
A hardware problem.
Action
Check your hardware connections.
cachefspack: error opening dir
Cause
You might not have the correct file or directory. The path identified after the BASE
command in the file format could be a file and not a directory. The path specified
must be a directory.
Action
Check for a possible typo. Check the path identified after the BASE command in your
file format. Make sure it is a directory, and not a file.
cachefspack: unable to get shared objects
Cause
The executable might be corrupt or it’s a format that is not recognizable.
The Cache File System (Tasks)
485
Action
No corrective action can be taken.
cachefspack: filename - can’t pack file: permission denied
Cause
You might not have the correct permissions to access the file or directory.
Action
Set the correct permissions.
cachefspack: filename - can’t pack file: no such file or directory
Cause
You might not have the correct file or directory.
Action
Check for a possible typo.
cachefspack: filename- can’t pack file: stale NFS file handle
Cause
The file or directory might have been moved or deleted from the server at the time
you attempted to access it.
Action
Verify that the file or directory on the server is still accessible.
cachefspack: filename- can’t pack file: interrupted system call
Cause
You might have pressed Control-c inadvertently while issuing the command.
Action
Reissue the command.
cachefspack: filename- can’t pack file: I/O error
Cause
A hardware problem.
486
Action
Check your hardware connections.
cachefspack: filename- can’t pack file: no space left on device.
Cause
You are out of disk space. The cache is at maximum capacity.
Action
You need to increase disk space. Increase the size of the cache.
cachefspack: filename - can’t unpack file: permission denied
Cause
You might not have the correct permissions to access the file or directory.
Action
Set the correct permissions.
cachefspack: filename - can’t unpack file: no such file or directory
Cause
You might not have the correct file or directory.
Action
Check for a possible typo.
cachefspack: filename- can’t unpack file: stale NFS file handle
Cause
The file or directory might have been moved or deleted from the server at the time
you attempted to access it.
Action
Verify that the file or directory on the server is still accessible.
cachefspack: filename - can’t unpack file: interrupted system call
Cause
You might have pressed Control-c inadvertently while issuing the command.
The Cache File System (Tasks)
487
Action
Reissue the command.
cachefspack: filename- can’t unpack file I/O error
Cause
A hardware problem.
Action
Check your hardware connections.
cachefspack: only one ‘d’, ‘i’, ‘p’, or ‘u’ option allowed
Cause
You entered more than one of the above options in a command session.
Action
Select one option for the command session.
cachefspack: can’t find environment variable.
Cause
You forgot to set a corresponding environment variable to match the $ in your
configuration file.
Action
Define the environment variable in the proper location.
cachefspack: skipping LIST command - no active base
Cause
A LIST command is present in your configuration file that has no corresponding
BASE command.
Action
Define the BASE command.
488
CacheFS Statistics
CacheFS statistics enable you to:
Determine an appropriate cache size
Observe the performance of the cache
These two pieces of information will help you determine the trade-off between your
cache size and the desired performance of the cache.
The CacheFS statistics consist of three commands:
Specifies the location of the log file. This command also
cachefslog(1M)
displays where the statistics are currently being logged, and
enables you to halt logging.
Interprets the log file to give a recommended cache size.
cachefswssize(1M)
Displays statistical information about a specific file system or all
cachefsstat(1M)
cached file systems. The information provided in the output of
this command is taken directly from the cache.
Note - The CacheFS statistics commands can be issued from any directory. You must
be superuser to issue the cachefswssize command.
The statistics begin accumulating when you create the log file. When the work
session length of time is up, stop the logging by using the cachefslog -h
command, as described in “How to Stop the Logging Process” on page 492.
Prerequisites for Setting Up and
Viewing the CacheFS Statistics
Before using the CacheFS statistics commands, you must:
Set up your cache using the cfsadmin(1M) command.
Decide on an appropriate length of time to allow statistical information to collect
in the log file you create. The length of time should equal a typical work session;
for example, a day, a week, or a month.
The Cache File System (Tasks)
489
Select a location or path for the log file. Make sure there is enough space to allow
for the growth of the log file. The longer you intend to allow statistical
information to collect in the log file, the more space you will need.
Note - The following procedures are presented in a recommended order. The order
is not required.
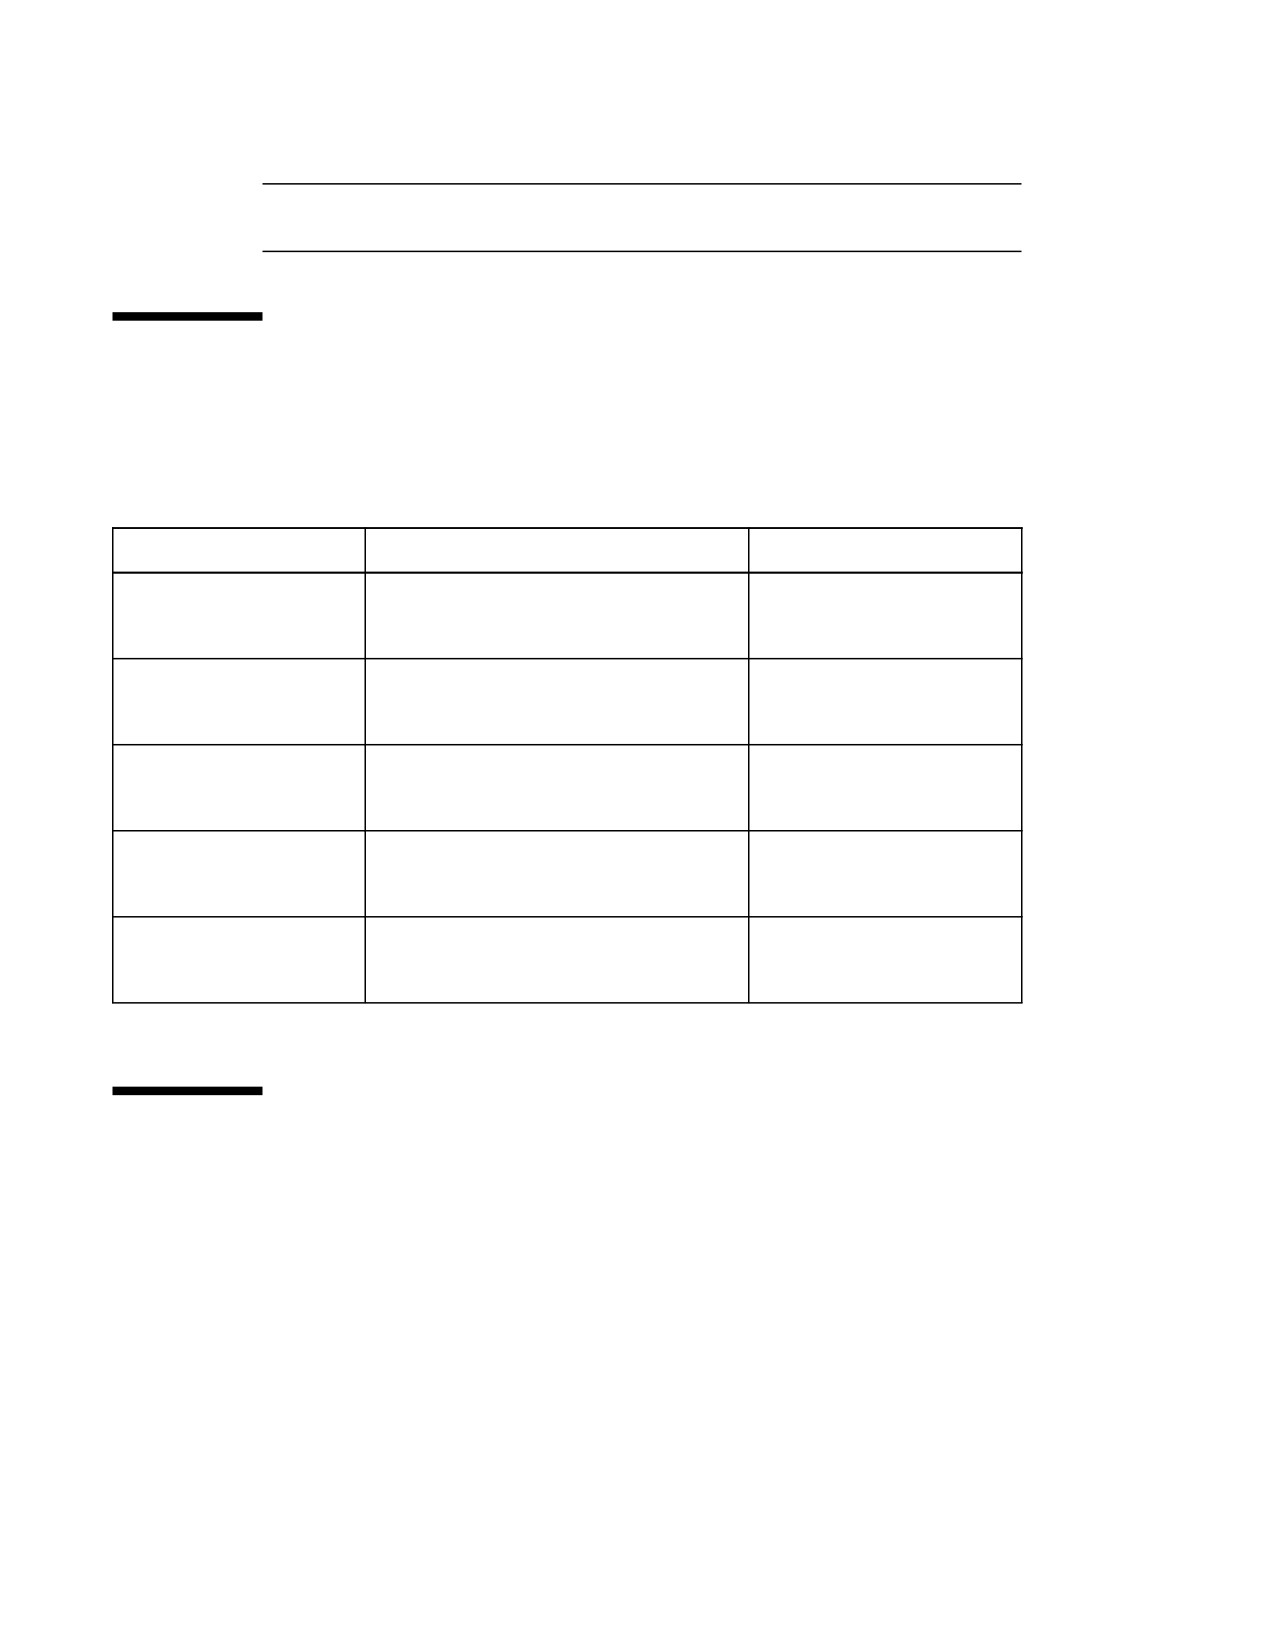
Setting Up CacheFS Statistics Task Map
The table below shows the steps involved in setting up CacheFS statistics.
TABLE 37-3
Setting Up CacheFS Statistics Task Map
Task
Description
For Instructions, Go To
1. Set Up Logging
Set up logging on a cached file system using
“How to Set Up the Logging
the cachefslog command.
Process” on page 491
2. Locate the Log File
Locate the log file with the cachefslog
“How to Locate the Log File”
command.
on page 491
3. Stop the Logging Process
Stop the logging process with the
“How to Stop the Logging
cachefslog command.
Process” on page 492
4. View the Cache Size
View the cache size using the
“How to View the Working Set
cachefswssize command.
(Cache) Size” on page 492
5. View the Cache Statistics
View the statistics using the cachefsstat
“How to View Cache Statistics”
command.
on page 494
CacheFS Logging
This section describes how to set up and view CacheFS logging.
490
How to Set Up the Logging Process
1. Set up the logging process with the cachefslog command.
$ cachefslog -f log-file-path mount-point
Sets up the logging process.
−f
log-file-path
Specifies the location of the log file. The log file is a
standard file you create with an editor, such as vi.
Designates the mount point (cached file system) for which
mount-point
statistics are being collected.
2. Verify that you set up the log file correctly by using the cachefslog
command, as follows:
$ cachefslog mount-point
Example—Setting Up the Logging Process
The following example sets up the log file samlog to collect statistics about
/home/sam. The location of samlog is /var/tmp/samlog.
$ cachefslog -f /var/tmp/samlog /home/sam
/var/tmp/samlog: /home/sam
How to Locate the Log File
You can also use the cachefslog(1M) command with no options to locate a log file
for a particular mount point.
$ cachefslog mount-point
Specifies the cached file system for which you want to view
mount-point
the statistics.
The Cache File System (Tasks)
491

Examples—Locating the Log File
The following example shows what you would see if a log file has been set up. The
location of the log file is /var/tmp/stufflog.
$ cachefslog /home/stuff
/var/tmp/stufflog: /home/stuff
The following example shows that no log file has been set up for the specified file
system.
$ cachefslog /home/zap
not logged: /home/zap
How to Stop the Logging Process
Use the −h option of the cachefslog(1M) command to stop the logging process.
$ cachefslog -h mount-point
Example—Stopping the Logging Process
The following example halts logging on /home/stuff.
$ cachefslog -h /home/stuff
not logged: /home/stuff
If you get a system response other than the one specified in the above example, you
did not successfully stop the logging process. Check to see if you are using the
correct log file name and mount point.
Viewing the Cache Size
You might want to check if you need to increase the size of the cache or determine
what the ideal cache size is based on your activity since you last used the
cachefslog(1M) command for a particular mount point.
How to View the Working Set (Cache) Size
1. Become superuser.
492
2. View the current and highest logged cache size with the cachefswssize(1M)
command.
# cachefswssize log-file-path
Example—Viewing the Working Set (Cache) Size
In the following example, the end size is the size of the cache at the time you issued
the cachefswssize command. The high water size is the largest size of the cache
during the time frame in which logging has occurred.
# cachefswssize /var/tmp/samlog
/home/sam
end size:
10688k
high water size:
10704k
/
end size:
1736k
high water size:
1736k
/opt
end size:
128k
high water size:
128k
/nfs/saturn.dist
end size:
1472k
high water size:
1472k
/usr/openwin
end size:
7168k
high water size:
7168k
/nfs/venus.svr4
end size:
4688k
high water size:
5000k
/usr
end size:
4992k
high water size:
4992k
total for cache
initial size: 110960k
end size:
30872k
high water size:
30872k
The Cache File System (Tasks)
493
Viewing the Statistics
You might want to view certain information about a specific cached file system. The
following table explains the terminology displayed in the statistics output.
TABLE 37-4
Statistics Output Terminology
Output Term
Description
hit rate
The rate of cache hits versus cache misses, followed by the actual
number of hits and misses. A cache hit occurs when the user wants to
perform an operation on a file or files, and the file or files are actually
in the cache. A cache miss occurs when the file was not in the cache.
The load on the server is the sum of cache misses, consistency checks,
and modifications (modifies).
checks
The number of consistency checks performed, followed by the number
that passed, and the number that failed.
modifies
The number of modify operations; for example, writes or creates.
How to View Cache Statistics
View the statistics with the cachefsstat(1M) command. You can do this at any
time. For example, you do not have to set up logging in order to view the statistics.
$ cachefsstat mount-point
mount-point
Specifies the cached file system for which you want to view
the statistics.
If you do not specify the mount point, statistics for all mounted CacheFS file systems
will be displayed.
Example—Viewing Cache Statistics
$ cachefsstat /home/sam
cache hit rate: 73% (1234 hits, 450 misses)
(continued)
494

(Continuation)
consistency checks: 700 (650 pass, 50 fail)
modifies: 321
garbage collection:
0
The Cache Structure and Behavior
Each cache has a set of parameters that determines how it behaves and its structure.
The parameters are set to default values which are listed in Table 37-5. The default
values specify that the entire front file system is used for caching, which is the
recommended method of caching file systems.
TABLE 37-5
Cache Parameters and Their Default Values
Cache Parameter Default Value
Definition
maxblocks
90%
Sets the maximum number of blocks that CacheFS
is allowed to claim within the front file system.
minblocks
0%
Sets the minimum number of blocks that CacheFS
is allowed to claim within the front file system.
85%
Sets the number of blocks that must be available
threshblocks
in the front file system before CacheFS can claim
more than the blocks specified by minblocks.
maxfiles
90%
Sets the maximum number of available inodes
(number of files) that CacheFS is allowed to claim
within the front file system.
minfiles
0%
Sets the minimum number of available inodes
(number of files) that CacheFS is allowed to claim
within the front file system.
threshfiles
85%
Sets the number of inodes (number of files) that
must be available in the front file system before
CacheFS can claim more than the files specified in
minfiles.
The Cache File System (Tasks)
495
Typically, you should not change any of these parameter values. They are set to
default values to achieve optimal cache behavior. However, you might want to
modify the maxblocks and maxfiles settings if you have some room in the front
file system that is not used by the cache, and you wish to use it for some other file
system. You do this using the cfsadmin(1M) command. For example:
$ cfsadmin -o maxblocks=60
Consistency Checking of Cached File
Systems With the Back File System
To ensure that the cached directories and files are kept up to date, CacheFS
periodically checks consistency of files stored in the cache. To check consistency,
CacheFS compares the current modification time to the previous modification time. If
the modification times are different, all data and attributes for the directory or file
are purged from the cache and new data and attributes are retrieved from the back
file system.
When a user requests an operation on a directory or file, CacheFS checks if it is time
to verify consistency. If it is, CacheFS obtains the modification time from the back file
system and performs the comparison.
Consistency Checking on Demand
By specifying the demandconst option of the mount(1M) command, consistency
checks can be performed only when you explicitly request them for file systems
mounted with this option. After specifying the demandconst option when you
mount a file system in a cache, you use the cfsadmin(1M) command with the −s
option to request a consistency check. By default, consistency checking is performed
file by file as the files are accessed. If no files are accessed, no checks are performed.
Use of the demandconst option will avoid the situation where the network is
flooded with consistency checks.
496