STEAM LOCOMOTIVE ENGINEMAN’S. Manual - part 33


  Index      Locomotives - books     STEAM LOCOMOTIVE ENGINEMAN’S - manual 2003 year


Search            


Content   ..  31  32  33  34   ..


STEAM LOCOMOTIVE ENGINEMAN’S. Manual - part 33


QUEENSLAND PIONEER STEAM RAILWAY CO-OP LTD 


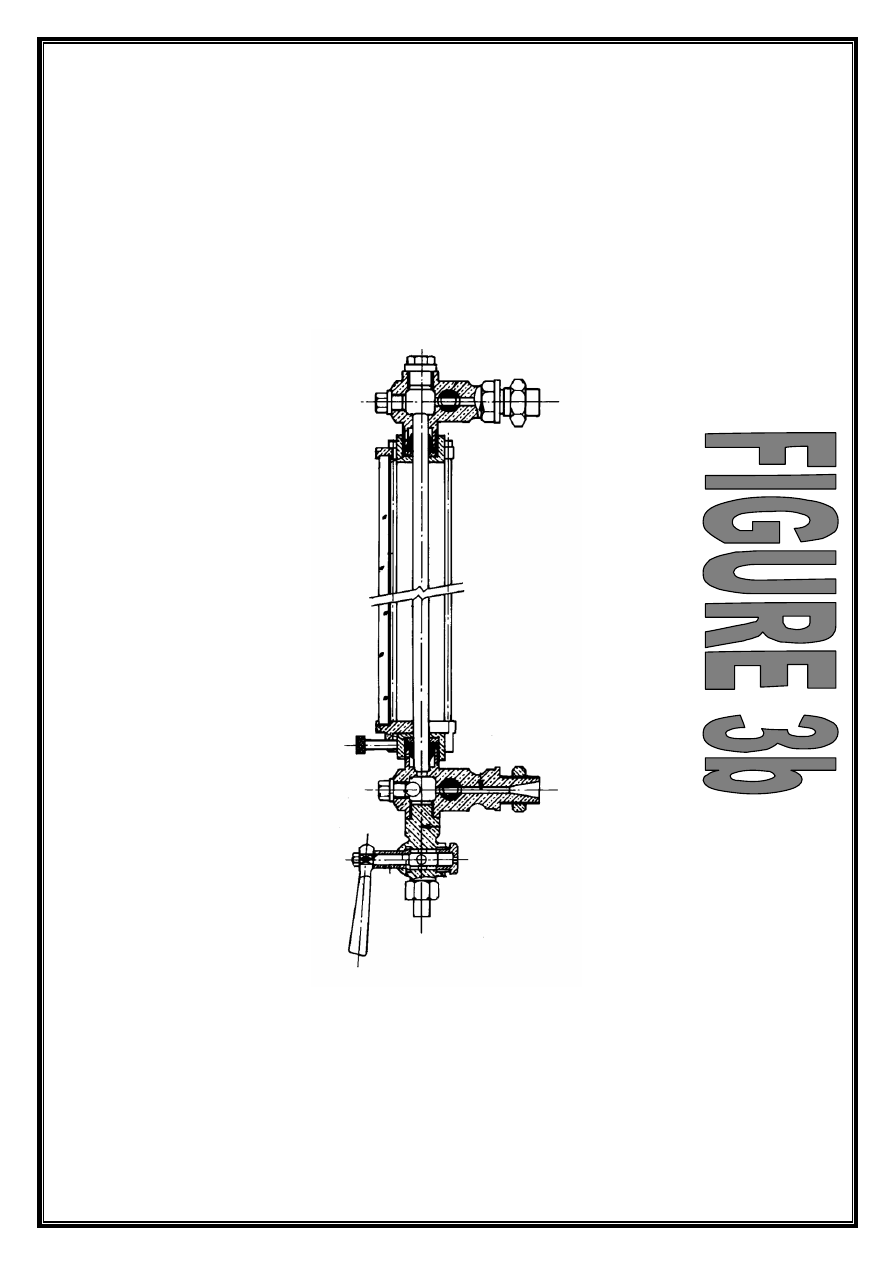
KILRIE’S GAUGE GLASS 


QUEENSLAND PIONEER STEAM RAILWAY 

                              CO-OPERATIVE LIMITED 
 
                   STEAM LOCOMOTIVE LIGHT UP 
                    & PREPARATION FOR TRAFFIC 


The following inspections prior to light up. 


1.  Check Boiler water level. 

[  ] 

2.  Test Gauge Glass Test Cocks. 

[  ] 

3.  Check leaks at Lead Plugs. 

[  ] 

4.  Check leaks at Tube Plates. 

[  ] 

5.  Check leaks at Stays. 

[  ] 

6.  Check Tubes. 

[  ] 

7.  Check Brick Arch 

[  ] 

8.  Check Baffle Plate and Ring. 

[  ] 

9.  Firebox free of ash and clinker.  

[  ] 

10. Fire Bars work freely. 

[  ] 

11. Fire bar Locking Pin.  

[  ] 

12. Behind Fire hole clear of ash.  

[  ] 

13. Ash pan clear of ash and clinker.  

[  ] 

14. Dampers work OK. 

[  ] 

15. PB15, Bridge between Ash pans clear.  

[  ] 

16. Check Blow down, Scum  & Ash ejector Cocks for leaks. 

[  ] 

17. Smoke box closed and secure. 

[  ] 

18. Injector Screens clean and water delivery hoses OK. 

[  ] 

19. Locomotive Tool Kit’ Spare Hose Bag and Coupling. 

[  ] 


Driver…………………..DAF…………………. 


(Optional) 

                Date……………………………. 


PTO. 


             Cont. 


QUEENSLAND PIONEER STEAM RAILWAY 

                         CO-OPERATIVE LIMITED 


 STEAM LOCO. LIGHT UP 

                   & PREPARATION FOR TRAFFIC 
 

   After the completion of light up and raising of Steam to Operating Pressure. 
 

1.  Operate both injectors and try heater cocks. 

[  ] 

2.  Check Whistle. 

[  ] 

3.  Check Taper pins are secure. 

[  ] 

4.  Crank pin Collar nuts are secure. 

[  ] 

5.  Big End Stra p wedges secure. 

[  ] 

6.  Gudgeon Pin Nuts secure. 

[  ] 

7.  Gudgeon Pin cotters secure. 

[  ] 

8.  Guide Bar Bolts secure. 

[  ] 

9.  Guide Bar Studs secure. 

[  ] 

10. Crosshead Cotters tight. 

[  ] 

11. Crosshead Split Pins in place. 

[  ] 

12. Check Brake Blocks. 

[  ] 

13. Check Brake Hanger Alignment. 

[  ] 

14. Motions Pins secure. 

[  ] 

15. Saddle Pins OK. 

[  ] 

16. Saddle Cotters in place. 

[  ] 

17. Centre Pins correct. 

[  ] 

18. Centre Pin Cotters in place. 

[  ] 

19. Engine & Tender Draw bar & Draw bar wedge OK. 

[  ] 

20. Spring end adjusting screws in place. 

[  ] 

21. Spring end  pins in place. 

[  ] 

22. Compensating Beam pins secure. 

[  ] 

23. Retaining Clips secure. 

[  ] 

24. Ash Pans & slides in good order.  

[  ] 

25. No loose equipment under Locomotive. 

[  ] 

26. No Faulty equipment under Locomotive. 

[  ] 

27. Check Sander.  

[  ] 


Driver…………………..DAF…………………. 


(Optional) 

                Date……………………………. 


PTO. 


        Cont. 


QUEENSLAND PIONEER STEAM RAILWAY 

                         CO-OPERATIVE LIMITED 
 
                          STEAM LOCO. LIGHT UP 
                    & PREPARATION FOR TRAFFIC 


 Lubrication of Locomotive. 

 
                                             Oil or Grease the following. 
 

1.  The side Rods. 

[  ] 

2.  Big end Bearings. 

[  ] 

3.  Gudgeon Pin Bearings. 

[  ] 

4.  Piston Rods. 

[  ] 

5.  Guide Bars. 

[  ] 

6.  Axle Boxes and Axle Box Horn Cheeks. 

[  ] 

7.  Compensating Beam Bearings. 

[  ]                                                                          

8.  Brake shaft bracket Bearings. 

[  ] 

9.  Bogie Centres, Eccentrics and Motion Pins. 

[  ] 

10. Reversing  lever Pivot and Reversing lever Pins. 

[  ] 

11. Corks replaced in oil cups after filling with oil. 

[  ] 

 
12. Running Tests. 
 
13. Test Electric light System, Headlights & Side Lights. 

[  ] 

14. Westinghouse pump governor set to correct pressure. 

[  ] 

15. Brake valve operational. 

[  ] 

16. Feed valve to Brake pipe set to correct pressure. 

[  ] 

17. Condensation drained from main Reservoirs. 

[  ] 

18. Blowdown Boiler with Blowdown and Scum cock. 

[  ] 

19. Check Boiler Safety valves set at correct pressures. 

[  ]    


Brake Pipe Leakage Tests. 

With the air system fully charged, Check for leaks in Rotary Valve. 
Make 15 PSI (100) Service reduction, leave handle in Lap position. 
Close the Isolating cock and move brake handle back to Full release. 
Observe for leaks is Brake Pipe, no more than 3 PSI in 60 Seconds. 
         

Main Reservoir Leakage Test. 

Main Reservoir to Maximum pressure, close steam supply to air 
Compressor and close Brake valve Isolating cock. 
Observe Main reservoir air gauge for any leakage. 


Driver…………………..DAF……………………. 


(Optional)


                           Date……………………..


Content   ..  31  32  33  34   ..