Lotus Eleven/Elise/Exige. Manual - part 33
Page 7
Lotus Service Notes
Section EH
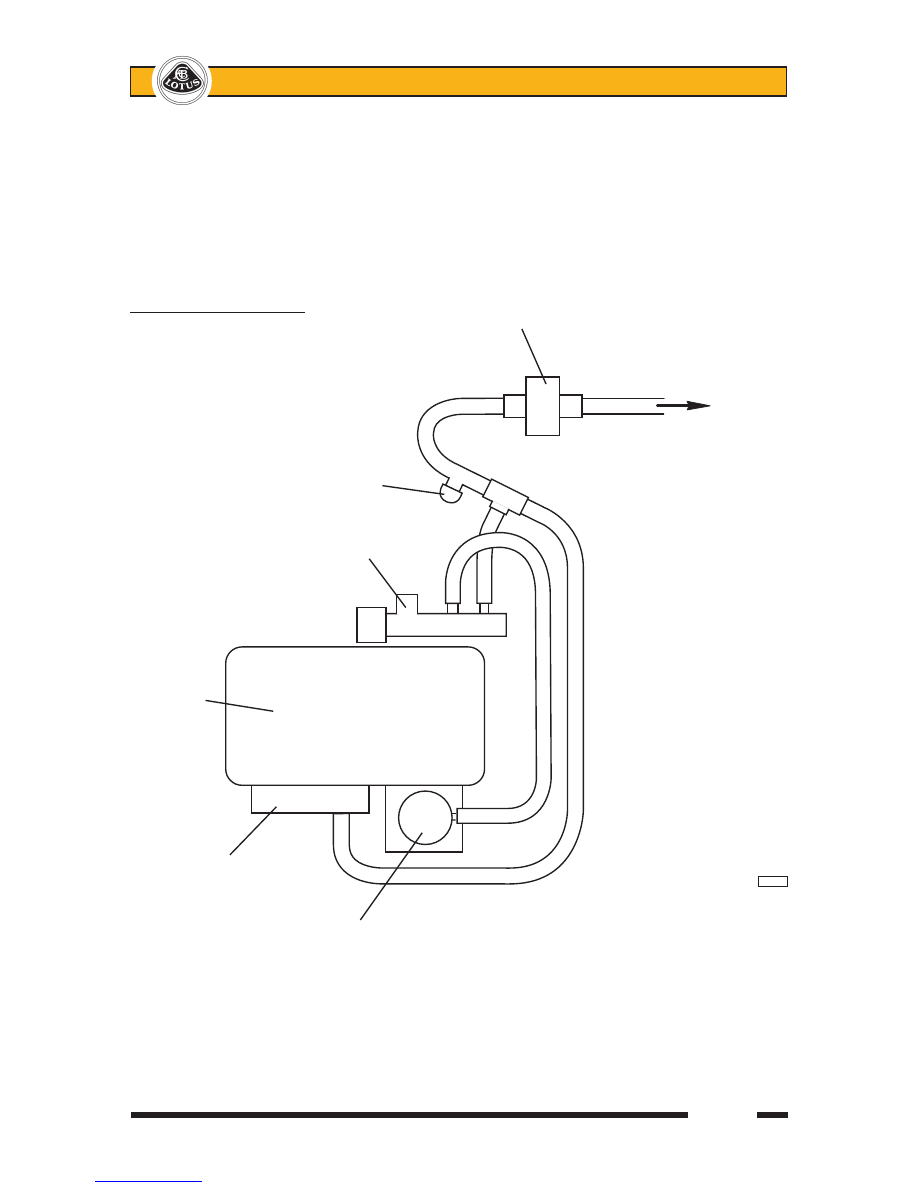
Airbox Flap Valve
In order to reduce airflow restriction into the airbox at periods of high demand, and also to provide an
acoustic enhancement, the ECU, when switching to high valve lift mode, also opens a flap valve in the under-
side of the airbox body. This butterfly valve is sprung open, and is closed by a vacuum actuator supplied from
the inlet manifold. The vacuum supply uses an in-line non-return valve and a reservoir incorporated into the
front face of the airbox body to maintain flap closure during periods of low inlet depression. A solenoid valve
mounted on top of the airbox, and connected into the vacuum capsule line, is energised by the ECU when ap-
propriate to ventilate the capsule and open the valve.
Airbox flap valve plumbing
Non-return valve
To inlet
manifold
Redundant
port capped
Intake flap solenoid valve
Air cleaner
Vacuum reservoir
em238
Intake flap valve actuator