Buick Enclave (2008 year). Manual - part 9


  Index      Buick     Buick Enclave (2008 year) - manual in english


Search            copyright infringement  


Content      ..     7      8      9      10     ..


Buick Enclave (2008 year). Manual - part 9


Gate Operator and Canadian
Programming

If you have questions or need help programming the
Universal Home Remote System, call 1-800-355-3515.

Canadian radio-frequency laws require transmitter
signals to time out or quit after several seconds of
transmission. This may not be long enough for Universal
Home Remote to pick up the signal during programming.
Similarly, some U.S. gate operators are manufactured
to time out in the same manner.

If you live in Canada, or you are having difficulty
programming a gate operator or garage door opener
by using the “Programming Universal Home Remote”
procedures, regardless of where you live, replace Step 3
under “Programming Universal Home Remote” with
the following:

Continue to press and hold the Universal Home Remote
button while you press and release every two seconds
(cycle) the hand-held transmitter button until the
frequency signal has been successfully accepted by the
Universal Home Remote. The Universal Home Remote
indicator light will flash slowly at first and then rapidly.
Proceed with Step 4 under “Programming Universal
Home Remote” to complete.

Using Universal Home Remote

Press and hold the appropriate Universal Home Remote
button for at least half of a second. The indicator light
will come on while the signal is being transmitted.

Erasing Universal Home Remote
Buttons

Erase the programmed buttons when you sell or
terminate your lease.

To erase all programmed buttons on the Universal
Home Remote device:

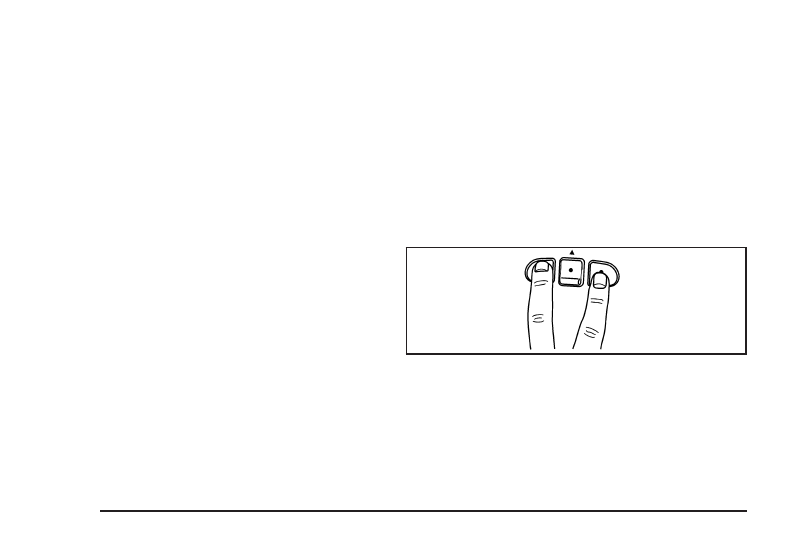
1. Press and hold down the two outside buttons until

the indicator light begins to flash, after 20 seconds.

2. Release both buttons.

2-54

-------------------------------------------------------------------------------------------------------------------------------------------------------------

Reprogramming a Single Universal
Home Remote Button

To reprogram any of the three Universal Home Remote
buttons, repeat the programming instructions earlier
in this section, beginning with Step 2.

For help or information on the Universal Home Remote
System, call the customer assistance phone number
under Customer Assistance Offices on page 7-6.

Storage Areas

Glove Box

To open, lift the handle up. Use the key to lock and
unlock.

Cupholder(s)

There are two cupholders, with removable liners,
located in front of the center console. There may be
cupholders located in the second row seat armrest.
To access, pull the armrest down. There are additional
cupholders located on each side of the third row
seat and in each door. There may be cupholders located
at the rear of the center console. To access, pull the
handle down.

Instrument Panel Storage

Your vehicle has an instrument panel storage area
located above the radio. To open the cover, press the
button.

2-55

-------------------------------------------------------------------------------------------------------------------------------------------------------------

Center Console Storage

The center console armrest can slide forward and
backward by pulling up the lever located on the front of
it. To open the armrest storage area, press the button
located on the front of the armrest. There is additional
storage under the armrest. Move the armrest all the way
to the rear position. Slide the cover back and remove
the tray for additional storage.

Second Row Center Console

Your vehicle may have a second row center console.

2-56

-------------------------------------------------------------------------------------------------------------------------------------------------------------

To access the upper storage area, press the upper
button (2) and lift up. To access the lower storage area,
press the lower button (3) and lift up. The top of the
console can be folded forward for increased storage
area. Lift up on handle on the rear of the console (1)
and pull forward.

{

CAUTION:

Never open more than one of the three latches
at a time. This is to help avoid personal injury
and damage to the console.

Notice: Slide the front console as far forward as
it will go before folding the second row console
forward. This will help prevent damage to the
consoles.

Floor Mats

There is a grommet in the driver side floor mat that
attaches to a hook on the floor of the vehicle to hold the
floor mat in place. To remove the floor mat, pull the
mat towards the rear of the vehicle until the grommet
can be removed from the hook.

2-57

-------------------------------------------------------------------------------------------------------------------------------------------------------------

Luggage Carrier

{

CAUTION:

If you try to carry something on top of your
vehicle that is longer or wider than the luggage
carrier — like paneling, plywood, a mattress
and so forth — the wind can catch it as you
drive along. This can cause you to lose
control. What you are carrying could be
violently torn off, and this could cause you or
other drivers to have a collision, and of course
damage your vehicle. You may be able to carry
something like this inside. But, never carry
something longer or wider than the luggage
carrier on top of your vehicle.

The luggage carrier allows you to load things on
top of your vehicle. Crossrails are available at your
dealer/retailer.

Notice: Loading cargo on the luggage carrier that
weighs more than 200 lbs (91 kg) or hangs over
the rear or sides of the vehicle may damage your
vehicle. Load cargo so that it rests as far forward
as possible and against the side rails, making sure
to fasten it securely.

Do not exceed the maximum vehicle capacity when
loading your vehicle. For more information on vehicle
capacity and loading, see Loading Your Vehicle on
page 4-20
.

To prevent damage or loss of cargo as you are driving,
check to make sure the cargo is still securely fastened.

Rear Seat Armrest

Your vehicle may have a rear seat armrest that contains
two cupholders. To access the cupholders, pull the
armrest down from the rear seatback.

Convenience Net

Your vehicle may have a convenience net in the rear of
the vehicle. Put small loads behind the net. The net
is not for heavier loads. Store them as far forward
as you can.

2-58

-------------------------------------------------------------------------------------------------------------------------------------------------------------

Cargo Cover

Your vehicle may have a cargo cover. It can be used to
cover items in the rear of the vehicle. To install the
cover, place the loops on each corner of the cover on
the four hooks in the rear of the vehicle. The cover
should be stored securely when not in use.

Cargo Tie Downs

Your vehicle has cargo tie-downs located in the rear of
the vehicle. These are used to secure small loads.

Cargo Management System

Your vehicle has a cargo management system located
in the rear of the vehicle. To open, pull the handle
toward the rear of the vehicle and lift the cover up.

There is an additional storage compartment on each side
of the system. To open, unlatch and lift the panel up.

To remove the cargo management system:

1. Open the lid.

2. Remove the side panels and place inside the bin.

3. Loosen the retaining nuts on each side of the

system by turning them counterclockwise.

4. Close the lid.

5. Pull up on the system by using the built in handles

and remove it from the vehicle.

2-59

-------------------------------------------------------------------------------------------------------------------------------------------------------------

Sunroof

The vehicle may have a sunroof over the front seats,
and a rear sunroof over the second row seats. The rear
sunroof does not open. The switches to operate the front
sunroof and rear sunshade are located on the headliner
above the rearview mirror. The ignition must be in ON
or ACCESSORY to operate the sunroof. See Ignition
Positions 
on page 2-26.

Vent: From the closed position, press and hold the
front of the driver’s side switch to vent the sunroof.
Press and hold the rear of the driver’s side switch
to close the sunroof.

Express-open/Express-close: From the closed
position, press and release the rear of the driver’s
side switch to express-open the sunroof. Press
and release the front of the driver’s side switch
to express-close the sunroof.

The front sunshade must be opened and closed
manually. Push up on the sunshade handle to open
the sunshade.

Notice: The rear sunshade could be damaged
if you attempt to open or close it manually.
Do not manually open or close the rear sunshade.

To open the rear sunshade, located over the second row
seats, press and release the rear of the passenger’s
side switch. Press and release the front of the switch
to close the sunshade.

2-60

-------------------------------------------------------------------------------------------------------------------------------------------------------------

Instrument Panel Overview ...............................3-4

Hazard Warning Flashers ................................3-6
Other Warning Devices ...................................3-6
Horn .............................................................3-6
Tilt and Telescopic Steering Wheel ...................3-7
Power Tilt Wheel and Telescopic

Steering Column .........................................3-7

Turn Signal/Multifunction Lever .........................3-8
Turn and Lane-Change Signals ........................3-8
Headlamp High/Low-Beam Changer ..................3-9
Flash-to-Pass .................................................3-9
Windshield Wipers ..........................................3-9
Windshield Washer .......................................3-10
Rear Window Wiper/Washer ...........................3-11
Cruise Control ..............................................3-12
Exterior Lamps .............................................3-14
Delayed Headlamps ......................................3-15
Daytime Running Lamps (DRL)/

Automatic Headlamp System .......................3-16

Adaptive Forward Lighting System ...................3-16
Fog Lamps ..................................................3-17
Instrument Panel Brightness ...........................3-17
Dome Lamps ...............................................3-17
Dome Lamp Override ....................................3-17
Entry Lighting ...............................................3-18
Delayed Entry Lighting ...................................3-18
Delayed Exit Lighting .....................................3-19

Parade Dimming ...........................................3-19
Reading Lamps ............................................3-19
Electric Power Management ...........................3-19
Battery Run-Down Protection ..........................3-20
Accessory Power Outlet(s) .............................3-20
Power Outlet 115 Volt Alternating Current ........3-21
Analog Clock ...............................................3-22

Climate Controls ............................................3-22

Dual Automatic Climate Control System ...........3-22
Outlet Adjustment .........................................3-29
Rear Air Conditioning and Heating System .......3-30
Rear Air Conditioning and Heating System

and Electronic Climate Controls ...................3-31

Warning Lights, Gages, and Indicators ............3-33

Instrument Panel Cluster ................................3-34
Speedometer and Odometer ...........................3-35
Tachometer .................................................3-35
Safety Belt Reminders ...................................3-35
Airbag Readiness Light ..................................3-36
Passenger Airbag Status Indicator ...................3-37
Charging System Light ..................................3-39
Voltmeter Gage ............................................3-40
Brake System Warning Light ..........................3-41
Antilock Brake System Warning Light ...............3-42
StabiliTrak

®

Indicator Light ..............................3-42

Engine Coolant Temperature Warning Light ......3-43

Section 3

Instrument Panel

3-1

-------------------------------------------------------------------------------------------------------------------------------------------------------------

Engine Coolant Temperature Gage ..................3-43
Tire Pressure Light .......................................3-44
Malfunction Indicator Lamp .............................3-45
Oil Pressure Light .........................................3-47
Security Light ...............................................3-48
Fog Lamp Light ............................................3-48
Cruise Control Light ......................................3-48
Highbeam On Light .......................................3-48
Tow/Haul Mode Light ....................................3-49
Fuel Gage ...................................................3-49

Driver Information Center (DIC) .......................3-50

DIC Operation and Displays ...........................3-50
DIC Warnings and Messages .........................3-56
DIC Vehicle Customization .............................3-65

Audio System(s) .............................................3-74

Setting the Time ...........................................3-75
Radio(s) (MP3) .............................................3-78
Using an MP3 (Radio with CD and

Six-Disc CD Player) ...................................3-96

Using an MP3 (Radio with CD and

DVD Player) ...........................................3-101

XM Radio Messages ...................................3-106
Navigation/Radio System ..............................3-107
Rear Seat Entertainment (RSE) System .........3-107
Rear Seat Audio (RSA) ................................3-117
Theft-Deterrent Feature ................................3-118
Audio Steering Wheel Controls ......................3-119
Radio Reception .........................................3-120
Multi-Band Antenna .....................................3-120

Section 3

Instrument Panel

3-2

-------------------------------------------------------------------------------------------------------------------------------------------------------------

NOTES

3-3

-------------------------------------------------------------------------------------------------------------------------------------------------------------

Instrument Panel Overview

3-4

-------------------------------------------------------------------------------------------------------------------------------------------------------------

The main components of your instrument panel are listed here:

A. Air Vent. See Outlet Adjustment on page 3-29.

B. Multifunction Lever. See Turn Signal/Multifunction

Lever on page 3-8. Windshield Wipers.
See Windshield Wipers on page 3-9.

C. Instrument Panel Cluster. See Instrument Panel

Cluster on page 3-34.

D. Driver Information Center (DIC) Buttons. See Driver

Information Center (DIC) on page 3-50.

E. Analog Clock. See Analog Clock on page 3-22.

F. Audio System. See Audio System(s) on page 3-74.

Navigation/Radio System (If Equipped).
See Navigation/Radio System on page 3-107.

G. Exterior Lamps Control. See Exterior Lamps on

page 3-14. Fog Lamps. See Fog Lamps on
page 3-17
.

H. Hood Release. See Hood Release on page 5-11.

I. Dome Lamp Override Button. See Dome Lamp

Override on page 3-17. Instrument Panel Brightness
Control. See Instrument Panel Brightness on
page 3-17
. Heated Windshield Washer Button (If
Equipped). See Windshield Washer on page 3-10.

J. Cruise Control Buttons. See Cruise Control on

page 3-12.

K. Tilt and Telescopic Steering Wheel. See Tilt and

Telescopic Steering Wheel on page 3-7.

L. Horn. See Horn on page 3-6.

M. Audio Steering Wheel Control Buttons. See Audio

Steering Wheel Controls on page 3-119.

N. Hazard Warning Flasher Button. See Hazard

Warning Flashers on page 3-6.

O. Dual Automatic Climate Controls. See Dual

Automatic Climate Control System on page 3-22.

P. Center Console Shift Lever. See “Console Shift

Lever” under Shifting Into PARK (P) on page 2-36.

Q. Rear Window Wiper/Washer. See Rear Window

Wiper/Washer on page 3-11. Traction Control
System (TCS) Disable Button (If Equipped).
See StabiliTrak

®

System on page 4-5. Tow/Haul

Selector Button (If Equipped). See Tow/Haul Mode
on page 2-34. Power Liftgate Button (If Equipped).
See Power Liftgate on page 2-14.

R. Accessory Power Outlets. See Accessory Power

Outlet(s) on page 3-20.

S. Heated Seats Button. See Heated Seats on

page 1-4.

T. Passenger Air Bag Status Indicator. See Passenger

Sensing System on page 1-69.

U. Glove Box. See Glove Box on page 2-55.

3-5

-------------------------------------------------------------------------------------------------------------------------------------------------------------

Hazard Warning Flashers

The hazard warning flashers let you warn others. They
also let police know you have a problem. The front
and rear turn signal lamps will flash on and off.

The hazard warning flasher
button is located in the
center of the instrument
panel, below the audio
system.

Press the button to make the front and rear turn
signal lamps flash on and off. Press the button again
to turn the flashers off.

The hazard warning flashers work at all times. However,
when they are on, the turn signals will not work.

Other Warning Devices

If you carry reflective triangles, you can set them up at
the side of the road about 300 feet (100 m) behind
your vehicle.

Horn

Press near or on the horn symbols on the steering
wheel pad to sound the horn.

3-6

-------------------------------------------------------------------------------------------------------------------------------------------------------------

Tilt and Telescopic Steering Wheel

A tilt and telescope wheel lets you adjust the steering
wheel before you drive. The steering wheel can be
raised to the highest level to give your legs more room
when you enter and exit the vehicle.

The lever that lets you tilt and telescope the steering
wheel is located on the left side of the steering column.

To tilt and telescope the steering wheel, pull down
the lever. Then move the steering wheel up or down
or backward or forward into a comfortable position.
Pull the lever up to lock the steering wheel in place.

Do not adjust the tilt and telescope lever while driving.

Power Tilt Wheel and Telescopic
Steering Column

The power tilt and
telescope wheel control is
located on the outboard
side of the steering
column.

To operate the power tilt feature, push the control
up and the steering wheel tilts up. Push the control
down and the steering wheel goes down.

Push the control forward and the steering wheel moves
toward the front of the vehicle. Push the control rearward
and the steering wheel moves toward the rear of the
vehicle. To set the memory position, see DIC Vehicle
Customization 
on page 3-65 and Memory Seat and
Mirrors 
on page 1-4.

3-7

-------------------------------------------------------------------------------------------------------------------------------------------------------------

Turn Signal/Multifunction Lever

The lever on the left side of the steering column
includes the following:

G

Turn and Lane Change Signals. See Turn and

Lane-Change Signals on page 3-8.

3

Headlamp High/Low-Beam Changer. See

Headlamp High/Low-Beam Changer on page 3-9.

Flash-to-Pass. See Flash-to-Pass on page 3-9.

N

Windshield Wipers. See Windshield Wipers on

page 3-9.

L

Windshield Washer. See Windshield Washer

on page 3-10.

For information on the headlamps, see Exterior Lamps
on page 3-14.

Turn and Lane-Change Signals

The turn signal has two upward (for right) and
two downward (for left) positions. These positions
allow you to signal a turn or a lane change.

To signal a turn, move the lever all the way up or
down. When the turn is finished, the lever will return
automatically.

An arrow on the instrument
panel cluster will flash in
the direction of the
turn or lane change.

To signal a lane change, raise or lower the lever until
the arrow starts to flash. Hold it there until you complete
your lane change. The lever will return by itself when
you release it. If you momentarily press and release
the lever, the turn signal will flash three times.

If the arrow flashes faster than normal as you signal a
turn or a lane change, a signal bulb may be burned
out and other drivers will not see your turn signal.

If a bulb is burned out, replace it to help avoid an
accident. If the arrows do not go on at all when you
signal a turn, check for burned-out bulbs and then check
the fuse. See Fuses and Circuit Breakers on page 5-100.

3-8

-------------------------------------------------------------------------------------------------------------------------------------------------------------

Turn Signal On Chime

If either one of the turn signals are left on and you have
drove more than 3/4 mile (1.2 km), a chime will sound.

Headlamp High/Low-Beam
Changer

To change the headlamps from low beam to high beam,
push the turn signal/multifunction lever toward the
front of the vehicle.

This light on the instrument
panel cluster comes on
if the high beam lamps
are turned on while
the ignition is on.

To change the headlamps from high beam to low beam,
pull the turn signal lever toward the rear of the vehicle.

Flash-to-Pass

With the turn signal lever in the low-beam position,
pull the lever toward you momentarily to switch
to high-beam, to signal that you are going to pass.

If the headlamps are on, they will return to low-beam
when the lever is released.

Windshield Wipers

Clear ice and snow from the wiper blades before using
them. If they are frozen to the windshield, gently loosen
or thaw them. Damaged wiper blades may not clear the
windshield well, making it harder to see and drive safely.
If the blades do become damaged, install new blades or
blade inserts. For more information, see Windshield
Wiper Blade Replacement 
on page 5-50.

Heavy snow or ice can overload the wiper motor.
A circuit breaker will stop the motor until it cools down.
Clear away snow or ice to prevent an overload.

3-9

-------------------------------------------------------------------------------------------------------------------------------------------------------------


Content      ..     7      8      9      10     ..