Saturn Astra (2008 year). Manual - part 5
 

  Index      Saturn     Saturn Astra (2008 year) - manual in english


Search            copyright infringement  


Content      ..     3      4      5      6     ..


Saturn Astra (2008 year). Manual - part 5


This device complies with RSS-210
of Industry Canada. Operation is
subject to the following two
conditions:

1. This device may not cause

interference.

2. This device must accept any

interference received, including
interference that may cause
undesired operation of the
device.

Changes or modifications to this
system by other than an authorized
service facility could void
authorization to use this equipment.

Immobilizer Operation

This vehicle has a passive
theft-deterrent system.

The system is automatically armed
when the key is removed from
the ignition.

The system is automatically
disarmed when the key is turned to
ON/RUN.

You do not have to manually arm or
disarm the system.

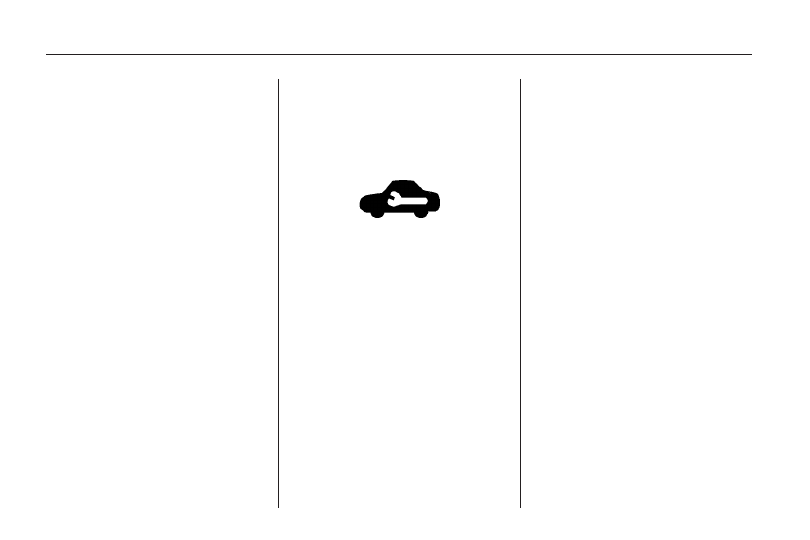
The service vehicle soon light,
located in the instrument panel
cluster, comes on if there is
a problem with arming or disarming
the theft-deterrent system.

The key uses a transponder that
matches an immobilizer control unit
in the vehicle. Only the correct
key starts the vehicle.

When starting the vehicle, the
service vehicle soon light comes on
briefly when the ignition is turned on.

If the engine does not start and the
service vehicle soon light flashes
there is a problem with the system.
Turn the ignition off and try again.

If the engine still does not start and
the service vehicle soon light
continues to flash, try another key.

If the engine still does not start
with the other key, the vehicle needs
service. If the vehicle does start,
the first key may be damaged.
See your dealer/retailer who can
service the theft-deterrent system
and have a new key made.

In an emergency, contact Roadside
Service. See Roadside Assistance
Program 
on page 11-5.

Do not leave the key or device that
disarms or deactivates the theft
deterrent system in the vehicle.

2-8

Keys, Doors and Windows

-------------------------------------------------------------------------------------------------------------------------------------------------------------

Content Theft-Deterrent

This vehicle has a content
theft-deterrent alarm system.

The security light is located on the
instrument panel.

Do not use this system if there are
people in the vehicle. The doors
can not be unlocked from inside the
vehicle.

Arming the System

To arm the system:

1. Close all doors, windows, hood

and sunroof.

2. Press

c

on the Remote Keyless

Entry (RKE) transmitter.

The security light flashes when the
vehicle is armed.

Disarming the System

To disarm the system, do one of the
following:

Press

d

on the RKE transmitter.

Turn the ignition on.

The security light stays on for
approximately one second when the
vehicle is disarming.

How the System Alarm is
Activated

To activate the system if it is armed,
open any door, the liftgate or
hood. The horn will sound and the
hazard warning flashers will flash.

How to Turn Off the System
Alarm

To turn off the system alarm, do
one of the following:

Press the unlock button on the
RKE transmitter.

Insert the key in the ignition and
turn it on.

The theft-deterrent system is
disarmed when the alarm is
turned off.

Keys, Doors and Windows

2-9

-------------------------------------------------------------------------------------------------------------------------------------------------------------

Windows

{

CAUTION

Leaving children, helpless
adults, or pets in a vehicle
with the windows closed is
dangerous. They can be
overcome by the extreme heat
and suffer permanent injuries
or even death from heat stroke.
Never leave a child, a helpless
adult, or a pet alone in a
vehicle, especially with the
windows closed in warm or hot
weather.

Power Windows

{

CAUTION

Leaving children in a vehicle
with the keys is dangerous for
many reasons, children or
others could be badly injured
or even killed. They could
operate the power windows or
other controls or even make the
vehicle move. The windows will
function and they could be
seriously injured or killed if
caught in the path of a closing
window. Do not leave keys in a
vehicle with children.

When there are children in
the rear seat use the window
lockout button to prevent
unintentional operation of
the windows.

2-10

Keys, Doors and Windows

-------------------------------------------------------------------------------------------------------------------------------------------------------------

The window switches are located on
each of the doors.

To lower a window, press the switch
down. To raise a window, pull the
switch up.

Express-Down Window

This feature is on all windows.
It allows you to lower the window
all the way without holding the
switch down.

Press the front of the switch to
the second position and release.
If you want to stop the window as
it is lowering, briefly pull up the
switch.

Press and hold the unlock button on
the Remote Keyless Entry (RKE)
transmitter to lower all of the
windows from outside the vehicle.

Window Lockout

o

(Window Lockout): This button

is located on the driver’s door
armrest. Slide the switch forward to
turn the lockout feature on. The
rear windows can only be opened or
closed by the driver window
switches. The light on the button
indicates the feature is in use. Press
again to turn off.

Sun Visors

Pull the visor toward you, or move it
to the side to help reduce glare.

To use the lighted mirror, lift
the cover.

Keys, Doors and Windows

2-11

-------------------------------------------------------------------------------------------------------------------------------------------------------------

Mirrors

Manual Rearview Mirror

Hold the mirror in the center to move
it for a clearer view of behind your
vehicle.

Headlamp Glare

To reduce headlamp glare from
vehicles following from behind, pull
the lever toward you. Push the
lever forward after the vehicle glare
is gone, to return the mirror back
to the original position.

Vehicles with OnStar

®

have three

OnStar

®

control buttons located at

the bottom of the mirror. See your
dealer/retailer for more information
on the system and how to subscribe
to OnStar

®

. See OnStar

®

System on

page 4-38.

Cleaning the Mirror

Do not spray glass cleaner directly
on the mirror. Use a soft towel
dampened with glass cleaner.

Outside Mirror(s)

To maximize the viewing area,
adjust each mirror to see the side of
your vehicle and the area beside
and behind your vehicle.

Manually fold the mirrors flat against
the side of the vehicle by pushing
them toward the vehicle’s doors.

Outside Power Mirror(s)

h i

(Power Mirrors): Press to

select the driver side or passenger
side mirror. Press the arrows to
move the selected mirror in
the desired direction.

2-12

Keys, Doors and Windows

-------------------------------------------------------------------------------------------------------------------------------------------------------------

Outside Heated Mirrors

The vehicle may have outside
heated mirrors which help clear the
condensation, snow, and ice.

<

(Rear Window Defogger):

Press to heat the mirrors. See “Rear
Window Defogger” under, Climate
Control System 
on page 7-1 for
more information.

Sunroof

On vehicles with a sunroof, the
switches are located in the overhead
console. To operate the sunroof,
the ignition must be turned on.

t

Vent/Open: With the sunroof in

the closed position, press to vent
the sunroof. With the sunroof in the
vent position, press to open the
sunroof. The sunshade will
open automatically with the sunroof.

u

Close: Press to close the

sunroof. Press and hold to close
completely.

Sunshade

r

Sunshade Open: Press to

open the sunshade.

s

Sunshade Close: Press to

close the sunshade, and press
and hold to close the sunshade
completely.

Keys, Doors and Windows

2-13

-------------------------------------------------------------------------------------------------------------------------------------------------------------

Storage

Storage

Glove Box

..........................3-1

Cupholders

.........................3-1

Cargo Cover

.......................3-1

Cargo Tie Downs

...............3-1

Storage

Glove Box

Pull up on the handle to open the
glovebox. There may be a shelf
inside that can be removed by lifting
up on the shelf and pulling it out.

Cupholders

There is a cupholder on the front
edge of the rear seat cushion.
To open or close, press on the
cupholder.

There is a cupholder on the rear
center console.

Cargo Cover

Your vehicle may have a cargo
cover.

To remove the cover, unhook the
retaining straps from the liftgate and
pull the cover from the side guides.

Cargo Tie Downs

There are four cargo tie-downs
located in the rear compartment of
the vehicle, that can be used to
secure small loads.

Storage

3-1

-------------------------------------------------------------------------------------------------------------------------------------------------------------

Instruments and
Controls

Instrument Panel
Overview

Instrument Panel

Overview

...........................4-2

Hazard Warning Flashers

...4-4

Horn

...................................4-4

Tilt Wheel

...........................4-4

Turn Signal/Multifunction

Lever

................................4-4

Cruise Control

....................4-5

Turn and Lane-Change

Signals

.............................4-8

Headlamp High/Low-Beam

Changer

............................4-8

Flash-to-Pass

......................4-8

Windshield Wipers

..............4-9

Windshield Washer

...........4-10

Rear Window Wiper/

Washer

...........................4-10

Accessory Power

Outlet(s)

..........................4-10

Warning Lights, Gages,
and Indicators

Warning Lights, Gages,

and Indicators

.................4-11

Instrument Panel Cluster

...4-12

Speedometer and

Odometer

........................4-13

Trip Odometer(s)

...............4-13

Tachometer

.......................4-13

Safety Belt Reminders

......4-14

Airbag Readiness Light

.....4-14

Passenger Airbag Status

Indicator

..........................4-15

Charging System Light

......4-17

Brake System Warning

Light

................................4-17

Antilock Brake System

(ABS) Warning Light

.......4-18

StabiliTrak

®

Indicator

Light

................................4-19

Engine Coolant

Temperature Warning
Light

................................4-19

Tire Pressure Light

...........4-19

Malfunction

Indicator Lamp

................4-20

Oil Pressure Light

.............4-22

Low Oil Level Light

...........4-23

Winter Driving Mode

Light

................................4-23

Fog Lamp Light

................4-23

Exterior Lamps Off

Reminder

........................4-24

Cruise Control Light

..........4-24

Highbeam On Light

...........4-24

Door Ajar Light

.................4-24

Service Vehicle Soon

Light

................................4-24

Fuel Gage

........................4-25

Low Fuel Warning Light

....4-25

Driver Information
Center (DIC)

Driver Information

Center (DIC)

...................4-26

DIC Operation and

Displays (Base Level
DIC and Audio)

...............4-27

DIC Operation and

Displays (Uplevel
DIC and Audio)

...............4-31

DIC Warnings and

Messages (Base and
Uplevel Systems)

............4-37

OnStar

®

System

OnStar

®

System

................4-38

Instruments and Controls

4-1

-------------------------------------------------------------------------------------------------------------------------------------------------------------

Instrument Panel Overview

4-2

Instruments and Controls

-------------------------------------------------------------------------------------------------------------------------------------------------------------

The main components of the
instrument panel are the:

A. Exterior Lamps Controls on

page 5-1.

B. Outlets. Outlet Adjustment on

page 7-4.

C. Turn Signal/Multifunction Lever

on page 4-4.

D. DIC Operation and Displays

(Base Level DIC and Audio)
on page 4-27 or DIC Operation
and Displays (Uplevel DIC
and Audio) 
on page 4-31 and
Audio Steering Wheel Controls
on page 6-24. (If Equipped)

E. Instrument Panel Cluster on

page 4-12.

F. Audio Steering Wheel Controls

on page 6-24. (If Equipped)

G. Windshield Wipers on page 4-9.

H. Heated Seats on page 1-6.

(If Equipped)

I. StabiliTrak

®

System on

page 8-19. (If Equipped)

J. Driver Information Center (DIC)

on page 4-26. (If Equipped)

K. Hazard Warning Flashers on

page 4-4.

L. Power Door Locks on page 2-5.

M. Passenger Safety Belt

Reminder. Safety Belt
Reminders 
on page 4-14.

N. Front Passenger Airbag. Airbag

System on page 1-23.

O. Fog Lamps on page 5-2.

(If Equipped)

P. Instrument Panel Brightness on

page 5-3.

Q. Hood Release on page 9-5.

R. Tilt Wheel on page 4-4.

S. Horn on page 4-4.

T. Ignition Positions on page 8-2.

U. Climate Control System on

page 7-1.

V. Accessory Power Outlet(s) on

page 4-10. (Covered)

W. Audio System(s) on page 6-1.

X. Glove Box on page 3-1.

Instruments and Controls

4-3

-------------------------------------------------------------------------------------------------------------------------------------------------------------

Hazard Warning Flashers

|

Press this button located on

the instrument panel, to make the
front and rear turn signal lamps flash
on and off. This warns others that
you are having trouble. Press the
button again to turn the flashers off.

While the hazard warning flashers
are on, the turn signals do not work.

An indicator light on the hazard
warning flasher button comes on
whenever the ignition is turned on.

If the airbags are deployed, the
hazard warning flashers turn
on automatically. Press the
button twice to turn them off.

Horn

Press the horn symbol in the middle
of the steering wheel to sound
the horn.

Tilt Wheel

A tilt and telescope wheel lets the
steering wheel position be adjusted.

The adjustment lever is located on
the left side of the steering column.

It allows the steering column to be
moved up or down and in or out.

Do not adjust the steering wheel
while driving.

Turn Signal/Multifunction
Lever

The lever on the left side of the
steering column includes the
following:

G

Turn and Lane-Change

Signals.

2

Headlamp High/Low-Beam

Changer.

J

Cruise Control (If Equipped).

Flash-to-Pass Feature.

Information for these features is on
the pages following.

4-4

Instruments and Controls

-------------------------------------------------------------------------------------------------------------------------------------------------------------

Cruise Control

{

CAUTION

Cruise control can be
dangerous where you cannot
drive safely at a steady speed.
So, do not use your cruise
control on winding roads or
in heavy traffic.

Cruise control can be
dangerous on slippery roads.
On such roads, fast changes
in tire traction can cause
excessive wheel slip, and you
could lose control. Do not use
cruise control on slippery
roads.

With cruise control, a speed of about
25 mph (40 km/h) or more can be
maintained without keeping your foot
on the accelerator. This can really
help on long trips. Cruise control
does not work at speeds below
about 25 mph (40 km/h).

The cruise control buttons
are located on the turn signal/
multifunction lever on the left
side of the steering wheel.

9

(On/Off): Press and hold the

button on the back end of the cruise
control lever, to turn the cruise
control system on or off. The CC
on or CC off message will appear on
the instrument panel cluster at the
odometer display to show that the
cruise control system is on or off.

A

J

(Set/Accelerate): Press

to set a speed and to accelerate
the speed.

B

W

(Resume/Coast): Press to

resume a set speed and to decrease
the speed.

Instruments and Controls

4-5

-------------------------------------------------------------------------------------------------------------------------------------------------------------

Setting Cruise Control

For safety reasons the cruise
control cannot be turned on until
the brake has been applied once.

With automatic transmission, only
use cruise control in DRIVE (D).

Press the On/Off button to turn on
the cruise control. A message briefly
appears on the instrument panel
cluster at the odometer display
when the cruise control has been
turned on.

{

CAUTION

If you leave your cruise control
on when you are not using
cruise, you might hit a button
and go into cruise when you
do not want to. You could be
startled and even lose control.
Keep the cruise control switch
off until you want to use cruise
control.

1. Press

J

and the current speed

is stored and maintained.

2. Take your foot off the accelerator

pedal. The

J

indicator light on

the instrument panel cluster turns
on after the cruise control has
been set to the desired speed.

The cruise control automatically
disengages under the following
conditions:

The vehicle speed drops below
25 mph (40 km/h).

The brake is applied.

The clutch pedal is applied
(for manual transmission
vehicles).

The automatic transmission is in
NEUTRAL (N).

The On/Off button is pressed.

CC On Message

CC Off Message

4-6

Instruments and Controls

-------------------------------------------------------------------------------------------------------------------------------------------------------------

Resuming a Set Speed

Once the vehicle speed reaches
about 25 mph (40 km/h) or more and
the cruise control is on, press

W

.

The vehicle returns to the previous
speed selected before the cruise
was disengaged.

The stored speed is deleted if the
ignition is turned off.

Increasing Speed While Using
Cruise Control

Press and hold

J

until the

desired speed is reached,
then release it.

To increase vehicle speed
in small increments, briefly
press

J

repeatedly. Each

time this is done, the vehicle
speed increase by about 1 mph
(1.6 km/h) without using the
accelerator pedal.

When the

J

button is released

the current speed is stored
and maintained.

Reducing Speed While Using
Cruise Control

Press and hold

W

until the

desired lower speed is reached,
then release it.

To reduce vehicle speed in
small increments, briefly
press

W

repeatedly. Each time

this is done, the vehicle speed
decreases by about 1 mph
(1.6 km/h).

When the

W

button is released

the current speed is stored
and maintained.

Passing Another Vehicle
While Using Cruise Control

Use the accelerator pedal to
increase the vehicle speed. When
the accelerator pedal is released,
the vehicle will return to the
previously set cruise speed.

Using Cruise Control on Hills

How well the cruise control will work
on hills depends upon the vehicle
speed, load, and the steepness of
the hills. While going up steep hills,
you might have to step on the
accelerator pedal to maintain the
vehicle’s speed. While going
downhill, you might have to brake
or shift to a lower gear to keep the
vehicle’s speed down. Of course,
applying the brake turns off the
cruise control.

Ending Cruise Control

There are several ways to end
cruise control:

Step lightly on the brake or
clutch pedal.

The automatic transmission is
placed in NEUTRAL (N).

Press the

9

button.

Erasing Speed Memory

The cruise control set speed
memory is erased when the cruise
control or the ignition is turned off.

Instruments and Controls

4-7

-------------------------------------------------------------------------------------------------------------------------------------------------------------

Turn and Lane-Change
Signals

The turn signal has two upward and
downward positions to signal a turn
or a lane change.

To signal a turn, move the lever all
the way up or down, past the detent.
The lever returns to its starting
position when released.

An arrow on the instrument panel
cluster flashes in the direction of
the turn or lane change.

To signal a lane change, raise or
lower the lever until the arrow starts
to flash, and then release the lever.
Do not move the lever past the
detent. The turn signal will
automatically flash three times
and turn off.

To cancel it before turning, move
the lever slightly in either direction.
Do not past the detent.

Headlamp High/
Low-Beam Changer

2 3

(Headlamp High/Low

Beam Changer): To change the
headlamps from low to high beam,
push the multifunction lever towards
the instrument panel. To return to
low-beam headlamps, push the lever
towards the instrument panel again
or pull the lever toward you. Then
release it.

This indicator light on the instrument
panel cluster is on while the high
beam headlamps are on.

Flash-to-Pass

Pull the turn signal/multifunction
lever towards you to flash the high
beams from low beam.

4-8

Instruments and Controls

-------------------------------------------------------------------------------------------------------------------------------------------------------------

Windshield Wipers

Clear ice and snow from the wiper
blades before using them. If the
wiper blades are frozen to the
windshield, gently loosen or thaw
them. If the blades do become
damaged, install new blades or
blade inserts. See Windshield Wiper
Blade Replacement 
on page 9-21.

Heavy snow or ice can overload the
wiper motor. A circuit breaker will
stop the motor until it cools down.
Clear away snow or ice to prevent
an overload.

The lever on the right side of the
steering column operates the
windshield wipers. Push up or pull
down on the lever to place it in
one of the following positions.

[

(High): For rapid wiping cycles.

— (Low): For slow, steady wiping
cycles.

-- (Intermittent/RainSense™):
See RainSense™ wipers below.

9

(Off): Turns off the wipers.

For a single wipe pull the lever
down from the off position. The lever
will return to its original position.
For more cycles, hold the lever
down before releasing it.

RainSense™ Wipers

There is a moisture sensor mounted
on the windshield next to the inside
rearview mirror. When active, the
sensor is able to detect moisture on
the windshield and automatically
control the frequency of the wipes
according to the weather conditions.

To turn on the RainSense feature,
the wipers must be set to the
intermittent delay setting on
the windshield wiper lever.

To turn off RainSense, move the
lever downwards.

Notice: Going through an
automatic car wash with the
wipers on can damage them.
Turn the wipers off when going
through an automatic car wash.

Instruments and Controls

4-9

-------------------------------------------------------------------------------------------------------------------------------------------------------------


Content      ..     3      4      5      6     ..