Saturn Ion (2007 year). Manual - part 10


  Index      Saturn     Saturn Ion (2007 year) - manual in english


Search            copyright infringement  


Content      ..     8      9      10      11     ..


Saturn Ion (2007 year). Manual - part 10


Headlamp High/Low-Beam Changer

Push the turn signal lever forward to change
the headlamps from low beam to high beam. Pull
the turn signal lever back and then release it
to change from high beam to low beam.
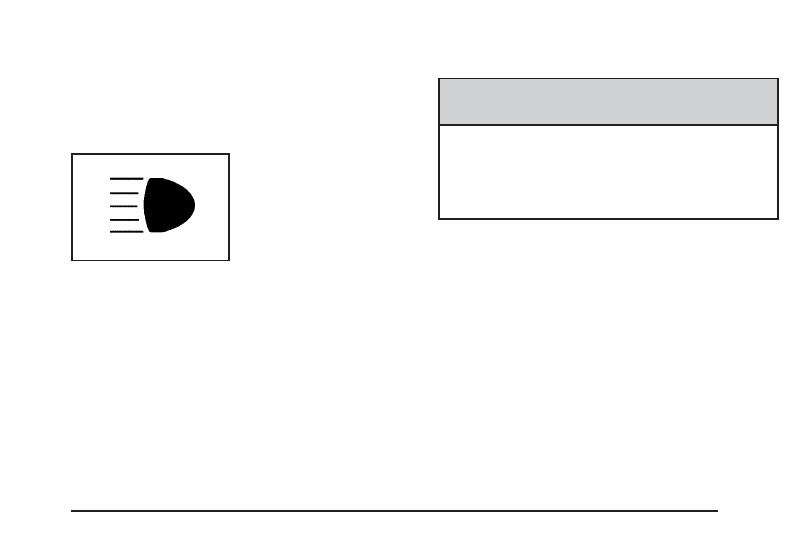
When the high beams
are on, this light on the
instrument panel
cluster will also be on.

Flash-to-Pass

This feature lets you use your high-beam
headlamps to signal a driver in front of you that
you want to pass.

To use it, pull the turn signal/multifunction lever
toward you until the high-beam headlamps
come on, then release the lever to turn them off.

Windshield Washer

{

CAUTION:

In freezing weather, do not use your
washer until the windshield is warmed.
Otherwise the washer fluid can form ice
on the windshield, blocking your vision.

L

(Washer Fluid): Pull the windshield wiper

lever toward you to operate the windshield wipers.
Washer fluid will squirt onto the windshield and
the wipers will run for a few cycles to clear
the windshield. For more wash cycles, pull the
lever toward you and hold it there.

145

-------------------------------------------------------------------------------------------------------------------------------------------------------------

Windshield Wiper Lever

The lever on the right side of the steering column
operates the windshield wipers.

7

(Mist): Pull the lever down and release it for

a single wiping cycle. The lever will return to its
original position. For more cycles, hold the
lever down before releasing it.

9

(Off): Put the lever in this position to turn off

the wipers.

&

(Delay): Put the lever in this position to set a

delay between wipes. Turn the end of the lever
to set the length of the delay.

6

(Low Speed): Put the lever in this position

for slow, steady wiping cycles.

1

(High Speed): Put the lever in this position

for rapid wiping cycles.

Be sure to clear ice and snow from the wiper
blades before using them. If they are frozen to the
windshield, gently loosen or thaw them. If the
blades do become damaged, install new blades or
blade inserts.

Heavy snow or ice can overload the wiper motor.
A circuit breaker will stop the motor until it
cools down. Clear away snow or ice to prevent
an overload.

146

-------------------------------------------------------------------------------------------------------------------------------------------------------------

Cruise Control

With cruise control, you can maintain a speed of
about 25 mph (40 km/h) or more without
keeping your foot on the accelerator. This can
really help on long trips. Cruise control does not
work at speeds below 25 mph (40 km/h).

{

CAUTION:

Cruise control can be dangerous where
you cannot drive safely at a steady speed.
So, do not use your cruise control on
winding roads or in heavy traffic.

Cruise control can be dangerous on
slippery roads. On such roads, fast
changes in tire traction can cause
excessive wheel slip, and you could lose
control. Do not use cruise control on
slippery roads.

Setting Cruise Control

{

CAUTION:

If you leave your cruise control on when
you are not using cruise, you might hit a
button and go into cruise when you do not
want to. You could be startled and even
lose control. Keep the cruise control switch
off until you want to use cruise control.

The cruise control buttons are located on the
steering wheel.

147

-------------------------------------------------------------------------------------------------------------------------------------------------------------

J

(On/Off): Press this button to turn the cruise

control system on and off.

+RES (Resume): Press this part of the button to
resume a set speed and to accelerate the speed.

SET (Set): Press this part of the button to set a

speed and to decrease the speed.

To set a speed do the following:

1. Press the on/off button to turn cruise control

on. The indicator light on the button will
come on.

2. Get to the speed you want.

3. Press the

SET part of the control button and

release it. The CRUISE message will display
in the instrument panel cluster to show the
system is engaged.

4. Take your foot off the accelerator pedal.

When the brakes are applied, the cruise control
shuts off.

If the vehicle is in cruise control and the Enhanced
Traction System (ETS) begins to limit wheel
spin, the cruise control will automatically
disengage. See Enhanced Traction System (ETS)
on page 226. When road conditions allow, the
cruise control can be used again.

Resuming a Set Speed

Suppose you set your cruise control at a desired
speed and then you apply the brake. This, of
course, disengages the cruise control. The
CRUISE message in the instrument panel cluster
will also go out indicating cruise is no longer
engaged. To return to your previously set speed,
you do not need to go through the set process
again. Once you are going about 25 mph (40 km/h)
or more, you can press the +RES part of the
button briefly.

This will take you back up to your previously
chosen speed and stay there.

148

-------------------------------------------------------------------------------------------------------------------------------------------------------------

Increasing Speed While Using
Cruise Control

There are two ways to go to a higher speed.

Disengage the cruise control but do not turn it
off. Accelerate to a higher speed and reset
the cruise control.

If the cruise control system is already engaged,
press the +RES part of the button. Hold it there
until you get up to the speed you want, and
then release the button. To increase your
speed in very small amounts, press the +RES
part of the button briefly and then release it.
Each time you do this, your vehicle will go
about 1 mph (1.6 km/h) faster.

Reducing Speed While Using
Cruise Control

If the cruise control system is already engaged,

Push and hold the

SET part of the button

until you reach the lower speed you want,
then release it.

To slow down in very small amounts, push the

SET part of the button briefly. Each time you

do this, you will go about 1 mph (1.6 km/h)
slower.

Passing Another Vehicle While Using
Cruise Control

Use the accelerator pedal to increase your speed.
When you take your foot off the pedal, your
vehicle will slow down to the cruise control speed
you set earlier.

Using Cruise Control on Hills

How well your cruise control will work on hills
depends upon your speed, load, and the
steepness of the hills. When going up steep hills,
you may have to step on the accelerator pedal
to maintain your speed. When going downhill, you
may have to brake or shift to a lower gear to
keep your speed down. Of course, applying the
brake takes you out of cruise control. Many drivers
find this to be too much trouble and do not use
cruise control on steep hills.

Ending Cruise Control

To end the cruise control session, step lightly on
the brake pedal or tap the clutch if your vehicle has
a manual transaxle.
Stepping on the brake pedal or clutch will only end
the current cruise control session. Press the
cruise control on/off button to turn the system
completely off.

149

-------------------------------------------------------------------------------------------------------------------------------------------------------------

Erasing Speed Memory

When you turn off the cruise control or the
ignition, your cruise control set speed memory is
erased.

Headlamps

The exterior lamp control is located in the middle
of the turn signal/multifunction lever.

O

(Exterior Lamp Control): Turn the control

with this symbol on it to operate the exterior lamps.

The exterior lamp control has the following
four positions:

9

(Off): Turn the control to this position to turn

off all lamps, except the Daytime Running
Lamps (DRL). On some vehicles, this position
activates the automatic headlamp system.

AUTO (Automatic): If the vehicle has automatic
headlamps, turning the control to this position
puts the headlamps in automatic mode. AUTO
mode will turn the exterior lamps on and off
depending upon how much light is available
outside of the vehicle.

;

(Parking Lamps): Turn the control to this

position to turn on the parking lamps together with
the following:

Sidemarker Lamps

Taillamps

License Plate Lamps

Instrument Panel Lights

5

(Headlamps): Turn the control to this position

to turn on the headlamps, together with the
previously listed lamps and lights.

Lamps On Reminder

If you open the driver’s door with the ignition off
and the lamps on, you will hear a warning chime.

150

-------------------------------------------------------------------------------------------------------------------------------------------------------------

Daytime Running Lamps (DRL)

Daytime Running Lamps (DRL) can make it easier
for others to see the front of your vehicle during
the day. DRL can be helpful in many different
driving conditions, but they can be especially
helpful in the short periods after dawn and before
sunset. Fully functional daytime running lamps
are required on all vehicles first sold in Canada.
The DRL system will make the turn signal
lamps come on in daylight when the following
conditions are met:

The ignition is on.

The exterior lamp band is in the off or AUTO
position.

When the DRL are on, the turn signal lamps will
be on. The taillamps, sidemarker, and other lamps
will not be on. The instrument panel back
lighting will not be on either.
When the exterior lamp band is turned to the
headlamp position, the headlamps will come on.
The other lamps that come on with the headlamps
will also come on.
When the headlamps are turned off, the regular
lamps will go off, and the turn signal lamps
will come on.

Automatic Headlamp System

If you have the automatic headlamps system, the
headlamps will come on automatically when it
is dark enough.

Your vehicle may have
a light sensor located
on top of the instrument
panel. Make sure it is
not covered, or the
headlamps will come on
when you do not
need them.

The system may also turn on the headlamps when
driving through a parking garage or tunnel.

151

-------------------------------------------------------------------------------------------------------------------------------------------------------------

Fog Lamps

If your vehicle has this feature, use your fog lamps
for better visibility in foggy or misty conditions.

The button for your fog
lamps is located next to
the instrument panel
brightness control.

Push the button to turn the fog lamps on or off.

When using fog lamps, the parking lamps or
low-beam headlamps must be on.

A light on the button will come on when the fog
lamps are on. The fog lamps will go off whenever
the high-beam headlamps come on. When the
high-beam headlamps go off, the fog lamps
will come on again.

Some localities have laws that require the
headlamps to be on along with the fog lamps.

Instrument Panel Brightness

This feature controls the brightness of the
instrument panel lights.

The thumbwheel for
this feature is located
on the instrument panel
to the left of the
steering column.

Turn the thumbwheel to the right to brighten the
lights or to the left to dim them.

152

-------------------------------------------------------------------------------------------------------------------------------------------------------------

Dome Lamp

The dome lamp switch has three positions.

ON: The lamp will stay on as long as the switch
is in this position.

DOOR: The lamp will come on when a door is
opened. See “Entry Lighting” for more information.

OFF: The lamp will not come on as long as the
switch is in this position.

Entry Lighting

If the dome lamp is to DOOR, the lamps inside
your vehicle will come on when any door is
opened. In addition, the light will come on when
the Remote Keyless Entry Unlock button is
on. It will stay on for 20 seconds or until a door is
opened. After the door is opened the light will
remain on and stay on for 20 seconds after
the doors are closed, or until you put the key in
the ignition and turn the key to RUN. The light will
then gradually dim until it is no longer lit.

Map Lamps

These lamps are located on the headliner above
the rearview mirror. To turn the lamps on, press the
lens. Press the lens again to turn them off.

Battery Run-Down Protection

Your vehicle has a battery saver feature designed
to protect the vehicle’s battery.

When any interior lamp is left on and the ignition
is turned off, the battery rundown protection
system automatically turns the lamp off after
20 minutes. This prevents draining of the battery.

Accessory Power Outlet(s)

The accessory power outlets can be used to
connect electrical equipment such as a cellular
phone or CB radio.

The accessory power outlets are located in the
middle and rear of the center console.

The front accessory power outlet has electrical
power available to it all the time. The rear
accessory power outlet only has electrical power
when the ignition key is turned on or the vehicle is
operating on Retained Accessory Power (RAP).
See Retained Accessory Power (RAP) on
page 108
.

153

-------------------------------------------------------------------------------------------------------------------------------------------------------------

To use the outlet, remove the cover. When not in
use, always cover the outlet with the protective cap.

Notice: Leaving electrical equipment on for
extended periods will drain the battery.
Always turn off electrical equipment when not
in use and do not plug in equipment that
exceeds the maximum 15 ampere rating.

Certain electrical accessories may not be
compatible with the accessory power outlet and
could result in blown vehicle or adapter fuses.
If you experience a problem, see your retailer for
additional information on the accessory
power outlet.

Notice: Adding any electrical equipment to
your vehicle may damage it or keep other
components from working as they should.
The repairs would not be covered by your
warranty. Check with your retailer before
adding electrical equipment.

Notice: Improper use of the power outlet can
cause damage not covered by your warranty.
Do not hang any type of accessory or
accessory bracket from the plug because the
power outlets are designed for accessory
power plugs only.

Ashtray(s) and Cigarette Lighter

Your vehicle may have an ashtray and cigarette
lighter. To use the lighter, just push it in all the way
and let go. When it is ready for use, it will pop
back out by itself.

Notice: Holding a cigarette lighter in while it
is heating will not allow the lighter to back
away from the heating element when it is hot.
Damage from overheating may occur to the
lighter or heating element, or a fuse could be
blown. Do not hold a cigarette lighter in
while it is heating. Do not use equipment
exceeding maximum amperage rating of
15 amperes.

To remove the ashtray, lift it straight up. To
reinstall it, press the ashtray down firmly until it is
fully seated.

Notice: If you put papers, pins, or other
flammable items in the ashtray, hot cigarettes
or other smoking materials could ignite
them and possibly damage your vehicle.
Never put flammable items in the ashtray.

154

-------------------------------------------------------------------------------------------------------------------------------------------------------------

Climate Controls

Climate Control System
(Without Air Conditioning)

With this system you can control the heating and
ventilation for your vehicle.

Operation

To change the current mode, select one of the
following:

H

(Vent): This mode directs air to the instrument

panel outlets.

)

(Bi-Level): This mode directs approximately

half of the air to the instrument panel outlets,
and then directs the remaining air to the
floor outlets. Cooler air is directed to the upper
outlets and warmer air to the floor outlets.

6

(Floor): This mode directs most of the air to

the floor outlets with some air directed to the
windshield.

The left knob can also be used to select defog or
defrost mode. Information on defogging and
defrosting can be found later in this section.

A

(Fan): Turn the center knob clockwise or

counterclockwise to increase or decrease the fan
speed. In any setting other than off, the fan
will run continuously with the ignition on.

9

(Off): To turn the fan off, turn the knob all the

way counterclockwise to the off position.

Temperature Control: Turn the right knob
clockwise or counterclockwise to increase or
decrease the temperature inside your vehicle.

155

-------------------------------------------------------------------------------------------------------------------------------------------------------------

Defogging and Defrosting

Fog on the inside of windows is a result of high
humidity (moisture) condensing on the cool window
glass. This can be minimized if the climate
control system is used properly. There are
two modes to clear fog or frost from your
windshield and side windows. Use the defog mode
to clear the windows of fog or moisture and
warm the passengers. Use the defrost mode to
remove fog or frost from the windshield more
quickly. For best results, clear all snow and ice
from the windshield before defrosting.

Turn the left knob to select the defog or
defrost mode.

-

(Defog): This mode directs half of the air to

the windshield and the side window outlets
and half to the floor outlets. To defog the windows
faster, turn the temperature control knob
clockwise to the warmest setting.

0

(Defrost): This mode directs most of the air to

the windshield, with some air directed to the
side window outlets and the floor outlets.

Rear Window Defogger

The rear window defogger uses a warming grid to
remove fog from the rear window.
The rear window defogger will only work when the
ignition is in RUN.

<

(Rear): Press the button to turn the rear

window defogger on or off. Be sure to clear as
much snow from the rear window as possible.
An indicator light above the button will come on to
let you know that the rear window defogger is
activated.
The rear window defogger will turn off
approximately 15 minutes after the button is
pressed. If turned on again, the defogger will only
run for approximately five minutes before turning
off. The defogger can also be turned off by pressing
the button again or by turning off the engine.

Notice: Do not use anything sharp on the
inside of the rear window. If you do, you could
cut or damage the warming grid, and the
repairs would not be covered by your warranty.
Do not attach a temporary vehicle license,
tape, a decal or anything similar to the
defogger grid.

156

-------------------------------------------------------------------------------------------------------------------------------------------------------------

Climate Control System
(With Air Conditioning)

With this system you can control the heating,
cooling and ventilation for your vehicle.

Operation

To change the current mode, select one of the
following:

H

(Vent): This mode directs air to the instrument

panel outlets.

)

(Bi-Level): This mode directs approximately

half of the air to the instrument panel outlets,
and then directs the remaining air to the
floor outlets. Cooler air is directed to the upper
outlets and warmer air to the floor outlets.

6

(Floor): This mode directs most of the air to

the floor outlets with some air directed to the
windshield.

The left knob can also be used to select defog or
defrost mode. Information on defogging and
defrosting can be found later in this section.

A

(Fan): Turn the center knob clockwise or

counterclockwise to increase or decrease the fan
speed. In any setting other than off, the fan
will run continuously with the ignition on. The fan
must be turned on to run the air conditioning
compressor.

157

-------------------------------------------------------------------------------------------------------------------------------------------------------------

9

(Off): To turn the fan off, turn the knob all the

way counterclockwise to the off position.

Temperature Control: Turn the right knob
clockwise or counterclockwise to increase or
decrease the temperature inside your vehicle.

>

(Recirculate): This mode keeps outside air

from coming in the vehicle. It can be used to
prevent outside air and odors from entering your
vehicle or to help heat or cool the air inside
your vehicle more quickly. An indicator light will
come on in this mode. The air-conditioning
compressor also comes on. Operation in this mode
during periods of high humidity and cool outside
temperatures may result in increased window
fogging. If window fogging is experienced, select
the defrost mode.

#

(Air Conditioning): Press this button to turn

the air-conditioning system on or off. When
this button is pressed, an indicator light above the
button will come on to let you know the air
conditioning is activated.

On hot days, open the windows to let hot inside
air escape; then close them. This helps to reduce
the time it takes for your vehicle to cool down.
It also helps the system to operate more efficiently.

For quick cool down on hot days:

1. Select the recirculation mode.

2. Select air conditioning.

3. Select the coolest temperature.

4. Select the highest fan speed.

Using these settings together for long periods of
time may cause the air inside of your vehicle to
become too dry. To prevent this from happening,
after the air in your vehicle has cooled, turn off the
recirculation by pressing the button again.

158

-------------------------------------------------------------------------------------------------------------------------------------------------------------

The air-conditioning system removes moisture
from the air, so you may sometimes notice a small
amount of water dripping underneath your
vehicle while idling or after turning off the engine.
This is normal.

Defogging and Defrosting

Fog on the inside of windows is a result of high
humidity (moisture) condensing on the cool window
glass. This can be minimized if the climate
control system is used properly. There are
two modes to clear fog or frost from your
windshield and side windows. Use the defog mode
to clear the windows of fog or moisture and
warm the passengers. Use the defrost mode to
remove fog or frost from the windshield more
quickly. For best results, clear all snow and ice
from the windshield before defrosting.

Turn the left knob to select the defog or
defrost mode.

-

(Defog): This mode directs half of the air to the

windshield and the side window outlets and half to
the floor outlets. When you select this mode the
system runs the air-conditioning compressor. To
defog the windows faster, turn the temperature
control knob clockwise to the warmest setting.

0

(Defrost): This mode directs most of the air to

the windshield, with some air directed to the
side window outlets and the floor outlets. When
you select this mode the system runs the
air-conditioning compressor.

159

-------------------------------------------------------------------------------------------------------------------------------------------------------------

Rear Window Defogger

The rear window defogger uses a warming grid to
remove fog from the rear window.

The rear window defogger will only work when the
ignition is in RUN.

<

(Rear): Press the button to turn the rear

window defogger on or off. Be sure to clear as
much snow from the rear window as possible.
An indicator light above the button will come on to
let you know that the rear window defogger is
activated.

The rear window defogger will turn off
approximately 15 minutes after the button is
pressed. If turned on again, the defogger will only
run for approximately five minutes before turning
off. The defogger can also be turned off by pressing
the button again or by turning off the engine.

Notice: Do not use anything sharp on the
inside of the rear window. If you do, you could
cut or damage the warming grid, and the
repairs would not be covered by your warranty.
Do not attach a temporary vehicle license,
tape, a decal or anything similar to the
defogger grid.

Outlet Adjustment

Use the louvers located on the air outlets to
change the direction of the airflow.

Operation Tips

Clear away any ice, snow, or leaves from the
air inlets at the base of the vehicle that may
block the flow of air into your vehicle.

Do not use any non-GM approved hood
deflectors that could adversely affect the
performance of the system.

Keep the path under the front seats clear of
objects to help circulate the air inside of
your vehicle more effectively.

160

-------------------------------------------------------------------------------------------------------------------------------------------------------------


Content      ..     8      9      10      11     ..