Oldsmobile Bravada (2004 year). Manual - part 7


  Index      Oldsmobile     Oldsmobile Bravada (2004 year) - manual in english


Search            copyright infringement  


Content      ..     5      6      7      8     ..


Oldsmobile Bravada (2004 year). Manual - part 7


-------------------------------------------------------------------------------------------------------------------------------------------------------------
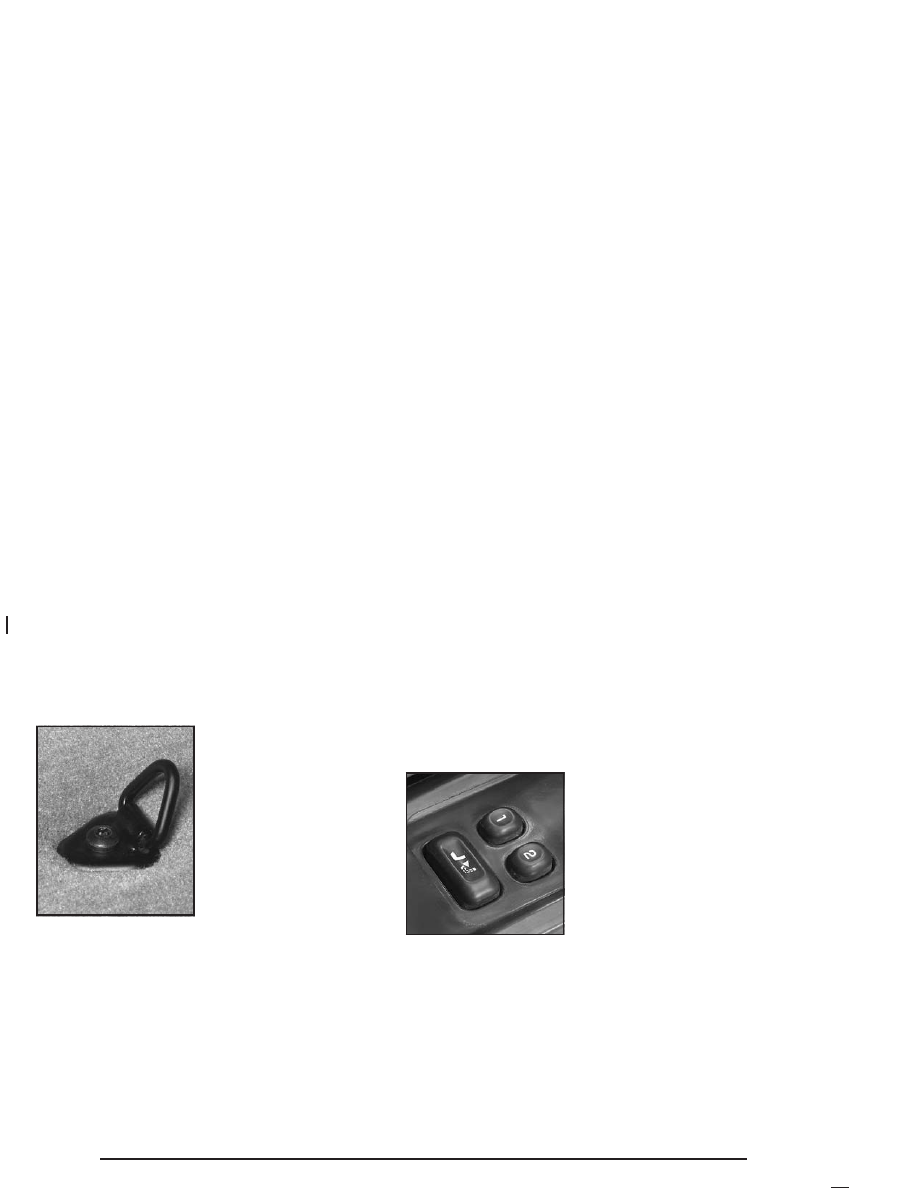
Cargo Tie Downs

There may be cargo tie
downs in the rear of your
vehicle that allow you
to strap cargo in and keep
it from moving.

Sunroof

Your vehicle may be equipped with a power sliding
sunroof. To open or close your sunroof, the ignition
must be on or Retained Accessory Power (RAP)
must be active.
Press and release the back of the button in the overhead
console to open the sunroof. Press the front of the button
to close the sunroof. Once the sunroof is closed, press
the forward side of the button to open the sunroof to the
vent position.
The sunroof is also equipped with a sunshade which
you can pull forward to block sun rays.

Vehicle Personalization

Memory Seat

Your vehicle may have this
feature. The controls are
located on the driver’s
door, and are used
to program and recall
memory settings for the
driver’s seating positions,
outside mirror positions
and adjustable pedals
(if equipped).

Adjust the driver’s seat, including the seatback recliner
and lumbar, both of the outside mirrors, and the
adjustable pedals to the desired position. Then press
and hold button 1 (for driver 1) for three seconds.
A double chime will sound to let you know that the
position has been stored.

2-42

-------------------------------------------------------------------------------------------------------------------------------------------------------------

-------------------------------------------------------------------------------------------------------------------------------------------------------------

A second mirror position, seating position and adjustable
pedal position can be programmed by repeating the
procedure with a second driver and pressing button 2 for
three seconds. Each time button 1 or 2 is pressed
and released while the vehicle is in PARK (P), a single
chime will sound, and the memory position will be
recalled.

If you use the unlock button on the remote keyless entry
transmitter to enter your vehicle, the preset driver’s
seat, mirror positions and adjustable pedal position will
be recalled if programmed to do so through the
Driver Information Center (DIC). The numbers on the
back of the transmitters, 1 or 2, correspond to the
numbers on the memory controls.

The seat positions, mirror positions and adjustable
pedal positions can also be recalled by placing the key
in the ignition if programmed to do so through the
Driver Information Center (DIC). See DIC Operation and
Displays 
on page 3-45.

To stop recall movement of the memory feature at any
time, press one of the power seat controls or memory
buttons.

Two personalized exit positions can be set by first
recalling the driver’s position by pressing 1 or 2, then
positioning the seat in the desired exit position for
that driver. Press and hold the button with the exit
symbol for three seconds. A double chime will sound to
let you know that the position has been stored. With
the vehicle in PARK (P), the exit position for that driver
can be recalled by pressing the exit button. The
mirrors, power lumbar, recline and adjustable pedal
positions will not be stored or recalled for the exit
positions. If no exit position is stored, the default is all
the way rearward.

Further programming for automatic seat and mirror
movement can be done through the Driver Information
Center (DIC). You may choose to either select or
not select the following:

Automatic seat, mirror movement and pedal
position when the vehicle is unlocked with the
remote keyless entry

automatic seat, mirror movement and pedal position
when a key is placed in the ignition

automatic seat movement to the exit position when
the vehicle is in PARK (P)

2-43

-------------------------------------------------------------------------------------------------------------------------------------------------------------

-------------------------------------------------------------------------------------------------------------------------------------------------------------

NOTES

2-44

-------------------------------------------------------------------------------------------------------------------------------------------------------------

-------------------------------------------------------------------------------------------------------------------------------------------------------------

Instrument Panel Overview ...............................3-4

Hazard Warning Flashers ................................3-6
Other Warning Devices ...................................3-7
Horn .............................................................3-7
Tilt Wheel .....................................................3-7
Turn Signal/Multifunction Lever .........................3-8
Exterior Lamps .............................................3-15
Interior Lamps ..............................................3-17
Accessory Power Outlets ...............................3-20
Ashtrays and Cigarette Lighter ........................3-20

Climate Controls ............................................3-21

Dual Automatic Climate Control System ...........3-21
Rear Climate Control System .........................3-26
Climate Controls Personalization .....................3-27

Warning Lights, Gages and Indicators .............3-28

Instrument Panel Cluster ................................3-29
Speedometer and Odometer ...........................3-30
Tachometer .................................................3-31
Safety Belt Reminder Light .............................3-31
Air Bag Readiness Light ................................3-32

Charging System Light ..................................3-33
Voltmeter Gage ............................................3-33
Brake System Warning Light ..........................3-34
Anti-Lock Brake System Warning Light .............3-35
Engine Coolant Temperature Gage ..................3-36
Malfunction Indicator Lamp .............................3-36
Oil Pressure Gage ........................................3-39
Change Engine Oil Light ................................3-40
Security Light ...............................................3-41
Cruise Control Light ......................................3-41
Reduced Engine Power Light .........................3-42
Service All-Wheel Drive Light .........................3-42
Check Gages Warning Light ...........................3-43
Gate Ajar Light .............................................3-43
Fuel Gage ...................................................3-44
Low Fuel Warning Light .................................3-44

Driver Information Center (DIC) .......................3-45

DIC Operation and Displays ...........................3-45
DIC Warnings and Messages .........................3-54

Section 3

Instrument Panel

3-1

-------------------------------------------------------------------------------------------------------------------------------------------------------------

-------------------------------------------------------------------------------------------------------------------------------------------------------------

-------------------------------------------------------------------------------------------------------------------------------------------------------------

-------------------------------------------------------------------------------------------------------------------------------------------------------------

NOTES

3-3

-------------------------------------------------------------------------------------------------------------------------------------------------------------

-------------------------------------------------------------------------------------------------------------------------------------------------------------

Instrument Panel Overview

3-4

-------------------------------------------------------------------------------------------------------------------------------------------------------------

-------------------------------------------------------------------------------------------------------------------------------------------------------------

The main components of your instrument panel are the
following:

A. Exterior Lamp Controls. See Exterior Lamps on

page 3-15.

B. Air Outlets. See “Outlet Adjustment” under Dual

Automatic Climate Control System on page 3-21.

C. Turn Signal/Multifunction Lever. See Turn

Signal/Multifunction Lever on page 3-8.

D. OnStar and Audio Steering Wheel Controls. See

Audio Steering Wheel Controls on page 3-95.

E. Instrument Panel Cluster. See Instrument Panel

Cluster on page 3-29.

F. Audio Steering Wheel Controls. See Audio Steering

Wheel Controls on page 3-95.

G. Ignition Switch. See Ignition Positions on page 2-19.

H. Audio System. See Audio System(s) on page 3-58.

I. Climate Controls. See Dual Automatic Climate

Control System on page 3-21.

J. Hood Release. See Hood Release on page 5-10.

K. Driver Information Center (DIC) Steering Wheel

Controls. See Driver Information Center (DIC) on
page 3-45
.

L. Rear Window Washer/Wiper. See “Rear Window

Washer/Wiper” under Turn Signal/Multifunction Lever
on page 3-8.

M. Lighter. See Ashtrays and Cigarette Lighter on

page 3-20.

N. Accessory Power Outlet. See Accessory Power

Outlets on page 3-20.

O. Rear Window Defogger. See “Rear Window

Defogger” under Dual Automatic Climate Control
System 
on page 3-21.

P. Glove Box. See Glove Box on page 2-38.

3-5

-------------------------------------------------------------------------------------------------------------------------------------------------------------

-------------------------------------------------------------------------------------------------------------------------------------------------------------

Hazard Warning Flashers

Your hazard warning flashers let you warn others. They
also let police know you have a problem. Your front
and rear turn signal lamps will flash on and off.

The button for the hazard
warning flashers is located
on top of the steering
column.

The hazard warning flashers work no matter what
position your key is in, and even if the key isn’t in.

Press the button all the way down to make your front
and rear turn signal lamps flash on and off. To turn
off the flashers, press the button again until it clicks and
then release it.

When the hazard warning flashers are on, the turn
signals won’t work.

3-6

-------------------------------------------------------------------------------------------------------------------------------------------------------------

-------------------------------------------------------------------------------------------------------------------------------------------------------------

Other Warning Devices

If you carry reflective triangles, you can set one up at
the side of the road about 300 feet (100 m) behind your
vehicle.

Horn

To sound the horn, press the horn symbols on the
steering wheel pad.

Tilt Wheel

You should adjust the
steering wheel before you
drive. The tilt lever is
located to the left of the
steering column, under the
turn signal lever.

You can raise it to the highest level to give your legs
more room when you enter and exit the vehicle.

To tilt the wheel, hold the steering wheel and pull the
lever toward you. Move the steering wheel to a
comfortable level, then release the lever to lock the
wheel in place.

Do not adjust the steering wheel while driving.

3-7

-------------------------------------------------------------------------------------------------------------------------------------------------------------

-------------------------------------------------------------------------------------------------------------------------------------------------------------

Turn Signal/Multifunction Lever

The lever on the left side of the steering column
includes the following:

G

Turn and Lane Change Signals

2

Headlamp High/Low-Beam Changer

Flash-to-Pass Feature

N

Windshield Wipers

J

Windshield Washer

I

Cruise Control (If Equipped)

Turn and Lane Change Signals

The turn signal has two upward (for right) and two
downward (for left) positions. These positions allow you
to signal a turn or a lane change.

To signal a turn, move the lever all the way up or down.
When the turn is finished, the lever will return
automatically.

An arrow on the instrument
panel cluster will flash in
the direction of the
turn or lane change.

To signal a lane change, just raise or lower the lever
until the arrow starts to flash. Hold it there until you
complete your lane change. The lever will return by itself
when you release it. The bottom of the outside
rearview mirrors may also be equipped with lane change
indicators.

As you signal a turn or a lane change, if the arrows flash
more quickly than normal, a signal bulb may be burned
out and other drivers won’t see your turn signal.

3-8

-------------------------------------------------------------------------------------------------------------------------------------------------------------

-------------------------------------------------------------------------------------------------------------------------------------------------------------

If a bulb is burned out, replace it to help avoid an
accident. If the arrows don’t go on at all when you signal
a turn, check the fuse. See Fuses and Circuit Breakers
on page 5-99 and check for burned-out bulbs.

If you have a trailer towing option with added wiring for
the trailer lamps, a different turn signal flasher is
used. With this flasher installed, the signal indicator will
flash even if a turn signal bulb is burned out. Check
the front and rear turn signal lamps regularly to make
sure they are working.

Turn Signal On Chime

If your turn signal is left on for more than 3/4 of a mile
(1.2 km), a chime will sound at each flash of the
turn signal. To turn off the chime, move the turn signal
lever to the off position.

Headlamp High/Low-Beam Changer

To change the headlamps from low to high beam, push
the lever toward the instrument panel. To return to
low-beam headlamps, pull the multifunction lever toward
you. Then release it.

When the high beams are
on, this indicator light on
the instrument panel
cluster will also be on.

Flash-to-Pass

This feature lets you use your high-beam headlamps to
signal a driver in front of you that you want to pass.
It works even if your headlamps are in the automatic
position.

To use it, pull the turn signal lever toward you, then
release it.

If your headlamps are in the automatic position or on
low beam, your high-beam headlamps will turn on.
They’ll stay on as long as you hold the lever toward you.
The high-beam indicator on the instrument panel
cluster will come on. Release the lever to return to
normal operation.

3-9

-------------------------------------------------------------------------------------------------------------------------------------------------------------

-------------------------------------------------------------------------------------------------------------------------------------------------------------

Windshield Wipers

8

(Mist): For a single wiping cycle, turn the band to

mist. Hold it there until the wipers start. Then let go.
The wipers will stop after one wipe. If you want
more wipes, hold the band on mist longer.

9

(Off): To stop the wipers, move the band to off.

N

(Windshield Wipers): Turn the band to control the

windshield wipers.

You can set the wiper speed for a long or short delay
between wipes. This can be very useful in light rain
or snow. Turn the band to choose the delay time. The
closer to the top of the lever, the shorter the delay.

For steady wiping at low speed, turn the band away from
you to the first solid band past the delay settings. For
high-speed wiping, turn the band further, to the second
solid band past the delay settings. To stop the wipers,
move the band to off.

Be sure to clear ice and snow from the wiper blades
before using them. If they’re frozen to the windshield,
carefully loosen or thaw them. If your blades do become
worn or damaged, get new blades or blade inserts.

Rainsense™ Wipers

Your vehicle may be equipped with
Rainsense™ windshield wipers. When active, these
wipers are able to detect moisture on the windshield
and automatically turn on the wipers.

The moisture sensor is located next to the inside
rearview mirror and is mounted on the windshield.

To turn on the Rainsense™ feature, the wipers must be
set to one of the five delay settings on the multifunction
lever. Each of the five settings adjusts the sensitivity
of the rainsensor. For more wipes, select the higher
settings; for fewer wipes, select the lower settings
located closer to off on the multifunction lever.

The rainsensor will automatically control the frequency
of the wipes from off to high speed according to the
weather conditions. The wipers can be left in a
rainsense mode even when it is not raining.

Notice: If you do not turn off the windshield wipers
when driving through an automatic car wash, you
could damage the wipers. Always turn off the
windshield wipers before entering an automatic
car wash.

3-10

-------------------------------------------------------------------------------------------------------------------------------------------------------------

-------------------------------------------------------------------------------------------------------------------------------------------------------------

Windshield Washer

L

(Windshield Washer): To spray washer fluid on the

windshield, press the windshield washer paddle. The
wipers will clear the window and then either stop
or return to your preset speed.

{

CAUTION:

In freezing weather, do not use your washer
until the windshield is warmed. Otherwise the
washer fluid can form ice on the windshield,
blocking your vision.

Rear Window Washer/Wiper

This control is located to
the right of the steering
wheel on the instrument
panel.

To turn the rear wiper on, turn the control to either 1, 2,
or 3. For delayed wiping, turn the control to 1 or 2.
For steady wiping, turn the control to 3. To turn the wiper
off, turn the control to 0.

To wash the rear window, press the washer symbol
located in the center of the control.

The rear window washer uses the same fluid bottle as
the windshield washer. However, the rear window
washer will run out of fluid before the windshield washer.
If you can wash your windshield but not your rear
window, check the fluid level.

3-11

-------------------------------------------------------------------------------------------------------------------------------------------------------------

-------------------------------------------------------------------------------------------------------------------------------------------------------------

Cruise Control

The cruise controls are
located on the end of the
turn signal/multifunction
lever.

R

(On): Move the switch to this position to turn the

cruise control system on.

S

(Resume/Accelerate): Move the switch to this

position to resume a set speed or to accelerate.

T

(Set): Press this button, located at the end of the

lever, to set a speed.

9

(Off): This position turns the cruise control system

off and cancels memory of a set speed.

With cruise control, you can maintain a speed of about
25 mph (40 km/h) or more without keeping your foot
on the accelerator. This can really help on long
trips. Cruise control does not work at speeds below
about 25 mph (40 km/h).

If you apply your brakes, the cruise control will shut off.

{

CAUTION:

Cruise control can be dangerous where you
can not drive safely at a steady speed. So, do
not use your cruise control on winding roads
or in heavy traffic.

Cruise control can be dangerous on slippery
roads. On such roads, fast changes in tire
traction can cause needless wheel spinning,
and you could lose control. Do not use cruise
control on slippery roads.

3-12

-------------------------------------------------------------------------------------------------------------------------------------------------------------

-------------------------------------------------------------------------------------------------------------------------------------------------------------

{

CAUTION:

If you leave your cruise control on when you
are not using cruise, you might hit a button
and go into cruise when you do not want to.
You could be startled and even lose control.
Keep the cruise control switch off until you
want to use cruise control.

Setting Cruise Control

1. Move the cruise control switch to on.

2. Get up to the speed you want.

3. Press in the set button at the end of the lever and

release it.

4. Take your foot off the accelerator pedal. The

accelerator pedal will not go down.

The cruise light on the instrument panel cluster will
come on when the cruise control is engaged.

Resuming a Set Speed

Suppose you set your cruise control at a desired speed
and then you apply the brake. This, of course, shuts
off the cruise control. But you don’t need to reset it.

Once you’re going about 25 mph (40 km/h) or more, you
can move the cruise control switch briefly from on to
resume/accelerate.

You’ll go right back up to your chosen speed and stay
there.

If you hold the switch at resume/accelerate, the vehicle
will keep going faster until you release the switch or
apply the brake. So unless you want to go faster, don’t
hold the switch at resume/accelerate.

United States

Canada

3-13

-------------------------------------------------------------------------------------------------------------------------------------------------------------


Content      ..     5      6      7      8     ..