Snowmobile Arctic Cat (2002 year). Manual - part 105
7-32
0736-811
0736-718
0736-526
0735-798
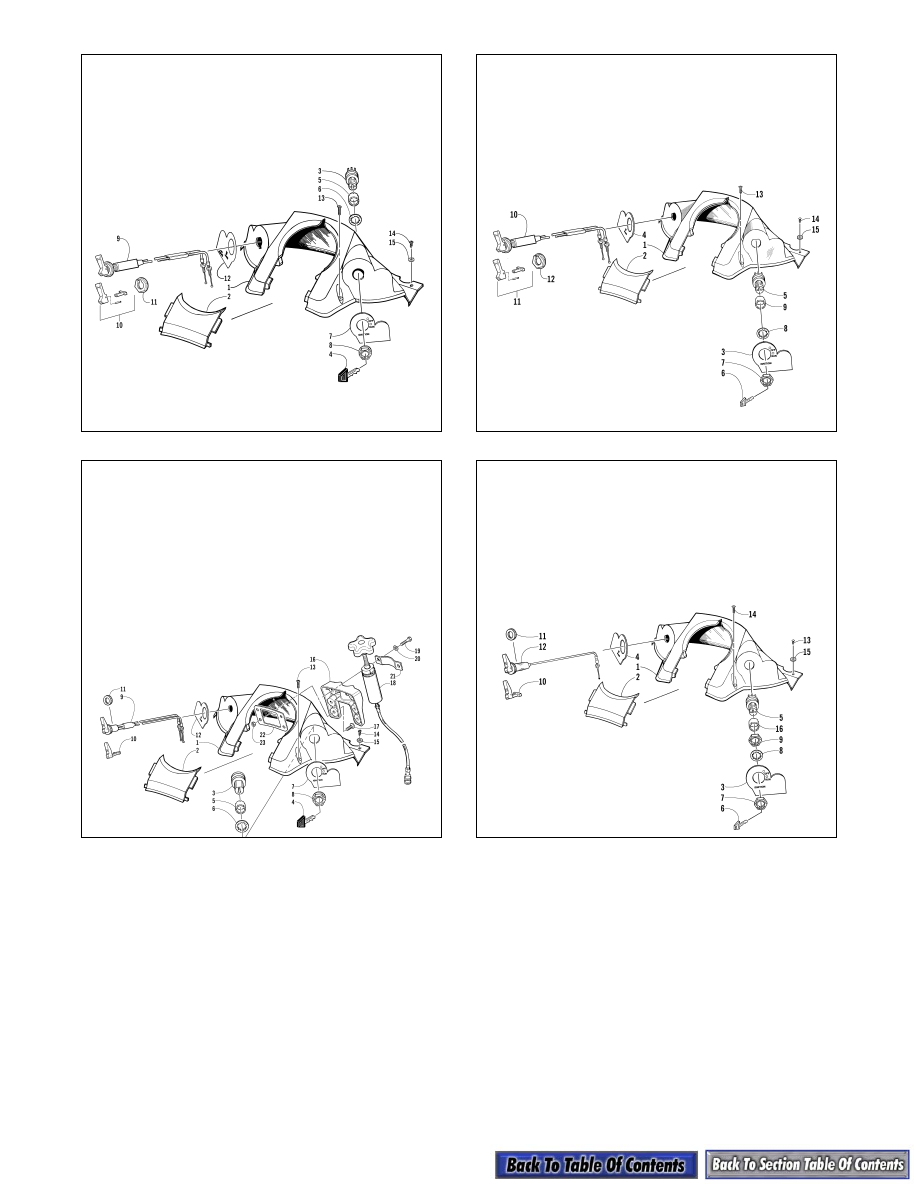
KEY
1. Console
2. Door
3. Ignition Switch
4. Key
5. Spacer
6. Lock Washer
7. Decal
8. Nut
9. Choke Cable
10. Choke Lever Kit
11. Choke Nut
12. Decal
13. Self-Tapping
Screw
14. Self-Tapping
Screw
15. Washer
KEY
1. Console
2. Door
3. Ignition Switch
4. Key
5. Spacer
6. Lock Washer
7. Decal
8. Nut
9. Choke Cable
10. Choke Lever Kit
11. Choke Nut
12. Decal
13. Self-Tapping
Screw
14. Self-Tapping
Screw
15. Washer
16. Mounting
Bracket
17. Machine Screw
18. Reservoir Assy
19. Cap Screw
20. Lock Washer
21. Retainer
Bracket
22. Backing Plate
23. Lock Nut
KEY
1. Console
2. Door
3. Decal
4. Decal
5. Ignition Switch
6. Key
7. Ignition Nut
8. Lock Washer
9. Spacer
10. Choke Cable
11. Choke Lever Kit
12. Choke Nut
13. Self-Tapping
Screw
14. Self-Tapping
Screw
15. Washer
KEY
1. Console
2. Door
3. Decal
4. Decal
5. Ignition Switch
6. Key
7. Retaining Nut
8. Lock Washer
9. Nut
10. Choke Lever Kit
11. Choke Nut
12. Choke Cable
13. Self-Tapping Screw
14. Self-Tapping Screw
15. Washer
16. Spacer