Snowmobile Yamaha Phazer PZ50W, PZ50GTW, PZ50FXW, PZ50MW, PZ50VTW, PZ50MPW. Manual - part 42
5-5
ENG
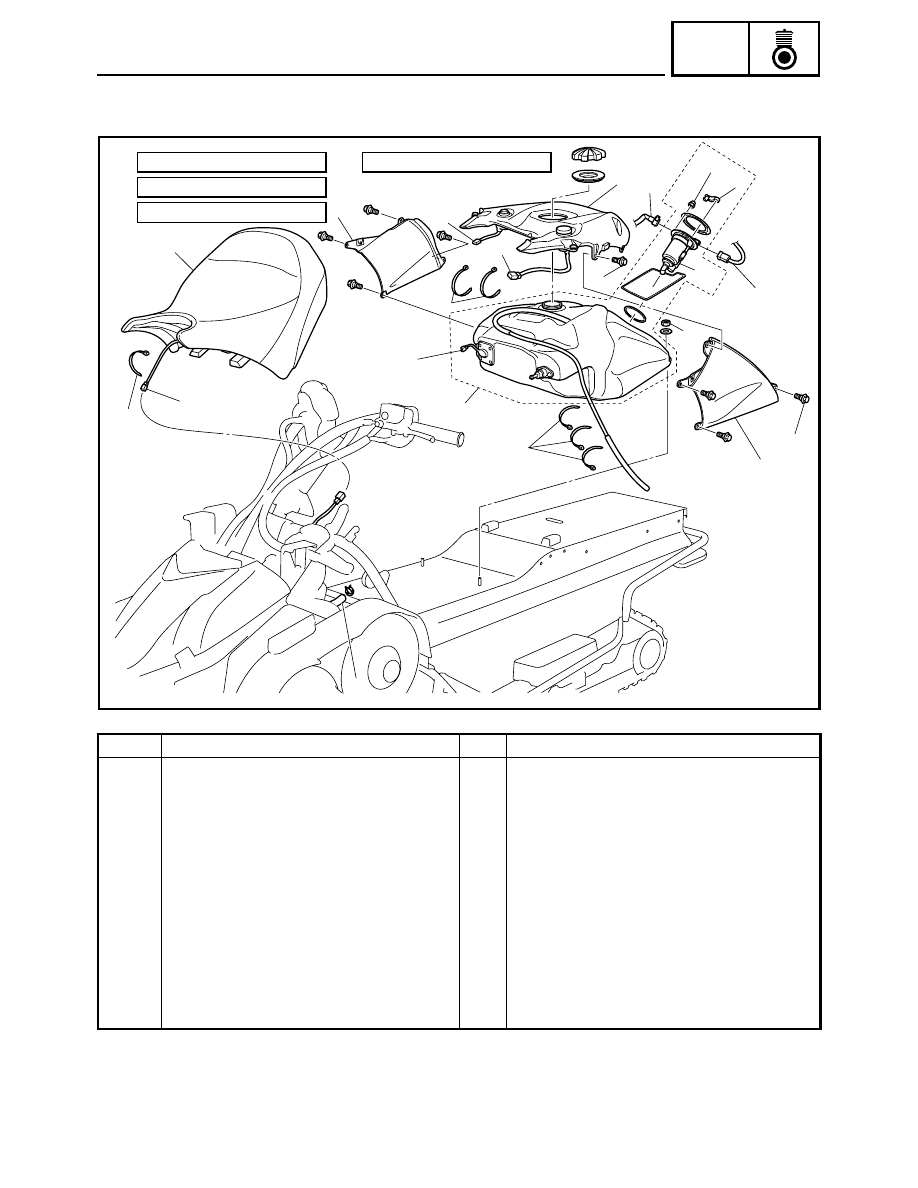
RIDER SEAT AND FUEL TANK
PZ50VT/PZ50MP
Order
Job name/Part name
Q’ty
Remarks
Rider seat and fuel tank removal
Remove the parts in the order listed below.
Passenger seat
Refer to “BACKREST AND PASSENGER
SEAT”.
1
Sub-wire harness 3 coupler
1
Disconnect.
2
Rider seat
1
3
Side cover
2
4
Main switch coupler
1
Disconnect.
5
Auxiliary DC jack coupler
1
Disconnect.
6
Fuel tank cover
1
7
Fuel pump coupler
1
Disconnect.
8
Fuel hose connector holder
1
9
Fuel hose
1
Disconnect.
10
Plastic band
6
11
14
10
10
10
12
1
13
4
3
3
6
8
(6)
5
2
7
9
8 Nm (0.8 m
•
kg, 5.8 ft
•
lb)
11 Nm (1.1 m
•
kg, 8.0 ft
•
lb)
Ë:
7 Nm (0.7 m
•
kg, 5.1 ft
•
lb)
È:
É:
10 Nm (1.0 m
•
kg, 7.2 ft
•
lb)
Ê:
É
È
Ë
Ê