Snowmobile Yamaha FX10X, FX10RTX, FX10RTRX, FX10RTRAX, FX10MTX, FX10MTRX, FX10MTRAX. Manual - part 43


  Index      Snowmobiles / ATV     Snowmobile Yamaha FX10X, FX10RTX, FX10RTRX, FX10RTRAX, FX10MTX, FX10MTRX, FX10MTRAX - service manual 2008 year


Search            


Content   ..  41  42  43  44   ..


Snowmobile Yamaha FX10X, FX10RTX, FX10RTRX, FX10RTRAX, FX10MTX, FX10MTRX, FX10MTRAX. Manual - part 43


4-61

POWR

TR

SLIDE RAIL SUSPENSION

HANDLING NOTES

WARNING

This shock absorber contains highly com-
pressed nitrogen gas. Before handling the
shock absorber read and make sure that you
understand the following information. The man-
ufacturer cannot be held responsible for prop-
erty damage or personal injury that may result
from improper handling.
• Do not tamper or attempt to open the gas

chamber.

• Do not subject the shock absorber to flames

or any other source of high heat. This may
cause the unit to explode due to excessive
gas pressure.

• Do not deform or damage the gas chamber in

any way. Gas chamber damage will result in
poor damping performance.
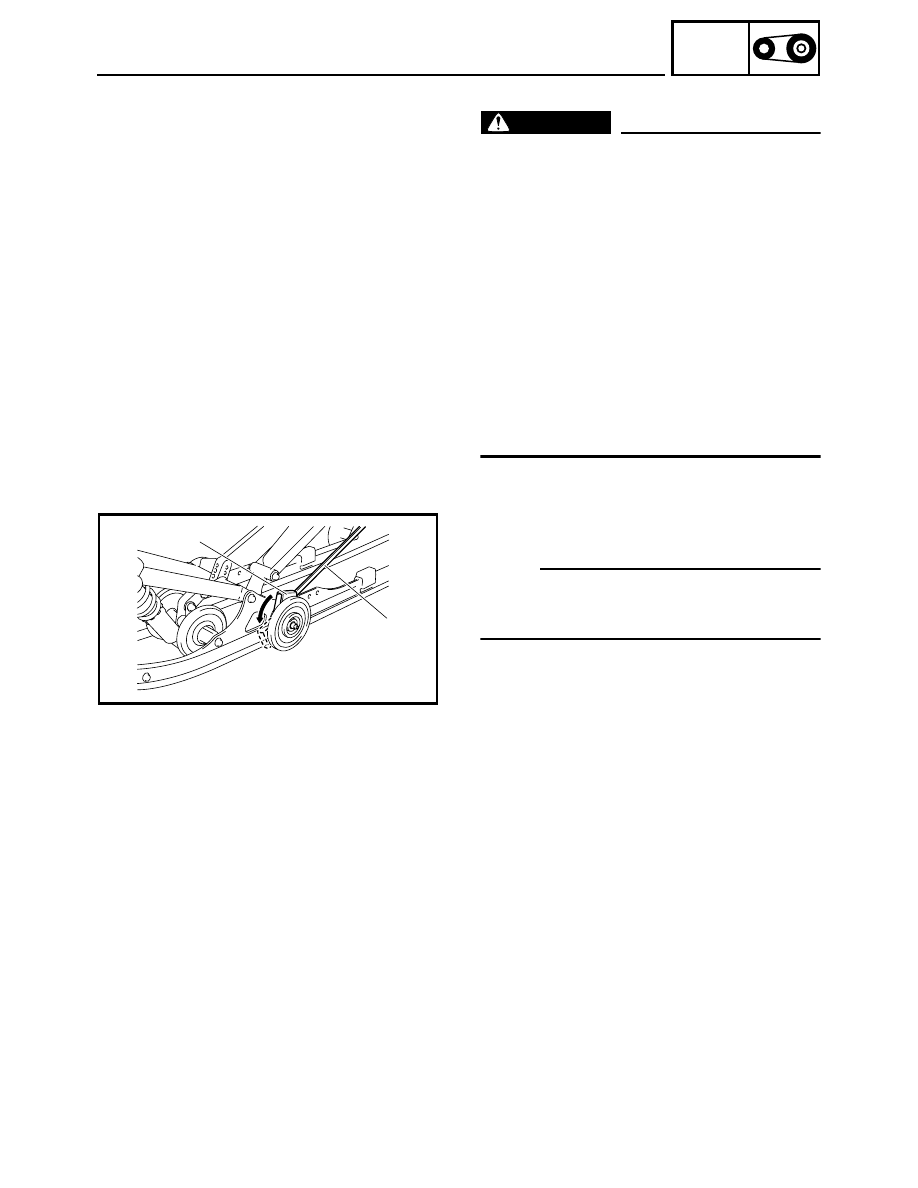
REMOVAL

1. Unhook the torsion spring 1 

NOTE:

Rotate the spring end guide 2 in the direction of
the arrow shown to unhook the end of the torsion
spring.

1

2

INSPECTION

1. Inspect:

• Suspension wheel
• Guide wheel

Cracks/damage 

→ Replace.

• Wheel bearing

Wheel turns roughly 

→ Replace.

2. Inspect:

• Stopper band

Frayed/damage 

→ Replace.

• Pull rod

Bends/damage 

→ Replace.

• Shock absorber

Oil (gas) leaks/damage 

→ Replace.

• Bushings

Wear/cracks/damage 

→ Replace.

• Front pivot arm
• Rear pivot arm
• Rear pivot arm bracket

(FX10/FX10RT/FX10RTR/FX10RTRA)

4-62

POWR

TR

SLIDE RAIL SUSPENSION

• Suspension wheel bracket
• Front suspension bracket
• Rear suspension bracket
• Connecting arm
• Sliding frame

Cracks/damage 

→ Replace.

• Slide runner

Wear/damage 

→ Replace.

ASSEMBLY

1. Install:

• tension adjusters 1 

NOTE:

Install the tension adjusters so that they are angled
outward as shown in the illustration.

1

1

2. Apply:

• ESSO beacon 325 grease or Aeroshell 

grease #7A (FX10MT/FX10MTR/FX10MTRA)

NOTE:

Apply grease to the bushings 1 and the shaft 2 in
the area 

a shown in the illustration.

b 5 ~ 15 mm (0.20 ~ 0.59 in)

a

b

b

1

1

1

2

3. Install:

• Control rods 1 

(FX10MT/FX10MTR/FX10MTRA)

NOTE:

Install the control rods with the water drain holes 

a

facing downward.

1

a

4. Install:

• Collars 1 

(FX10/FX10RT/FX10RTR/FX10RTRA)

NOTE:

Fit the projection 

a on each collar into the hole b

in its respective sliding frame.

b

a

1

4-63

POWR

TR

SLIDE RAIL SUSPENSION

5. Install:

FX10/FX10RT/FX10RTR/FX10RTRA

• Pull rods 1 
• Collars 2 
• Washers 3 

NOTE:

Be sure not to pinch the washers when installing
the pull rods. After installing the pull rods, make
sure that the washers rotate.

1

1

3

2

2

6. Install:

• Rear shock absorber 1 

(FX10/FX10RT/FX10RTR/FX10RTRA)

NOTE:

Install the rear shock absorber with its gas cylinder
a facing downward.

1

a

7. Install:

FX10/FX10RT/FX10RTR/FX10RTRA

• Front suspension bracket 1 
• Gas cylinder bracket 2 

(FX10RT/FX10RTR/FX10RTRA)

• Shaft 3 
• Washers 4 

NOTE:

• Install the shaft into the sliding frames with its flat

portions 

a facing upward.

• Install each washer with its chamfered edge 

b

facing inward and its flat edge 

c facing upward.

c

4

4

3

1

2

b

b

c

a

4-64

POWR

TR

SLIDE RAIL SUSPENSION

8. Install:

• Front shock absorber 1 

(FX10/FX10RT/FX10RTR/FX10RTRA)

NOTE:

• For FX10:

Install the front shock absorber with the charging
valve 

a facing downward.

• For FX10RT/FX10RTR/FX10RTRA:

Install the gas cylinder with the adjuster 

b facing

upward.
Install the front shock absorber with the valve 

c

facing upward.

• Make sure that the gas cylinder contacts the pro-

jection 

d on the gas cylinder bracket.

• Be sure to install the screw clamps 2 used to

secure the gas cylinder so that the fastener of
each clamp is on top of the cylinder and the
screw is horizontal.

È FX10
É FX10RT/FX10RTR/FX10RTRA

1

a

È

c

b

É

2

d

É

9. Install:

FX10RT/FX10RTR/FX10RTRA

• Suspension wheel brackets
• Bracket 1 
• Holder 2 
• Circlips
• Suspension wheels

NOTE:

• Install the bracket 1 with the mark 

a on the

inner side of the bracket facing forward.

• Fasten the hose (front shock absorber to gas cyl-

inder) with the holder 2, making sure to position
the hose protector 3 toward the shock absorber.
Do not install the holder on the hose protector.

2

3

1

a


Content   ..  41  42  43  44   ..