Snowmobile Polaris PRO X (2003 year). Manual - part 44
CLUTCHING
4.44
Clutch Offset Inspection (ALL)
NOTE: Proper offset aligns the fixed sheaves of both
clutch assemblies.
This allows the clutches to be
aligned throughout the shift range.
1.
Remove drive belt.
Belt deflection adjustments
affect offset. Set belt deflection first.
2.
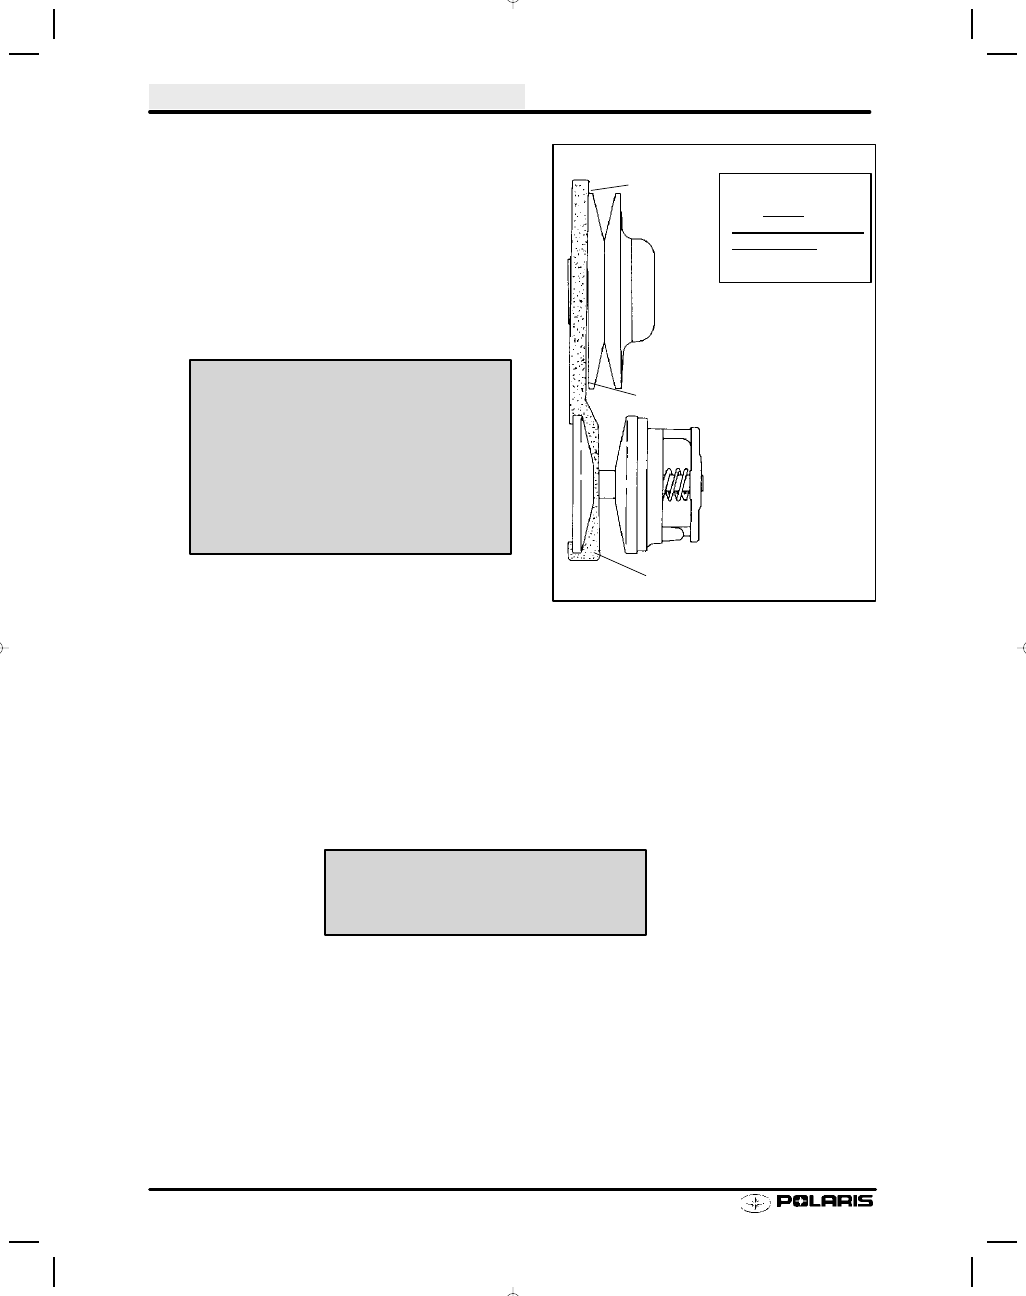
Install proper alignment tool, depending on type of
clutch, as shown in Ill. 1.
3.
Rear of driven clutch moveable sheave should just
contact tool when clutch is pushed inward on
jackshaft.
Clutch Offset Adjustment
1.
Determine direction driven clutch needs to be adjusted. (Refer to Clutch Offset Inspection procedure above).
2.
Remove driven clutch retaining bolt, and remove driven clutch.
3.
Add or take out washers on jackshaft between the driven clutch and jackshaft bearing to achieve proper offset.
4.
Most models require the driven clutch to float on the jackshaft. After adjusting offset, add or remove shim
washers from the retaining bolt to provide a .040
s-.100s (1-2.4mm) of float on jackshaft. This will prevent side
loads on the jackshaft bearing.
Driven Clutch Bolt Torque -
15 ft. lbs. (21 Nm)
Offset Alignment Tool
5/8
s Offset
All models with P85
driven clutch
NOTE: Up to .060
s (1.5mm)
air gap allowed at point “B”.
Up to .125
s is acceptable on
new machines.
Ill. 1
Offset - Non-Electric Start Models
A
B
No gap at
point “A”
Clutch Alignment (Tools) -
P85 - 5/8
sOffset (PN 2870426)