Takeuchi compact excavator TB125, TB135, TB145 / diesel TNE / diesel Yanmar. Service Manual - page 16
 

  Index      Manuals     Takeuchi compact excavator TB125 (12510003~), TB135 (13510004~), TB145 (14510004~) / diesel TNE / diesel Yanmar. Service Manual


Search            copyright infringement  


Content      ..     14      15      16      17     ..


Takeuchi compact excavator TB125, TB135, TB145 / diesel TNE / diesel Yanmar. Service Manual - page 16


III-176

TB125, 135, 145

After finding a leak, recover all refrigerant from the
system and repair the leak. Check the compressor and
replace any refrigeration oil lost due to leakage. Evacuate
and recharge the system with refrigerant, then check AC
operation and performance.

Air and/or Moisture in the System

Tip:

The sight glass may be clear or show some bubbles. The
air from vents in the cab is only slightly cool. In a cycling
clutch type system with a thermostatic switch, the switch
may not cycle the clutch on and off, so the low pressure
gauge will not fluctuate.

Cause:

Air and/or moisture in the system.

RepairProcedure:

Test for leaks, especially around the compressor shaft seal
area. When the leak is found, recover refrigerant from the
system and repair the leak. Replace the receiver-drier or
accumulator because the desiccant may be saturated with
moisture (there is no way to tell). Check the compressor
and replace any refrigeration oil lost due to leakage.
Evacuate and recharge the system with refrigerant, then
check AC operation and performance.

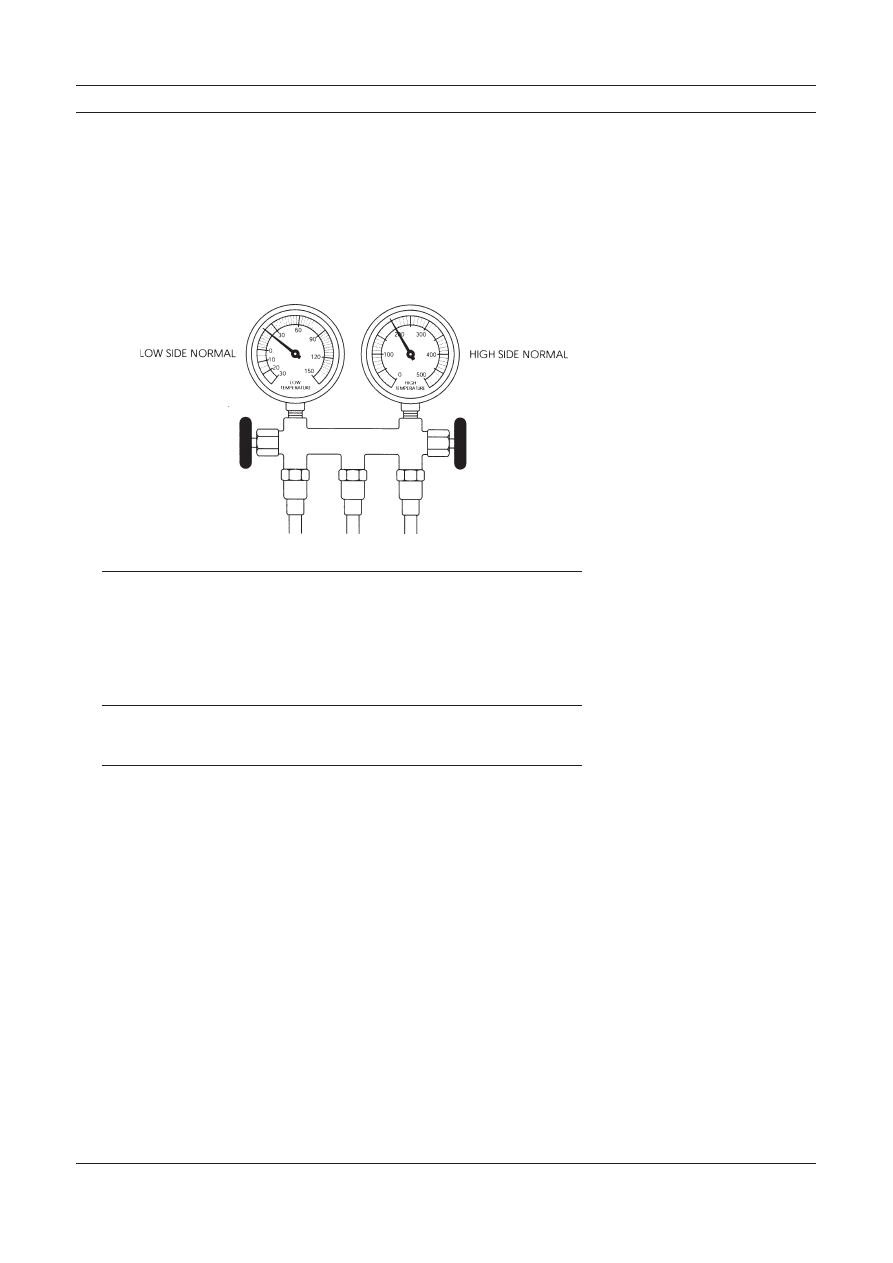
Troubleshooting & Service Procedures

Figure 8-7

Gauge reading, air and/or
moisture in the system.

III-177

TB125, 135, 145

Excessive Air and/or Moisture in the System

Tip:

There may be occasional bubbles in the sight glass. Air
from vents in the cab is only slightly cool.

Cause:

System contains excessive air and/or moisture.

Repair Procedure:

Test for leaks, recover refrigerant from the system and
repair the leak. Depending on the type of system, replace
the receiver-drier or accumulator. The desiccant is satu-
rated with moisture. Check and replace any compressor
oil lost due to leakage. Evacuate and recharge the system,
then check AC operation and performance.

Expansion Valve (TXV) Stuck Closed or Plugged

Tip:

Air from vents in the cab is only slightly cool. The
expansion valve body is frosted or sweating.

Manifold Gauge Set Readings

Figure 8-9

Gauge reading, expansion
valve (TXV) stuck closed.

Figure 8-8

Gauge reading, excessive air
and/or moisture in the
system.

III-178

TB125, 135, 145

Cause:

An expansion valve malfunction could mean the valve is
stuck in the closed position, the filter screen is clogged
(block type expansion valves do not have filter screens),
moisture in the system has frozen at the expansion valve
orifice, or the sensing bulb is not operating. In vehicles
where the TXV and sensing bulb are accessible, perform
the following test. If not accessible, then proceed to

Repair Procedure.

Test:

1.

Warm diaphragm and valve body in your hand or
carefully with a heat gun. Activate system and watch
to see if the low pressure gauge rises.

2.

Next, carefully spray a little nitrogen, or any substance
below 32 degrees Fahrenheit, on the capillary coil
(bulb) or valve diaphragm. The low side gauge needle
should drop and read at a lower (suction) pressure on
the gauge. This indicates the valve was part way open
and that your action closed it. Repeat the test, but first
warm the valve diaphragm or capillary with your hand.
If the low side gauge drops again, the valve is not stuck.

3.

Clean the surfaces of the evaporator outlet and the
capillary coil or bulb. Make sure the coil or bulb is
securely clamped to the evaporator outlet tube and the
insulation is in place. Next proceed with recovering
refrigerant from the system.

Repair Procedure:

Inspect the expansion valve screen (except block type
valves). To do this you must recover all refrigerant from
the system. Disconnect the inlet hose fitting from the
expansion valve. Remove, clean and replace the screen,
then reconnect the hose. Any signs of contamination will

require

  flushing the system. Next, replace the

receiverdrier. Then evacuate and recharge the system
with refrigerant, and check AC operation and perfor-
mance.

Troubleshooting & Service Procedures

III-179

TB125, 135, 145

Note:

If the expansion valve tests did not cause the low
pressure gauge needle to rise and drop, and if the other
procedures described did not correct the problem, the
expansion valve is defective. You must recover all
refrigerant from the system again, and replace the ex-
pansion valve and receiver-drier. Evacuate and recharge
the system with refrigerant, then check AC operation
and performance.

Expansion Valve (TXV) Stuck Open

Tip:

Air from vents in the cab is warm or only slightly cool.

Cause:

The expansion valve is stuck open and/or the capillary
tube (bulb) is not making proper contact with the evapo-
rator outlet tube. Liquid refrigerant may be flooding the
evaporator making it impossible for the refrigerant to
vaporize and absorb heat normally. In vehicles where the
TXV and sensing bulb are accessible, check the capillary
tube for proper mounting and contact with the evaporator
outlet tube. Then perform the following test. If the TXV
is not accessible, then proceed to 

Repair Procedure

.

Test:

1.

Operate the AC system on it’s coldest setting for a few
minutes. Carefully spray a little nitrogen or other cold
substance, on to the capillary tube coil (bulb) or head
of the valve.

2.

The low pressure (suction) side gauge needle should
now drop on the gauge. This indicates the valve has
closed and is not stuck open. Repeat the test, but first
warm the valve diaphragm with your hand.

Manifold Gauge Set Readings

Figure 8-10

Gauge reading, expansion
valve (TXV) stuck open.

III-180

TB125, 135, 145

3.

If the low side gauge shows a drop again, the valve is
not stuck. Clean the surfaces of the evaporator outlet
and the capillary coil or bulb. Make sure the coil or
bulb is securely fastened to the evaporator outlet and
covered with insulation material. Operate the system
and check performance.

Repair Procedure:

If the test did not result in proper operation of the expan-
sion valve, the valve is defective and must be replaced.
Recover all refrigerant from the system and replace the
expansion valve and the receiver-drier. Evacuate and
recharge the system with refrigerant, then check AC
operation and performance.

System High Pressure Side Restriction

Tip:

Air from vents in the cab is only slightly cool. Look for
sweat or frost on high side hoses and tubing, and frost
appearing right after the point of restriction. The hose or
line may be cool to the touch near the restriction.

Cause:

There could be a kink in a line, or other restriction in the
high side of the system.

Troubleshooting & Service Procedures

Figure 8-11

Gauge reading, system high
pressure side restriction.

III-181

TB125, 135, 145

Repair Procedure:

After you locate the defective component containing the
restriction, recover all of the refrigerant. Replace the
defective component and the receiver-drier. Evacuate and
recharge the system with refrigerant, then check AC
operation and performance.

Compressor Malfunction

Tip:

The compressor may be noisy when it operates.

Cause:

Defective reed valves or other compressor components. If
the compressor is not noisy, there may be a worn or loose
compressor clutch drive belt.

Repair Procedure:

If you find the belt worn or loose, replace or tighten it and
recheck system performance and gauge readings. To
inspect and service the compressor, you must isolate
(front seat the stem type compressor service valves) and
recover refrigerant, or fully recover R-12 from systems
containing Schrader valves. Remove the compressor cyl-
inder head and check the appearance of the reed valve
plate assembly. If defective, replace the valve plate and
install with new gaskets, or replace the compressor assem-
bly.

Manifold Gauge Set Readings

Figure 8-12

Gauge reading, compressor
malfunction.

III-182

TB125, 135, 145

If you find particles of desiccant in the compressor,
remove and replace it and the receiver-drier. Before doing
so, back flush other system components (except the ex-
pansion valve) using a flushing kit. If there are stem type
valves and you isolate the compressor, the rest of the
system must be purged of refrigerant before you can
disconnect and flush system components (

Chapter 9

describes the flushing procedure). After flushing, reas-
semble the components. Always check the oil level in the
compressor, even if you install a new or rebuilt unit.
Tighten all connections and evacuate the system. Re-
charge the air conditioner with refrigerant and check
system operation and performance.

Note:

Rotary compressors have a limited oil reservoir. Extra
oil must be added for all truck installations

Condenser Malfunction or System Overcharge

Tip:

The air from vents in the cab may be warm. In R-12
systems there can be bubbles in the sight glass. The high
pressure hoses and lines will be very hot. Don’t forget to
check the engine cooling system components—fan and
drive belt, fan clutch operation, and the radiator shutter.

Troubleshooting & Service Procedures

Figure 8-13

Gauge reading, condenser
malfunction or system
overcharge.

III-183

TB125, 135, 145

Cause:

The condenser is not functioning correctly or there may be
an overcharge of refrigerant inside the system. Another
possibility is lack of (ram) air flow through the condenser
fins during testing. Engine cooling system component
malfunction can cause high pressure by blocking air flow
(radiator shutter) or not providing air flow (fan clutch) in
sufficient quantity.

Repair Procedure:

Inspect the condenser for dirt, bugs or other debris and
clean if necessary. Be sure the condenser is securely
mounted and there is adequate clearance (about 1-1/2
inches) between it and the radiator. Check the radiator
pressure cap and cooling system, including the fan, fan
clutch, drive belts and radiator shutter assembly. Replace
any defective parts and then recheck AC system opera-
tion, gauge readings and performance.

If the problem continues, the system may be over- charged
(have too much refrigerant inside). Recover the system
slowly until low and high pressure gauges read below
normal, and bubbles appear in the sight glass. Then add
refrigerant (charge the system) until pressures are normal
and the bubbles disappear. Add another quarter to half
pound of refrigerant and recheck AC system operation,
gauge readings and performance.

If the high gauge readings do not change, you should
recover all of the refrigerant and flush (it may be partially
plugged) or replace the condenser. Also replace the re-
ceiver-drier or accumulator. Then connect the compo-
nents and evacuate the system. Recharge the air condi-
tioner with refrigerant and check system operation and
performance.

Manifold Gauge Set Readings

III-184

TB125, 135, 145

Thermostatic Switch Malfunction

Tip:

The low side gauge needle may fluctuate in a very narrow
range compared to a normal range. The compressor clutch
may be cycling on and off more frequently than it should.

The low side gauge needle may fluctuate in an above
normal range as the clutch cycles. This may be an indica-
tion that the thermostat is set too high (someone may have
attempted to adjust the factory setting). A new thermostat
may have been installed incorrectly (capillary tube not
inserted between the evaporator fins in the proper posi-
tion).

Cause:

The thermostatic switch is not functioning properly or at
all.

Repair Procedure:

Replace the thermostatic switch. When you remove the
old thermostat, replace it with one of the same type. (They
operate in a factory preset temperature range.) Take care
in removing and handling the thermostat and thin capil-
lary tube attached to it. Don’t kink or break the tube.

Position the new thermostat capillary tube at or close to
the same location and seating depth between the evapora-
tor coil fins as the old one. Connect the electrical leads.

Troubleshooting & Service Procedures

Figure 8-14

Gauge reading, thermostatic
switch malfunction.

III-185

TB125, 135, 145

Note:

See the 

Thermostat

 section in 

Chapter 10

. Fan clutch,

radiator shutter, condenser, compressor, and the newer
air and water valve control systems are covered in

Chapter 10

.

Review of Frequent Problem Areas

In HVAC systems a limited number of things can go wrong. Moving parts of the
compressor, clutch, and expansion valve or refrigerant metering device can malfunc-
tion or break down from metal fatigue, contamination, abnormal pressure or lack of
lubrication. Electrical connections may corrode, become disconnected or break.
Fuses blow from shorts or overload. Belts slip or break.

Vibration from the engine or road surface can work bolts and air or vacuum lines

loose, or rub and break or wear parts out. Motors may burn out. The inside of the
system can become contaminated from moisture, air or desiccant material break-
down. Refrigerant may leak out of the system quickly or very slowly. Moisture in the
system can combine with refrigerant to form acid and attack (corrode) metal parts
from the inside. Moisture and refrigeration oil can combine to form sludge that may
block refrigerant flow.

The following problems are discussed in more detail in this section:

1.

Belts and Compressor Clutch

2.

Condenser

3.

Refrigerant Lines, Hoses, and Fittings

4.

Refrigerant Metering Valves

5.

Other Problems

1. Belts and Compressor Clutch

Let’s review problem areas listed at the beginning of 

Chapter 7

. The most

frequent repairs are replacing belts and servicing or replacing the compressor
or clutch. Heavy duty vehicle operation puts a lot of stress on these parts. There
are several main reasons.

There is often continuous operation for long periods of time. There may be

frequent sudden RPM variations when shifting gears up or down. For this
reason the AC clutches used in heavy duty systems usually have double row ball
bearings. Vibration and road shock contribute to loose or broken mounting
brackets, electrical connections and fittings. Belts, bearings and compressor
reed valves wear out.

Various compressor clutch cutout switches are used because the AC design-

ers know about compressor operating conditions. System leaks, high operating
pressures, malfunctioning engine cooling system components—all cause com-
pressor problems and failures. When refrigerant and refrigeration oil leaks out
of a system or there is contamination blocking oil flow, the compressor will be
starved for oil and seize.

Review of Frequent Problem Areas

III-186

TB125, 135, 145

2. Condenser

Condensers get dirty and the dirt reduces heat movement by insulating the
condenser. The fittings come loose or break from stress if the condenser or
connecting hoses are not secured properly to keep the effects of vibration at a
minimum.

Heat transfer efficiency and pressure in the condenser are affected by the

amount of outside air flowing through condenser fins. A lack of air flow can
mean the refrigerant doesn’t give up enough heat energy to the outside air (it
doesn’t change state). The refrigerant arrives at the evaporator as a gas and can’t
pick up any heat energy from cab air. In the cab, air from the vents is only
slightly cool or warm.

One possible cause of condenser malfunction could be the engine cooling

system. This is why fan clutches and radiator shutters are often controlled or
overridden by AC switch function. In fact, we can add fan clutch, radiator
shutters and also fan motors to condenser problems. If they don’t function to
allow sufficient air through the condenser, pressure inside the system may
become dangerously high. A lack of air through the condenser fins can raise
high side pressure and blow out the weakest point in a system, or damage the
compressor.

3. Refrigerant Lines, Hoses and Fittings

Problems with these parts may be caused by normal deterioration, vibration
damage, lack of maintenance or human error (improper installation or replace-
ment). All rubber parts are attacked by ozone (oxygen) in the air. Rubber parts
break down slowly and become more vulnerable to the effects of vibration with
the passage of time.
Heavy duty vehicle vibration causes stress on all lines, fittings and connections.
Regular maintenance includes checking and tightening any suspect line, or
hose retainers, or grommet position where the grommet is protecting a line or
hose from abrasion. Any insulating material wrapped around hoses must be in
place and securely fastened.

4. Refrigerant Metering Valves

When you consider valve problems there are obvious differences in valve
construction and what can go wrong. If a valve is clogged with sludge or other
obstruction, the result is a valve problem but the cause is contamination in the
system. Valves get stuck open or closed, although most often closed when the
gas charge is lost from the diaphragm housing in a traditional TXV. The
capillary tube can vibrate loose from the evaporator outlet tube. The capillary
can break and the small quantity of temperature sensitive gas can escape. The
diagnosis of a valve as defective calls for replacement.

5. Other Problems—Leaks, Moisture, and Adding
Refrigerant

Before any refrigerant was put inside the AC system, someone used a vacuum
pump to evacuate any air and moisture. Vacuum is really a force pulling against
all hoses, fittings and components from the inside. When the system is charged
with refrigerant, the pressure goes from minus (a vacuum) to plus pressure
inside the hoses and all components. The refrigerant and refrigeration oil are
trying to escape from the system at all times.

Troubleshooting & Service Procedures

III-187

TB125, 135, 145

Technicians frequently add refrigerant to a system, replacing refrigerant

seepage through system connections or fittings. If the system has been main-
tained regularly (every three to six months), adding a small amount of
refrigerant may result in normal system function. However, the best procedure
is to check all connections and look for, find and repair any leaks before adding
refrigerant.

When your leak detector indicates the presence of a leak, you can’t tell how

long the system has been leaking. Finding one leak doesn’t mean there are not
others. Until you have some AC system work experience, it will be hard to guess
how much refrigerant may have leaked. If you have to top a system off with a
half pound of refrigerant or more, adding refrigerant is not the answer.

Find the leak. Recover all of the refrigerant and repair the system. The

moisture absorbing capacity of any desiccant material is limited and cannot be
measured. For that reason, replace the receiver-drier or accumulator. Then
evacuate the system for an hour and recharge with refrigerant.

When a compressor shaft seal has leaked oil and the refrigerant charge is a

little low, the shaft seal may have leaked because the air conditioner was not
used. The seal can get a little out of round from the weight of the crankshaft and
leak above the shaft. Running the compressor may cause the seal to swell and
close up the leak. The shaft rotation exerts force all around the seal and puts life
back into it. To prevent this from happening, manufacturers recommend
regular AC system operation a minimum of every couple of weeks even in cool
weather.
Keep in mind that the compressor can cause a vacuum inside the system if there
is a restriction in the system. That means it can suck air and moisture inside
under some conditions. It will pull these contaminants in through the same
space where refrigerant and refrigerant oil has leaked out.

Conclusion

What could the air conditioning problem and it’s cause have been at the beginning
of this chapter? The operator was in a hurry, but you were able to start your
troubleshooting with the answers he gave you. Problems your inspection may have
turned up are a very low refrigerant charge, a contaminated system or defective
compressor. Those are not quick fix jobs.

On the other hand, you might have found enough debris on the condenser fin

surface to boost high side pressures to an abnormal level during the hottest part of
the day. So the Trinary™ or high pressure switch would cut out from high pressure—
but reset itself. You cleaned the condenser, added a half pound of refrigerant and AC
system pressures and function returned to normal. Service and repair took a half hour.
But there was no way to tell without using your knowledge and experience. By now
you are pretty familiar with AC system problems, the reasons for some of them,
troubleshooting and repair. In 

Chapter 9

 we will describe complete system purging,

evacuation, flushing and recharging.

Conclusion

MACHINE CONFIGURATION

III-188

TB125, 135, 145

MACHINE CONFIGURATION

SECURITY SYSTEM

III-189

TB125, 135, 145

Security System

TABLE OF CONTENTS

Notes on Use ................................................................................................................................... 190

Overview of Functions ...................................................................................................................... 191

Loss of an Immobilizer Key .............................................................................................................. 192

Obtaining Multiple Immobilizer Keys ................................................................................................ 192

Troubleshooting ............................................................................................................................... 195

MACHINE CONFIGURATION

SECURITY SYSTEM

III-190

TB125, 135, 145

NOTES ON USE

The Security System has a Registration Key and two Immobilizer Keys.

Registration Key (gray key grip): used for registra-
tion or de-registration of the key.

Immobilizer Key (black key grip): used for every-
day operation.

Once this security system is implemented, the existing key(s) cannot be used to start the engine.
Use either the Registration Key or Immobilizer Key to start the engine.

Important

• Although the system includes an anti-theft mechanism, it is not completely theft-proof as the

mechanism itself could be removed. Take special caution while parking or storing the machine.

• Since the Registration Key is required for registration or de-registration, keep it safely to avoid losing

it. If you lose it, the system may need to be replaced. Use the Immobilizer Key for everyday operation
whenever possible.

• The Registration Key and Immobilizer Key(s) will work only for a specific machine (controller), and will

not work on other machines. Keep these keys separate from keys of other machines.

• Do not use a key chain, etc. to hold more than one

Registration or Immobilizer Key, otherwise the engine may
fail to start due to an incorrect signal received by the
machine from the key.

• Keep metal away from the Registration or Immobilizer Key when starting the engine, otherwise the

engine may fail to start due to an incorrect signal received by the machine from the key.

N0C950

N0C951

N0C952

MACHINE CONFIGURATION

SECURITY SYSTEM

III-191

TB125, 135, 145

OVERVIEW OF FUNCTIONS

1. Protection of Illegal Engine Startup

Prevent illegal operation by limiting the engine startup with the Registration Key and Immobilizer Key
(hereafter, “authorized key”) registered to the controller on the machine.

2. Horn Alarm

If an attempt to start the engine using a key other than the authorized key is made five times within three minutes,
the warning horn will sound for four minutes and then stop.
To stop the horn, use an authorized key to turn the starter switch position to ON.

Notes

• Starter switch (key switch) operation is counted as one when the switch position is changed from OFF

to ON, then to START. Switching between ON and START is not considered as one operation.

• The illegal attempt count is reset if four subsequent illegal operations are not made within three minutes

after the first one.

• If the battery is disconnected while the horn is sounding and then reconnected, the horn alarm will sound

for four minutes from the time when the battery is connected.

N0C953E

OFF

ON

START


Content      ..     14      15      16      17     ..