Toyota Tundra. Manual - part 801


  Index      Toyota     Toyota Tundra (2007-2010 year) - Service and Repair Manual


Search            copyright infringement  


Content   ..  799  800  801  802   ..


Toyota Tundra. Manual - part 801


g. Using a T40 "TORX" socket, tighten the striker mounting screws after the adjustment. 

Torque: 23 N*m (235 kgf*cm, 17 ft.*lbf)  

h. Connect the cable to the negative (-) battery terminal. 

i. Inspect the SRS warning light (see DIAGNOSIS SYSTEM ).  

REASSEMBLY 

HINT: 

Use the same procedures for the RH side and LH side.  

The procedures listed below are for the LH side.  

A bolt without a torque specification is shown in the standard bolt chart (see SPECIFIED TORQUE 
FOR STANDARD BOLTS
 ).  

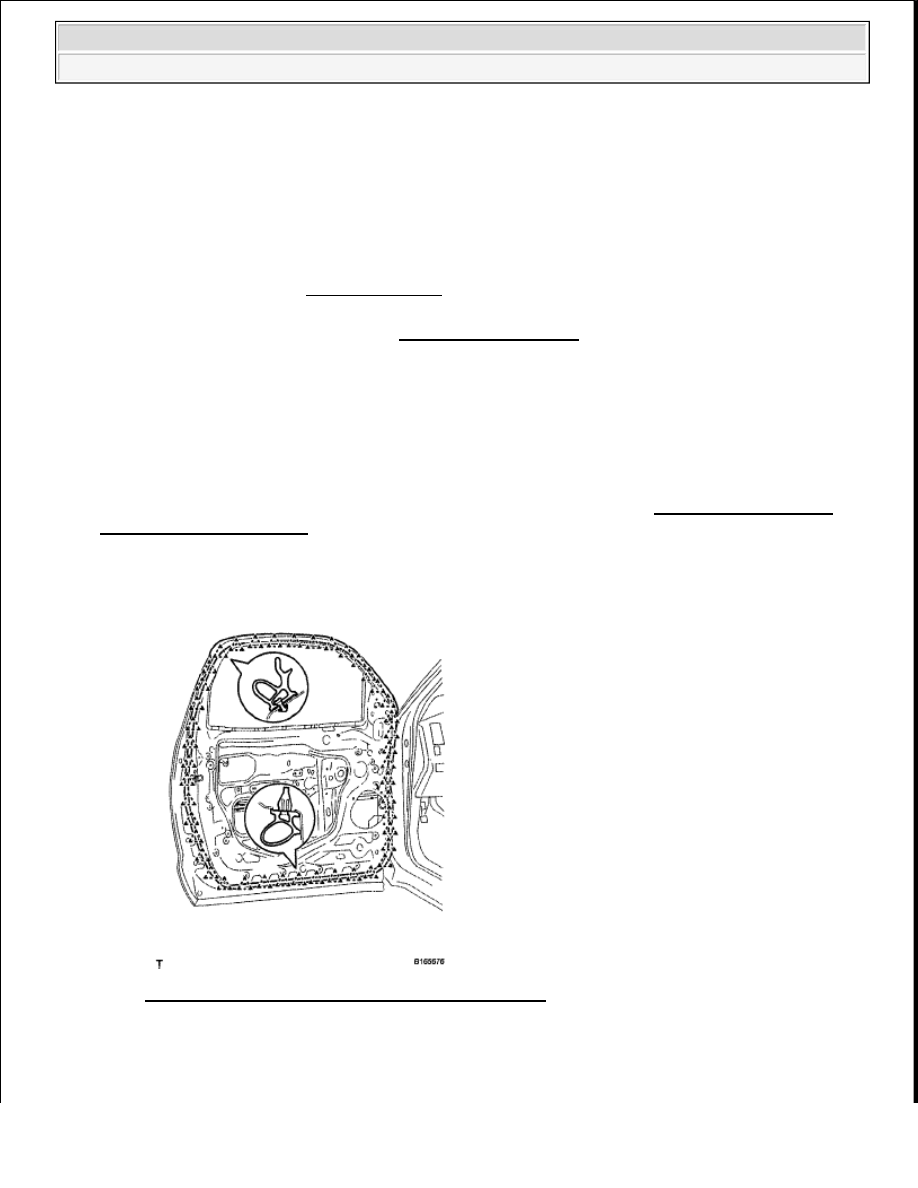
1. INSTALL FRONT DOOR WEATHERSTRIP LH 

a. Attach the 43 clips to install the weatherstrip. 

Fig. 204: Identifying Front Door Weatherstrip Clips 
Courtesy of TOYOTA MOTOR SALES, U.S.A., INC. 

HINT: 

NOTE:

Some systems need to be initialized after the cable is reconnected 
(see INITIALIZATION ).


2009 Toyota Tundra 

2009 ACCESSORIES AND EQUIPMENT Engine Hood/Door - Tundra


If clips are damaged during installation, replace them. 

2. INSTALL FRONT DOOR CHECK ASSEMBLY LH 

a. Apply MP grease to the sliding areas of the door check.  

b. Install the door check to the door panel with the 2 nuts. 

Torque: 8.5 N*m (87 kgf*cm, 75 in.*lbf)  

Fig. 205: Identifying Front Door Check Assembly With Bolt And Nuts 
Courtesy of TOYOTA MOTOR SALES, U.S.A., INC. 

c. Apply adhesive to the threads of the bolt. 

Adhesive: Toyota Genuine Adhesive 1324, Three Bond 1324 or equivalent  

d. Install the bolt. 

Torque: 29 N*m (296 kgf*cm, 21 ft.*lbf)  

3. INSTALL FRONT DOOR PANEL PROTECTOR LH 

a. Attach the 11 clips to install the door panel protector. 

Fig. 206: Identifying Door Panel Protector Clips 
Courtesy of TOYOTA MOTOR SALES, U.S.A., INC. 

4. INSTALL FRONT NO. 2 DOOR STIFFENER CUSHION 


2009 Toyota Tundra 

2009 ACCESSORIES AND EQUIPMENT Engine Hood/Door - Tundra


a. Install the stiffener cushion with the 2 clips. 

Fig. 207: Identifying Stiffener Cushion With Clips 
Courtesy of TOYOTA MOTOR SALES, U.S.A., INC. 

5. INSTALL FRONT DOOR LOCK OPEN ROD LH 

a. Install the lock open rod to the outside handle frame.  

6. INSTALL FRONT DOOR OUTSIDE HANDLE FRAME SUB-ASSEMBLY LH 

a. Slide the outside handle frame to install it. 

b. Using a T30 "TORX" wrench, tighten the screw. 

Torque: 4.0 N*m (41 kgf*cm, 35 in.*lbf)  

Fig. 208: Identifying Outside Handle Pads Screw 
Courtesy of TOYOTA MOTOR SALES, U.S.A., INC. 

c. Install the front and rear outside handle pads.  

7. INSTALL FRONT DOOR HANDLE ASSEMBLY OUTSIDE LH 

a. Install the handle by pushing it in the direction of the arrow in the illustration. 

NOTE:

If the release plate is not pulled and held when installing the outside 
handle, it will strike against the outside handle and become 
damaged.


2009 Toyota Tundra 

2009 ACCESSORIES AND EQUIPMENT Engine Hood/Door - Tundra


Fig. 209: Removal/Installation Of Front Door Handle Assembly Outside LH 
Courtesy of TOYOTA MOTOR SALES, U.S.A., INC. 

8. INSTALL FRONT DOOR INSIDE LOCKING CABLE ASSEMBLY LH 

a. Install the front door inside locking cable. 

Fig. 210: Identifying Front Door Inside Locking Cable 
Courtesy of TOYOTA MOTOR SALES, U.S.A., INC. 

b. Attach the 3 claws. 

Fig. 211: Identifying Claws 
Courtesy of TOYOTA MOTOR SALES, U.S.A., INC. 

NOTE:

If the bellcrank lever is not pulled and held when installing the 
handle, the bellcrank lever will interfere with the handle and become 
damaged.


2009 Toyota Tundra 

2009 ACCESSORIES AND EQUIPMENT Engine Hood/Door - Tundra


Content   ..  799  800  801  802   ..