Toyota Tundra. Manual - part 1883


  Index      Toyota     Toyota Tundra (2007-2010 year) - Service and Repair Manual


Search            copyright infringement  


Content   ..  1881  1882  1883  1884   ..


Toyota Tundra. Manual - part 1883


SPECIFICATION TABLE 

q

Completely remove the Plastigage   

7

REMOVE CRANKSHAFT 

a

Lift out the crankshaft   

b

Remove the crankshaft bearings and upper thrust washers from the cylinder block  

HINT: 

Arrange the bearings and thrust washers in the correct order  

8

REMOVE PISTON RING SET 

HINT: 

Arrange the piston rings in the correct order  

a

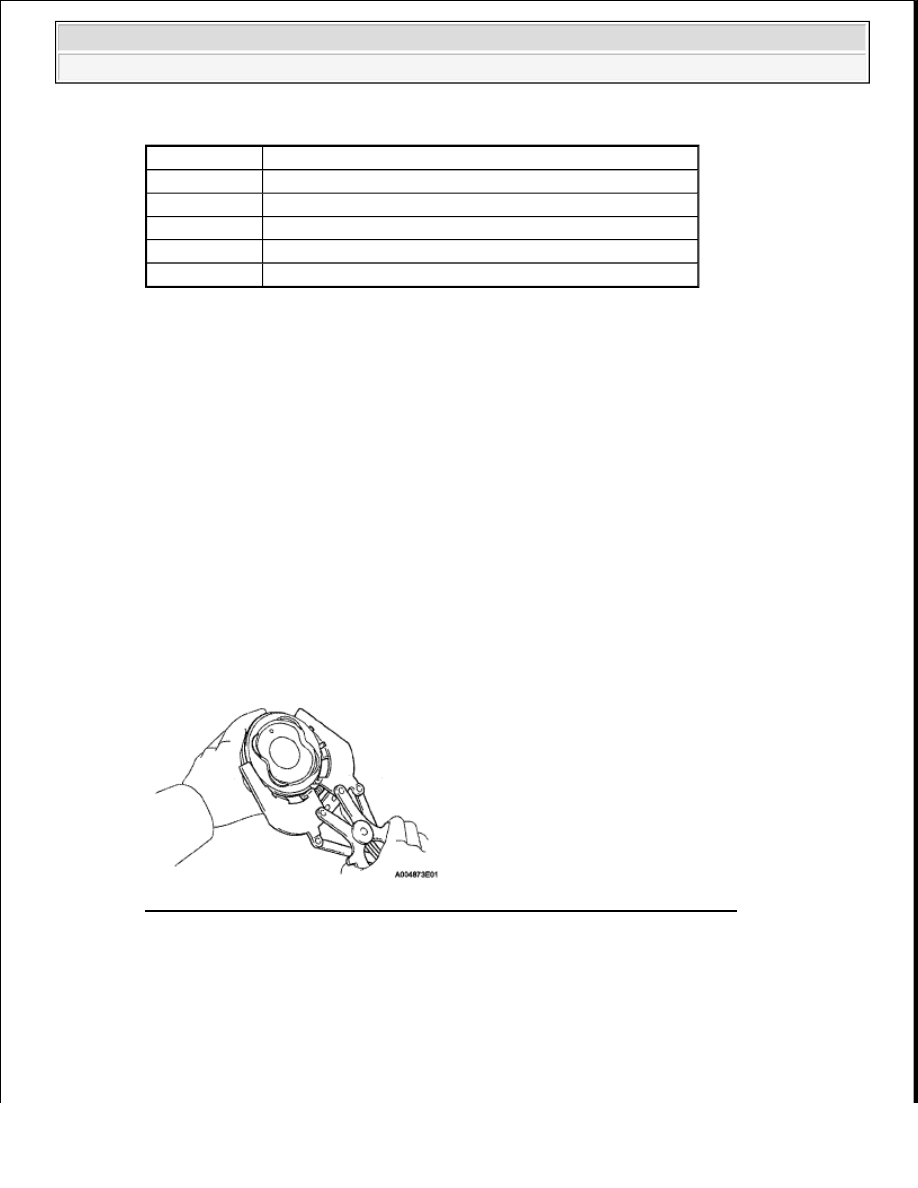
Using a piston ring expander, remove the No  1 and No  2 piston rings   

b

Remove the oil ring (2 side rails and expander) by hand  

Fig. 260: Using Piston Ring Expander To Remove No. 1 & No. 2 Piston Rings 
Courtesy of TOYOTA MOTOR SALES, U.S.A., INC. 

9

REMOVE PISTON SUB-ASSEMBLY WITH PIN 

a

Check the fitting condition between the piston and piston pin  

1

Move the connecting rod back and forth on the piston pin  Check the fitting condition  

If abnormal movement is felt, replace the piston and pin as a set  

Number Mark

Specified Condition

Mark 1

2 481 to less than 2 484 mm (0 0977 to less than 0 0978 in )

Mark 2

2 484 to less than 2 487 mm (0 0978 to less than 0 0979 in )

Mark 3

2 487 to less than 2 490 mm (0 0979 to less than 0 0980 in )

Mark 4

2 490 to less than 2 493 mm (0 0980 to less than 0 0981 in )

Mark 5

2 493 to less than 2 496 mm (0 0981 to less than 0 0983 in )


2009 Toyota Tundra 

2009 ENGINE Engine Mechanical (2UZ-FE) - Tundra


2

Rotate the piston back and forth on the piston pin  Check the fitting condition  

If abnormal movement is felt, replace the piston and pin as a set  

Fig. 261: Identifying Piston And Piston Pin 
Courtesy of TOYOTA MOTOR SALES, U.S.A., INC. 

b

Using a small screwdriver, pry out the 2 snap rings  

Fig. 262: Using Small Screwdriver To Pry Out Snap Rings 
Courtesy of TOYOTA MOTOR SALES, U.S.A., INC. 

c

Gradually heat the piston to approximately 60°C (140°F)  

Fig. 263: Heating Piston 
Courtesy of TOYOTA MOTOR SALES, U.S.A., INC. 


2009 Toyota Tundra 

2009 ENGINE Engine Mechanical (2UZ-FE) - Tundra


d

Using a plastic-faced hammer and brass bar, lightly tap out the piston pin  Then remove the 
connecting rod  

HINT: 

The piston and pin are a matched set   

Be sure to arrange the removed pistons, pins, rings, connecting rods and bearings in such a 
way that the parts can be reinstalled exactly as before  

Fig. 264: Tapping Out Piston Pin Using Plastic-Faced Hammer & Brass Bar 
Courtesy of TOYOTA MOTOR SALES, U.S.A., INC. 

10

REMOVE NO. 1 OIL NOZZLE SUB-ASSEMBLY 

a

Using a 5 mm hexagon wrench, remove the 4 bolts and 4 oil nozzles  

Fig. 265: Locating Oil Nozzles Bolts 
Courtesy of TOYOTA MOTOR SALES, U.S.A., INC. 

INSPECTION 

1

INSPECT CYLINDER BLOCK SUB-ASSEMBLY 

a

Clean the cylinder block  

1

Using a gasket scraper, remove all the gasket material from the top surface of the cylinder 
block  


2009 Toyota Tundra 

2009 ENGINE Engine Mechanical (2UZ-FE) - Tundra


Fig. 266: Identifying Cylinder Block Sub-Assembly 
Courtesy of TOYOTA MOTOR SALES, U.S.A., INC. 

2

Using a soft brush and solvent, thoroughly clean the cylinder block  

b

Using a precision straight edge and feeler gauge, measure the surfaces contacting the cylinder head 
and main bearing cap for warpage  

Maximum warpage: 0.07 mm (0.00276 in.)  

If the warpage is greater than the maximum, replace the cylinder block  

NOTE:

If the cylinder is washed at high temperatures, the cylinder liner 
sticks out beyond the cylinder block. Always wash the cylinder 
block at a temperature of 45°C (113°F) or less.


2009 Toyota Tundra 

2009 ENGINE Engine Mechanical (2UZ-FE) - Tundra


Content   ..  1881  1882  1883  1884   ..