Mazda 6. Manual - part 300


  Index      Mazda     Mazda 6 - service repair manual 2002 year


Search            


Content   ..  298  299  300  301   ..


Mazda 6. Manual - part 300


S–94

TRIM 

5HB

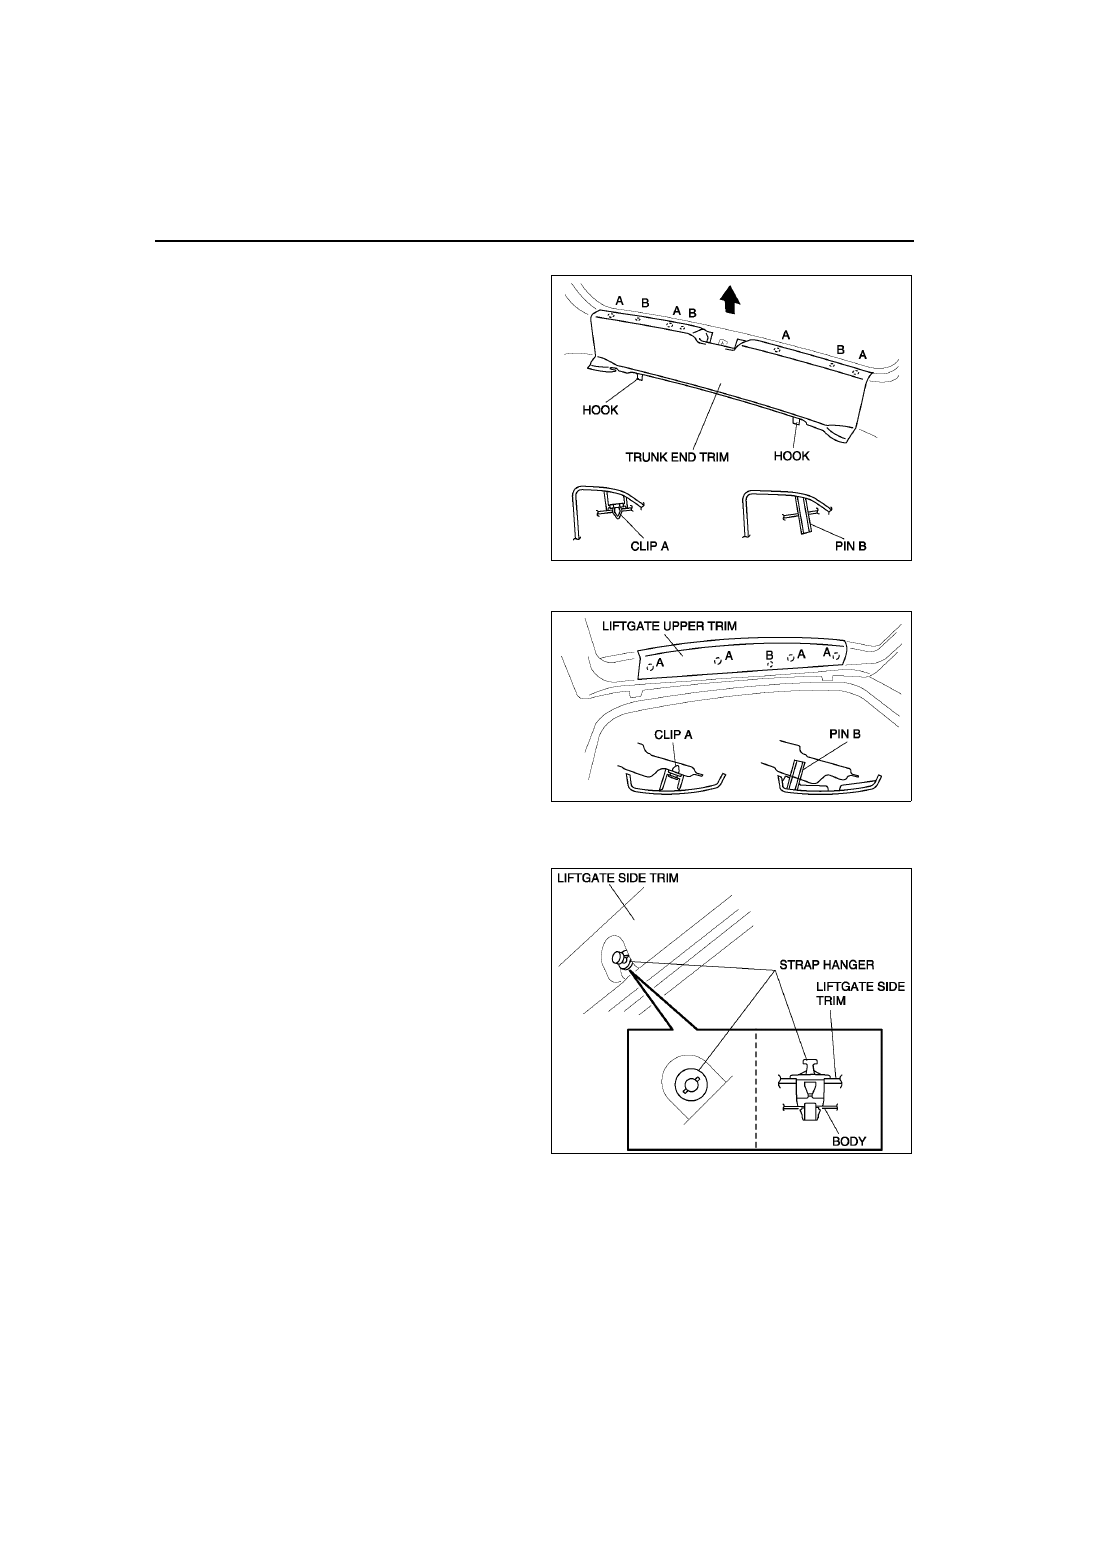
1. Pull the trunk end trim upward, then disengage 

clips A, pins B, and hooks.

2. Remove the trunk end trim.
3. Install in the reverse order of removal.

End Of Sie

LIFTGATE UPPER TRIM REMOVAL/INSTALLATION

A6E774468930W01

1. Pull the liftgate upper trim toward you, then 

disengage clips A, and pin B from the body.

2. Remove the liftgate upper trim.
3. Install in the reverse order of removal.

End Of Sie

LIFTGATE SIDE TRIM REMOVAL/INSTALLATION

A6E774468940W01

1. Remove the liftgate upper trim.
2. Position the strap hanger as shown in the figure.

A6E7744W013

A6E7744W002

A6E7744W003

TRIM 

S–95

S

3. Pull the liftgate side trim toward you, then 

disengage clips A, pin B and the strap hanger 
from the body and pin B, hook C, D from the 
liftgate lower trim.

4. Remove the liftgate side trim.
5. Remove the hanger strap from the liftgate side 

trim.

6. Install in the reverse order of removal.

End Of Sie

LIFTGATE LOWER TRIM REMOVAL/INSTALLATION

A6E774468960W01

1. Remove the liftgate upper trim.
2. Remove the liftgate side trim.
3. Pull the handle toward you, then remove the 

handle.

4. Pull the liftgate lower trim toward you, then 

disengage clips A, B and pins C, D from the body.

5. Remove the liftgate lower trim.
6. Install in the reverse order of removal.

End Of Sie

A6E7744W004

A6E7744W001

S–96

HEADLINER 

HEADLINER REMOVAL/INSTALLATION

A6E774668030W01

1. Disconnect the negative battery cable.
2. Turn the seaming welt and weatherstrip over.
3. Remove the sunroof seaming welt. (vehicles with sunroof only) 
4. Remove the A-pillar trims.
5. Remove the B-pillar upper trims.
6. Remove the C-pillar trims.
7. Remove the front and rear map light. (See 

T–48 FRONT MAP LIGHT REMOVAL/INSTALLATION

.)

 (See 

T–49 REAR MAP LIGHT REMOVAL/INSTALLATION

.)

8. Remove the sunvisors.
9. Remove the assist handle.

10. Disconnect the roof harness connector, remove the clip, and remove the connector.
11. Remove the fasteners.
12. Disconnect the front and rear drain hose.
13. Disconnect the rear washer hose (5HB).
14. Remove the hook holding the roof panel and remove the headliner.

15. Take the headliner off from the passenger-side door opening.
16. Install in the reverse order of removal.

End Of Sie

HEADLINER

A6E7746W004

HEADLINER 

S–97

S

SHOCK ABSORBING PAD REMOVAL/INSTALLATION

A6E774668H10W01

1. Remove the headliner.
2. Remove the fastener, then remove the shock 

absorbing pad.

3. Install in the reverse order of removal.

End Of Sie

ASSIST HANDLE REMOVAL/INSTALLATION

A6E774669440W01

1. Insert a screwdriver into the assist handle notch 

and remove the assist handle cover.

2. Pull the assist handle forward you, then remove 

the assist handle.

3. Install in the reverse order of removal.

End Of Sie

A6E7746W003

A6E7746W001

A6E7746W002


Content   ..  298  299  300  301   ..