Iveco Stralis AT/AD. Manual - part 282
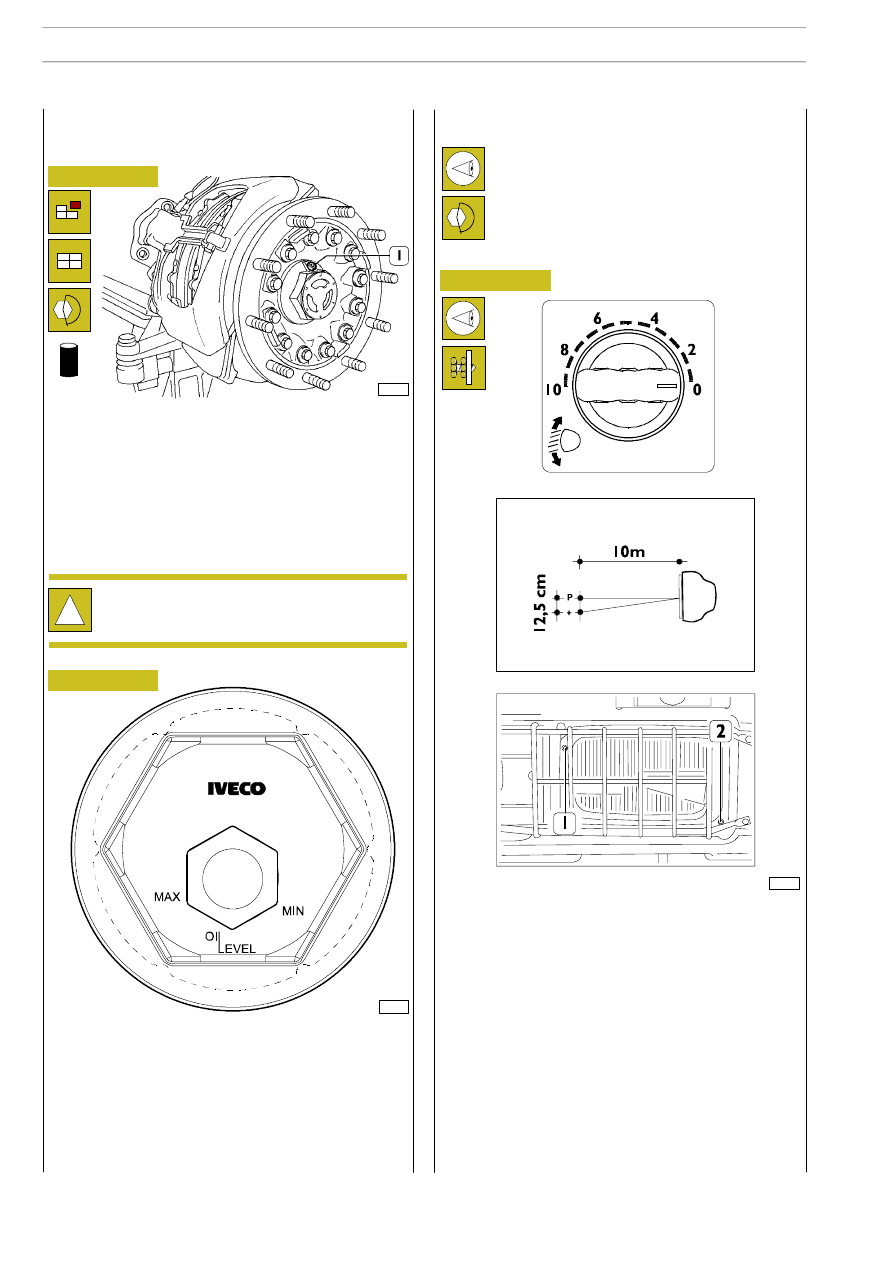
Figure 47
Figure 48
77471
72558
12. Change front, middle or rear axle wheel
hub oil (where applicable)
For the wheel hubs with the cover illustrated in the figure,
proceed as follows:
- turn the wheel hub so as to bring the plug (1) downward;
unscrew the plug and drain off the oil into an appropriate
container;
- then turn the hub and take the hole closed by the plug
(1) back upward and replenish with fresh oil; for the
quantity, see CHARACTERISTICS AND DATA in the
“AXLES” section;
- screw the plug down to the prescribed torque.
Figure 49
!
Use no chlorothene based solvents to clean the
cover.
For the wheel hub with the cover illustrated in the figure,
proceed as follows:
- remove the plug (1) and draw up the oil with a suitable
string;
- fill the wheel hub with new oil (for the quantity and type
of oil, see CHARACTERISTICS AND DATA in the
“AXLES” section.
The oil level is checked through the window in the plug (1)
with max. and min. on the cover in a horizontal position.
11. Check steering box fixing and mounting
Check that the fastenings of the steering box and
mounting are tightened to the required torque.
10. Check headlight adjustment
72585
- Set the vehicle unladen with its tyres at the required
pressure on level ground facing a light wall.
- Mark two crosses on the wall corresponding to the
centres of the two headlights.
- Turn the switch onto 0.
- Set the vehicle at 10 metres and turn on the low beam.
The distance between the crosses and the points P,
which correspond to the angle of the headlights, has to
be 12.5 cm.
1.
Light beam adjustment screw in horizontal direction.
2.
Light beam adjustment screw in vertical direction.
•
General chassis greasing
•
Manoeuvring
•
Road test
28
SCHEDULED MAINTENANCE
S
TRALIS
AT/AD
Base - January 2003