Content .. 1673 1674 1675 1676 ..
Isuzu Amigo / Axiom / Trooper / Rodeo / VehiCross. Manual - part 1675
EXTERIOR/INTERIOR TRIM
8J–7
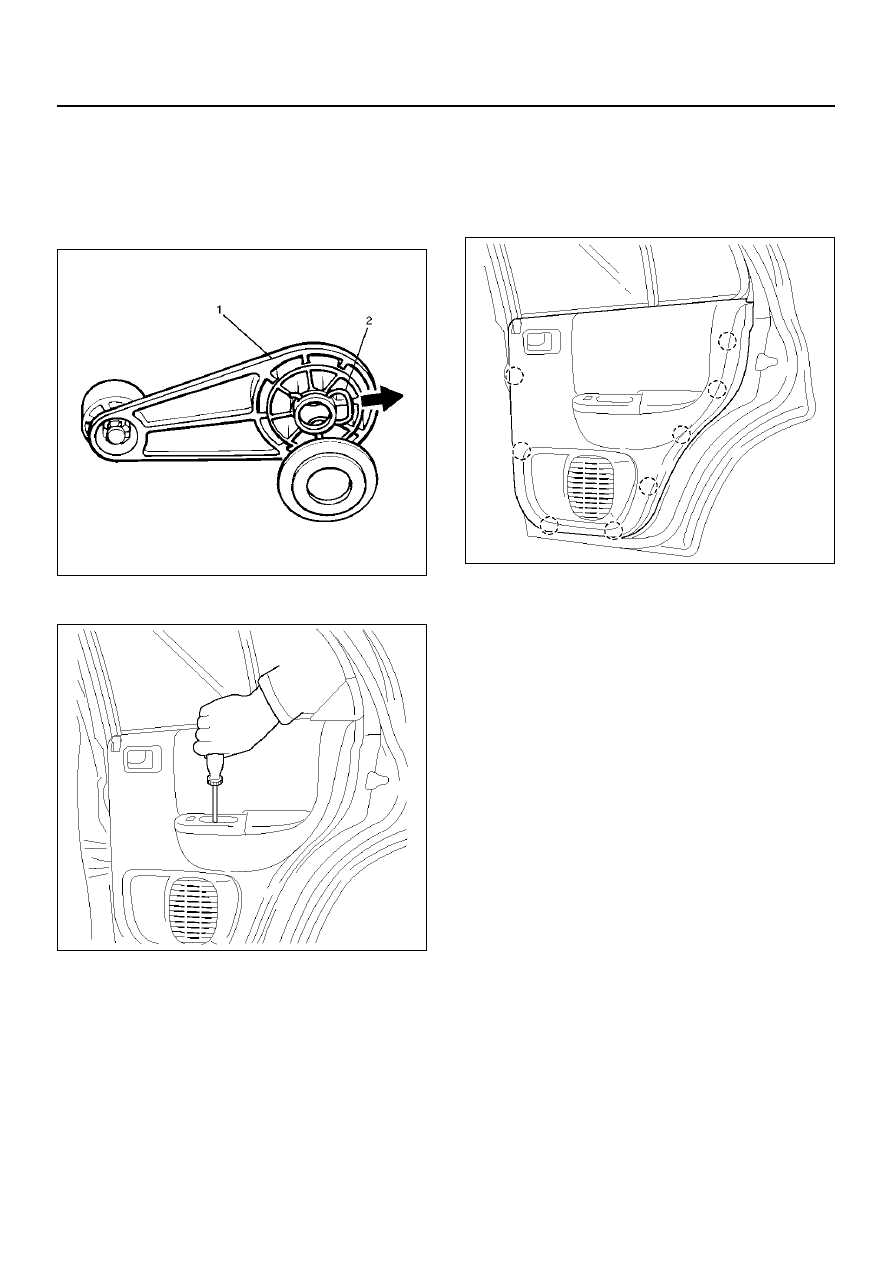
Removal
1. Disconnect the battery ground cable.
2. Remove the regulator handle(1).
• Pull the hook(2) out and remove the regulator
handle.
631RW002
3. Remove the one screw from the pullcase.
655R100002
4. Remove the inside handle fixing screw.
CAUTION: Do not apply excessive force on the
inside handle link or damage may occur, which
could make the inside handle difficult to operate.
5. Remove the rear door corner garnish.
• Pull the garnish to disconnect the retaining clip.
6. Remove the door trim panel.
• Pull out the eight clip positions from the door
panel.
655R100003
• Disconnect the power window switch connector
to lift the trim panel and unlock the engagement
of the waist seal section, then pass the inside
lever through the mounting hole of the trim panel,
and detach the trim panel.
7. Remove the inside handle.
8. Remove the power window switch and pull case.
• Remove the fixing screws from back side of the
rear door trim.
Installation
To install, follow the removal steps in the reverse order.