Content .. 1004 1005 1006 1007 ..
Isuzu D-Max / Isuzu Rodeo (TFR/TFS). Manual - part 1006
10-24 CAB
Important Operations
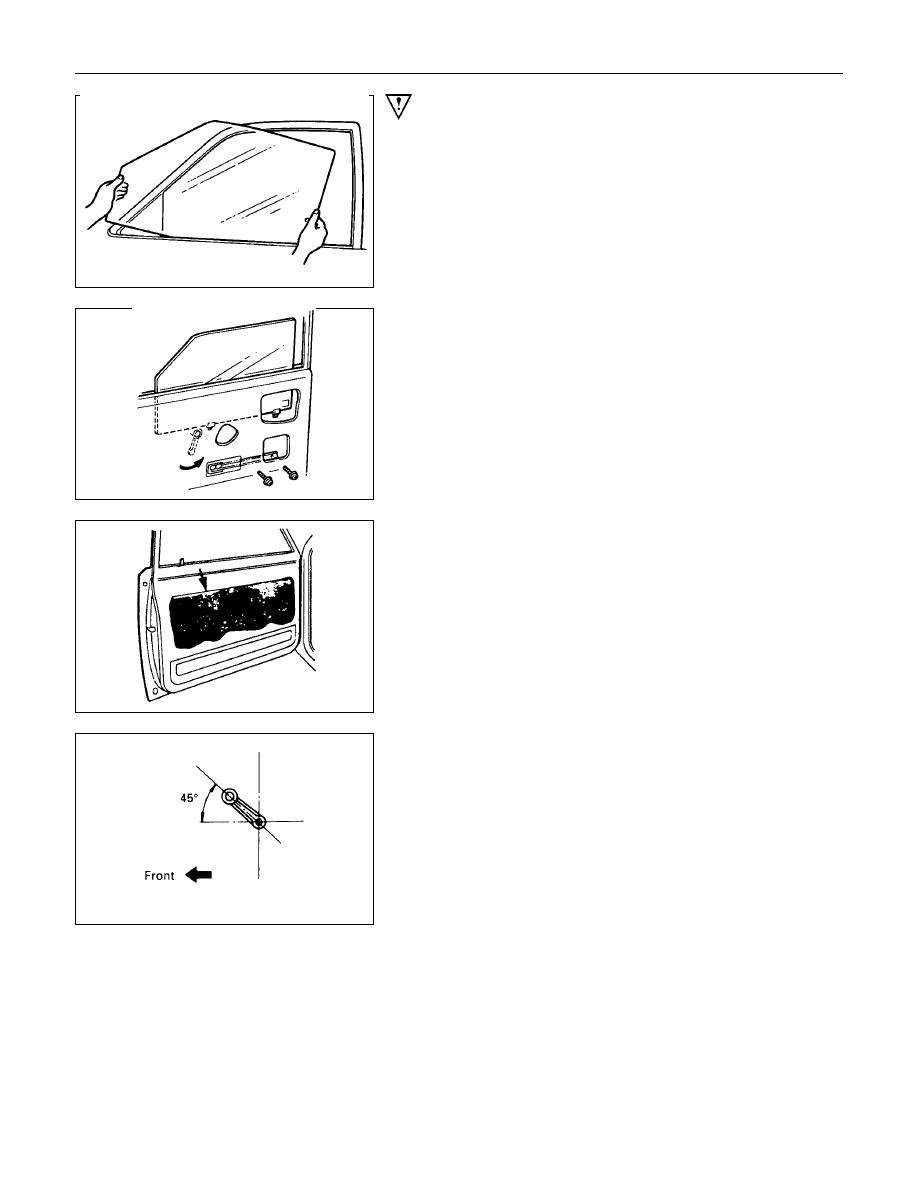
9.Window Glass
•
Insert the window glass into position by tilting it as
necessary, then set it against the channel of the window
regulator.
•
Attach the window glass to the window regulator with the
two screws.
10.Water Proof Sheet
•
Place the butyl type on the door panel so as not to cover
the drain hole.
25.Regulator Handle
•
Install the regulator handle as illustrated when closing
the window glass.