Infiniti G35 (V35). Manual - part 195


  Index      Infiniti     Infiniti G35 (V35) Coupe - service repair manual 2007 year


Search            


Content   ..  193  194  195  196   ..


Infiniti G35 (V35). Manual - part 195


TRUNK LID

BL-167

C

D

E

F

G

H

J

K

L

M

A

B

BL

INSTALLATION

1.

Install in the reverse order of removal.

2.

After installing, check the operation.

Removal and Installation of Trunk Lid Lock 

NIS000CG

REMOVAL

1.

Remove the trunk lid finisher. Refer to 

EI-38, "Removal and

Installation for Trunk Room Trim"

 .

2.

Disconnect the emergency handle and trunk lid opener cable
from the clip.

3.

After removing the harness connector, remove the mounting
bolts, and remove the trunk lid lock.

INSTALLATION

1.

Install in the reverse order of removal.

2.

After installing, close the trunk lid height. Perform the lock and surface height adjustment. Refer to 

BL-

165, "Fitting Adjustment"

 .

3.

After installing, check the operation.

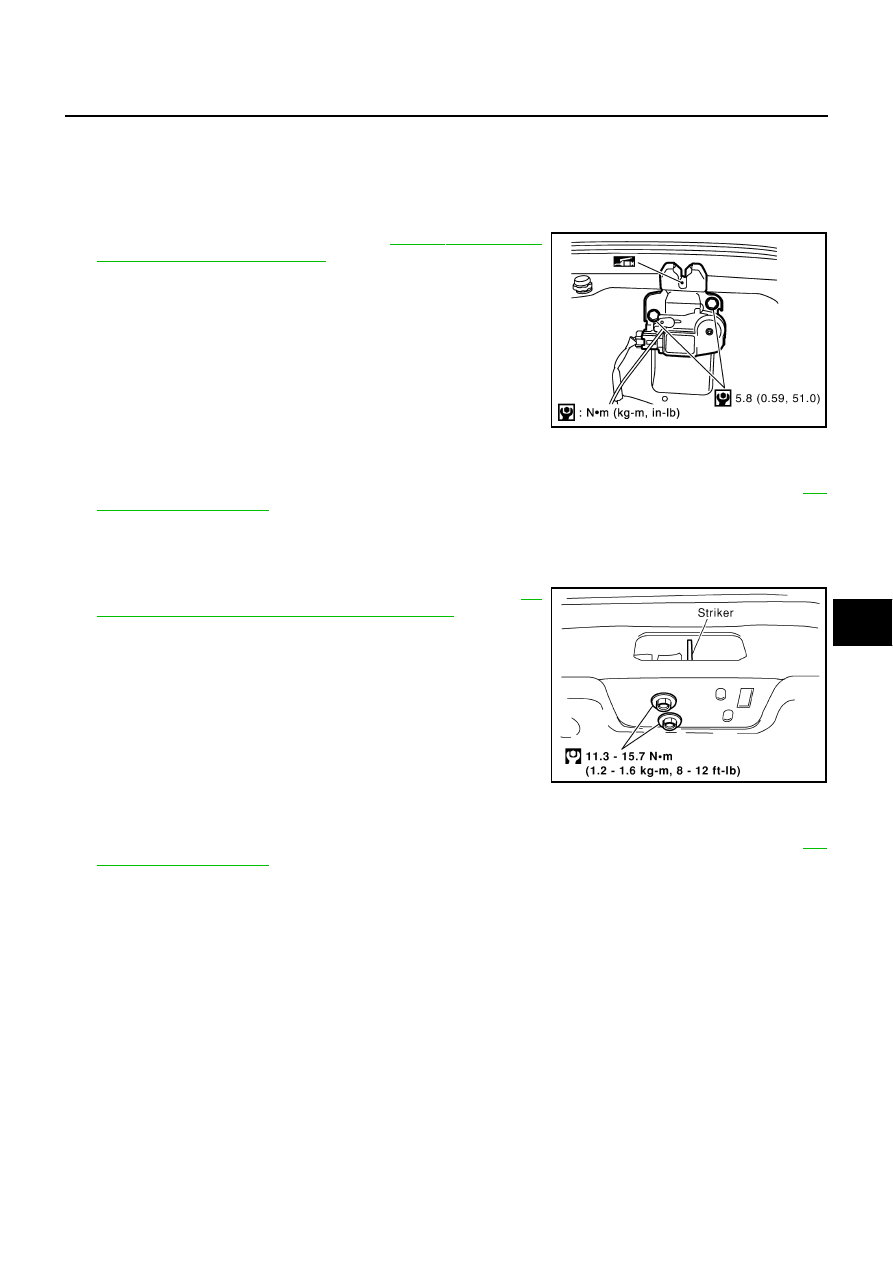
Removal and Installation of Trunk Lid Striker

NIS000CH

REMOVAL

1.

Remove the trunk rear plate and trunk rear finisher. Refer to 

EI-

38, "Removal and Installation for Trunk Room Trim"

 .

2.

Remove the mounting bolts, and remove the striker from the
trunk lock support.

INSTALLATION

1.

Install in the reverse order of removal.

2.

After installing, close the trunk lid height. Perform the lock and surface height adjustment. Refer to 

BL-

165, "Fitting Adjustment"

 .

3.

After installing, check the operation.

PIIB9130E

PIIA0641E

BL-168

TRUNK LID

Removal and Installation of Trunk lid Emergency Opener Cable

NIS000CI

REMOVAL

1.

Remove trunk lid finisher. Refer to 

EI-38, "TRUNK ROOM TRIM & TRUNK LID FINISHER"

 .

2.

Disconnect each clamp of trunk lid emergency opener cable.

3.

Disconnect the trunk lid emergency opener cable and from the trunk lid lock assembly.

4.

Disconnect the trunk lid emergency opener cable from the trunk lid emergency opener lever holder.

5.

Remove trunk lid emergency opener cable.

INSTALLATION

Install in the reverse order of removal.

CAUTION:

After installing, check the operation.

Removal and Installation of Trunk Lid Weatherstrip

NIS000CJ

1.

Trunk rid lock assembly

2.

Trunk rid emergency opener cable

3.

Trunk rid emergency opener lever 
holder

4.

Trunk rid emergency opener lever 

PIIB9131E

PIIA0642E

TRUNK LID

BL-169

C

D

E

F

G

H

J

K

L

M

A

B

BL

REMOVAL

Pull up and remove engagement with body from weatherstrip joint.

CAUTION:

After removal, do not pull strongly on the weatherstrip.

INSTALLATION

1.

Working from the upper section, align weatherstrip mark with vehicle center position mark and install
weatherstrip onto the vehicle.

2.

For the lower section, align the weatherstrip seam with center of the striker.

3.

After installation, pull the weatherstrip gently to ensure that there is no loose section.

NOTE:
Make sure the weatherstrip is fit tightly at each corner and back door rear plate.

BL-170

TRUNK LID OPENER

TRUNK LID OPENER

PFP:84640

Component Parts and Harness Connector Location

NIS001J8

System Description

NIS001J9

Power is supplied at all times

through 50A fusible link (letter F,  located in the fuse and fusible link box)

to BCM terminal 55,

through 10A fuse [No.18, located in the fuse block (J/B)]

to BCM terminal 42.

Ground is supplied

to BCM terminal 52

through body grounds M30 and M66.

When trunk lid opener cancel switch is ON and trunk lid opener switch is ON (pushed)

PIIB9156E


Content   ..  193  194  195  196   ..