Freightliner Coronado 132 / 122SD. Manual - part 28
cooled. Draining it when the engine is hot could
cause severe personal injury due to scalding.
If returning fuel is released into the atmosphere,
its vapors can ignite in the presence of any igni-
tion source. Do not expose the fuel to, or work
with the fuel system near, open flame or intense
heat. To do so could cause fire, possibly resulting
in serious personal injury or property damage.
1.
Shut down the engine, apply the parking brake,
and chock the tires.
2.
Put a clean receptacle under the fuel/water sepa-
rator and attach a piece of hose to the drain
valve, to direct fuel into the receptacle.
The drain valve has a 1/2-inch (12.7-mm) pipe;
use a hose with a 1/2-inch pipe thread to fit cor-
rectly.
3.
Remove the vent cap (
, Item 4) and open
the drain valve (
, Item 1) to drain the fuel
completely, then close the drain valve.
4.
Using a DAVCO Collar Wrench (
), remove
the clear cover and collar.
NOTE: Broken vent cap and collar warranty
claims will not be accepted if any tool other than
a DAVCO Collar Wrench, part number 380134,
is used for removal. During installation, the vent
cap and collar are to be hand-tightened only,
not tightened with a wrench.
5.
Remove the filter and dispose of it in an environ-
mentally acceptable manner.
6.
Clean all threads and sealing surfaces very thor-
oughly. Even a small amount of dirt will prevent
the fuel/water separator from sealing, and an air
leak may result.
7.
Ensure that the drain valve is closed.
8.
Remove the filter grommet from the filter stud, if
equipped.
9.
Fill the housing to the top with clean diesel fuel.
10. Install a standard engine spin-on filter (part num-
ber FF105 or equivalent) on the filter stud.
11. Install the cover O-ring, clear cover, and the col-
lar. Hand-tighten the collar.
12. Install and hand-tighten the vent cap O-ring and
vent cap.
05/05/2009
f470530
1
2
3
4
5
6
7
8
9
10
11
12
13
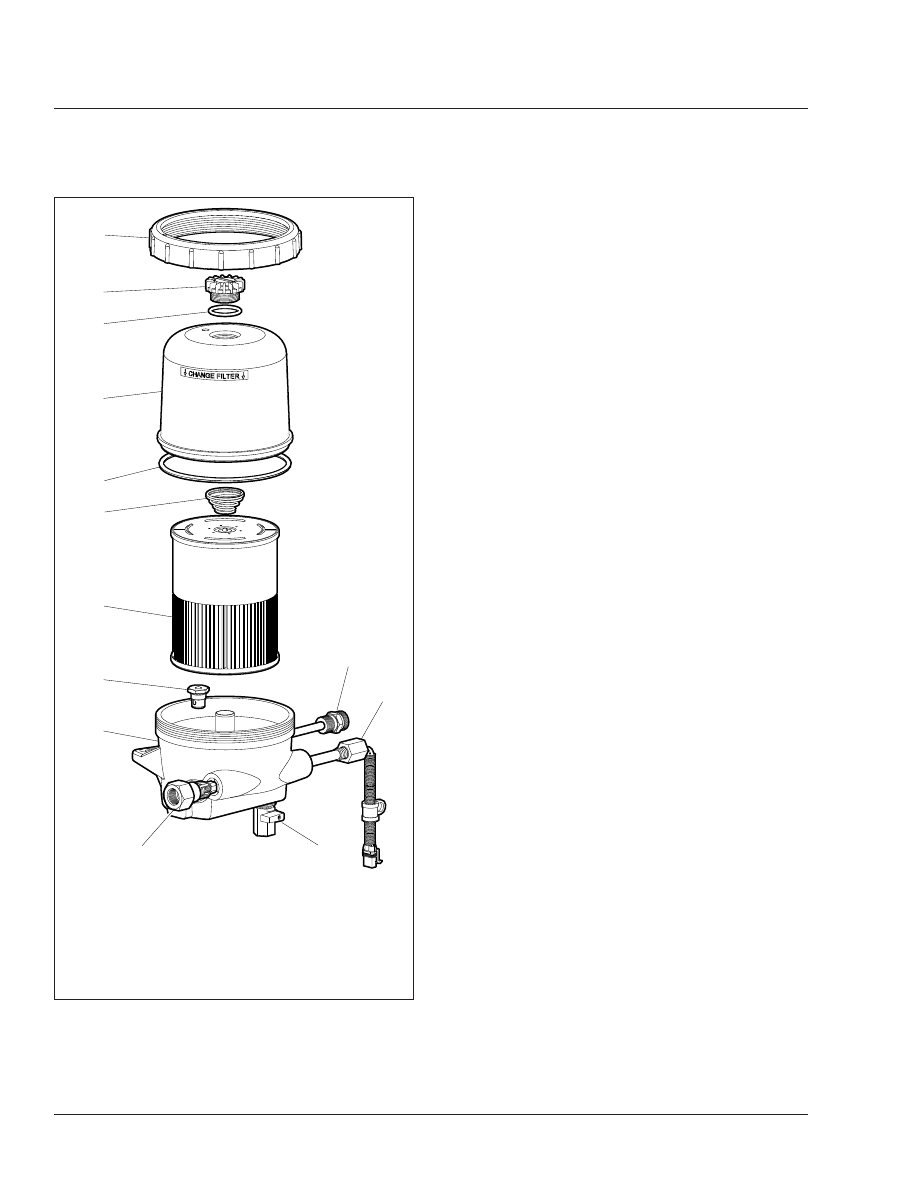
1.
Inlet Port/Check Valve
2.
Lower Housing
3.
Bypass Valve
4.
Filter Element
5.
Spring
6.
Cover O-Ring
7.
Clear Cover
8.
Vent Cap O-Ring
9.
Vent Cap
10. Collar
11. 120VAC Pre-Heater
12. 12VDC Pre-Heater
13. Drain Valve
Fig. 5, DAVCO Fuel Pro 482
Fuel
47
47/4